Introduction
Are you looking to cancel your Grammarly subscription? Whether you’ve found another writing tool or no longer require the services of Grammarly, we’ve got you covered. In this step-by-step guide, we will walk you through the process of canceling your Grammarly subscription.
Grammarly is a popular online writing assistant that helps you improve your grammar, spelling, and overall writing skills. It offers various subscription plans, including a free version with limited features and premium plans with advanced functionalities. However, if you have decided to cancel your subscription for any reason, you can easily do so by following the steps outlined in this article.
Before we dive into the cancellation process, it’s important to note that Grammarly offers a 14-day money-back guarantee for its premium plans. If you have recently subscribed to Grammarly and are within the refund period, you may be eligible for a refund. However, keep in mind that the cancellation process differs slightly depending on whether you purchased your subscription through the Grammarly website or a third-party platform. In this guide, we will focus on canceling your Grammarly subscription directly through the Grammarly website.
So, without further ado, let’s get started on canceling your Grammarly subscription!
Step 1: Go to the Grammarly Website
The first step in canceling your Grammarly subscription is to visit the official Grammarly website. Open your preferred web browser and type “Grammarly” in the search bar. Click on the official Grammarly website link in the search results to be directed to the homepage.
If you already have a Grammarly account, you can proceed to Step 2. However, if you don’t have an account yet, you will need to create one before canceling your subscription. To create a new account, click on the “Sign Up” or “Get Started” button on the Grammarly homepage.
Fill out the required information, including your email address and password, and click on the “Sign Up” button. You may also choose to sign up using your Google or Facebook account by selecting the appropriate option. Once you have successfully created your Grammarly account, you are ready to proceed to the next step.
If you already have a Grammarly account, simply click on the “Log In” button at the top-right corner of the Grammarly homepage. Enter your login credentials, such as your email address and password, and click on the “Log In” button to access your account.
Ensure that you are logged in to the correct Grammarly account that is associated with the subscription you wish to cancel. It’s important to note that if you purchased your subscription through a third-party platform, such as the App Store or Google Play Store, you will need to follow the cancellation process specific to that platform. For subscriptions purchased directly through the Grammarly website, let’s move on to Step 2.
Step 2: Log in to Your Grammarly Account
Once you have reached the Grammarly homepage, locate the “Log In” button at the top-right corner of the page. Click on this button to access the login page.
On the login page, enter the email address and password associated with your Grammarly account. If you have enabled two-factor authentication for added security, you may need to enter the verification code sent to your registered mobile device or email address.
Double-check that you have entered the correct login information to ensure a smooth login process. If you encounter any issues logging in, click on the “Forgot password?” link below the login fields to initiate the password recovery process.
Once you have successfully logged in to your Grammarly account, you will be directed to your Grammarly dashboard. Here, you can access your writing projects, settings, and subscription details.
If you are unable to log in to your account or have forgotten your login credentials, Grammarly provides options for account recovery and password reset. Click on the respective links on the login page to initiate the recovery process. You may need to provide certain personal information or answer security questions to verify your identity and regain access to your account.
Now that you are logged in to your Grammarly account, let’s move on to the next step and find out how to access your account settings in order to cancel your subscription.
Step 3: Open Account Settings
After successfully logging in to your Grammarly account, it’s time to navigate to the Account Settings section. This is where you can manage various aspects of your Grammarly subscription, including cancellation.
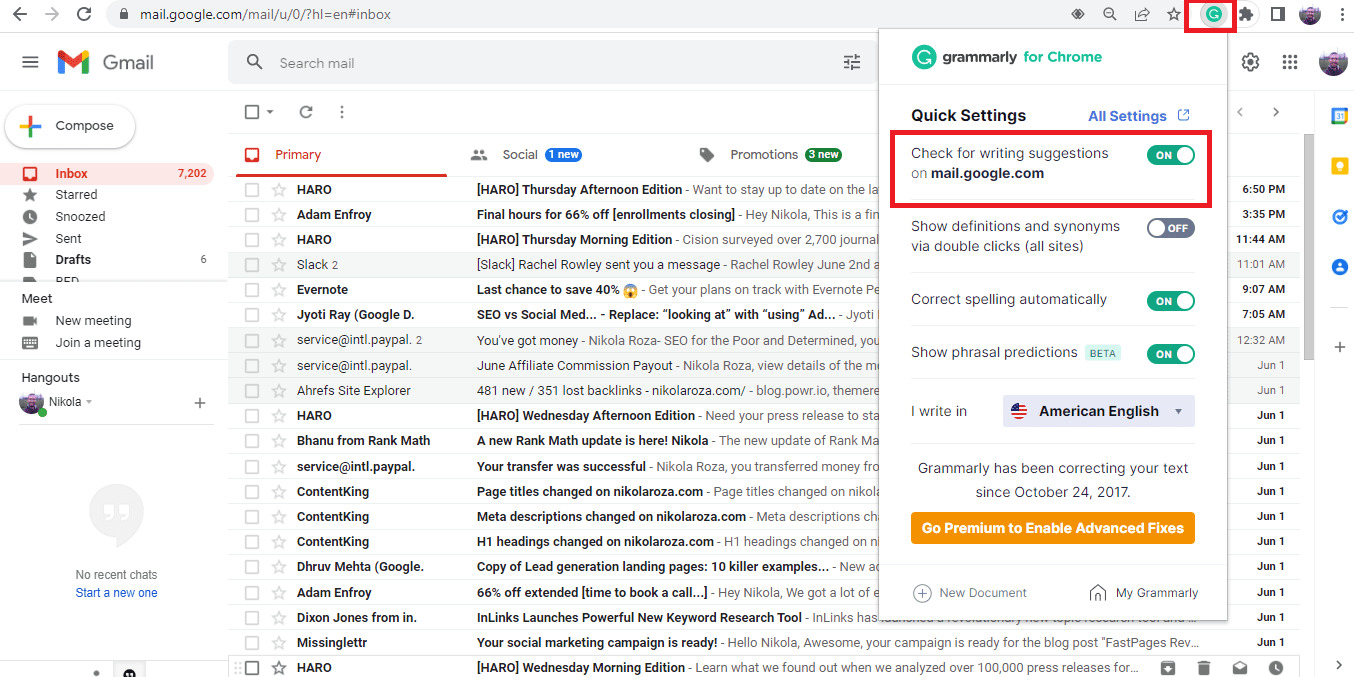
To access your Account Settings, look for your profile picture or initials on the top-right corner of the Grammarly dashboard. Click on it, and a dropdown menu will appear. From the menu, select “Account” or “Account Settings.”
Alternatively, some versions of Grammarly may have a dedicated “Settings” tab or icon that you can click on to access the Account Settings page. Look for any options that lead to account management.
Once you have located and clicked on the appropriate link, you will be taken to the Account Settings page. Here, you will find various options related to your Grammarly subscription and preferences.
Take a moment to familiarize yourself with the different sections and options available on the Account Settings page. This is also a good time to review your subscription details, such as the plan you are currently on and the next billing date.
Now that you have accessed the Account Settings, let’s move on to the next step and find out how to access the subscription details specifically.
Step 4: Access Subscription Details
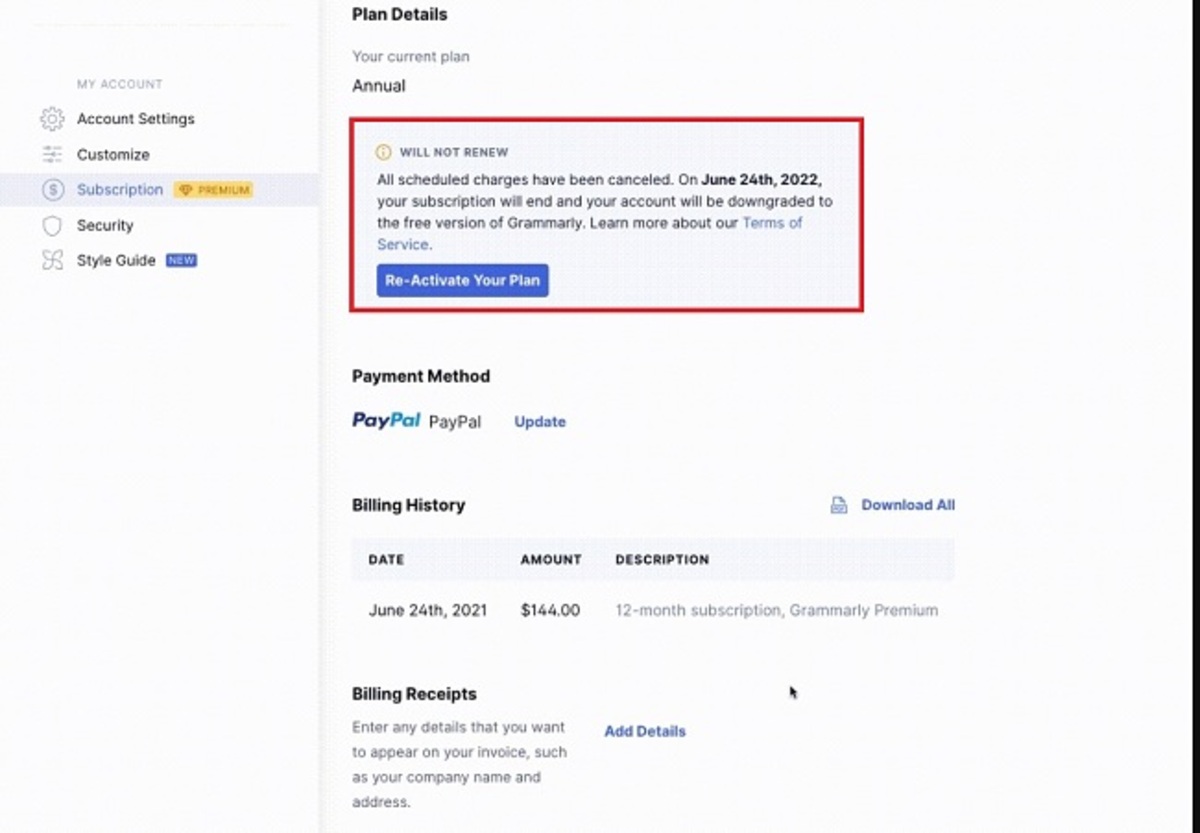
Once you are on the Account Settings page, it’s time to access the details of your Grammarly subscription. In this section, you will find information about your current plan, payment method, and other pertinent subscription details.
Scroll through the options and sections on the Account Settings page until you find a section labeled “Subscription” or “Billing.” Click on this section to expand it and reveal more details about your subscription.
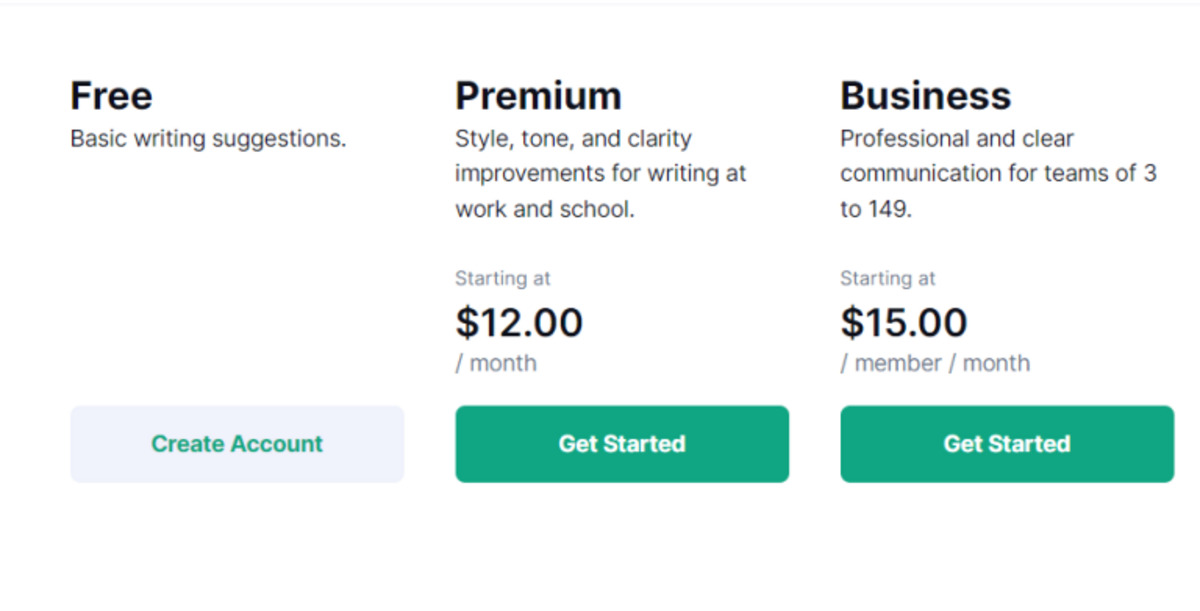
Within the Subscription or Billing section, you will typically see information such as the type of plan you are subscribed to (e.g., Free, Premium, Business), the duration of your subscription, and the cost of your plan.
Review the subscription details carefully to ensure you have accurate information about your Grammarly subscription. It’s important to note the specific terms and conditions of your subscription, such as the renewal date and any applicable cancellation policies.
Take a moment to read through any additional information or options provided in this section. Grammarly may provide links or buttons that give you the option to manage or cancel your subscription directly. If available, you can proceed to Step 5. However, if there is no clear option to cancel your subscription, proceed to the next step for guidance on how to cancel manually.
Now that you have accessed your subscription details and are familiar with the terms of your Grammarly subscription, let’s move on to the next step and find out how to cancel your subscription.
Step 5: Cancel Your Subscription
Now that you have accessed your subscription details and are ready to cancel your Grammarly subscription, it’s time to take the necessary steps to terminate your membership.
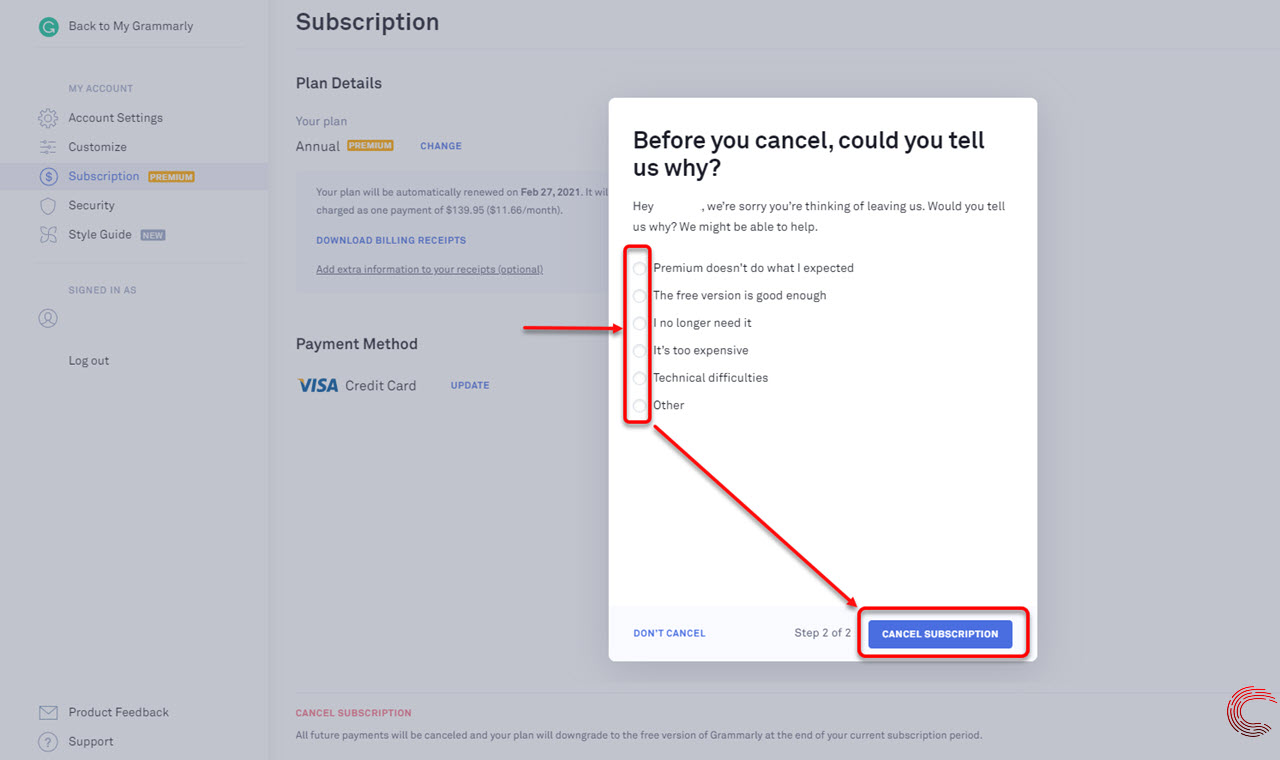
Within the Subscription or Billing section of your Account Settings, look for any options or buttons that specifically mention cancellation or termination. Grammarly may provide a direct “Cancel Subscription” button, or you may need to click on a related link, such as “Manage Subscription” or “Cancel Membership.”
Clicking on the appropriate button or link will typically prompt a confirmation dialogue or a new page where you can proceed with the cancellation process.
Before finalizing the cancellation, Grammarly may present you with alternative options or incentives to encourage you to stay. These offers can include discounted subscription rates or access to additional features. Evaluate these offers carefully to determine if any of them are of interest to you.
If you still wish to cancel your subscription, proceed with the cancellation process as directed. This may involve confirming the cancellation, selecting a reason for your decision, or providing feedback on your experience. Follow the on-screen instructions to complete the cancellation process.
Once you have successfully canceled your Grammarly subscription, you should receive a confirmation message or email. Take note of any important information provided, such as the effective cancellation date or any steps you need to follow to ensure a smooth transition.
It’s important to keep in mind that after canceling your subscription, you will no longer have access to the premium features or benefits provided by Grammarly. If you decide to join again in the future, you may need to go through the sign-up and subscription process again.
Congratulations! You have now successfully canceled your Grammarly subscription. If you ever change your mind or need to reactivate your account, you can simply revisit the Grammarly website and follow the appropriate steps to sign up for a new subscription.
Step 6: Provide Feedback (Optional)
After canceling your Grammarly subscription, you may have the option to provide feedback about your experience. Providing feedback can help Grammarly understand the reasons for your cancellation and improve their services for future users.
When you cancel your subscription, Grammarly may prompt you to share your feedback through a survey or a feedback form. This form typically asks questions about your overall experience with Grammarly, the reason for cancellation, and any specific feedback or suggestions you may have.
Participating in this feedback process is entirely optional, but it can be a valuable opportunity to voice your thoughts and help Grammarly enhance their product. If you choose to provide feedback, take the time to answer the questions honestly and constructively. Your insights can contribute to the ongoing development and improvement of Grammarly’s writing tools.
If you do not have the immediate option to provide feedback during the cancellation process, you can still give your feedback to Grammarly by locating their support or contact page. Grammarly often provides ways to reach out to their support team or submit feedback through their website. Look for a “Contact Us” or “Support” link in the footer or navigation menu of the Grammarly website.
Whether you choose to provide feedback during the cancellation process or through other means, remember to be respectful and constructive in your communication. Clear and specific feedback can help Grammarly understand your concerns and make necessary improvements to their services.
Now that you have canceled your subscription and may have provided feedback (if desired), let’s move on to the final step, where you can confirm the cancellation and ensure there are no further steps to take.
Step 7: Confirm Cancellation
After you have canceled your Grammarly subscription and, if applicable, provided any feedback, it’s important to confirm the cancellation and ensure that there are no further steps to take.
Check your email inbox for a confirmation message from Grammarly regarding the cancellation of your subscription. This email should contain details about the cancellation, including the effective date of termination.
Review the confirmation email carefully to ensure that all the information is accurate and matches your intention to cancel. Take note of any important instructions or next steps provided in the email, such as confirmation of automatic billing cancellation or any remaining usage of premium features.
If you don’t receive a confirmation email or have any concerns about the cancellation process, consider reaching out to Grammarly’s customer support. Browse the Grammarly website for their support contact information or look for a “Help” or “Support” section that provides access to their support channels.
Once you have confirmed the cancellation and resolved any potential issues or concerns, you can rest assured that your Grammarly subscription has been successfully terminated.
Remember to keep any important information related to your canceled subscription, such as confirmation emails or reference numbers, for your records. This way, you can address any future inquiries or concerns related to the cancellation, if necessary.
Your decision to cancel your Grammarly subscription might have been based on various factors, such as personal preferences, changing needs, or financial considerations. If you ever decide to revisit Grammarly or explore their services again in the future, you can easily sign up for a new subscription and continue benefiting from their writing tools.
Congratulations! You have now completed the process of canceling your Grammarly subscription. We hope this guide has been helpful in assisting you with the cancellation process and providing a seamless experience. Should you have any further questions or need additional assistance, don’t hesitate to reach out to Grammarly’s customer support for further guidance.
Conclusion
Cancelling your Grammarly subscription is a straightforward process that can be done through the Grammarly website. By following the step-by-step guide provided in this article, you can successfully terminate your subscription and explore other writing tools or options that better suit your needs.
We started by introducing Grammarly as a popular online writing assistant and highlighting the importance of reviewing the refund policy if you are eligible for a refund. Then, we went through the steps of going to the Grammarly website, logging in to your account, opening the Account Settings, accessing the Subscription Details, and finally canceling your subscription. We also discussed the optional step of providing feedback to Grammarly to help them improve their services.
Remember to carefully review your cancellation confirmation email and keep any relevant information for your records. This will ensure a smooth cancellation process and help address any potential concerns or inquiries in the future. If you ever decide to rejoin Grammarly, you can easily sign up for a new subscription and continue benefiting from their writing assistance.
We hope this guide has provided valuable insights and guidance on how to cancel your Grammarly subscription. If you have any further questions or need assistance, don’t hesitate to reach out to Grammarly’s customer support for help. Happy writing!