Introduction
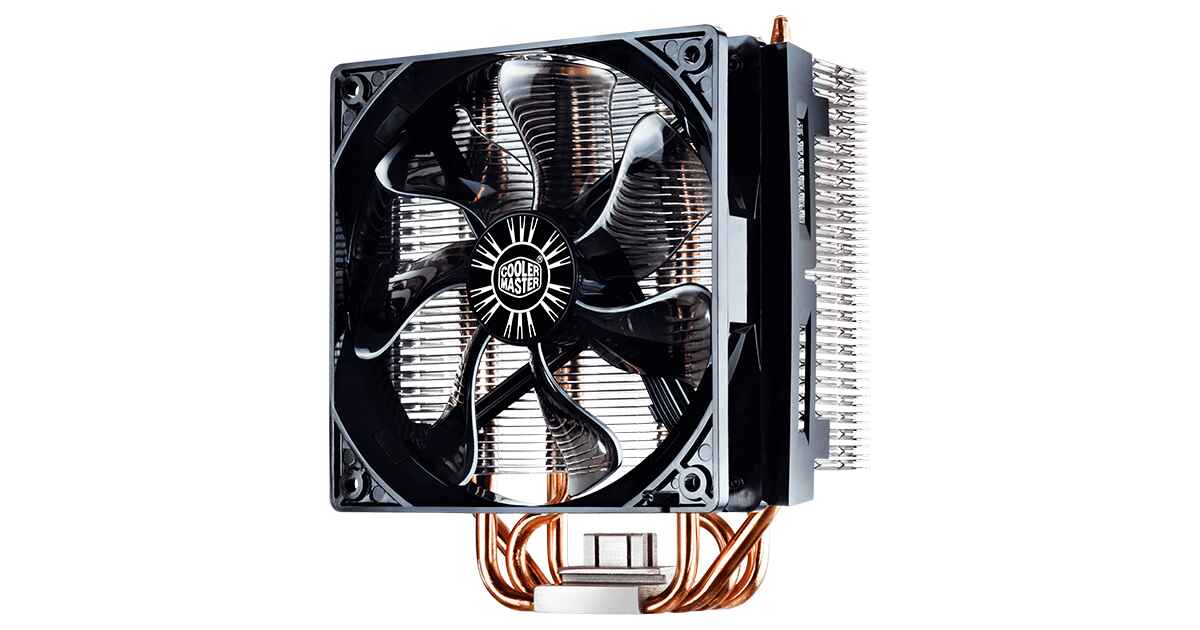
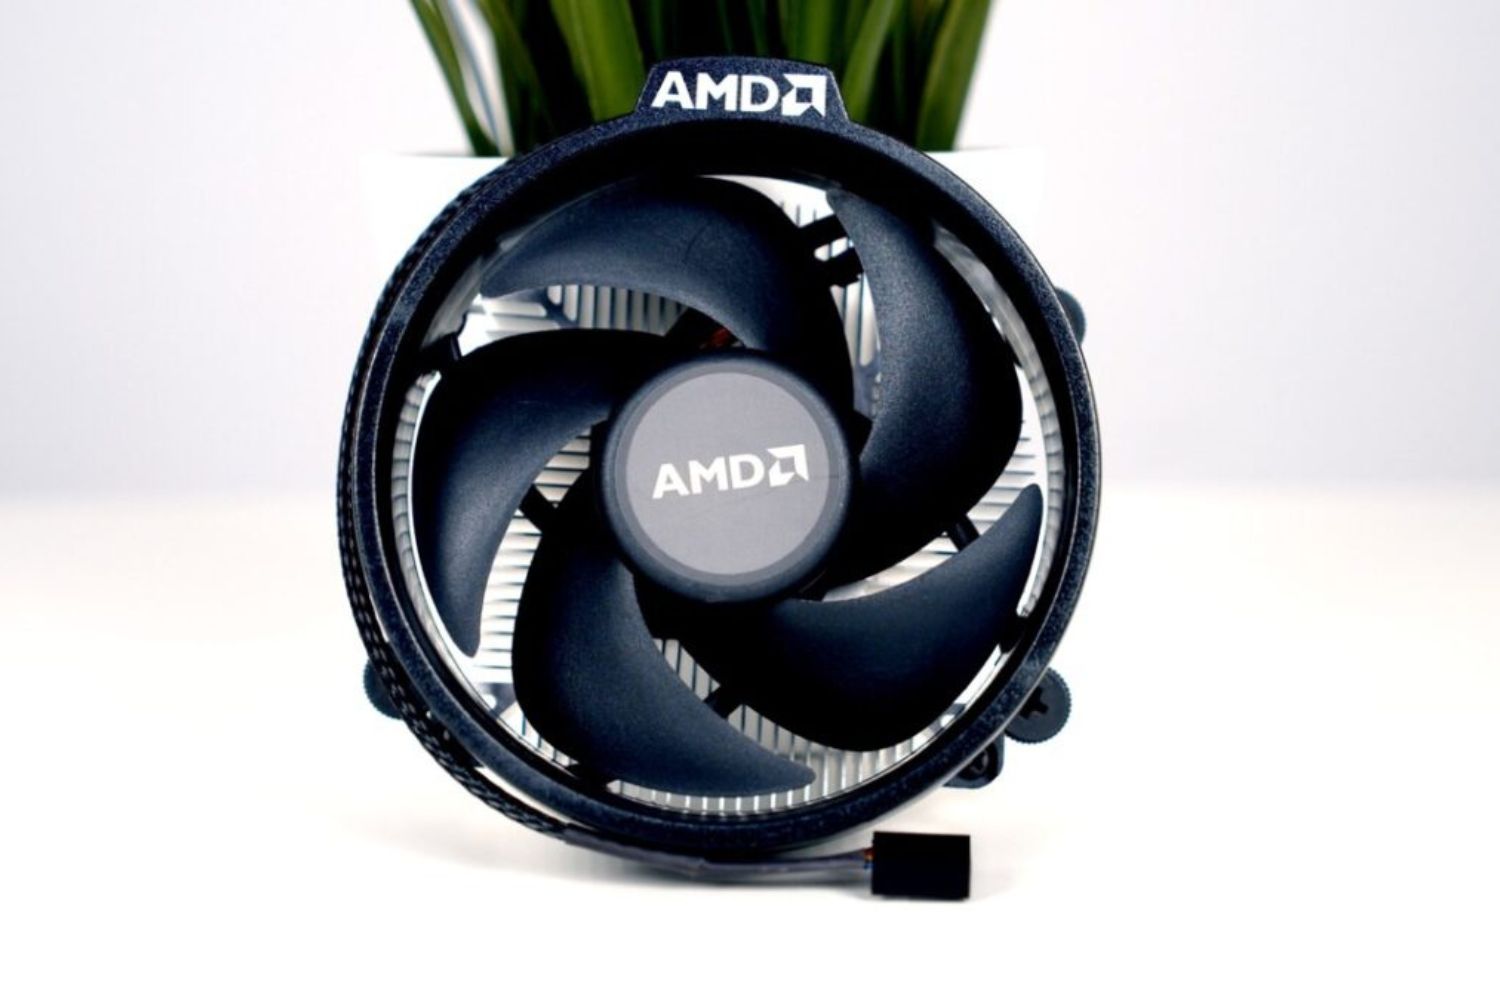
The central processing unit (CPU) is the heart of a computer, responsible for executing instructions and performing calculations. During operation, the CPU generates a significant amount of heat, necessitating the use of a CPU cooler to dissipate the heat and prevent the CPU from overheating. The proper installation and tightening of the CPU cooler are essential to ensure optimal cooling performance and the longevity of the processor.
When it comes to tightening the CPU cooler, there is often confusion about how tight it should be. Tightening it too much can cause damage to the processor or the motherboard, while a loose fit may hinder the cooling performance. Striking the right balance is crucial to achieve efficient heat dissipation and avoid any potential issues.
In this article, we will explore the importance of properly tightening the CPU cooler and provide guidelines on how to achieve the optimal tightness. We will discuss the factors to consider, the risks of over-tightening or under-tightening, and provide a step-by-step guide to help you get it right. By understanding the correct process and avoiding common mistakes, you can ensure that your CPU remains cool and performs at its best.
It is important to note that every CPU cooler may have different installation requirements, so be sure to consult the manufacturer’s instructions for specific guidelines. However, the principles discussed in this article can serve as a general reference point for properly tightening the CPU cooler.
Importance of Properly Tightening CPU Cooler
Properly tightening the CPU cooler is of utmost importance for several reasons. First and foremost, it ensures efficient heat dissipation from the CPU. The CPU generates a significant amount of heat during operation, and if the cooler is not tightly secured, it can lead to inadequate heat transfer and poor cooling performance. This can result in the CPU running at higher temperatures, which can negatively impact its performance and potentially lead to system instability or even permanent damage.
Additionally, a properly tightened CPU cooler helps maintain consistent thermal contact between the CPU and the cooler’s heat sink. By eliminating any gaps or inconsistencies, the thermal transfer between the CPU and the cooler is maximized, allowing for optimal heat dissipation. This results in lower CPU temperatures and ensures that the processor operates within safe thermal limits.
Furthermore, proper CPU cooler tightening helps prevent vibrations or movement of the cooler assembly. Inadequately secured coolers can lead to unwanted vibrations, which not only increase the noise levels but can also cause damage to other components or affect the stability of the system. By securely fastening the cooler, you can minimize any potential vibrations and ensure a quieter and more stable system.
Another critical factor to consider is the overall longevity of the CPU. Excessive heat can degrade the performance and lifespan of the processor over time. By properly tightening the CPU cooler, you can help maintain lower operating temperatures, reducing the risk of long-term damage caused by prolonged exposure to high temperatures. This can ultimately extend the lifespan of your CPU and provide better reliability and longevity for your computer system.
To summarize, properly tightening the CPU cooler is crucial for efficient heat dissipation, consistent thermal contact, stability, and the longevity of the CPU. By ensuring a secure and proper fit, you can maintain optimal cooling performance, lower temperatures, and protect your valuable processor from potential damage. In the following sections, we will delve deeper into the factors to consider and provide a step-by-step guide to help you achieve the perfect balance when tightening your CPU cooler.
Factors to Consider
When it comes to tightening the CPU cooler, there are several factors to consider to ensure that you achieve the optimal tightness. Here are important factors that you should keep in mind:
- CPU Cooler Design: Different CPU coolers have varying designs and mounting mechanisms. It’s essential to understand the specific requirements of your CPU cooler model. Refer to the manufacturer’s instructions to determine the correct installation method and recommended tightness.
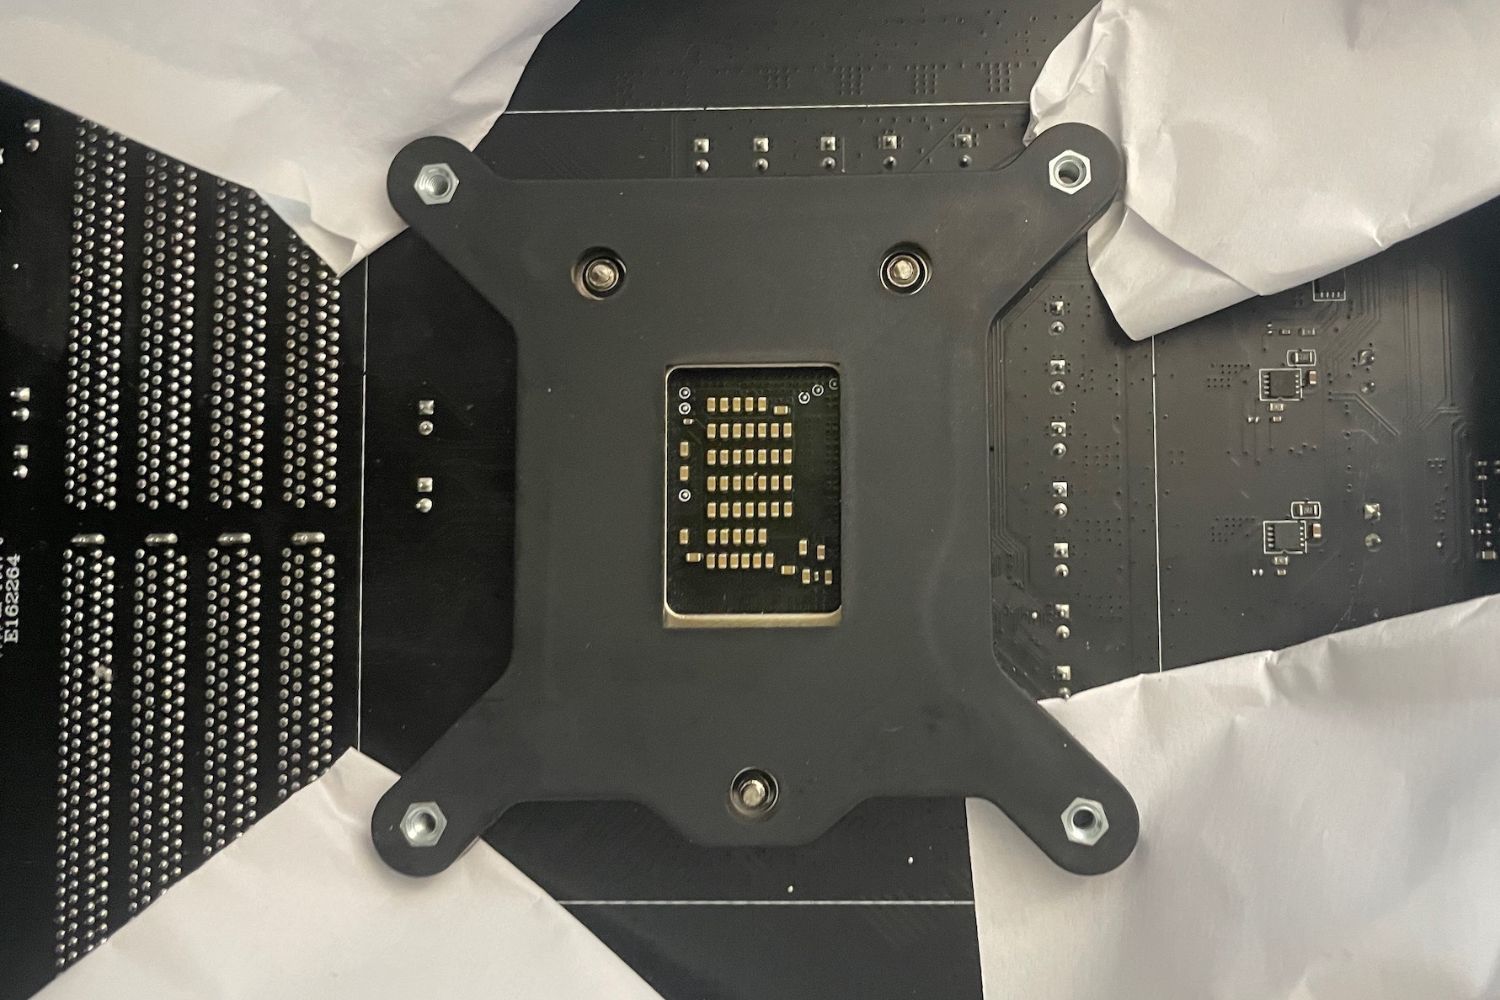
- Motherboard Compatibility: The motherboard layout and type can influence the installation and tightening of the CPU cooler. Some motherboards may require the use of specific brackets or backplates, while others may have integrated mounting mechanisms. Make sure to consult the motherboard manual for any specific instructions or compatibility issues.
- Mounting Pressure: Achieving the correct mounting pressure is crucial for optimal heat transfer. While it is important for the cooler to be securely fastened, excessive pressure can lead to warping or damaging the CPU or the motherboard. Strike a balance by applying firm, even pressure when tightening the cooler.
- Thermal Interface Material (TIM): The TIM, often in the form of thermal paste or pad, plays a vital role in facilitating heat transfer between the CPU and the cooler. Ensure that the TIM is applied correctly and evenly to promote efficient thermal conductivity. It is essential to follow the manufacturer’s instructions regarding the application of TIM.
- Temperature and CPU Load: Consider the intended usage and workload of your CPU. If you plan to engage in demanding tasks that significantly increase the CPU load, it may be wise to tighten the cooler slightly more to ensure optimal cooling under heavy workloads. Monitoring temperatures under various workloads can help determine if any adjustments are necessary.
- Experience and Expertise: If you are a novice builder or have little experience with computer hardware, it is always a good idea to seek guidance from experts or consult resources such as user forums, installation guides, or video tutorials. Learning from experienced individuals can provide valuable insights and ensure a successful installation.
By taking these factors into account, you can make informed decisions when tightening your CPU cooler. Remember that each factor can influence the overall tightness, and it’s crucial to find the right balance to ensure efficient cooling performance while safeguarding your CPU and motherboard. Moving forward, let’s explore how tight is “too tight” and how loose is “too loose” when tightening the CPU cooler.
How Tight is “Too Tight”
While it is crucial to properly tighten the CPU cooler, tightening it excessively can lead to potential problems. Applying too much force when securing the cooler can cause damage to the CPU socket, motherboard, or the cooler itself. It can result in bent or broken pins on the CPU, cracked motherboard traces, or even damage to the retaining mechanisms that hold the cooler in place.
To avoid these issues, it is important to understand the appropriate level of tightness. As a general rule of thumb, the CPU cooler should be snugly secured, with even pressure applied to ensure a proper connection with the CPU. It should be firmly attached, but you should be cautious not to overtighten it.
The exact tightness can vary depending on the type of cooler and the mounting mechanism. If you are using a cooler with a spring-loaded mounting mechanism, you will typically need to tighten it until you feel resistance from the springs, and then give it a slight additional twist or turn to ensure a secure fit. For coolers that use a backplate and screws, tighten the screws gradually in a diagonal pattern until snug, without applying excessive force.
It is essential to rely on your judgment and avoid using excessive strength or tools to tighten the cooler. If you encounter significant resistance or a sense of strain while tightening, stop immediately and reassess the situation. Applying excessive force can cause irreparable damage to your CPU or motherboard.
Moreover, overtightening the cooler can lead to poor thermal performance. Excessive pressure can cause the cooler to lose proper contact with the CPU, resulting in inadequate heat transfer and increased temperatures. This can negate the purpose of the cooler and potentially lead to overheating issues. It is crucial to achieve the right balance of tightness to ensure optimal heat dissipation while preventing any damage or performance problems.
In the next section, we will explore how loose is “too loose” when it comes to tightening the CPU cooler. By understanding the potential risks of under-tightening and following proper installation guidelines, you can achieve the perfect balance and protect your CPU while enjoying efficient cooling performance.
How Loose is “Too Loose”
While it’s important to avoid overtightening the CPU cooler, leaving it too loose can also have negative consequences. When the CPU cooler is not securely fastened, it may not make proper contact with the CPU, leading to inefficient heat transfer and poorer cooling performance. This can result in higher CPU temperatures, reduced system stability, and potential long-term damage to the processor.
If the cooler is too loose, it may not provide sufficient pressure to maintain consistent thermal contact with the CPU. This can create air gaps or uneven contact, inhibiting the transfer of heat from the CPU to the cooler. As a result, heat is trapped, and the CPU’s temperature can rise, impacting its performance and potentially triggering thermal throttling or shutdowns to prevent overheating.
To avoid these issues, it is crucial to ensure that the CPU cooler is firmly and evenly secured to the CPU. When tightening the cooler, apply enough pressure to ensure a secure fit, but be careful not to overtighten. The cooler should not wobble or move when gently nudged, indicating that it is properly mounted and providing adequate thermal contact.
It is worth noting that different CPU coolers have varying mounting mechanisms, and each may have specific instructions on how tight it should be. Some coolers may require a specific torque setting, while others may have a recommended number of turns or a specific position indicator. Consult the manufacturer’s instructions to determine the correct tightness guidelines for your particular CPU cooler model.
If you are unsure about the appropriate tightness, you can refer to CPU cooler installation guides or seek advice from experienced builders or enthusiasts. They can provide valuable insights and help ensure that you achieve the optimal balance of tightness for your CPU cooler installation.
In summary, while it is crucial to avoid over-tightening the CPU cooler, leaving it too loose can also lead to problems. Striking the right balance is vital to ensure proper thermal contact, efficient heat dissipation, and reliable performance of your CPU. By following manufacturer instructions and taking care to firmly secure the cooler without excessive force, you can achieve the optimal tightness and maintain optimal cooling performance for your system.
Step-by-Step Guide to Properly Tightening CPU Cooler
Achieving the correct tightness when installing a CPU cooler is vital for optimal cooling performance and the longevity of your system. Follow this step-by-step guide to ensure that you properly tighten your CPU cooler:
- Gather the necessary tools: Before starting, ensure that you have all the necessary tools at hand. These typically include a screwdriver, thermal paste (if required), and any additional components specific to your CPU cooler model.
- Clean the CPU and cooler: Begin by cleaning the surface of the CPU and the base of the cooler. Use a lint-free cloth or a thermal pad cleaning kit to remove any dust, residue, or old thermal paste.
- Apply thermal paste (if required): If your CPU cooler requires the use of thermal paste, carefully apply a small, pea-sized amount to the center of the CPU. Avoid applying excessive paste, as it can lead to poor thermal conductivity.
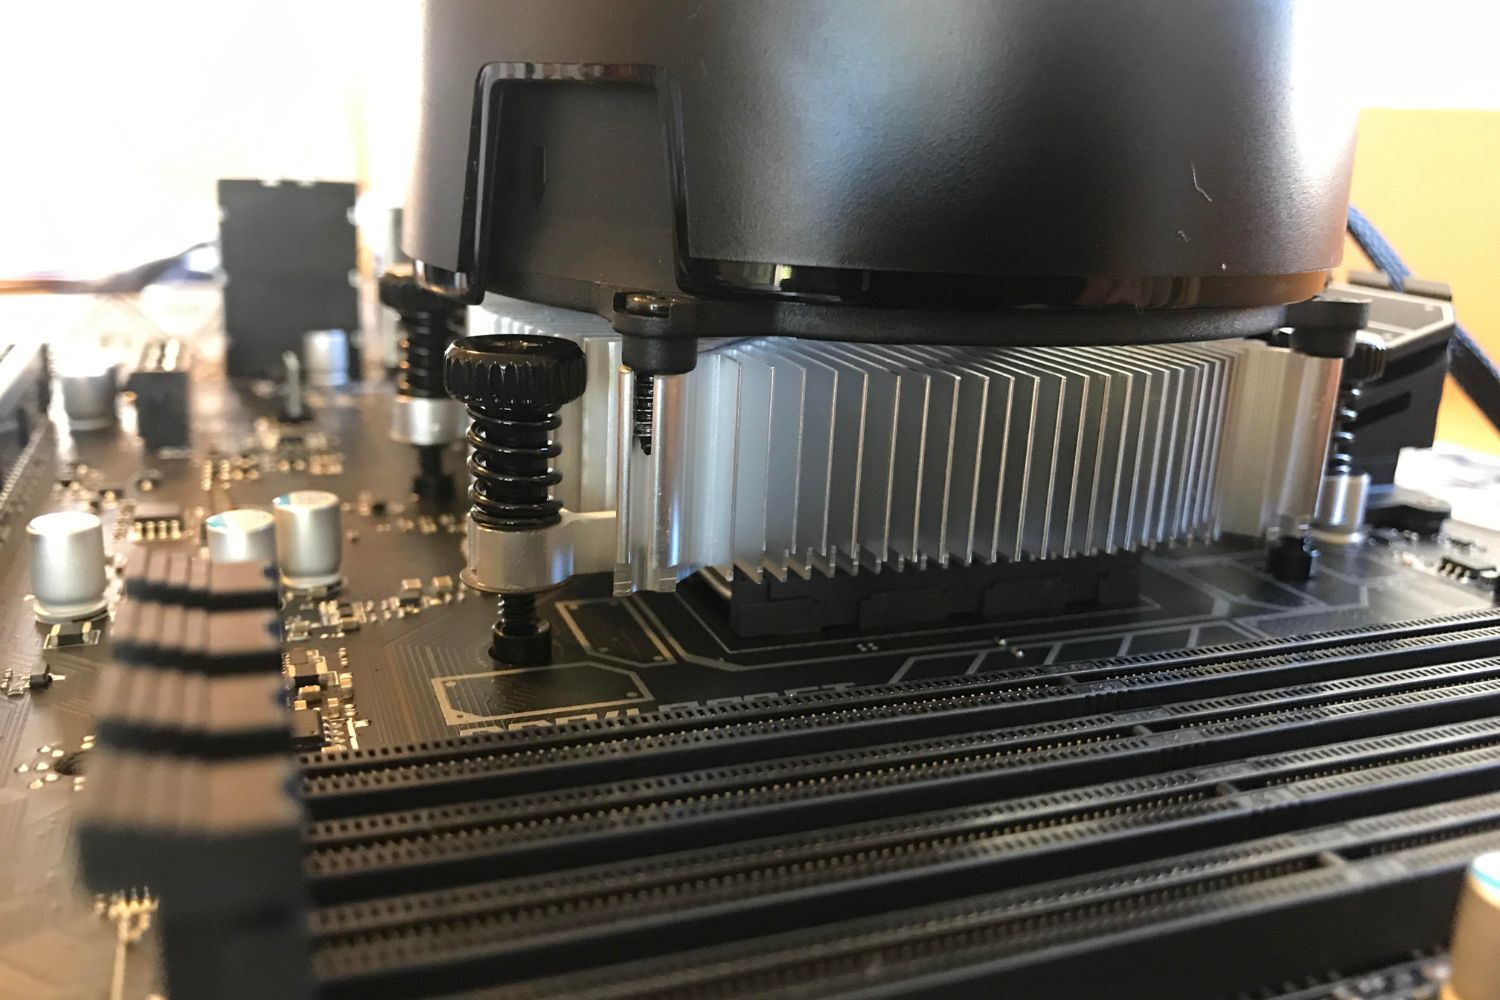
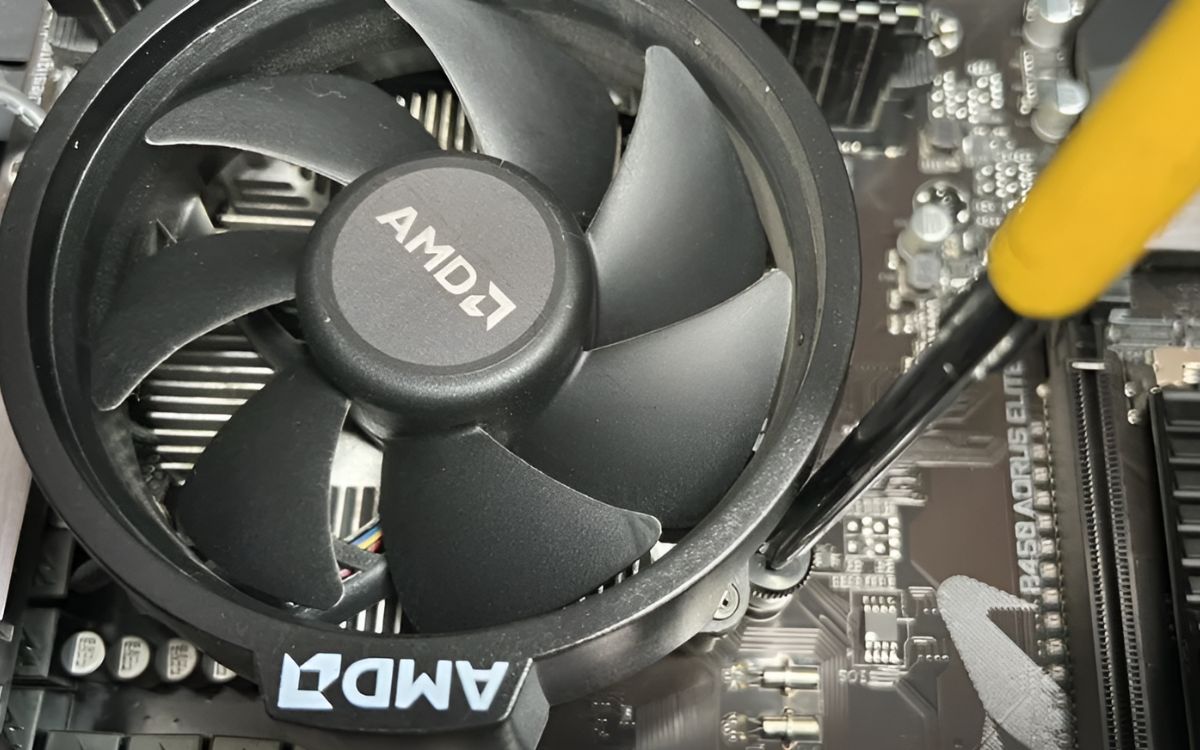
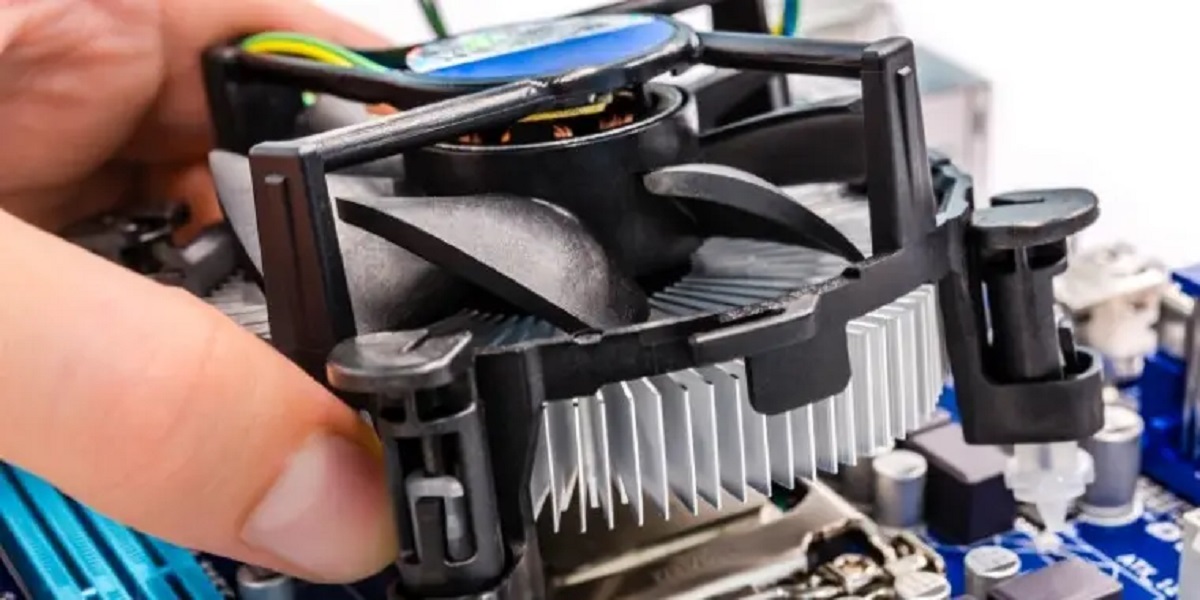
- Align the cooler: Carefully place the cooler on top of the CPU, ensuring that it aligns with the mounting holes or brackets on the motherboard. Be cautious not to misalign or damage any pins or connectors during this process.
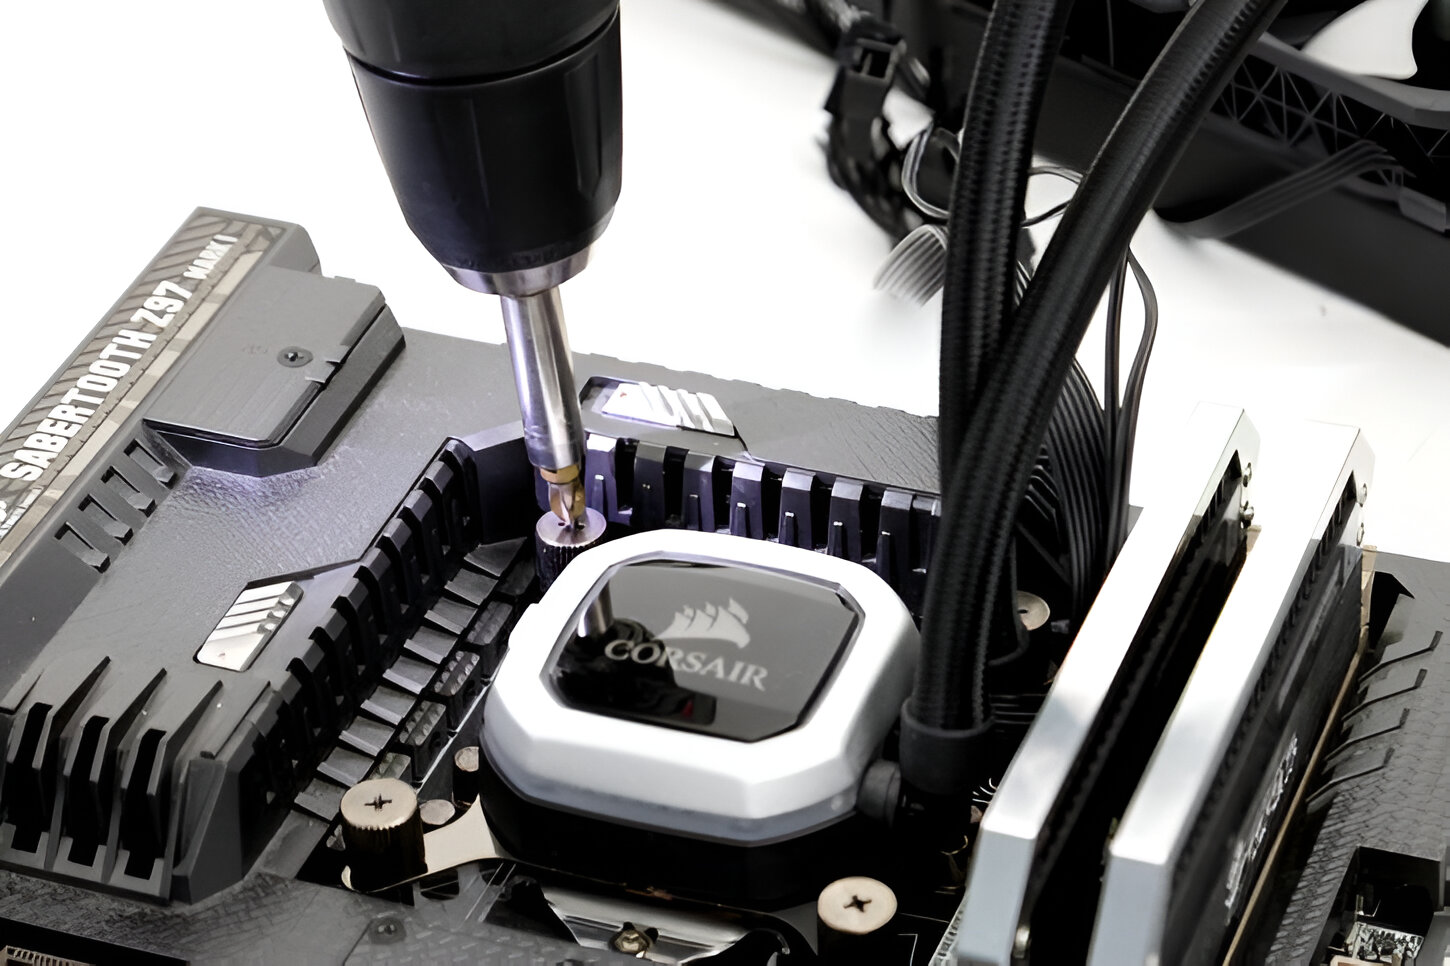
- Secure the cooler: Using the designated mounting mechanism, start tightening the cooler in a diagonal pattern. Gradually increase the tightness, alternating between screws or fasteners in an “X” pattern. This helps evenly distribute the pressure and ensures a secure fit.
- Apply the appropriate pressure: As you tighten each screw or fastener, apply moderate pressure. Avoid using excessive force or tools that can overtighten the cooler. Stop tightening when you feel resistance and the cooler is firmly secured.
- Perform a wiggle test: After securing the CPU cooler, gently and carefully give it a slight wiggle. It should not move or feel loose. If it does, double-check the tightness of the screws or fasteners and ensure proper alignment.
- Test for proper thermal contact: Once the CPU cooler is securely tightened, monitor your CPU temperatures during normal operation or stress testing. If the temperatures remain within acceptable limits, it indicates proper thermal contact and effective heat dissipation.
Remember, each CPU cooler may have specific installation guidelines, so refer to the manufacturer’s instructions for any additional steps or considerations. When in doubt, seek guidance from experts or experienced individuals to ensure a successful and properly tightened CPU cooler installation.
Common Mistakes to Avoid
When it comes to properly tightening the CPU cooler, there are several common mistakes that you should avoid to ensure a successful installation and optimal cooling performance. By being aware of these mistakes, you can minimize the risk of damaging your CPU or motherboard and ensure efficient heat dissipation. Here are some common mistakes to avoid:
- Overtightening: Applying excessive force when tightening the CPU cooler can result in damage to the CPU, motherboard, or the cooler itself. Follow the manufacturer’s instructions and apply firm, even pressure without using excessive strength or tools.
- Under-tightening: Leaving the CPU cooler too loose can hinder proper thermal contact and impede heat dissipation. Ensure that the cooler is securely fastened to avoid potential heating issues and reduced cooling performance.
- Skipping the cleaning step: Failing to clean the CPU and cooler surfaces before installation can lead to poor thermal contact and reduced cooling efficiency. Take the time to properly clean the surfaces and remove any debris, dust, or old thermal paste to ensure optimal heat transfer.
- Using too much thermal paste: Applying an excessive amount of thermal paste can create a thicker thermal barrier and impede heat transfer. Follow the recommended guidelines for applying thermal paste, usually a small, pea-sized amount in the center of the CPU.
- Not following the manufacturer’s instructions: Each CPU cooler may have specific installation guidelines and requirements. Failing to follow the manufacturer’s instructions can result in an improper fit, inadequate cooling, or potential damage. Always refer to the instructions provided with your CPU cooler.
- Ignoring motherboard compatibility: Different motherboards may have specific requirements or compatibility issues when it comes to CPU cooler installation. Check the motherboard manual and ensure that the cooler’s mounting mechanism aligns correctly.
- Rushing the installation: Taking the time to properly install and tighten the CPU cooler is crucial for optimal performance. Rushing through the process can lead to mistakes, uneven pressure distribution, or misalignment. Be patient and meticulous during the installation process.
By avoiding these common mistakes and following the proper installation guidelines, you can ensure a successful and properly tightened CPU cooler installation. Taking the extra time and care will result in efficient heat dissipation, lower CPU temperatures, and a more reliable and long-lasting computer system.
Impact of Incorrectly Tightened CPU Cooler
Incorrectly tightening the CPU cooler can have several negative consequences that can affect the performance and lifespan of your computer system. Here are some potential impacts of an improperly tightened CPU cooler:
- Reduced cooling efficiency: If the CPU cooler is not properly tightened, it may not make sufficient contact with the CPU, resulting in poor heat dissipation. This can lead to higher CPU temperatures, causing the CPU to throttle its performance or even shut down to prevent overheating.
- Decreased system stability: Inadequate cooling due to an improperly tightened CPU cooler can result in system instability. Higher CPU temperatures can lead to crashes, freezes, and unexpected shutdowns during demanding tasks or prolonged use.
- Potential damage to CPU or motherboard: Overtightening the CPU cooler can exert excessive pressure on the CPU socket or motherboard mounts, resulting in bent or broken pins, cracked motherboard traces, or damaged retaining mechanisms. This can lead to expensive repairs or even the need for a replacement of the CPU or motherboard.
- Accelerated CPU degradation: Excessive heat due to an improperly tightened CPU cooler can accelerate the degradation of the CPU over time. Operating the CPU at high temperatures for prolonged periods can reduce its performance and lifespan, resulting in the need for a premature upgrade.
- Increased noise levels: A loosely attached CPU cooler can cause vibrations and unnecessary movement, resulting in increased noise levels. This can be disruptive and annoying, especially if you prioritize a quiet and peaceful computing environment.
It is important to note that the impact of an incorrectly tightened CPU cooler can vary depending on the specific system configuration and workload. However, by ensuring proper installation and following the manufacturer’s guidelines, you can mitigate these risks and ensure optimal cooling performance, system stability, and the longevity of your CPU and motherboard.
In the next section, we will discuss the benefits of properly tightened CPU cooler and why it is crucial to prioritize this aspect during computer assembly or maintenance.
Benefits of Properly Tightened CPU Cooler
Properly tightening the CPU cooler brings several benefits that contribute to the overall performance, stability, and lifespan of your computer system. Here are some key advantages of ensuring a proper fit for your CPU cooler:
- Efficient heat dissipation: A properly tightened CPU cooler allows for optimal contact between the CPU and the cooler’s heat sink. This ensures efficient heat transfer from the CPU to the cooler, preventing overheating and maintaining lower operating temperatures. As a result, the CPU can operate at its full potential without the risk of thermal throttling or performance degradation.
- Enhanced system stability: By maintaining optimal operating temperatures, a properly tightened CPU cooler promotes system stability. It reduces the risk of unexpected system crashes, freezes, and shutdowns, even during demanding tasks or extended periods of use. This is particularly important for those who engage in resource-intensive activities such as gaming or video editing.
- Extended CPU lifespan: Excessive heat can degrade the performance and lifespan of the CPU over time. With a properly tightened CPU cooler, you can effectively regulate temperatures, reducing the risk of long-term damage caused by prolonged exposure to high temperatures. This helps maximize the lifespan of your CPU and protects your investment in computer components.
- Quieter operation: A securely fastened CPU cooler minimizes vibrations and unwanted movement, resulting in reduced noise levels. This is particularly desirable for those who prefer a quiet computing environment, allowing for a more peaceful and enjoyable experience while working or performing tasks on the computer.
- Improved overall system performance: By keeping the CPU at optimal temperatures, a properly tightened CPU cooler helps ensure consistent and reliable performance. It allows the CPU to operate within safe thermal limits, enabling it to deliver its full processing power without being limited by excessive heat.
In summary, a properly tightened CPU cooler is crucial for efficient heat dissipation, system stability, extended CPU lifespan, reduced noise levels, and improved overall system performance. By prioritizing a proper fit and following manufacturer guidelines, you can enjoy the benefits of a well-cooled system that operates reliably and efficiently.
Conclusion
Properly tightening the CPU cooler is essential for maintaining optimal cooling performance, system stability, and the longevity of your computer system. By striking the right balance between tightness and avoiding common mistakes, you can ensure efficient heat dissipation, lower CPU temperatures, and reliable operation for your CPU.
When installing a CPU cooler, consider factors such as the CPU cooler design, motherboard compatibility, mounting pressure, thermal interface material, and the CPU workload. Following a step-by-step guide and adhering to the manufacturer’s instructions will help you achieve the correct tightness, ensuring proper thermal contact and heat transfer.
Avoid the common mistakes of overtightening or under-tightening the CPU cooler, skipping the cleaning step, using excessive thermal paste, ignoring motherboard compatibility, and rushing the installation process. By avoiding these mistakes, you can prevent potential damage to your CPU or motherboard and ensure successful cooling performance.
The benefits of properly tightened CPU cooler are numerous, including efficient heat dissipation, enhanced system stability, extended CPU lifespan, reduced noise levels, and improved overall system performance. By prioritizing the proper fit and following proper installation guidelines, you can create a well-cooled system that operates reliably and efficiently.
In conclusion, take the necessary time and care to correctly tighten your CPU cooler, ensuring that it is secure and making proper contact with the CPU. By doing so, you can maintain optimal cooling performance, lower CPU temperatures, and protect your valuable components, resulting in a more reliable and long-lasting computer system.