Introduction
Installing a CPU cooler is a crucial step when building or upgrading a computer. A CPU cooler is responsible for maintaining the optimal temperature of the central processing unit (CPU) by dissipating heat generated during its operation. However, many people often overlook the importance of properly tightening the CPU cooler during installation. Understanding the correct tightness level is essential to ensure efficient heat transfer and prevent potential damage to the CPU and other components.
In this article, we will delve into the significance of properly installing a CPU cooler and explain the risks associated with both over-tightening and under-tightening. We will also provide you with practical tips and a step-by-step guide to determine the right tightness for your CPU cooler, as well as highlight common mistakes to avoid during the installation process. Whether you are a seasoned computer builder or a novice enthusiast, following these guidelines will help you ensure the longevity and optimal performance of your CPU.
Before we explore the intricacies of tightening a CPU cooler, it is important to note that different CPU cooler types may require varying levels of tightness. The methods and techniques discussed in this article are generally applicable to most CPU coolers, but it is crucial to consult the manufacturer’s instructions for specific guidelines tailored to your particular CPU cooler model.
The Importance of Properly Installing a CPU Cooler
Properly installing a CPU cooler is a crucial aspect of building or upgrading a computer. The CPU cooler plays a vital role in maintaining the optimal temperature of the CPU, which is essential for its performance and longevity.
When your CPU operates, it generates heat. Without a sufficient cooling mechanism in place, the excessive heat can cause the CPU to overheat and potentially malfunction. This can lead to decreased performance, system instability, and even permanent damage to the CPU and other components of your computer.
By installing a CPU cooler, you ensure that the heat generated by the CPU is effectively dissipated, preventing any potential issues. The cooler consists of heatsinks and fans that actively draw heat away from the CPU and exhaust it out of the system. This process allows the CPU to operate within safe temperature limits, improving overall system stability and performance.
Not only does proper installation of a CPU cooler prevent overheating, but it also extends the lifespan of your CPU. Excessive heat can degrade the internal components of the CPU, including the delicate transistors. By keeping the CPU cool, you reduce the risk of long-term damage and increase the longevity of your computer system.
Moreover, a well-installed CPU cooler can prevent the CPU from throttling its performance due to high temperatures. When the CPU reaches a certain temperature threshold, it may automatically reduce its clock speed to cool down, resulting in decreased performance. A properly installed cooler helps maintain stable temperatures, allowing the CPU to operate at its full potential.
Whether you are a casual computer user, a gamer, or a professional demanding high-performance computing, a properly installed CPU cooler is paramount to ensure optimal system performance and longevity. Neglecting this essential step can lead to a range of issues, from system instability and decreased performance to permanent damage to your valuable components.
In the following sections, we will explore the risks associated with both over-tightening and under-tightening a CPU cooler, providing you with insights and guidelines to achieve the right level of tightness for your specific cooler.
The Risks of Over-Tightening a CPU Cooler
While it may seem counterintuitive, over-tightening a CPU cooler can pose significant risks to your computer system. Applying excessive force when securing the cooler can lead to various negative consequences that may compromise the performance and lifespan of your CPU and other components.
One of the primary risks of over-tightening a CPU cooler is the potential for damaging the CPU itself. CPUs are delicate electronic components with sensitive circuitry. When excessive pressure is applied to the CPU during installation, there is a risk of bending or breaking the delicate pins or damaging the socket. This can result in a non-functional or unstable CPU, rendering your computer inoperable.
Over-tightening a CPU cooler can also cause uneven pressure distribution on the CPU, leading to poor thermal contact with the cooler. Proper thermal contact between the CPU and the cooler is essential for efficient heat transfer. If there are gaps or inconsistencies in the contact, heat dissipation will be compromised, causing the CPU to run hotter than intended. This can result in increased thermal throttling, decreased performance, and even CPU overheating.
Another risk of over-tightening is the potential for damage to the motherboard. Motherboards have sensitive electronic components and traces that can be easily damaged by excessive pressure. Applying too much force when securing the CPU cooler can lead to cracks, fractures, or even breaks in the motherboard, rendering it unusable.
In addition to hardware damage, over-tightening a CPU cooler can create difficulties during future maintenance or upgrades. Removing an over-tightened cooler can be challenging and may require excessive force or specialized tools, increasing the risk of damaging other components or the motherboard itself.
It is important to note that different CPU coolers may have specific recommendations regarding the tightness level. Following the manufacturer’s guidelines ensures that you do not exceed the safe limits and minimizes the risks associated with over-tightening.
In the next section, we will explore the risks of under-tightening a CPU cooler and discuss how to determine the appropriate level of tightness for your CPU cooler installation.
The Risks of Under-Tightening a CPU Cooler
Under-tightening a CPU cooler can be just as detrimental to your computer system as over-tightening. When a CPU cooler is not properly secured to the CPU, it can lead to a series of issues that can affect the overall performance, stability, and lifespan of your system.
One of the primary risks of under-tightening a CPU cooler is poor thermal contact between the CPU and the cooler. When the cooler is not adequately secured, there can be gaps or uneven contact between the CPU’s heat spreader and the cooler’s base. This results in poor heat transfer, causing the CPU to operate at higher temperatures than intended.
Operating the CPU at higher temperatures due to under-tightening can lead to thermal throttling. Thermal throttling is a CPU’s safety mechanism that reduces its clock speed to prevent overheating. When the CPU throttles, it runs at a lower frequency, resulting in decreased performance. This can significantly impact tasks that require high computing power, such as gaming, video editing, or running resource-intensive applications.
Moreover, under-tightening a CPU cooler can result in increased fan noise. When a cooler is not securely attached, vibrations and movement can occur, causing excessive fan noise. This can be both distracting and annoying, especially when you are trying to work or enjoy a quiet computing experience.
Another risk of under-tightening is the potential for the CPU cooler to become dislodged during operation or transportation. A loose cooler can lead to accidental detaching, which can cause severe damage to the CPU, motherboard, and other components. This risk is particularly significant if you need to move or transport your computer system frequently.
It is important to note that different CPU coolers have varying levels of tightness recommended by their manufacturers. By following these guidelines and ensuring that the CPU cooler is properly secured, you can minimize the risks associated with under-tightening.
Now that we have explored the risks of both over-tightening and under-tightening a CPU cooler, let’s move on to the next section, where we will discuss how to determine the right level of tightness for your specific CPU cooler installation.
How to Determine the Right Tightness for Your CPU Cooler
Determining the right tightness level when installing a CPU cooler is crucial for optimal performance and longevity. While there is no one-size-fits-all approach, several factors can guide you in achieving the appropriate level of tightness for your specific CPU cooler.
Firstly, it is important to consult the manufacturer’s instructions that accompany your CPU cooler. Different coolers may have specific recommendations regarding the number of turns or the amount of pressure required to secure them properly. Following these guidelines ensures that you stay within safe limits and minimizes the risks of over or under-tightening.
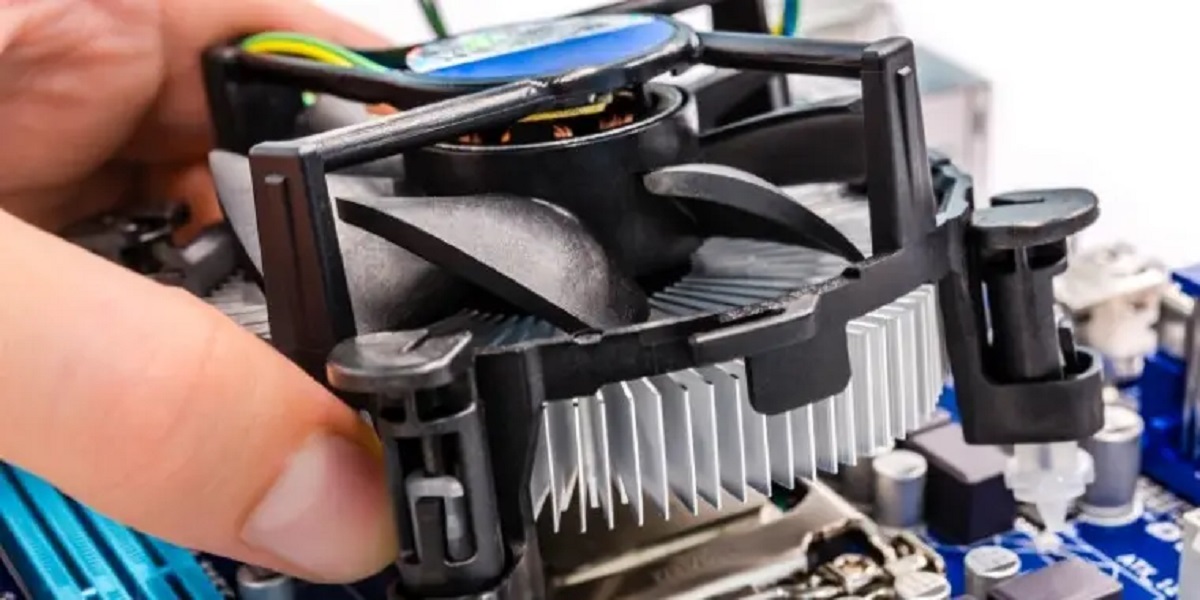
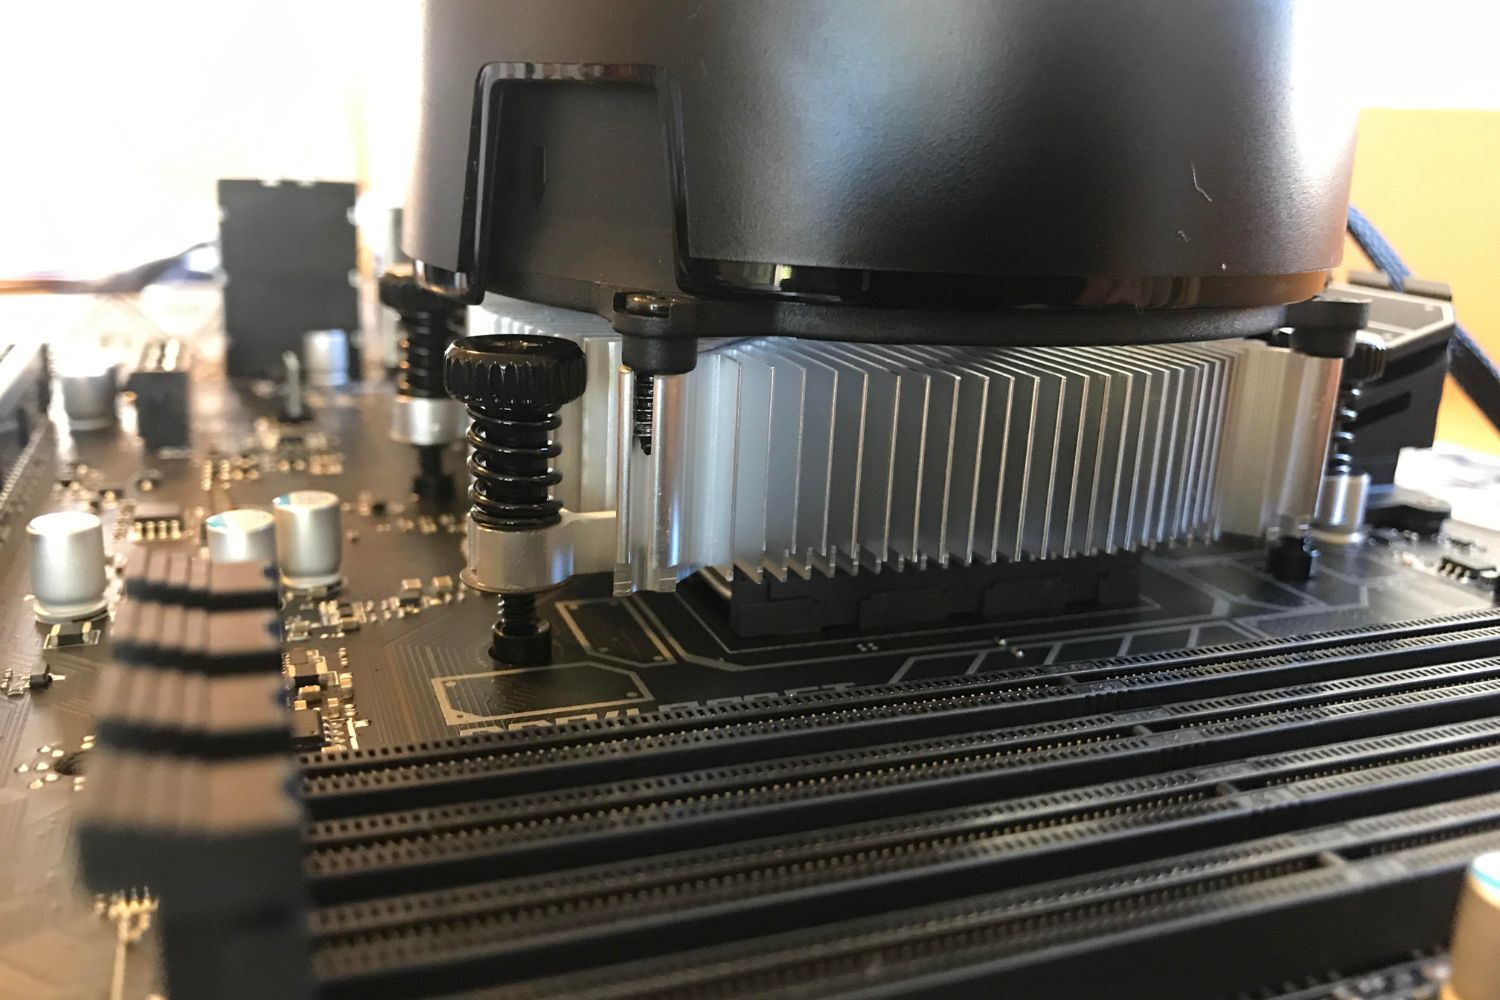
Secondly, consider the type of mounting mechanism used by your CPU cooler. Most coolers either use a direct contact heat sink with screws or a mounting bracket with spring-loaded screws. Each mechanism requires a different approach when it comes to achieving optimal tightness.
If you have a direct contact heat sink, the goal is to evenly distribute the pressure across the CPU’s heat spreader. Start by screwing all four corners of the heat sink in a diagonal pattern. This method ensures that the pressure is evenly applied, minimizing the risk of uneven contact or damage to the CPU.
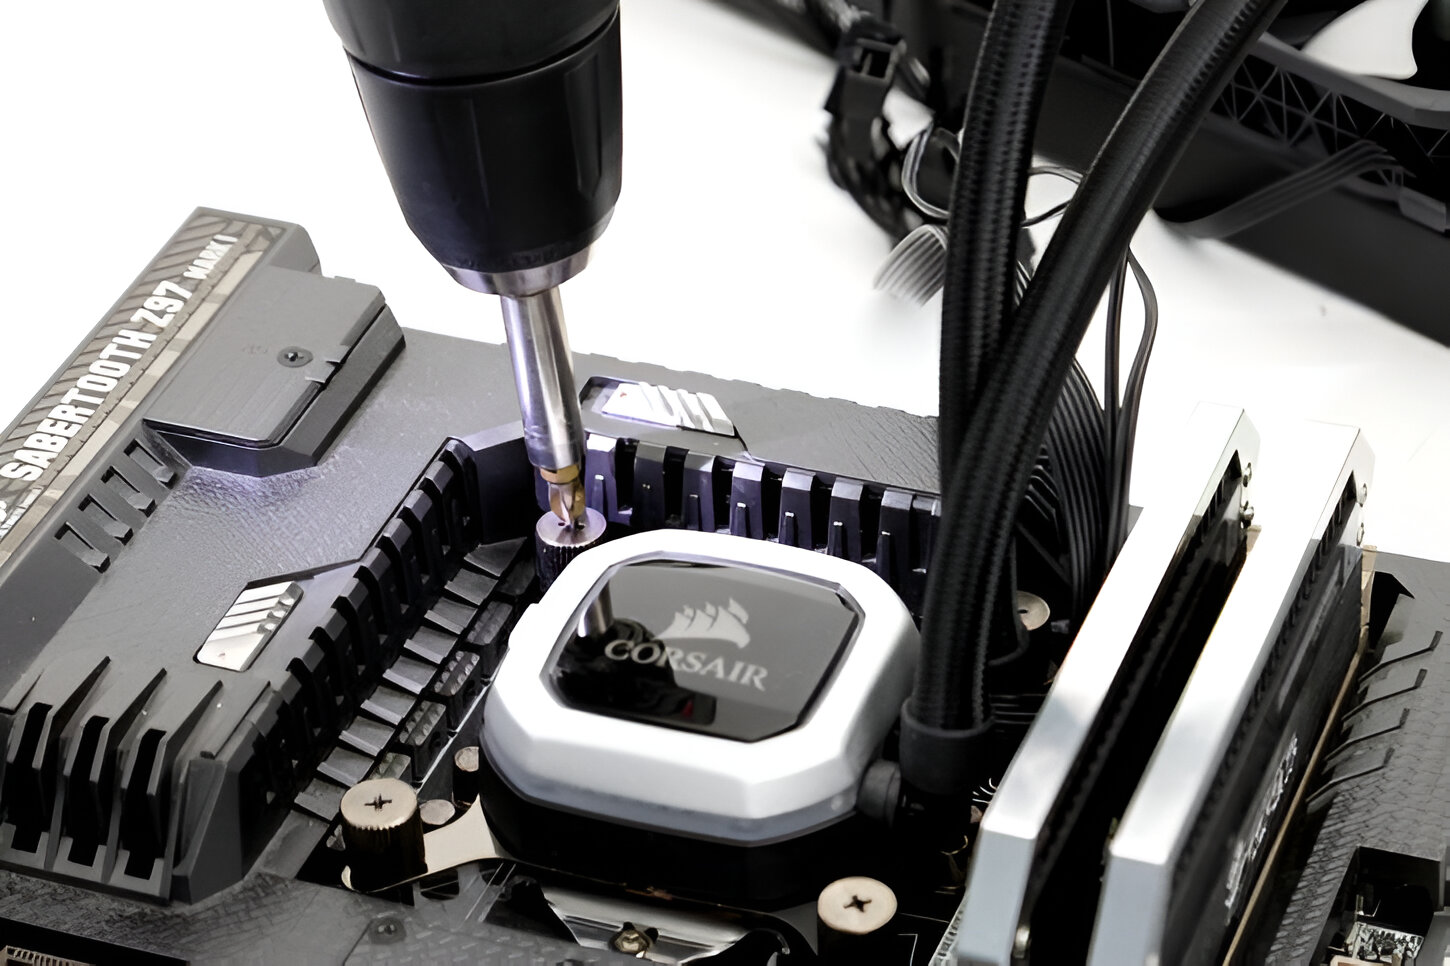
On the other hand, if your CPU cooler utilizes a mounting bracket with spring-loaded screws, it is important to tighten the screws gradually and evenly. These brackets are designed to provide consistent pressure without over-tightening. Tighten each screw a little at a time, alternating between them to ensure uniform distribution of pressure.
Additionally, pay attention to the material of the CPU cooler. Cooler materials, such as copper or aluminum, have different structural properties and thermal conductivity. Copper coolers, for example, are generally softer than aluminum coolers and may require slightly less tightness. Understanding the characteristics of your cooler material can help you determine the appropriate level of tightness.
Lastly, consider using a screwdriver with a torque measurement feature. This allows you to accurately measure the applied force and ensures consistent tightness across all screws. However, be mindful not to exceed the recommended torque specifications provided by the manufacturer.
By taking into account the manufacturer’s instructions, the type of mounting mechanism, the cooler’s material, and using a torque measuring screwdriver if available, you can determine the right tightness level for your CPU cooler. Remember, the goal is to achieve proper and even contact between the CPU and the cooler, ensuring efficient heat transfer while avoiding excessive pressure or damage to the components.
In the next section, we will provide you with a step-by-step guide to properly tightening a CPU cooler, regardless of the specific mechanism or cooler type you have.
Step-by-Step Guide to Properly Tightening a CPU Cooler
Properly tightening a CPU cooler is crucial to ensure efficient heat transfer and prevent potential damage to your CPU and other components. Here is a step-by-step guide to help you achieve the correct tightness for your CPU cooler installation:
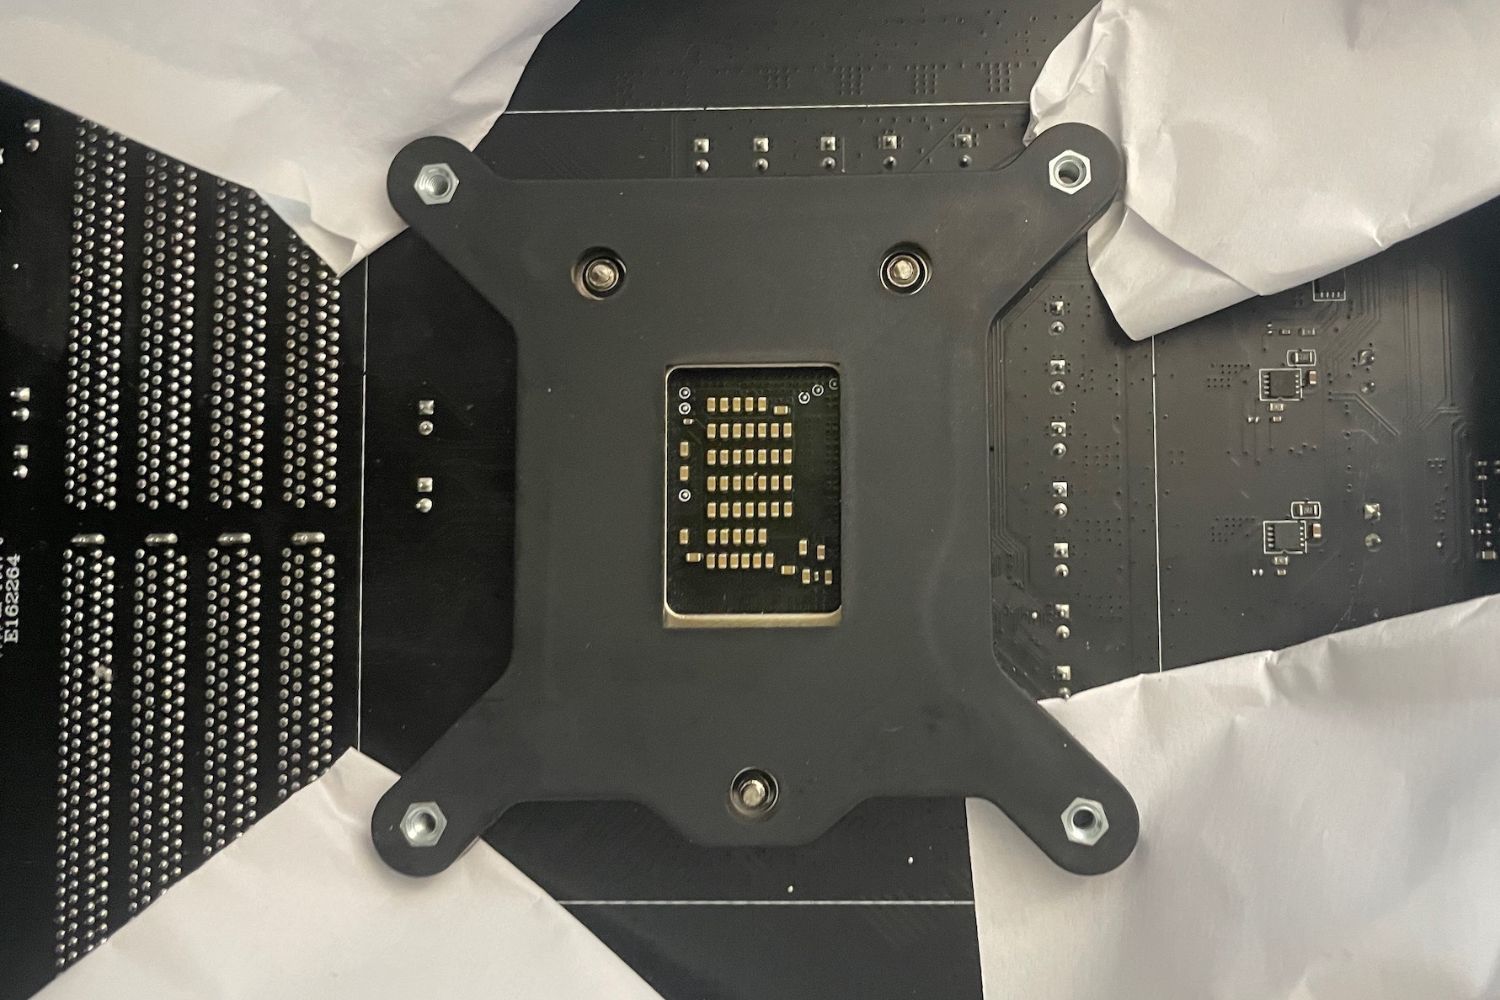
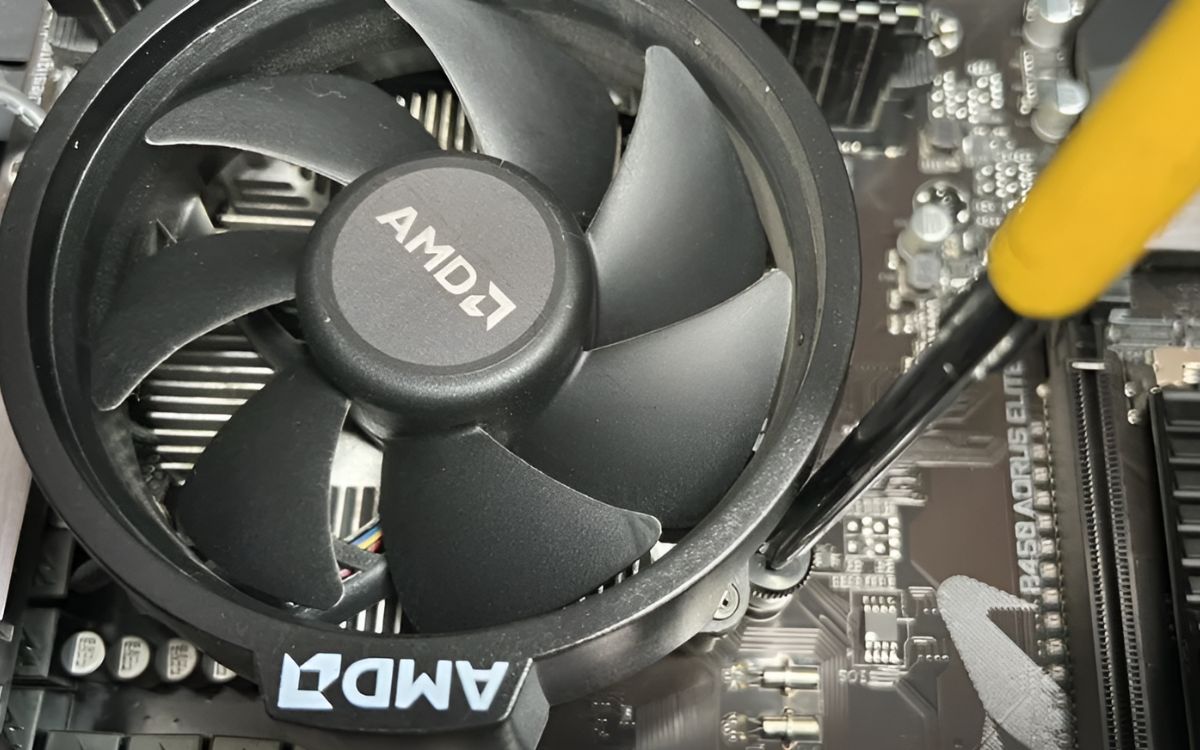
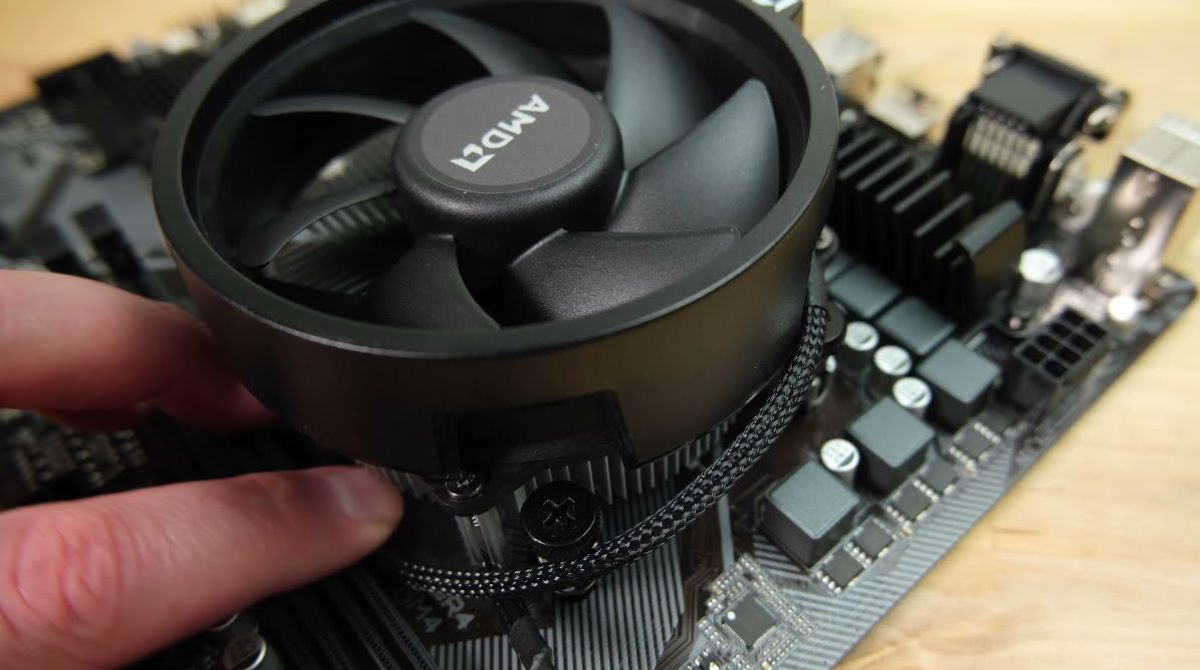
- Start by placing the CPU cooler onto the CPU socket, ensuring proper alignment with the mounting holes.
- If your CPU cooler uses a direct contact heat sink, use an X-shaped pattern to tighten the screws. Start by lightly screwing each corner in a diagonal sequence, gradually increasing the tightness in small increments.
- If your CPU cooler uses a mounting bracket with spring-loaded screws, tighten them gradually and evenly. Start by tightening each screw a little at a time, moving in an X-pattern, ensuring uniform distribution of pressure.
- Monitor the tightness level by using a screwdriver with a torque measurement feature, if available. Be careful not to exceed the recommended torque specifications provided by the CPU cooler manufacturer.
- Ensure that the pressure is evenly distributed across the CPU’s heat spreader. This prevents uneven contact and potential damage to the CPU.
- Double-check that all screws are securely tightened, but avoid applying excessive force or over-tightening.
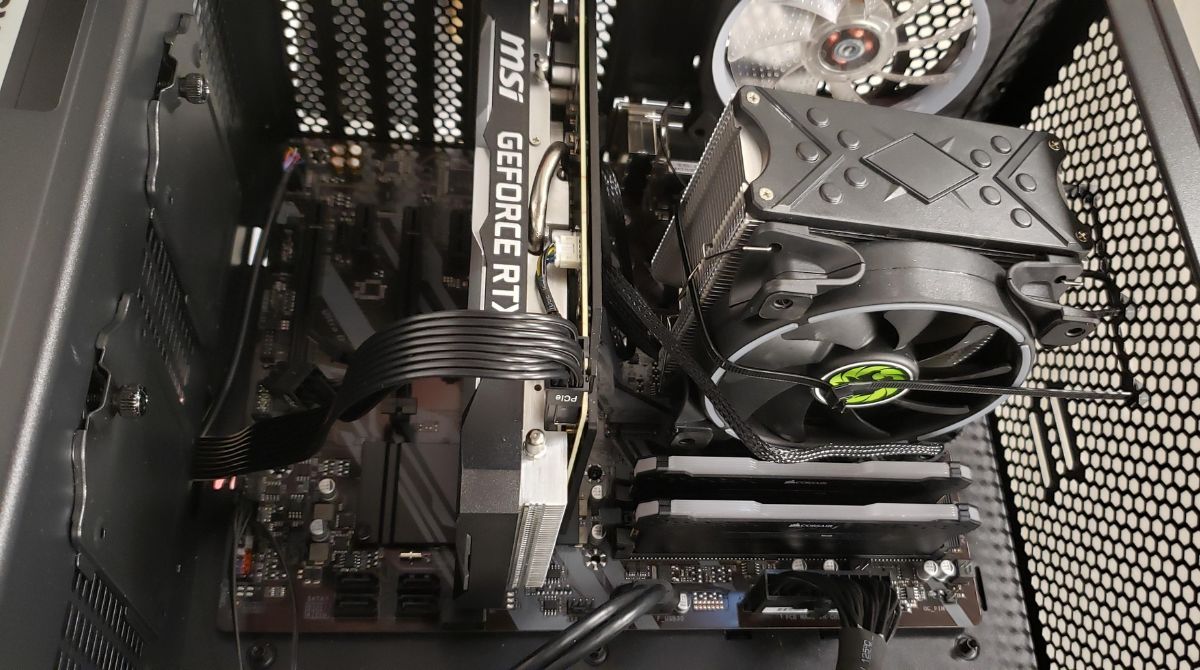
- Verify that the CPU cooler is firmly attached and does not wobble or move when gently nudged.
- If you notice any issues, such as poor contact or uneven pressure distribution, consider adjusting the tightness accordingly, following the manufacturer’s guidelines.
- Finally, connect the CPU fan to the appropriate header on the motherboard and ensure it is functioning correctly.
By following this step-by-step guide, you can properly tighten your CPU cooler, ensuring optimal thermal performance and safeguarding your CPU and other components from potential damage.
In the next section, we will provide you with some additional tips to help you achieve the right tightness for your CPU cooler and avoid common mistakes during the installation process.
Tips for Achieving the Right Tightness
When it comes to achieving the right tightness for your CPU cooler, there are several tips and considerations that can help you ensure optimal performance and avoid potential issues. Here are some valuable tips to keep in mind:
- Read and follow the manufacturer’s instructions carefully: Every CPU cooler may have specific guidelines regarding the tightness level. Make sure to thoroughly read and understand the instructions provided by the manufacturer.
- Use a screwdriver with a comfortable grip: A comfortable grip on your screwdriver allows for stable and controlled tightening without straining your hand or applying excessive force unintentionally.
- Alternate between screws: When tightening the screws, alternate between them in an X or diagonal pattern. This ensures even pressure distribution and reduces the likelihood of uneven contact with the CPU.
- Apply pressure gradually: Avoid abruptly tightening the screws. Instead, apply pressure gradually, making small adjustments and checking the tightness level during the process.
- Ensure a proper cooling solution: Choose a CPU cooler that is suitable for your CPU’s thermal requirements. This ensures that the cooler is effective in dissipating heat and maintaining optimal temperatures.
- Consider using a thermal compound: Using a high-quality thermal compound can improve heat transfer between the CPU and the cooler. Apply a thin, even layer on the CPU’s heat spreader before installing the cooler.
- Monitor temperatures: After installing the CPU cooler, monitor your CPU temperatures under various workloads. Abnormally high temperatures may indicate poor contact or inadequate tightening. If necessary, reevaluate the tightness and adjust accordingly.
- Seek professional help if needed: If you are unsure about the correct tightness or encounter any issues during the installation process, it is always recommended to seek assistance from a professional or refer to reputable sources for guidance.
By following these tips, you can increase your chances of achieving the right tightness for your CPU cooler, ensuring optimal thermal performance and minimizing the risks associated with over or under-tightening.
Now, let’s move on to the next section, where we will discuss common mistakes to avoid when tightening a CPU cooler, ensuring a smooth installation process.
Common Mistakes to Avoid When Tightening a CPU Cooler
When it comes to tightening a CPU cooler, there are some common mistakes that people often make. Being aware of these mistakes can help you avoid potential issues and ensure a successful installation. Here are some common mistakes to avoid:
- Over-tightening the screws: Applying excessive force when tightening the screws can lead to damage to the CPU, motherboard, or other components. Follow the manufacturer’s guidelines and apply the right amount of pressure without going beyond the recommended torque specifications.
- Under-tightening the screws: On the other hand, under-tightening the screws can result in poor contact between the CPU and the cooler, leading to inefficient heat transfer and higher operating temperatures. Ensure that the cooler is securely attached without being too loose.
- Not following the manufacturer’s instructions: Each CPU cooler may have specific recommendations and guidelines for proper installation. Failure to follow these instructions can result in improper tightening and potential issues down the line.
- Skipping the use of thermal compound: Applying a thin layer of thermal compound between the CPU and the cooler helps improve heat transfer. Skipping this essential step can result in reduced cooling efficiency and higher temperatures.
- Mixing up the mounting hardware: CPU coolers often come with different mounting hardware options. Using the wrong mounting hardware or mixing it up can lead to improper installation and potential damage to the CPU or motherboard.
- Not checking for proper alignment: Ensure that the CPU cooler is properly aligned with the mounting holes on the motherboard. Improper alignment can result in uneven contact and poor heat dissipation.
- Not monitoring temperatures: After installing the CPU cooler, monitor the temperatures of your CPU to ensure that it is operating within safe limits. If temperatures are unusually high, it may indicate a problem with the tightness or contact of the cooler.
- Ignoring the importance of maintenance: Once the CPU cooler is installed, it is essential to regularly clean and maintain it. Dust accumulation can hinder proper cooling performance, so regularly clean the cooler and its fans to ensure optimal heat dissipation.
Avoiding these common mistakes will help you achieve proper tightening of your CPU cooler and ensure efficient cooling performance without risking damage to your components.
In the next section, we will discuss the importance of considering different CPU cooler types and their specific tightness requirements.
A Word of Caution: Different CPU Cooler Types may Require Different Tightness Levels
When it comes to CPU cooler installations, it is important to note that different types of CPU coolers may have varying tightness requirements. The specific design and mounting mechanism of each cooler can influence the appropriate level of tightness needed for optimal performance. Therefore, it is crucial to consider these variations and follow the manufacturer’s recommendations for your specific CPU cooler type.
Air coolers, which consist of heatsinks and fans, typically require a moderate level of tightness. The goal is to ensure even pressure distribution across the CPU’s heat spreader, allowing for efficient heat transfer without excessive force. Following the manufacturer’s instructions and guidelines for the specific air cooler model is key in achieving the desired tightness.
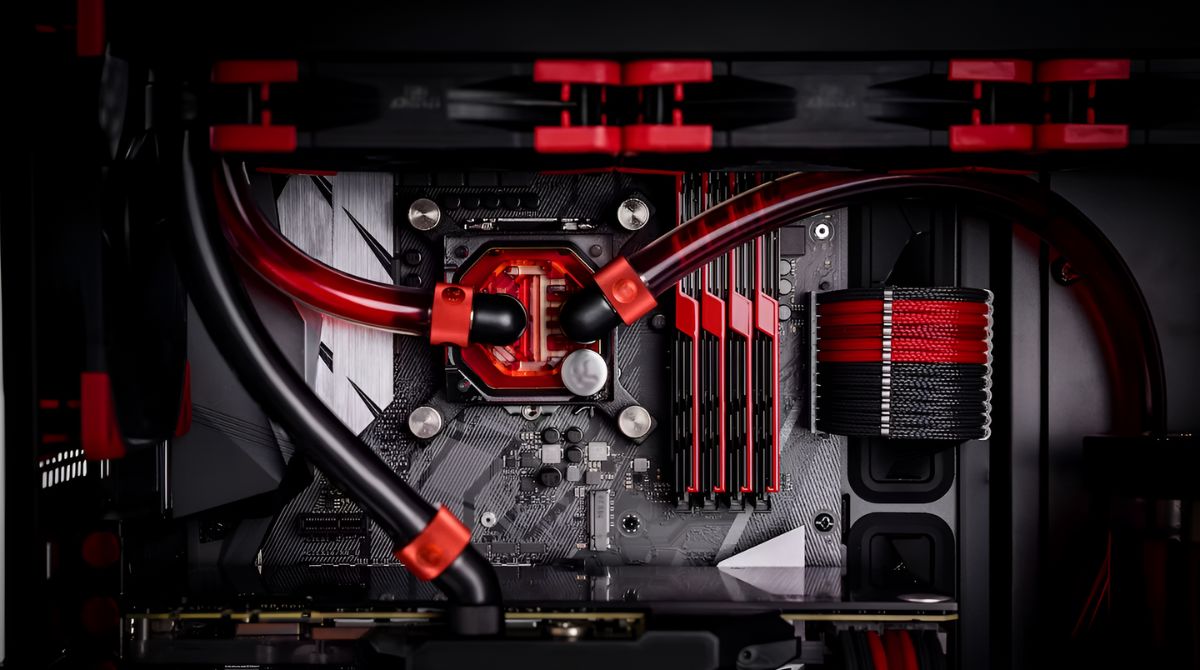
Liquid coolers, such as all-in-one (AIO) liquid coolers or custom water cooling setups, have a different design and mounting mechanism compared to air coolers. These types of coolers often use pump units, water blocks, radiator brackets, and tubes. The tightness requirements for liquid coolers may vary depending on the specific components used. It is crucial to carefully follow the manufacturer’s instructions and guidelines for each component to prevent leaks, damage to the cooler, or improper cooling performance.
Additionally, certain CPU coolers, such as heavy-duty coolers or those designed for high-end processors, may have specific mounting mechanisms that require higher levels of tightness. These coolers often come with their own unique installation procedures, and it is important to strictly adhere to the manufacturer’s recommendations to ensure stability and proper cooling performance.
By considering the differences in CPU cooler types and their specific tightness requirements, you can ensure that your cooler is appropriately secured and functioning optimally. Always refer to the manufacturer’s guidelines and instructions for the specific CPU cooler model you are using, as they provide the most accurate and reliable information for achieving the appropriate tightness level.
In the next section, we will summarize the key points discussed in this article and provide a final overview of tightening a CPU cooler.
Conclusion
Properly tightening a CPU cooler is a critical step in ensuring optimal performance, stability, and longevity of your computer system. Over-tightening or under-tightening a CPU cooler can lead to a range of issues, including damage to the CPU or motherboard, inefficient heat dissipation, and decreased performance.
By following the manufacturer’s guidelines, using the appropriate mounting hardware, and considering the specific requirements of your CPU cooler, you can achieve the right level of tightness. Start with the manufacturer’s instructions, apply even pressure, and monitor temperatures to ensure optimal cooling performance.
Remember to avoid common mistakes such as over-tightening, under-tightening, skipping the use of thermal compound, and mixing up the mounting hardware. By being mindful of these mistakes, you can sidestep potential issues and ensure a successful installation.
Furthermore, it is important to consider that different CPU cooler types may have unique tightness requirements. Air coolers, liquid coolers, and heavy-duty coolers each have their own guidelines and instructions to follow to achieve the appropriate level of tightness.
By properly tightening your CPU cooler, you can enhance the overall efficiency and lifespan of your computer system, prevent overheating, and maximize its performance for various tasks, whether you are a casual user or a demanding professional.
Lastly, if you encounter any difficulties or uncertainties during the installation process, it is always advisable to seek professional assistance or refer to reputable sources for guidance.
Following these guidelines and understanding the importance of proper tightening will help you maintain a stable and cool CPU, ensuring the smooth operation of your computer system for years to come.