Why Use Subtitles?
Subtitles are an essential feature that enhances the viewing experience of movies, TV shows, and videos. They provide text-based transcriptions of the audio content, allowing viewers to read along while watching. Subtitles have numerous benefits that make them a valuable tool for both entertainment and education purposes.
Firstly, subtitles are extremely helpful for individuals who are deaf or hard of hearing. They allow these individuals to access the dialogue and storyline of a video or film, enabling them to fully enjoy the content. Subtitles make it possible for the deaf and hard of hearing community to be included in the entertainment experience, ensuring that no one is left out.
Moreover, subtitles are useful for viewers who are not fluent in the language spoken in the video. They can help individuals understand the dialogue and follow the plot even if they are not familiar with the language. Subtitles can also assist language learners in improving their language skills by allowing them to read and listen simultaneously.
Another advantage of using subtitles is that they can enhance comprehension, especially in situations where the audio quality is poor or there is background noise. When viewers encounter difficult accents or muffled speech, subtitles provide clarity and prevent misunderstandings. Additionally, subtitles can help viewers catch and remember key information, such as names, locations, or important details that may be easily missed through auditory processing alone.
Subtitles are also beneficial in environments where watching videos without sound is necessary or preferred, such as in libraries, offices, or public transportation. They enable individuals to watch content discreetly and without disturbing others, ensuring a respectful and considerate viewing experience.
Lastly, subtitles are a valuable tool for foreign films or videos with regional dialects or slang. They bridge the gap between different cultures and enable a wider audience to appreciate and understand content from around the world. Subtitles preserve the original text and artistic choices made by the creators, making it possible for the intended emotions, humor, and cultural references to be accurately conveyed to the audience.
In summary, subtitles are an important feature that enhances accessibility, comprehension, and cultural appreciation. Whether for individuals who are deaf or hard of hearing, language learners, or those in noisy environments, subtitles provide a valuable aid in understanding and enjoying audiovisual content. They promote inclusivity, facilitate language learning, and enrich the viewing experience for all.
How to Turn On Subtitles on Netflix
Netflix offers a wide range of movies and TV shows, and enabling subtitles can greatly enhance the viewing experience. If you want to turn on subtitles while watching your favorite content on Netflix, follow these simple steps:
- Start playing the movie or TV show you want to watch.
- Move your cursor or tap on the screen to bring up the player controls.
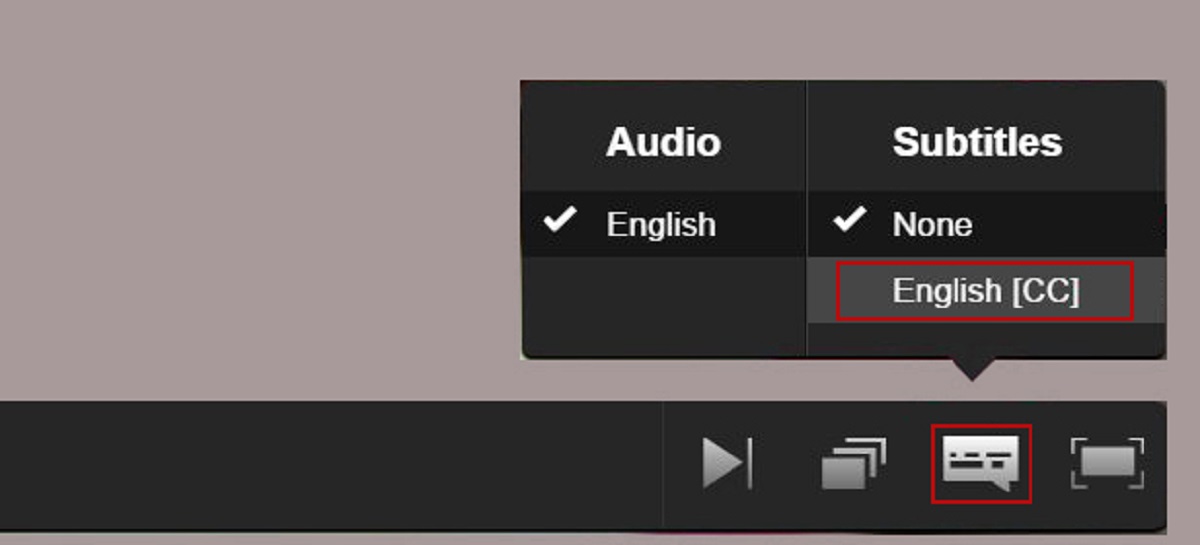
- Look for the “Dialogue” or “Subtitles” icon, usually represented by a speech bubble or a letter “S” within a square.
- Click or tap on the “Dialogue” or “Subtitles” icon.
- A list of available subtitle options will appear. Choose the language you prefer from the list. You can also select “None” if you want to turn off the subtitles.
- The selected subtitle language will now be displayed while you watch the movie or TV show. Enjoy!
Note that the availability of subtitles may vary depending on the movie or TV show. Some content may have multiple subtitle options, including different languages or versions. Make sure to select the appropriate subtitle option that best suits your needs.
If you want to change the appearance or style of the subtitles, you can customize them in the account settings on the Netflix website. Here’s how:
- Go to the Netflix website and log in to your account.
- Click on your profile icon at the top right corner of the screen.
- Select “Account” from the drop-down menu.
- Under the “Profile & Parental Controls” section, click on the profile that you want to customize.
- Scroll down to the “My Profile” section and click on “Subtitle Appearance”.
- You can now adjust the font, color, size, and background of the subtitles to your liking. Once you’re satisfied with the changes, click “Save”.
With these simple steps, you can easily turn on subtitles and customize their appearance while streaming your favorite content on Netflix. Whether you want subtitles for better understanding, language learning, or simply enjoying a movie without disturbing others, Netflix provides a user-friendly interface that caters to your needs and preferences.
Steps to Activate Subtitles on YouTube
YouTube offers a vast library of videos in various languages, and enabling subtitles can make it easier for viewers to understand the content. If you want to activate subtitles while watching a video on YouTube, follow these simple steps:
- Start playing the video you want to watch.
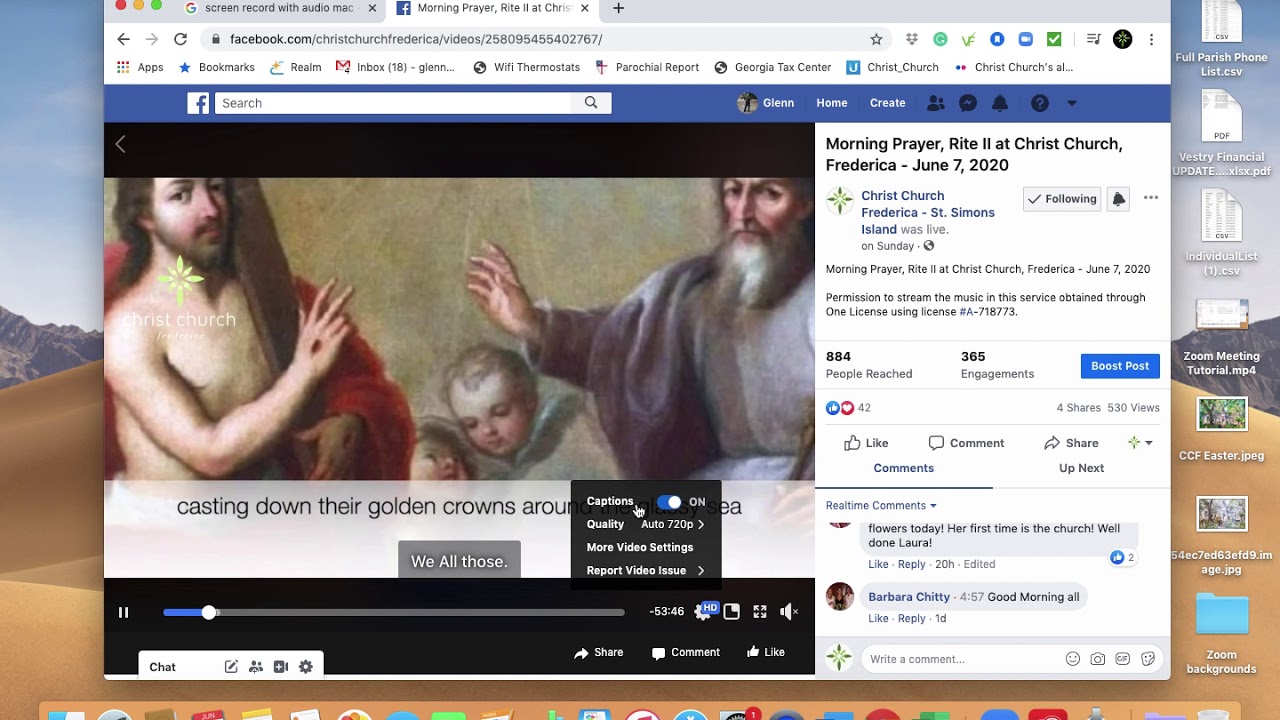
- Click on the “Settings” icon, represented by a gear icon, located at the bottom right corner of the video player.
- A menu will appear. Click on the “Subtitles/CC” option.
- A list of available subtitles will appear. If the video has multiple subtitle options, click on the language you prefer. If there is only one option, it will be automatically selected.
- The selected subtitle language will now be displayed while you watch the video. Enjoy!
In addition to selecting subtitles from the available options, YouTube also provides the option to auto-generate subtitles using its automated speech recognition technology. Here’s how to enable this feature:
- Go to the video you want to watch on YouTube.
- Click on the “Settings” icon, represented by a gear icon, located at the bottom right corner of the video player.
- Select the “Subtitles/CC” option.
- Click on “Auto-generated” to enable the automated subtitles.
- The auto-generated subtitles will now appear while you watch the video. Note that the accuracy of these subtitles may vary depending on the quality of the audio and the clarity of the speech.
If you want to customize the appearance of the subtitles, including the font, size, and color, you can do so by accessing the YouTube settings. Here’s how:
- Click on your profile icon at the top right corner of the YouTube homepage.
- Select “Settings” from the drop-down menu.
- Click on “Playback and Performance” in the left sidebar.
- Scroll down to the “Subtitles” section and click on “Options”.
- You can now adjust the appearance settings according to your preferences. Once you’re satisfied with the changes, click “Save”.
By following these steps, you can easily activate subtitles and customize their appearance while enjoying videos on YouTube. Whether you need subtitles for better understanding, language learning, or accessibility purposes, YouTube provides a user-friendly interface that caters to your needs.
Enabling Subtitles on Amazon Prime Video
Amazon Prime Video offers a vast library of movies, TV shows, and exclusive content, and enabling subtitles can greatly enhance your viewing experience. If you want to enable subtitles while watching your favorite content on Amazon Prime Video, follow these simple steps:
- Start playing the movie or TV show you want to watch.
- Move your cursor or tap on the screen to bring up the player controls.
- Look for the “Subtitles” icon, usually represented by a speech bubble or the letters “CC”.
- Click or tap on the “Subtitles” icon.
- A list of available subtitle options will appear. Choose the language you prefer from the list. You can also select “Off” if you want to turn off the subtitles.
- The selected subtitle language will now be displayed while you watch the movie or TV show. Enjoy!
Note that the availability of subtitles may vary depending on the movie or TV show. Some content may have multiple subtitle options, including different languages or versions. Make sure to select the appropriate subtitle option that best suits your needs.
If you want to customize the appearance of the subtitles, such as the font, size, and color, you can adjust these settings on your Amazon Prime Video account. Here’s how:
- Go to the Amazon Prime Video website and log in to your account.
- Hover over your profile icon at the top right corner of the screen.
- Choose “Account & Settings” from the drop-down menu.
- Under the “Preferences” tab, scroll down to the “Subtitles” section.
- You can now select your preferred subtitle language and customize the appearance settings as desired.
- Click “Save Changes” to apply the new subtitle settings.
With these easy steps, you can enable subtitles and customize their appearance while streaming your favorite content on Amazon Prime Video. Subtitles provide improved accessibility, language learning, and a better understanding of the dialogue, allowing you to fully enjoy the immersive experience of watching movies and TV shows on the platform.
Using Subtitles on Hulu
Hulu is a popular streaming platform that offers a wide variety of TV shows, movies, and original content. If you want to utilize subtitles while watching your favorite content on Hulu, the process is simple. Here’s how you can use subtitles on Hulu:
- Start playing the TV show or movie you want to watch on Hulu.
- Move your cursor or tap on the screen to bring up the player controls.
- Look for the “CC” button, typically located in the bottom right corner of the screen.
- Click or tap on the “CC” button to enable subtitles.
- The subtitles will now appear on the screen while you watch the content. Enjoy!
Hulu provides different subtitle options to cater to your preferences. You can choose from various languages, styles, and even adjust the size and color of the subtitles. To customize the subtitle settings on Hulu, follow these steps:
- Start playing the TV show or movie you want to watch on Hulu.
- Move your cursor or tap on the screen to bring up the player controls.
- Click or tap on the “CC” button to enable subtitles.
- A settings icon (usually represented by a gear or cog) will appear near the “CC” button. Click or tap on it.
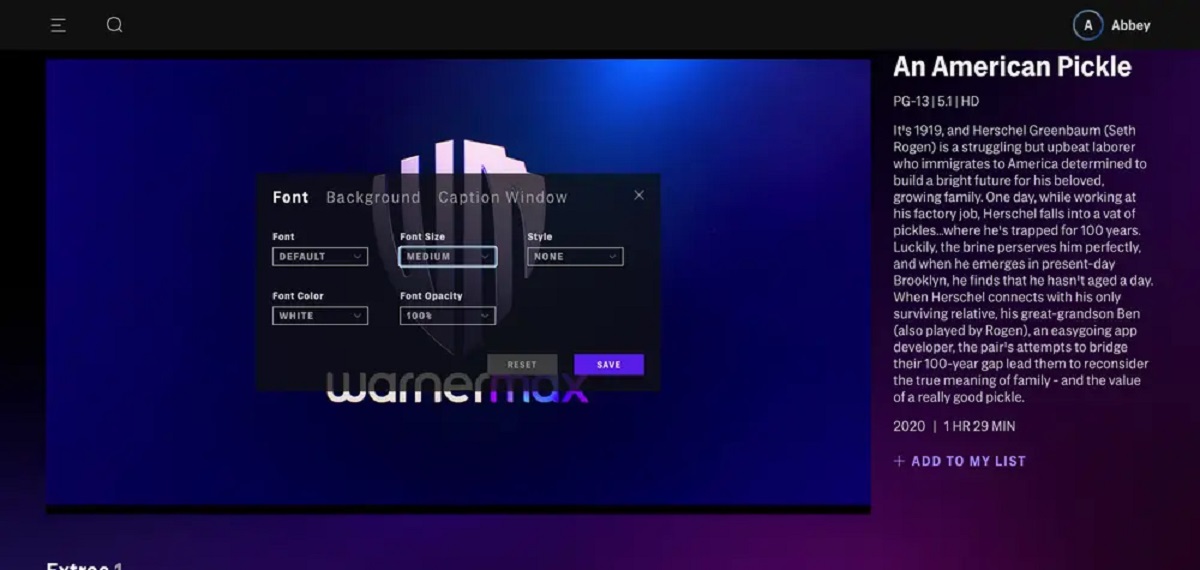
- A menu with subtitle options will appear. Here, you can adjust the language, style, size, and color of the subtitles according to your preference.
- Once you have customized the subtitle settings, click or tap outside the settings menu to resume watching.
By using subtitles on Hulu, you can improve your viewing experience in several ways. Subtitles can assist with understanding dialogue, especially in situations where the audio quality is poor or there are background noises. They also benefit individuals who are deaf or hard of hearing, allowing them to follow along with the content seamlessly. Subtitles can even be beneficial for language learners, helping them improve their language skills by associating spoken words with written text.
Hulu’s user-friendly interface and customizable subtitle options provide a convenient way to enhance your enjoyment of the platform’s content. Whether you require subtitles for assistance, language learning, or simply personal preference, Hulu ensures that you can follow the storyline and dialogue with ease.
Steps to Turn On Subtitles on Disney+
Disney+ is a popular streaming service that provides access to a wide range of beloved Disney movies, TV shows, and original content. If you want to turn on subtitles while watching your favorite content on Disney+, follow these simple steps:
- Start playing the movie or TV show you want to watch on Disney+.
- Move your cursor or tap on the screen to reveal the player controls.
- Look for the “Subtitles” button, usually represented by an icon with speech bubbles or the letters “CC”.
- Click or tap on the “Subtitles” button.
- A list of available subtitle options will appear. Choose the language you prefer from the list.
- The selected subtitle language will now be displayed while you watch the movie or TV show. Enjoy!
Depending on the content, Disney+ may offer multiple subtitle options in different languages. Make sure to select the appropriate subtitle option that matches your preferred language.
If you prefer to customize the appearance of the subtitles, such as the font, size, or color, you can do so using the settings on your Disney+ account. Here’s how:
- Go to the Disney+ website and log in to your account.
- Click on your profile icon in the top right corner of the screen.
- Choose “Edit Profiles” from the drop-down menu.
- Select the profile you want to customize.
- Scroll down to the “Subtitles” section and click on the pencil icon next to “Subtitles”.
- Customize the appearance settings of the subtitles, such as font, size, and color, to your preference.
- Click on “Save” to apply the changes.
By following these steps, you can easily turn on subtitles and customize their appearance while streaming your favorite content on Disney+. Subtitles can improve your viewing experience by providing a better understanding of dialogue, assisting language learners, and enabling access for individuals who are deaf or hard of hearing. Disney+ ensures that everyone can enjoy their magical content with the convenience of subtitles.
Activating Subtitles on Apple TV
Apple TV is a popular streaming device that allows users to access a wide variety of movies, TV shows, and other content. If you want to activate subtitles while watching your favorite content on Apple TV, follow these simple steps:
- Start playing the movie or TV show you want to watch on Apple TV.
- Swipe down on the remote or press the “Down” button to reveal the Info panel.
- Look for the “Subtitles” option in the Info panel.
- Click or tap on “Subtitles”.
- A list of available subtitle options will appear. Choose the language you prefer from the list.
- The selected subtitles will now be displayed while you watch the movie or TV show. Enjoy!
Apple TV allows you to customize the subtitle settings to suit your preferences. Here’s how to do it:
- Go to the main Settings menu on Apple TV.
- Click on “Accessibility” and then select “Subtitles and Captioning”.
- Toggle the “Closed Captions and SDH” option to enable subtitles.
- Click on “Style” to adjust the appearance of the subtitles, such as font, size, and color.
- Once you have customized the subtitle settings, go back to the movie or TV show and the changes will be applied.
Activating subtitles on Apple TV provides a better viewing experience for users, especially for those who are deaf or hard of hearing. Subtitles allow individuals to follow the dialogue and captions, ensuring they don’t miss any important information. Additionally, subtitles can be beneficial for language learners, helping them to improve their language skills by seeing the words spoken on the screen.
Apple TV’s user-friendly interface and customizable subtitle options make it easy to activate subtitles to suit your preferences. Whether for accessibility purposes or personal preference, Apple TV allows you to enjoy your favorite content with the convenience of subtitles.
Enabling Subtitles on Roku
Roku is a popular streaming device that offers a wide range of channels and streaming options. If you want to enable subtitles while watching your favorite content on Roku, follow these simple steps:
- Start playing the movie or TV show you want to watch on Roku.
- Press the star (*) button on your Roku remote to open the Options menu.
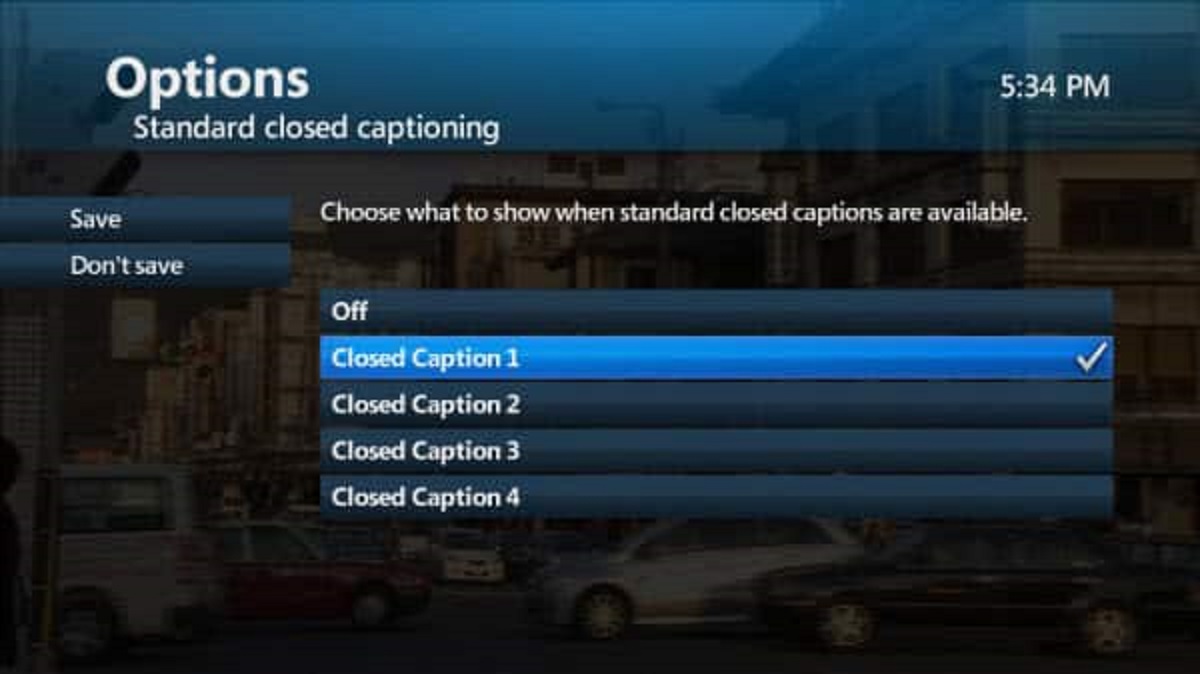
- Select the “Subtitles” or “Captions” option from the menu.
- A list of available subtitle options will appear. Choose the language you prefer from the list.
- The selected subtitles will now be displayed while you watch the movie or TV show. Enjoy!
Note that the availability of subtitles may vary depending on the channel or content provider. Some channels may offer multiple subtitle options in different languages.
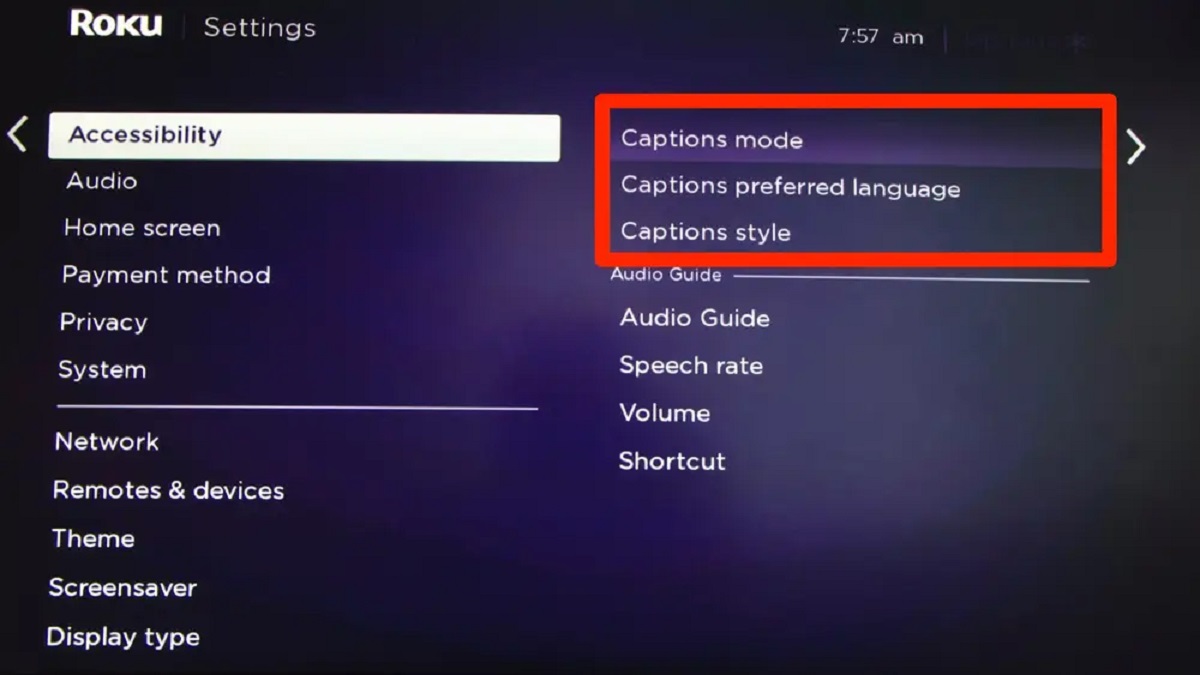
If you want to customize the appearance of the subtitles, such as the font, size, or color, you can do so in the Roku settings. Here’s how:
- Press the Home button on your Roku remote to go to the Roku home screen.
- Scroll up or down and select “Settings”.
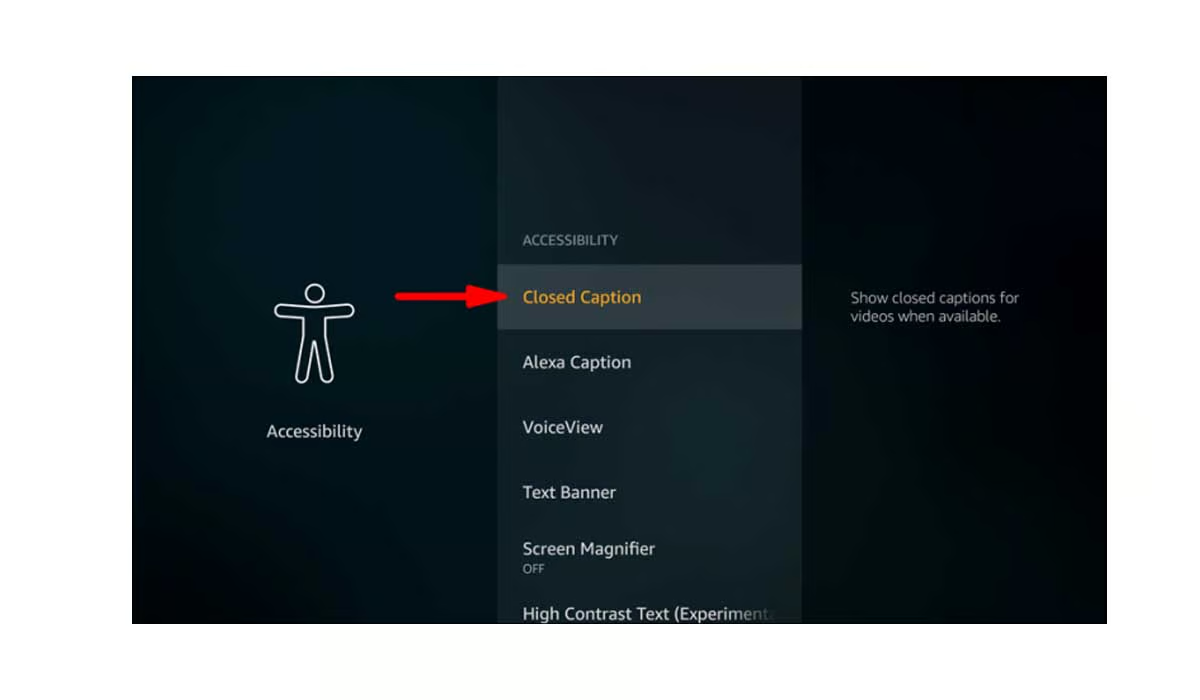
- Select “Accessibility” from the settings menu.
- Choose “Captions” or “Subtitles” and select your preferred options, such as font, size, and color.
- Go back to the movie or TV show you’re watching, and the changes will be applied.
Enabling subtitles on Roku enhances the viewing experience, allowing individuals to understand the dialogue and captions more easily. Subtitles are especially beneficial for individuals who are deaf or hard of hearing, as they provide access to the audio content. They also assist language learners, enabling them to improve their language skills by reading along with the subtitles.
Roku’s user-friendly interface and customizable subtitle options make it easy to enable subtitles according to your preferences. Whether for accessibility purposes or personal preference, Roku ensures that you can enjoy your favorite content with the convenience of subtitles.
Using Subtitles on VLC Media Player
VLC Media Player is a popular and versatile media player that supports a wide range of audio and video formats. If you want to use subtitles while watching your favorite content on VLC Media Player, follow these simple steps:
- Start playing the video file you want to watch on VLC Media Player.
- Click on the “Subtitles” tab in the menu at the top of the player.
- From the drop-down menu, choose “Add Subtitle File”.
- Select the subtitle file you want to use, which should have the same name as the video file and be in the supported subtitle format (e.g., .srt or .sub).
- The subtitles will now be displayed while you watch the video. Enjoy!
If the subtitles do not sync correctly with the video, you can adjust the synchronization manually. Here’s how:
- While the video is playing, click on the “Subtitle” tab in the menu at the top of the player.
- Navigate to “Track Synchronization”.
- Adjust the “Subtitle Track Synchronization” by either moving it forward (positive values) or backward (negative values) to sync the subtitles with the video.
- Click “Save” to apply the synchronization adjustment.
VLC Media Player also allows you to customize the appearance of the subtitles, such as font, size, and color. Here’s how to do it:
- Click on the “Tools” tab in the menu at the top of the player.
- Select “Preferences” from the drop-down menu.
- In the Preferences window, navigate to “Subtitles / OSD” in the left sidebar.
- You can now adjust the settings for font, size, color, and other appearance options to your preference.
- Click “Save” to apply the changes.
Using subtitles on VLC Media Player enhances the viewing experience by providing easy access to text-based transcriptions of the audio content. Subtitles are especially beneficial for individuals who are deaf or hard of hearing, enabling them to follow along with the dialogue. They can also assist language learners by allowing them to read and listen simultaneously.
VLC Media Player’s user-friendly interface and various customization options make it easy to use subtitles according to your preferences. Whether for accessibility purposes or personal preference, VLC Media Player ensures that you can enjoy your favorite videos with the convenience of subtitles.
Steps to Turn On Subtitles on Windows Media Player
Windows Media Player is a popular media player that comes pre-installed on Windows operating systems. If you want to turn on subtitles while watching a video on Windows Media Player, follow these simple steps:
- Start playing the video file you want to watch on Windows Media Player.
- Right-click anywhere on the player to reveal a context menu.
- From the context menu, select “Lyrics, Captions, and Subtitles” and then “On if Available”.
- If the video has embedded subtitles, they will automatically appear. Otherwise, proceed to the next step.
- Go to the “Play” tab in the menu at the top of the player.
- Select “Lyrics, Captions, and Subtitles” and then click on “On if Available”.
- From the list of available subtitle files, choose the appropriate subtitle file to enable subtitles.
- The subtitles will now be displayed while you watch the video. Enjoy!
If the subtitle file does not automatically sync with the video, you can adjust the synchronization manually. Here’s how:
- Right-click on the player window to access the context menu.
- Select “Lyrics, Captions, and Subtitles”.
- Click on “Captions” and then “Synchronization”.
- Adjust the “Synchronization Delay” by either moving it forward (positive values) or backward (negative values) to sync the subtitles with the video.
- Click “Apply” to save the synchronization adjustment.
- Close the synchronization window and continue watching the video with the adjusted subtitles.
Windows Media Player supports various subtitle formats, such as .srt, .sub, and .idx. Ensure that the subtitle file you are using is compatible with Windows Media Player.
By following these steps, you can easily turn on subtitles and adjust their synchronization while watching a video on Windows Media Player. Subtitles can enhance the viewing experience, making it easier to understand the dialogue and captions. They are particularly useful for individuals who are deaf or hard of hearing and can also assist language learners by providing a visual aid to aid in comprehension.
Windows Media Player’s user-friendly interface and subtitle options make it convenient to use subtitles according to your preferences. Whether for accessibility purposes or personal preference, Windows Media Player ensures that you can enjoy your favorite videos with the added convenience of subtitles.
Activating Subtitles on Android Devices
Android devices provide a convenient way to watch videos and movies on the go. If you want to activate subtitles while watching content on your Android device, the process is simple. Here’s how to activate subtitles on Android devices:
- Start playing the video you want to watch on your Android device.
- Tap on the screen to reveal the playback controls.
- Look for the “Subtitles” or “CC” button, usually represented by an icon with speech bubbles or the letters “CC”.
- Tap on the “Subtitles” or “CC” button.
- A list of available subtitle options will appear. Choose the language or subtitle track you prefer from the list.
- The selected subtitles will now be displayed while you watch the video. Enjoy!
Note that the availability of subtitles may vary depending on the app or streaming service you are using. Some apps may offer multiple subtitle options in different languages, while others may only have a few choices available.
If you want to customize the appearance of the subtitles, such as the font, size, and color, you can do so in the settings of the app or streaming service. Here’s how:
- While playing the video, tap on the “Settings” or “Options” button within the playback controls.
- Look for the “Subtitles” or “CC” settings.
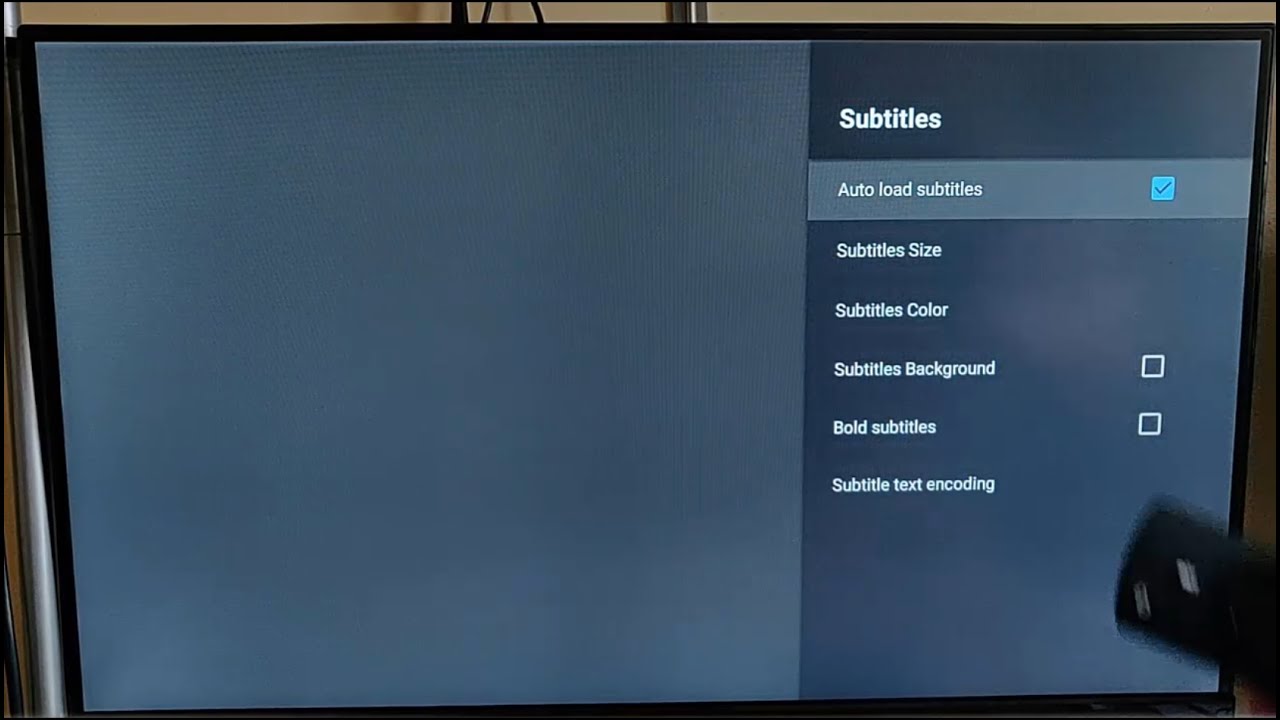
- Within the subtitle settings, you may find options to adjust the appearance, such as font style, size, color, and background.
- Customize the subtitle settings according to your preferences.
- Exit the settings and the changes will be applied.
Activating subtitles on Android devices offers multiple benefits, such as improved accessibility and language learning. Subtitles allow individuals who are deaf or hard of hearing to follow the dialogue and captions, ensuring they don’t miss any important information. Subtitles also assist language learners by providing visual aid to aid in comprehension and vocabulary acquisition.
The process of activating subtitles on Android devices is straightforward, and most video apps and streaming services offer customizable subtitle settings. Whether you need subtitles for accessibility purposes or personal preference, Android devices ensure that you can enjoy your favorite videos with the convenience of subtitles.
Enabling Subtitles on iOS Devices
iOS devices, such as iPhones and iPads, offer a seamless streaming experience with access to a variety of video content. If you want to enable subtitles while watching videos on your iOS device, the process is simple. Here’s how you can enable subtitles:
- Start playing the video you want to watch on your iOS device.
- Tap on the screen to reveal the playback controls.
- Look for the “Subtitles” or “CC” button, usually represented by an icon with speech bubbles or the letters “CC”.
- Tap on the “Subtitles” or “CC” button.
- A list of available subtitle options will appear. Choose the language or subtitle track you prefer from the list.
- The selected subtitles will now be displayed on the screen while you watch the video. Enjoy!
It’s important to note that the availability of subtitles may vary depending on the app or streaming service you are using. Some apps may provide multiple subtitle options in different languages, while others may have a limited selection.
If you want to customize the appearance of the subtitles, including the font, size, and color, iOS devices offer settings to adjust these preferences. Here’s how:
- While playing the video, tap on the “Settings” or “Options” button within the playback controls.
- Look for the “Subtitles” or “CC” settings.
- Within the subtitle settings, you may find options to adjust the appearance, such as font style, size, color, and background.
- Customize the subtitle settings based on your preferences.
- Exit the settings, and the changes will be applied to the subtitle appearance.
Enabling subtitles on iOS devices enhances the viewing experience by providing easy access to text-based transcriptions of the audio content. Subtitles are particularly beneficial for individuals who are deaf or hard of hearing, allowing them to follow the dialogue and captions seamlessly. Subtitles also support language learners by providing visual aid for comprehension and vocabulary acquisition.
iOS devices provide a user-friendly interface and customizable subtitle settings, ensuring that you can enjoy your favorite videos with the convenience of subtitles. Whether for accessibility purposes or personal preference, iOS devices make it easy to enable and customize subtitles to enhance your overall viewing experience.


