Introduction
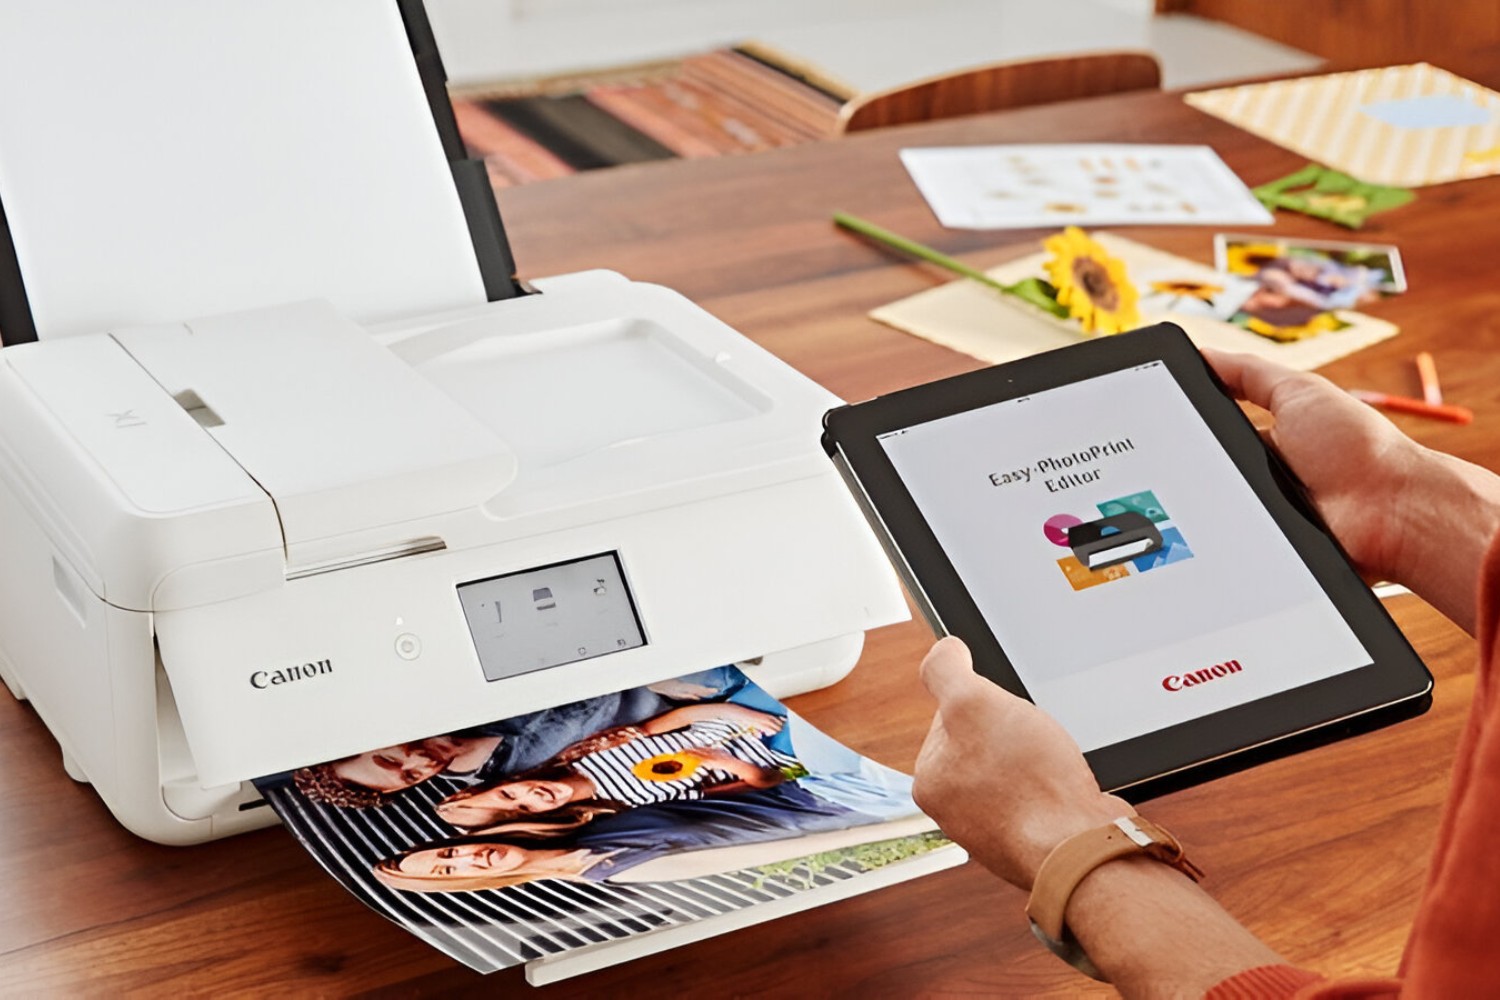
Printing from a tablet to a printer has become increasingly convenient with the advancement of technology. Whether you need to print an important document, a boarding pass, or a cherished photograph, being able to seamlessly connect your tablet to a printer can save you time and effort. However, many tablet users may be unsure about how to go about this process.
In this article, we will guide you through the steps to print from your tablet to your printer. We will cover everything from checking the compatibility between your tablet and printer, setting up your printer for wireless printing, connecting your tablet to the same Wi-Fi network as your printer, and finally, printing the desired document or photo.
By following these steps, you can avoid the frustration of transferring files to a computer or using a USB cable and enjoy the convenience of directly printing from your tablet. So, let’s dive in and explore the exciting possibilities of tablet-to-printer printing!
Step 1: Ensure your printer is compatible with your tablet
Before you can start printing from your tablet, it’s important to check if your printer is compatible with your device. Most modern printers have wireless printing capabilities, which are essential for connecting to your tablet. Here are a few ways to determine compatibility:
- Check the printer’s documentation: Consult the user manual or check the manufacturer’s website for information on wireless printing compatibility. Look for terms like Wi-Fi Direct, AirPrint, Google Cloud Print, or Mopria Print Service, as these are commonly used printing technologies that work with tablets.
- Use the tablet’s printing support feature: Some tablets have a built-in feature that allows you to check for printer compatibility. Go to the settings menu on your tablet, search for “Printing” or “Printing Support,” and follow the instructions to see if your printer is listed as a compatible option.
- Investigate third-party printing apps: If your printer is not directly compatible with your tablet, you can explore third-party printing apps available in the app store. These apps often provide additional compatibility options and functionality for a wide range of printers.
It’s important to note that older printers may not have wireless printing capabilities. In such cases, you may need to consider alternative methods, such as using a print server or connecting your tablet to a computer that is connected to the printer. However, for the most seamless and convenient printing experience, it’s recommended to use a printer that offers wireless printing compatibility.
By ensuring that your printer is compatible with your tablet, you can confidently move on to the next steps and set up wireless printing. So, let’s proceed to the next step and get your printer ready for wireless connectivity!
Step 2: Set up your printer for wireless printing
Now that you’ve confirmed your printer’s compatibility with your tablet, it’s time to set up your printer for wireless printing. Follow these general steps to prepare your printer:
- Connect the printer to Wi-Fi: Most modern printers have a built-in setup wizard that will guide you through the process of connecting your printer to your Wi-Fi network. This step may involve selecting your network from a list of available options and entering your Wi-Fi password.
- Update printer firmware: Check for any available firmware updates for your printer on the manufacturer’s website. Updated firmware ensures optimal performance and compatibility with your tablet.
- Configure printer settings: Access the printer’s settings menu and ensure that wireless printing features are enabled. This may include settings related to Wi-Fi Direct, AirPrint, or Google Cloud Print, depending on the printing technology supported by your printer.
If you’re unsure about any of these steps, refer to your printer’s user manual or visit the manufacturer’s support website for detailed instructions specific to your printer model.
Once you have successfully set up your printer for wireless printing, ensure that it is powered on and connected to the same Wi-Fi network as your tablet. This will allow your tablet to discover and communicate with the printer when sending print jobs.
With your printer ready for wireless printing, it’s time to move on to the next step, which involves connecting your tablet to the same Wi-Fi network as your printer. Let’s proceed to step 3!
Step 3: Connect your tablet to the same Wi-Fi network as your printer
In order for your tablet to communicate with your printer, it is crucial to connect both devices to the same Wi-Fi network. Follow these steps to connect your tablet to the Wi-Fi network:
- Go to the Wi-Fi settings: On your tablet, open the settings menu and navigate to the Wi-Fi section. This is typically found under the “Network & Internet” or “Connections” category.
- Select the Wi-Fi network: From the list of available networks, choose the Wi-Fi network that your printer is connected to. Make sure that it matches the network name you configured during the printer setup process.
- Enter the Wi-Fi password: If the Wi-Fi network is password-protected, you may need to enter the network password. Ensure that you enter the correct password to establish a secure connection.
- Connect to the network: Once you’ve entered the password, tap on the “Connect” or “Join” button to connect your tablet to the Wi-Fi network. Your tablet will now be connected to the same network as your printer.
It’s important to note that some tablets may have slightly different steps or options when it comes to connecting to a Wi-Fi network. If you encounter any difficulties, refer to your tablet’s user manual or seek assistance from the manufacturer’s support website.
Once your tablet is connected to the same Wi-Fi network as your printer, you’re ready to move on to the next step and install a printing app on your tablet. This app will enable you to send print jobs from your tablet to your printer effortlessly. Let’s proceed to step 4!
Step 4: Install a printing app on your tablet
To streamline the process of printing from your tablet to your printer, you will need to install a printing app. These apps act as a bridge between your tablet and printer, allowing you to easily select and send print jobs. Here’s how you can install a printing app on your tablet:
- Open the app store: Launch the app store on your tablet. The app store may be called “Play Store” for Android devices or “App Store” for iOS devices.
- Search for a printing app: In the app store’s search bar, enter keywords such as “printing app,” “printer app,” or the name of a specific printing app you prefer. Some popular printing apps include Google Cloud Print, HP Smart, and Epson iPrint.
- Select and install the app: Review the search results and choose the printing app that best suits your needs. Tap on the app to view its details and click on the “Install” or “Get” button to download and install the app on your tablet.
- Follow the setup instructions: Once the app is installed, launch it and follow any on-screen instructions to set it up. This may include granting necessary permissions or signing in to your account if required.
Keep in mind that the specific steps and options may vary depending on the app and your tablet’s operating system. If you encounter any difficulties during the installation or setup process, consult the app’s documentation, the app store’s support resources, or the app developer’s website.
Now that you have a printing app installed on your tablet, you’re one step closer to printing from your tablet to your printer. In the next step, we’ll guide you on how to select the document or photo you want to print. Let’s proceed to step 5!
Step 5: Select the document or photo you want to print
Now that you have a printing app installed on your tablet, it’s time to select the document or photo that you want to print. Different printing apps may have slightly different interfaces or options, but the general steps remain similar. Here’s how you can select the content you want to print:
- Open the printing app: Locate the printing app on your tablet and launch it. This will typically be an app icon with the name or logo of the printing app you installed.
- Select the document or photo: Look for an option within the app that allows you to choose the content you want to print. This may be labeled as “Print,” “Print Documents,” or “Print Photos,” depending on the app.
- Browse and locate the file: Navigate through the file explorer or gallery within the printing app to find the specific document or photo you wish to print. You may need to browse through different folders or albums to locate the desired file.
- Tap on the file to select it: Once you’ve located the file, tap on it to select it for printing. Some apps may allow you to select multiple files at once if you want to print multiple documents or photos in one go.
- Review and customize print settings: Before sending the print job, you may have the option to review and adjust the print settings. This can include choosing the paper size, print quality, number of copies, and other specific print settings available in the app.
By following these steps, you will be able to select the exact document or photo you want to print from your tablet. This ensures that you have full control over the content and can customize the print settings according to your preferences and requirements.
Now that you have selected the document or photo to print, let’s move on to step 6 and adjust the printing settings on your tablet.
Step 6: Adjust printing settings on your tablet
Once you have selected the document or photo you want to print from your tablet, it’s time to adjust the printing settings to ensure the best possible printout. The specific options and settings may vary depending on the printing app you are using, but here are some common adjustments you can make:
- Choose the printer: If you have multiple printers connected to your tablet, select the desired printer from the list of available options. This allows you to ensure that the print job goes to the correct printer.
- Specify the print layout: Depending on the content you are printing, you may have the option to choose the print layout. This can include options like portrait or landscape orientation, single-sided or double-sided printing, or even multiple pages per sheet.
- Select the paper size and type: If you are printing onto specific paper sizes or types (such as letter, legal, or photo paper), make sure to select the appropriate settings in the printing app. This ensures that the document or photo is printed correctly onto the desired paper.
- Adjust print quality: Some printing apps allow you to adjust the print quality to optimize the output. Higher print quality settings generally result in more detailed and vibrant printouts, but it may also increase printing time and ink usage. Choose the print quality that best suits your needs.
- Check other print settings: Explore the options within the printing app to see if there are any additional settings you can adjust, such as color settings, page range, or specialized print options like borderless printing or grayscale printing.
- Preview the printout: Many printing apps offer a preview feature that allows you to see how the printout will look before sending the job to the printer. Take advantage of this feature to make any final adjustments or corrections as needed.
Remember, the available settings and options may vary depending on your tablet, printer, and the specific printing app you are using. Take your time to explore the options within the app and customize the settings according to your preferences and requirements.
Once you have adjusted the printing settings on your tablet, you are ready to move on to the final step and print from your tablet to your printer. Let’s proceed to step 7!
Step 7: Print from your tablet to your printer
Now that you have selected the document or photo and adjusted the printing settings on your tablet, it’s time to print from your tablet to your printer. Follow these steps to complete the printing process:
- Verify printer status: Ensure that your printer is powered on, properly connected to the Wi-Fi network, and ready to receive print jobs.
- Tap the print button: Look for a print button or icon within the printing app. This may be represented by a printer icon or a button labeled “Print.” Tap on it to initiate the printing process.
- Wait for the print job to complete: The printing app will send the print job to your printer, and you need to wait for the printer to process and complete the job. The printing time may vary depending on the complexity of the printout and the settings you have chosen.
- Collect the printout: Once the print job is complete, the printer will dispense the printed document or photo. Retrieve it from the printer’s output tray and ensure that the printout meets your expectations.
It’s important to note that during the printing process, make sure not to turn off the printer or interrupt the connection between your tablet and the printer. Doing so may result in incomplete or corrupted printouts.
If the print job does not start or encounters any issues during the printing process, double-check the printer’s status, Wi-Fi connection, and the print settings on your tablet. You may need to troubleshoot any potential issues or consult the documentation provided by the printing app or the printer manufacturer.
Congratulations! You have successfully printed from your tablet to your printer. Now you can enjoy the convenience of directly printing your documents and photos without the need for a computer or USB connection.
If you encounter any difficulties or have any specific questions related to your tablet or printer, it’s always helpful to refer to the user manuals or reach out to the respective manufacturer’s support for assistance.
With this final step completed, you should now be able to print from your tablet with ease. Happy printing!
Troubleshooting common printing issues
While printing from your tablet is generally a straightforward process, you may encounter occasional issues that can hinder the printing experience. Here are some common printing issues and troubleshooting steps you can take to resolve them:
- Printer not detected: If your tablet is unable to detect your printer, ensure that both devices are connected to the same Wi-Fi network. Double-check the printer’s Wi-Fi settings and restart both the tablet and the printer if necessary.
- Print job stuck in queue: If a print job gets stuck in the queue and doesn’t start printing, try clearing the print queue on both your tablet and the printer. Restarting the devices may also help resolve the issue.
- Poor print quality: If the printouts appear faded, streaky, or blurry, check the print settings on your tablet and adjust the print quality. Ensure that you are using the correct paper type and that the ink cartridges in your printer are not running low.
- Alignment or paper feeding issues: If the printouts are misaligned or the paper isn’t feeding correctly, check the paper tray for any obstructions and ensure that the paper is loaded properly. Some printers have alignment or calibration features that can help fix these issues.
- Print app not working: If the printing app on your tablet is not functioning as expected, try closing the app and reopening it. If the problem persists, uninstall and reinstall the app or consider trying a different printing app.
- Compatibility issues: If your tablet and printer are not compatible or having trouble communicating, ensure that you have installed the latest firmware updates for both devices. You may also need to consult the printer’s user manual or contact the manufacturer’s support for specific troubleshooting steps.
If the above troubleshooting steps do not resolve the issue, it may be worthwhile to seek further assistance from the printer manufacturer’s support team or consult online forums and communities dedicated to your specific printer model.
Remember, each printer and tablet combination may have its unique quirks and requirements, so don’t hesitate to reach out for help if needed. With patience and some troubleshooting, you can overcome common printing issues and continue to enjoy seamless printing from your tablet.
Conclusion
Printing from your tablet to your printer has become easier than ever, thanks to wireless printing technology and user-friendly printing apps. By following the steps outlined in this guide, you can seamlessly connect your tablet to your printer and print documents, photos, and more with convenience and efficiency.
We started by ensuring that your printer is compatible with your tablet and went on to set up your printer for wireless printing. We then discussed the importance of connecting your tablet to the same Wi-Fi network as your printer and the process of installing a printing app on your tablet. With these initial steps completed, we moved on to selecting the desired document or photo and adjusting the printing settings on your tablet.
Finally, we covered troubleshooting common printing issues that you may encounter along the way. By following the troubleshooting suggestions provided, you can overcome obstacles and ensure a smooth and successful printing experience.
Remember, each printer and tablet combination may have its own unique setup instructions, so always refer to the user manuals and support resources specific to your devices for detailed guidance.
With printing from your tablet mastered, you can now embark on a world of convenience and productivity. Whether you need to print important documents for work, creative projects, or cherished memories, you can do so effortlessly from the palm of your hand.
So go ahead, grab your tablet, follow the steps outlined in this guide, and start enjoying the convenience of printing directly from your tablet to your printer. Happy printing!