Introduction
Screen recording has become an indispensable tool for many individuals and businesses. Whether you are a content creator, educator, or professional looking to demonstrate a process or capture a moment on your screen, the ability to record your screen can be incredibly valuable. Fortunately, Google Chrome offers a convenient solution for screen recording through the use of extensions. By leveraging these extensions, you can easily capture and share your screen activities with others.
In this comprehensive guide, we will walk you through the process of screen recording on Google Chrome using a reliable extension. You will learn how to install the extension, adjust the settings to meet your specific recording needs, and seamlessly initiate and conclude your screen recording session. By the end of this tutorial, you will have the knowledge and confidence to effortlessly record your screen activities with Google Chrome, opening up a world of possibilities for communication, collaboration, and content creation.
So, let's dive in and explore the step-by-step process of screen recording on Google Chrome, empowering you to effectively capture and share your digital experiences. Whether you are looking to create engaging tutorials, share insightful demonstrations, or simply document your screen interactions, this guide will equip you with the essential skills to make the most of this powerful feature.
Step 1: Install a Screen Recording Extension
To begin your journey into the world of screen recording on Google Chrome, the first step is to install a reliable screen recording extension. These extensions are designed to seamlessly integrate with your browser, providing you with the necessary tools to capture your screen activities with ease. Here's how you can get started:
-
Navigate to the Chrome Web Store: Open your Google Chrome browser and navigate to the Chrome Web Store, which serves as a hub for a wide range of extensions designed to enhance your browsing experience.
-
Search for Screen Recording Extensions: Once you are in the Chrome Web Store, use the search bar to look for screen recording extensions. You can use keywords such as "screen recorder," "screen capture," or "screen recording extension" to explore the available options.
-
Evaluate and Select an Extension: As you browse through the search results, take the time to evaluate the features and user reviews of different screen recording extensions. Look for extensions that have a high rating and positive feedback from users, as this can indicate their reliability and effectiveness.
-
Install the Chosen Extension: After identifying a suitable screen recording extension, click on the "Add to Chrome" button to initiate the installation process. You may be prompted to confirm the installation, after which the extension will be added to your browser.
-
Access the Extension: Once the installation is complete, you can typically access the screen recording extension by locating its icon in the Chrome toolbar or navigating to the extensions section within your browser settings.
By following these steps, you can successfully install a screen recording extension on Google Chrome, equipping yourself with the essential tool to capture and share your screen activities. With the extension in place, you are now ready to move on to the next steps of launching the extension and adjusting the settings to prepare for your screen recording session.
Step 2: Launch the Extension
With the screen recording extension successfully installed in your Google Chrome browser, the next crucial step is to launch the extension and familiarize yourself with its interface. Launching the extension is the gateway to accessing its features and functionalities, allowing you to prepare for your screen recording session effectively.
To launch the screen recording extension, locate its icon in the Chrome toolbar, typically represented by a recognizable symbol or logo associated with screen recording. Upon identifying the extension icon, click on it to open the extension interface. Alternatively, you can access the extension by navigating to the extensions section within your browser settings and selecting the screen recording extension from the list of installed extensions.
Upon launching the extension, you will be presented with a user-friendly interface that is designed to facilitate seamless screen recording experiences. The interface may include options to initiate a recording, adjust recording settings, and access additional features to enhance your recording process. Take a moment to explore the various elements of the extension interface, familiarizing yourself with the available tools and functionalities.
As you launch the extension, pay attention to any introductory guides or tutorials that may be provided to help you navigate the features effectively. These resources can offer valuable insights into maximizing the potential of the screen recording extension, empowering you to make informed decisions when configuring your recording settings and initiating the recording process.
Furthermore, take note of any customization options available within the extension interface. This may include the ability to select specific areas of the screen for recording, adjust audio settings, or enable additional features such as webcam overlays or annotations. By familiarizing yourself with these customization options, you can tailor your screen recording experience to align with your specific requirements and preferences.
In essence, launching the screen recording extension sets the stage for your recording journey, providing you with access to the tools and features necessary to capture your screen activities seamlessly. By taking the time to explore the extension interface and understand its capabilities, you can confidently proceed to the next steps of adjusting the settings and preparing for your screen recording session.
With the extension launched and at your disposal, you are now poised to delve into the process of adjusting the settings to optimize your screen recording experience. This pivotal step will enable you to fine-tune various aspects of the recording, ensuring that it aligns with your intended purpose and delivers the desired results.
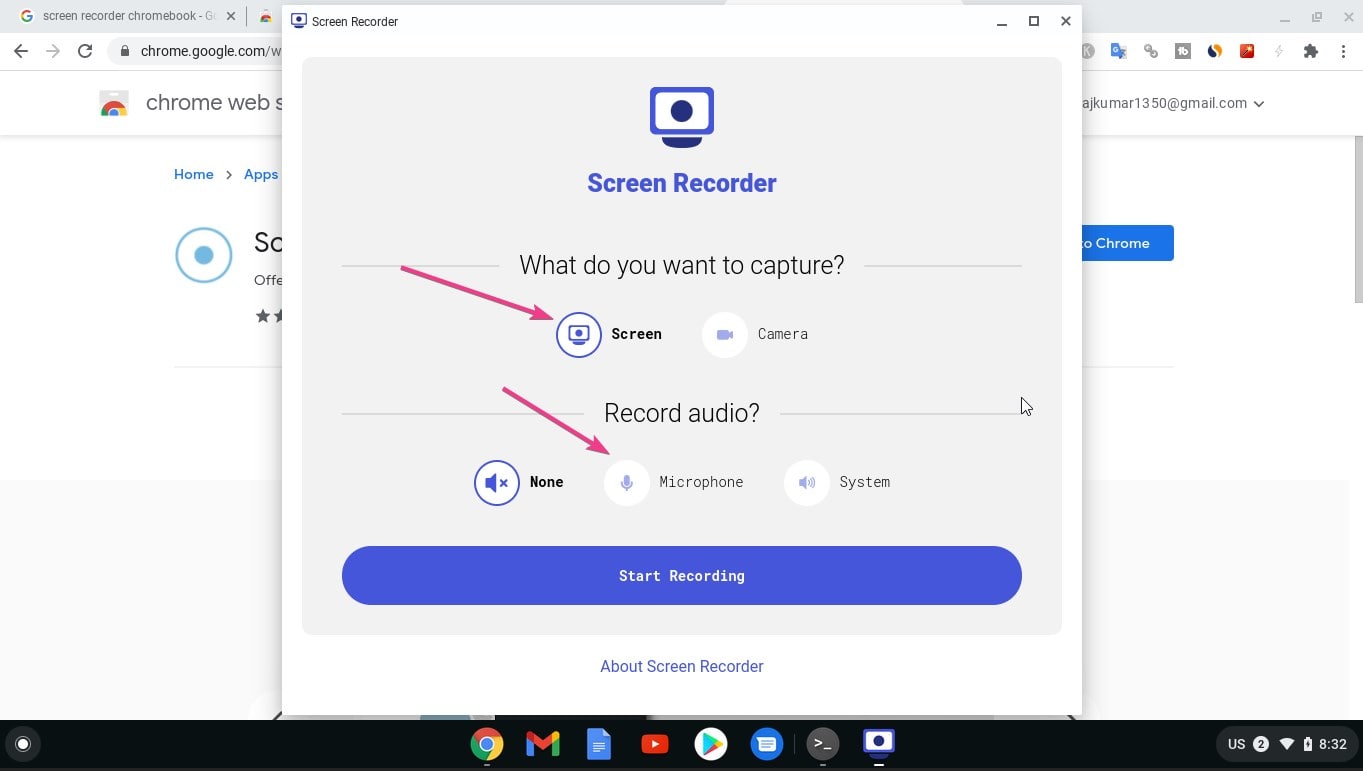
Step 3: Adjust Settings
Upon launching the screen recording extension in Google Chrome, the next crucial step is to adjust the settings to optimize your screen recording experience. By fine-tuning the settings, you can tailor the recording process to meet your specific requirements, ensuring that the resulting capture aligns with your intended purpose and delivers the desired outcome.
Customizing Recording Parameters
One of the key aspects of adjusting the settings involves customizing the recording parameters to suit your needs. This may include specifying the area of the screen to be captured, defining the audio input sources, and configuring any additional visual elements such as webcam overlays or cursor effects. By accessing the settings within the extension interface, you can typically find options to define these parameters, allowing you to capture the precise content you intend to share.
Quality and Format Selection
Another important consideration when adjusting the settings is the selection of recording quality and format. Depending on the nature of your screen recording, you may have the flexibility to choose the resolution, frame rate, and video format for the capture. By evaluating the available options and making informed decisions based on your intended use case, you can ensure that the recording meets the desired standards in terms of visual clarity and compatibility with different platforms.
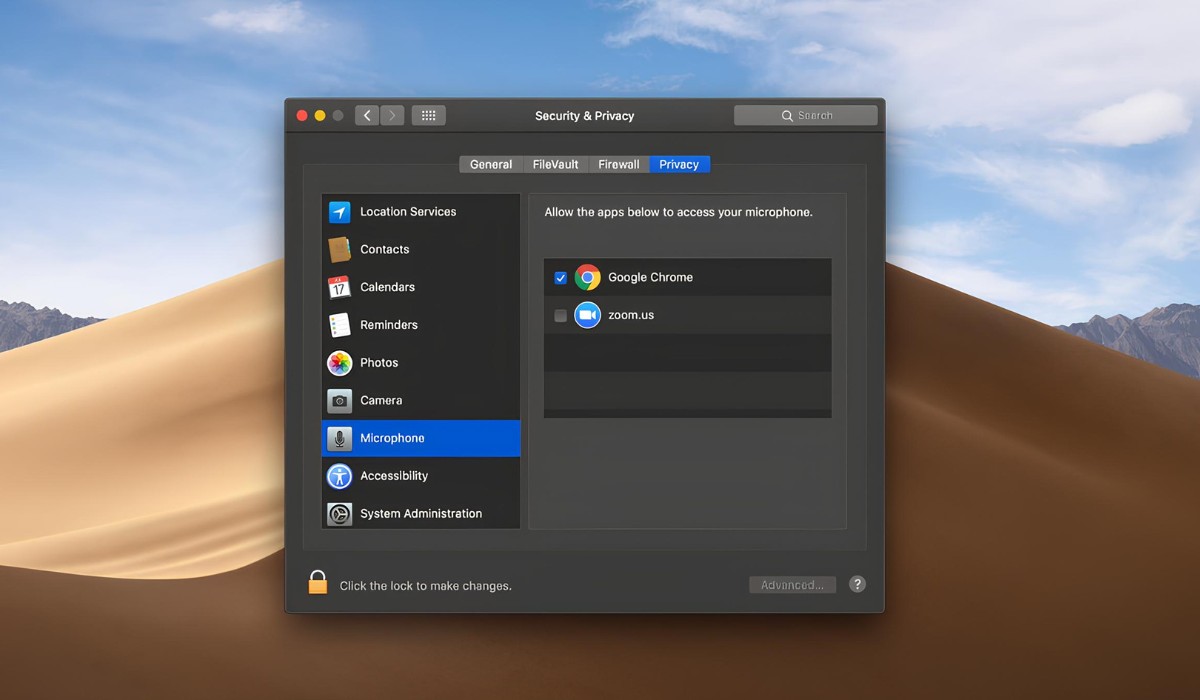
Audio and Microphone Configuration
If your screen recording involves audio narration, system sounds, or external audio sources, it is essential to configure the audio settings accordingly. This may involve selecting the appropriate audio input sources, adjusting volume levels, and enabling features such as microphone enhancements or noise suppression. By fine-tuning the audio settings within the extension interface, you can capture high-quality audio alongside your screen activities, enhancing the overall impact of the recording.
Additional Features and Enhancements
Many screen recording extensions offer a range of additional features and enhancements that can be adjusted to enrich the recording experience. These may include options for adding annotations, highlighting cursor movements, or incorporating visual effects to emphasize certain elements on the screen. By exploring these supplementary features and customizing them to complement your recording objectives, you can elevate the overall quality and engagement of the captured content.
Preview and Test Recording
Before proceeding to initiate the actual screen recording, it is advisable to utilize any preview or testing features provided within the extension interface. This allows you to verify that the settings have been configured as intended and that the recording parameters align with your expectations. By previewing and testing the recording setup, you can identify and address any potential issues or discrepancies, ensuring a smooth and successful recording session.
In essence, adjusting the settings within the screen recording extension empowers you to tailor the recording process to your specific needs, optimizing the visual and audio elements to deliver a compelling and effective capture. With the settings finely tuned, you are now prepared to proceed to the pivotal step of initiating the screen recording and bringing your digital experiences to life.
Step 4: Start Recording
With the settings finely adjusted and your screen recording extension primed for action, the moment has arrived to initiate the recording process. This pivotal step marks the transition from preparation to execution, as you embark on capturing your screen activities with precision and purpose.
To commence the recording, locate the designated "Start Recording" button within the extension interface. This button is typically prominently displayed, serving as the gateway to launch the recording session. Upon identifying the "Start Recording" button, click on it to trigger the commencement of the screen capture process.
As you initiate the recording, a countdown or visual indicator may appear, signaling the imminent start of the capture. This provides you with a brief moment to prepare and position your screen content as needed before the recording officially commences. Pay attention to any on-screen prompts or notifications that may accompany the initiation of the recording, as they can offer valuable insights into the status and progress of the capture.
Once the recording is underway, proceed with your screen activities as intended, ensuring that you navigate through the content or processes you wish to capture with clarity and purpose. Whether you are demonstrating a software workflow, delivering a presentation, or guiding viewers through a tutorial, maintain a steady and deliberate pace to facilitate a seamless recording experience.
Throughout the recording session, keep an eye on any visual cues or indicators provided by the extension interface, as they can offer real-time feedback on the duration of the recording, audio levels, and other relevant metrics. This awareness allows you to monitor the progress of the capture and make any necessary adjustments to optimize the quality and coherence of the recorded content.
As you progress through the screen recording, maintain a natural and engaging delivery, ensuring that your interactions with the screen and any accompanying narration or commentary are conveyed with clarity and enthusiasm. By infusing your screen activities with a sense of purpose and coherence, you can create a compelling and informative recording that resonates with your intended audience.
When you have effectively captured the desired content and completed the screen recording, proceed to the next crucial step of stopping and saving the recording, thereby concluding the recording session and preparing the captured content for further use or sharing.
Step 5: Stop and Save Recording
As you reach the culmination of your screen recording session, the final step entails stopping the recording and saving the captured content for future use or sharing. This pivotal phase marks the transition from active screen capture to the preservation and accessibility of the recorded material.
To conclude the recording, locate the designated "Stop Recording" button within the extension interface. This button is typically positioned prominently, allowing for quick and intuitive access to conclude the recording session. Upon identifying the "Stop Recording" button, click on it to halt the screen capture process.
Upon stopping the recording, the extension interface may present a summary or confirmation dialog, providing you with an overview of the captured content and options for saving or discarding the recording. Take a moment to review the details presented and ensure that the recording has been concluded as intended.
Following the cessation of the recording, you will typically be prompted to specify the destination and format for saving the captured content. The extension may offer options to save the recording locally on your device or directly to a cloud storage service, depending on your preferences and requirements.
When selecting the save location and format, consider the accessibility and usability of the recorded content, ensuring that it can be easily retrieved and shared as needed. Additionally, take note of any recommended settings or guidelines provided by the extension to optimize the quality and compatibility of the saved recording.
After confirming the save settings, proceed to initiate the saving process, allowing the extension to process and store the recorded content based on your specifications. Depending on the duration and resolution of the recording, this process may take a few moments to complete, so exercise patience as the extension finalizes the saving operation.
Upon successful completion of the saving process, you will receive a confirmation message or notification from the extension, indicating that the recording has been saved and is ready for access. Take note of any relevant details provided, such as the file location or sharing options, to ensure that you can readily retrieve and utilize the saved recording.
With the recording successfully saved, you have effectively concluded the screen recording process, preserving your digital experiences for future reference, distribution, or further editing. By following these steps to stop and save the recording, you can seamlessly transition from active screen capture to the availability of valuable recorded content, empowering you to leverage the captured material for diverse purposes.
Conclusion
In conclusion, the ability to screen record on Google Chrome through the use of reliable extensions offers a wealth of opportunities for individuals and businesses alike. By following the step-by-step process outlined in this guide, you have gained valuable insights into the seamless and effective execution of screen recording sessions, empowering you to capture and share your digital experiences with precision and purpose.
Through the installation of a screen recording extension, the initial step sets the foundation for accessing the essential tools and functionalities required to initiate the recording process. By carefully evaluating and selecting a suitable extension, you can equip yourself with a versatile and user-friendly tool that aligns with your specific recording needs.
Upon launching the extension, you have familiarized yourself with its interface and explored the available features and customization options. This preparatory phase has enabled you to gain a comprehensive understanding of the extension's capabilities, setting the stage for fine-tuning the settings to optimize the recording experience.
Adjusting the settings within the screen recording extension has allowed you to customize the recording parameters, select quality and format preferences, configure audio inputs, and explore additional features to enhance the overall recording process. By tailoring the settings to align with your intended use case, you have ensured that the resulting screen capture meets the desired standards in terms of visual clarity, audio quality, and overall impact.
The pivotal step of initiating the recording has enabled you to capture your screen activities with purpose and coherence, leveraging the features and functionalities of the extension to convey your digital experiences effectively. By maintaining a steady and deliberate approach throughout the recording session, you have created a compelling and informative capture that resonates with your intended audience.
Finally, the process of stopping and saving the recording has facilitated the seamless preservation and accessibility of the captured content, ensuring that your digital experiences are readily available for future reference, distribution, or further editing. By following these steps, you have seamlessly transitioned from active screen capture to the availability of valuable recorded material, ready to be leveraged for diverse purposes.
In essence, the journey of screen recording on Google Chrome using reliable extensions empowers you to communicate, collaborate, and create compelling content with ease. Whether you are a content creator, educator, or professional seeking to demonstrate processes or share insights, the ability to capture and share your screen activities opens up a world of possibilities for effective communication and engagement.
By mastering the art of screen recording on Google Chrome, you have unlocked a powerful tool that can elevate your digital interactions, enrich your content creation endeavors, and facilitate seamless knowledge sharing. Embrace the capabilities of screen recording extensions, and embark on a journey of capturing and sharing your digital experiences with confidence and impact.