Introduction
Screen recording on Chromebooks has become an essential need for many users, whether for creating tutorials, capturing gameplay moments, or saving important video conferences. With the increasing popularity of Chromebooks, the demand for reliable screen recording methods that include audio has grown as well.
Fortunately, there are various ways to screen record on a Chromebook with audio, both using built-in features and third-party applications. In this article, we will explore different methods to help you successfully record your screen on a Chromebook, complete with high-quality audio.
Whether you have a Chromebook for work, education, or personal use, the ability to record your screen can greatly enhance your productivity and make tasks more convenient. However, it’s important to note that Chrome OS doesn’t have a native screen recording tool like other operating systems do. But don’t worry! There are effective workarounds that will allow you to achieve the same result.
In this comprehensive guide, we will walk you through three different methods to screen record on your Chromebook with audio. You will learn how to use the built-in screen recorder, explore third-party screen recording extensions, and also discover online screen recording tools that can be used directly from your browser. Whether you prefer a basic or more advanced approach, you will find a solution that suits your needs.
Before we dive into the methods, let’s quickly go over the basic requirements you need to fulfill in order to successfully screen record on your Chromebook.
Prerequisites
Before you can start screen recording on your Chromebook, there are a few prerequisites you need to ensure are in place. These requirements will help you set up your Chromebook and ensure a smooth and successful screen recording experience. Here’s what you’ll need:
- A Chromebook: Obviously, you will need a Chromebook device that is running on Chrome OS. Whether you have a newer or older model, as long as it is running the Chrome OS, you can proceed with screen recording.
- Updated Chrome OS: It is essential to keep your Chromebook’s operating system up to date. Ensure that you have installed the latest updates for Chrome OS so that you have access to the latest features and improvements.
- Installed Browser Extensions: Depending on the method you choose for screen recording, you may need to install specific browser extensions. These extensions will enable additional functionalities and optimize the screen recording process.
- Permission to Install Extensions: Make sure that you have the necessary permissions to install browser extensions on your Chromebook. If you are using a Chromebook provided by an organization or educational institution, you may need to consult your administrator to grant you the required privileges.
- A Stable Internet Connection: While screen recording, it is important to have a stable internet connection. This is especially crucial if you plan to use online screen recording tools or rely on cloud storage for saving your recorded videos.
- Audio Recording Capability: To record audio along with your screen, ensure that your Chromebook’s audio is functioning correctly. Check the volume settings and perform a test recording to confirm that audio is being captured during the screen recording process.
By fulfilling these prerequisites, you can maximize your chances of a successful screen recording session on your Chromebook. Now that we have covered the necessary requirements, let’s dive into the different methods you can use to screen record on a Chromebook with audio.
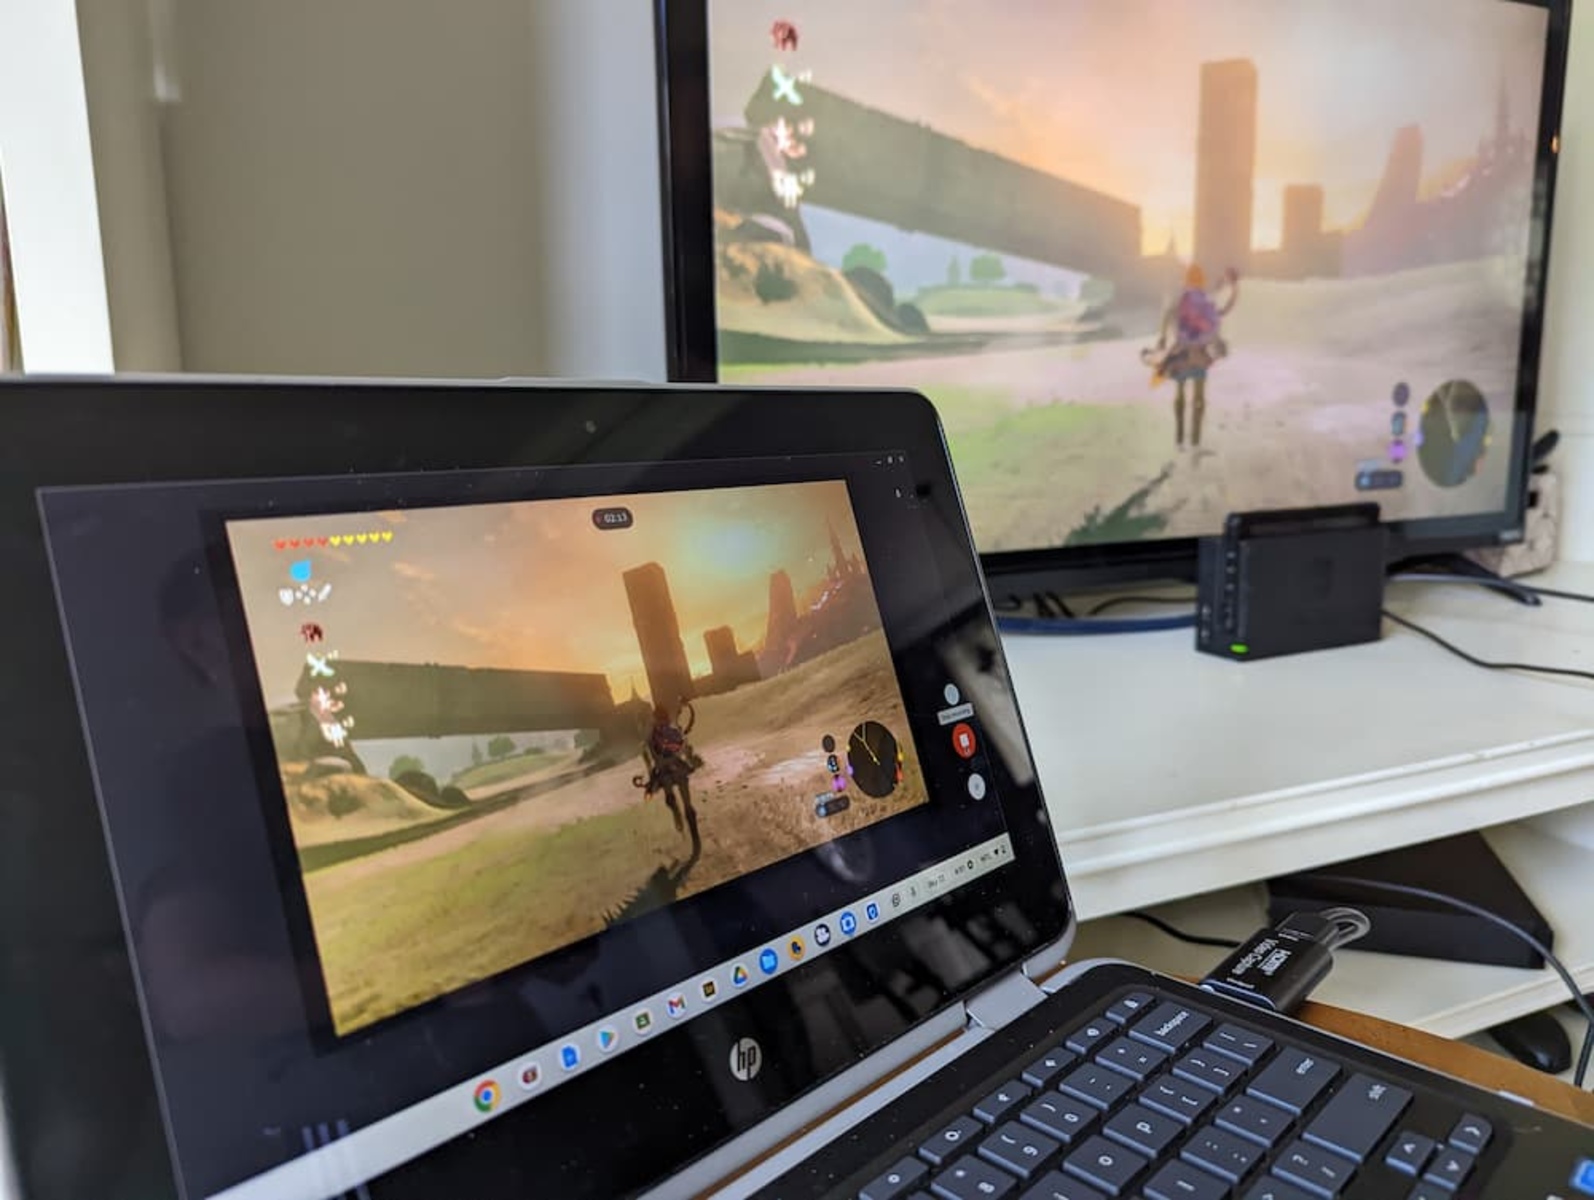
Method 1: Using the Built-in Screen Recorder
Google has introduced a built-in screen recorder feature in Chrome OS, making it easier than ever to capture your screen on a Chromebook. This native screen recording tool allows you to record your screen along with audio without the need for any additional software or browser extensions. Here’s how you can use the built-in screen recorder on your Chromebook:
- Open the Quick Settings menu: To access the screen recorder, click on the clock located in the bottom-right corner of your Chromebook’s screen. This will open the Quick Settings menu.
- Find the Screen Recorder icon: In the Quick Settings menu, you will see an icon that resembles a video camera with a dot in the center. This is the Screen Recorder icon.
- Start recording: Click on the Screen Recorder icon to start recording your screen. A pop-up menu will appear, giving you options to choose what to record. You can select full-screen recording or choose a specific window or application to record.
- Enable audio recording: To include audio in your screen recording, make sure to toggle the “Record audio” option in the pop-up menu. This will capture audio from your Chromebook’s microphone.
- Begin screen recording: Once you have selected the desired recording options, click on the “Start” button in the pop-up menu to begin the screen recording. You will see a countdown timer before the recording starts.
- Control the screen recording: During the recording session, you will see a small floating control bar at the bottom-right corner of your screen. This allows you to pause, resume, or stop the recording at any time.
- Save the recording: When you have finished recording, click on the control bar and select the “Stop” button. The screen recording will be saved automatically in your “Downloads” folder as a video file.
The built-in screen recorder in Chrome OS provides a simple and convenient method to capture your screen on a Chromebook. However, keep in mind that this native screen recorder may not offer advanced features like video editing or customizable settings. If you need more control and flexibility for your screen recording, you may consider exploring third-party screen recording extensions or online screen recording tools.
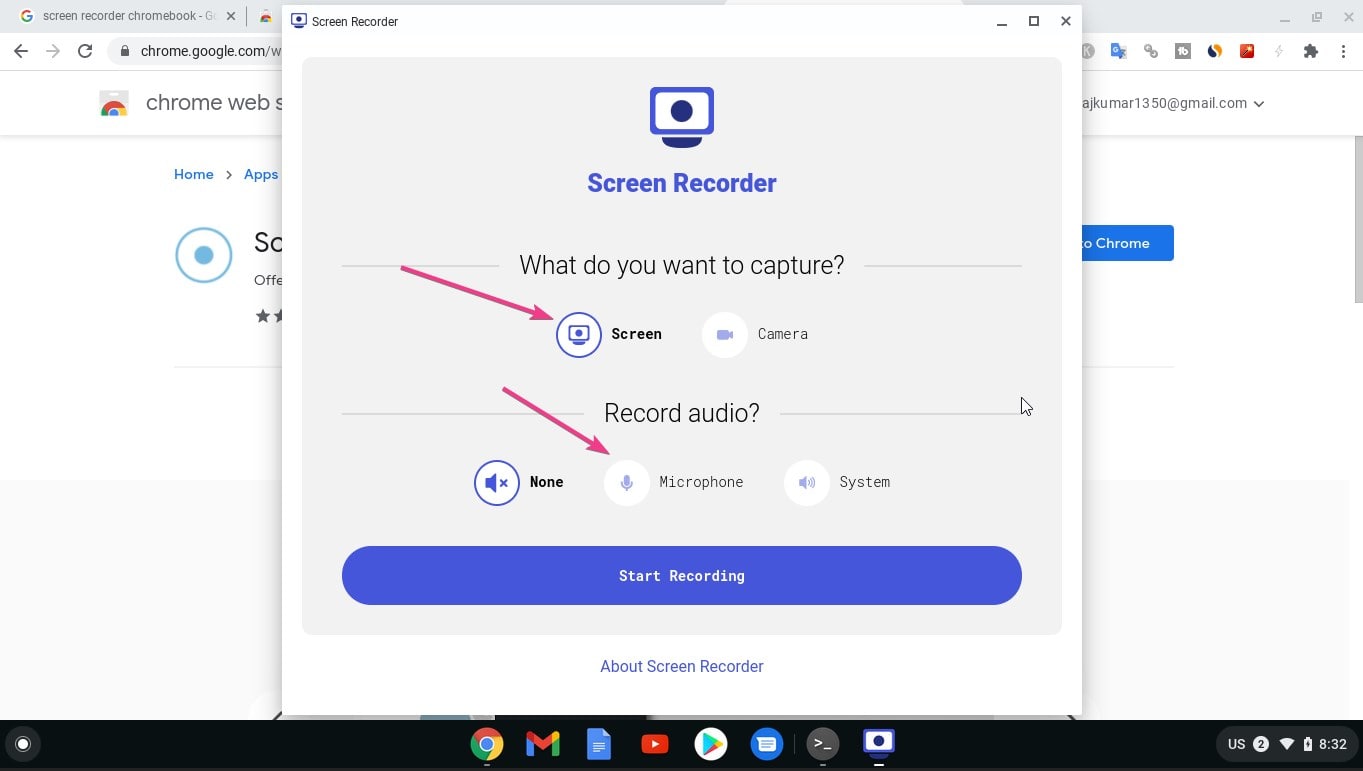
Method 2: Using Third-Party Screen Recording Extensions
If you’re looking for more advanced screen recording options and additional features, third-party screen recording extensions can be a great option for your Chromebook. These extensions offer enhanced functionalities and customization settings, allowing you to tailor your screen recording experience to your specific needs. Here’s how you can use third-party screen recording extensions on your Chromebook:
- Open the Chrome Web Store: Launch the Chrome browser on your Chromebook and navigate to the Chrome Web Store.
- Search for screen recording extensions: In the search bar of the Chrome Web Store, type in “screen recording” or “screen capture” to find a list of available screen recording extensions.
- Choose a trusted extension: Look through the options and choose a well-rated and trusted screen recording extension that suits your requirements. Check the user reviews and ratings to ensure the extension is reliable and widely used.
- Install the extension: Once you have selected the desired screen recording extension, click on the “Add to Chrome” button to install it on your Chromebook.
- Grant necessary permissions: After installation, the screen recording extension may ask for certain permissions, such as access to your microphone or storage. Grant the necessary permissions to ensure the extension functions properly.
- Launch the extension: Locate the extension’s icon in the top-right corner of your Chrome browser. Click on it to open the extension’s interface and access its settings.
- Adjust your recording settings: Within the extension’s settings, you can adjust various options, such as video quality, audio source, mouse cursor visibility, and hotkeys for starting, pausing, and stopping the recording.
- Start recording: When you’re ready to begin recording, click on the extension’s icon and select the “Record” or “Start” option from the dropdown menu. The extension will start capturing your screen.
- Control the recording process: Most third-party screen recording extensions offer intuitive control options during recording, such as a floating control bar or a toolbar within the browser interface. You can use these controls to pause, resume, or stop the recording.
- Save the recording: Once you have finished recording, click on the appropriate option in the extension’s interface to save the recording as a video file on your Chromebook.
Using third-party screen recording extensions gives you more flexibility and control over your screen recording process. You can choose extensions that offer features like video editing, annotations, trimming, and customizable settings to enhance your recording experience. Make sure to explore the options available in the Chrome Web Store and choose an extension that meets your specific requirements.
Method 3: Using Online Screen Recording Tools
If you don’t want to install additional software or extensions on your Chromebook, using online screen recording tools can be a convenient option. These tools allow you to capture your screen directly from your browser without the need for any downloads or installations. Here’s how you can use online screen recording tools on your Chromebook:
- Search for online screen recording tools: Open your Chrome browser and search for “online screen recording tools” or “web-based screen recorders” in your preferred search engine.
- Select a reliable tool: Look through the available options and choose a trustworthy and reputable online screen recording tool. Read user reviews and recommendations to ensure the tool meets your requirements.
- Access the tool’s website: Visit the website of the selected online screen recording tool. Take note that some tools may require you to create a free account before you can start recording.
- Grant required permissions: Before you begin recording, the online tool may prompt you to grant necessary permissions, such as access to your microphone and camera. Allow the tool to access the required resources for screen recording.
- Adjust recording settings: Within the online screen recording tool’s interface, you will usually find settings options to adjust parameters like audio source, video quality, and recording area. Customize these settings according to your preferences.
- Start the recording: When you’re ready to start recording, click on the “Start,” “Record,” or similar button within the online tool’s interface. This will initiate the screen recording process.
- Control the recording: Most online screen recording tools provide on-screen controls that allow you to pause, resume, or stop the recording. Utilize these controls whenever necessary during the recording session.
- Save the recording: Once you have finished recording, look for an option to save the recorded video file. The tool may provide various saving options, such as downloading the video directly to your Chromebook or saving it to cloud storage.
- Access your recording: After the video has been saved, you can locate the file in your designated download folder or storage location. From there, you can view, edit, or share the recorded video as needed.
Using online screen recording tools eliminates the need for software installations and allows you to capture your screen directly from your browser. These tools often offer additional features like real-time annotations, video editing, and the ability to store recordings in the cloud. Explore the options available and choose an online screen recording tool that best fits your requirements and preferences.
Tips for Successful Screen Recording on Chromebook
Recording your screen on a Chromebook can be a valuable tool for various purposes. To ensure a successful screen recording experience, keep these tips in mind:
- Plan your recording: Before you start recording, plan out what you want to capture and prepare any necessary materials or documents. This will help you stay organized and create a more concise and focused recording.
- Clear your desktop: Remove any unnecessary icons, files, or windows from your desktop. A clutter-free screen will make your recording look more professional and focused.
- Use a stable surface: If possible, place your Chromebook on a stable surface like a desk or table to minimize vibrations or camera shake during the recording.
- Maintain a quiet environment: Find a quiet location to record your screen and ensure there are no distractions or background noises that could interfere with your audio or video quality.
- Test your audio: Before starting the actual recording, conduct a quick test to ensure that your Chromebook’s audio settings are properly configured and recording audio as intended.
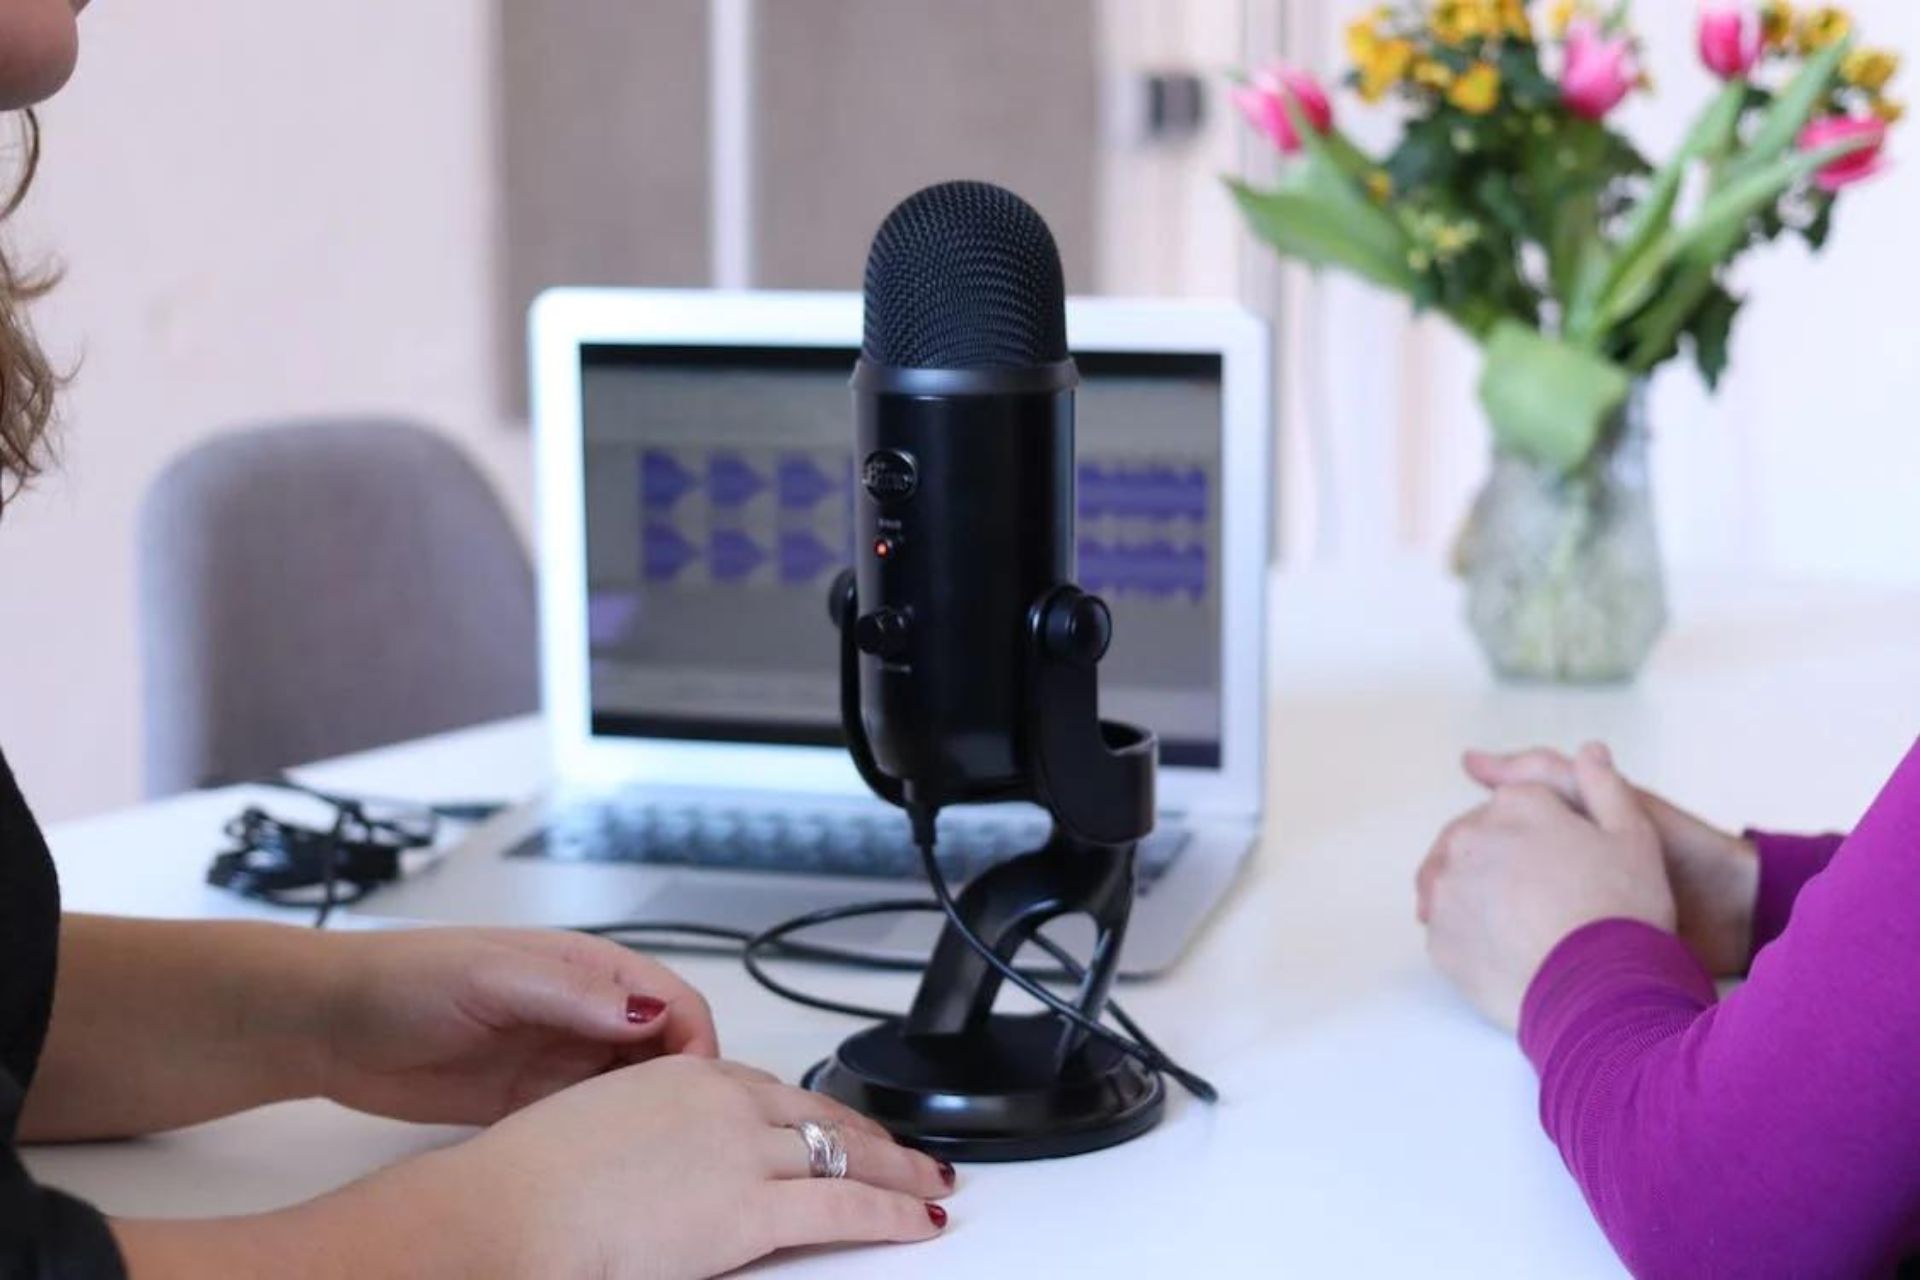
- Consider using an external microphone: For better audio quality, you may want to invest in an external microphone that can be connected to your Chromebook. This can greatly enhance the clarity and overall sound of your recordings.
- Use keyboard shortcuts: Familiarize yourself with the keyboard shortcuts for starting, pausing, and stopping screen recordings. This can help streamline your workflow and make the recording process more efficient.
- Monitor your resources: Keep an eye on your Chromebook’s CPU and memory usage during screen recording. Recording high-resolution videos or intensive applications may put a strain on your resources, so ensure that you have enough available resources to maintain a smooth recording.
- Use a high-quality recording format: When possible, choose a recording format that offers good video and audio quality. This will ensure that your final recording is clear and visually appealing.
- Review and edit your recordings: After completing a screen recording session, take the time to review the recording and make any necessary edits or adjustments. This can include trimming unnecessary parts, adding annotations, or enhancing the overall quality of the recording.
By following these tips, you can optimize your screen recording process on a Chromebook and achieve professional-looking results. Experiment with different techniques and settings to find what works best for your specific recording needs.
Troubleshooting Audio Issues
When screen recording on a Chromebook, you may encounter issues with audio, such as low volume, distorted sound, or no sound at all. Here are some troubleshooting steps you can take to resolve audio issues:
- Check audio settings: Verify that the volume on your Chromebook is turned up and not muted. Also, ensure that the audio source is set to the correct input, such as the built-in microphone or an external microphone if you’re using one.
- Restart your Chromebook: A simple restart can sometimes fix audio-related issues. Restart your Chromebook and check if the audio problem persists.
- Update audio drivers: Outdated or incompatible audio drivers can cause problems with audio recording. Visit the manufacturer’s website or Google’s support page to find and install the latest drivers for your Chromebook.
- Check for conflicting applications: Some applications, especially ones that use audio, might conflict with your screen recording process. Close other applications that could be interfering with audio and try recording again.
- Try an external microphone: If the built-in microphone is not capturing audio properly or you’re experiencing poor audio quality, consider using an external microphone. Connect it to your Chromebook and check if the audio issue is resolved.
- Test with another application: To determine if the audio issue is specific to the screen recording software or if it’s a broader problem, try recording audio using a different application. If the problem persists across different applications, it may indicate a hardware or driver issue.
- Perform a powerwash: As a last resort, you can perform a powerwash, which is a factory reset for your Chromebook. This will erase all data, so be sure to back up your important files before proceeding. A powerwash can potentially resolve persistent audio issues by resetting your Chromebook to its default settings.
If none of these troubleshooting steps resolve your audio issues, it may be worthwhile to consult Google’s support resources or seek assistance from their support team. They can provide specific guidance based on your Chromebook model and help you resolve any underlying issues.
Remember, troubleshooting audio issues can be a bit complex, but with patience and persistence, you can overcome them and achieve optimal audio quality for your screen recordings on your Chromebook.
Conclusion
Screen recording on a Chromebook with audio is a valuable capability that can enhance your work, education, and personal activities. By utilizing the built-in screen recorder, third-party screen recording extensions, or online screen recording tools, you can easily capture your screen and create engaging tutorials, presentations, gameplay videos, and more.
In this guide, we explored three different methods for screen recording on a Chromebook, each offering its own advantages and features. The built-in screen recorder provides a simple and convenient solution, while third-party screen recording extensions offer advanced functionalities and customization options. Online screen recording tools provide a browser-based alternative that eliminates the need for downloads or installations.
We also discussed important prerequisites for successful screen recording, such as ensuring your Chromebook is up-to-date, having the necessary permissions to install extensions, and checking your audio settings. Additionally, we provided tips for optimal screen recording, including planning your recording, maintaining a quiet environment, and utilizing keyboard shortcuts.
If you encounter any audio issues during your screen recording sessions, we provided troubleshooting steps to help resolve them, such as checking audio settings, updating drivers, and testing with different applications.
Remember, the key to successful screen recording on a Chromebook is to find the method that best suits your needs and preferences. Experiment with different options, explore additional features, and refine your recording techniques to create professional and engaging content.
Now that you have the knowledge and tools at your disposal, go ahead and start capturing your screen on your Chromebook with audio! Let your creativity flow and share your knowledge, skills, or memorable moments through the power of screen recording.