Introduction
A school Chromebook is a valuable tool for students, allowing them to access educational resources, collaborate with classmates, and complete assignments. However, like any electronic device, it requires regular maintenance and inspections to ensure optimal performance. By conducting periodic inspections, you can identify and address any issues early on, preventing further damage and ensuring that the device remains in top condition.
In this article, we will guide you through a step-by-step process on how to inspect a school Chromebook. Whether you are a student, teacher, or IT staff member, these simple checks will help you identify any problems and take appropriate action. It’s important to note that these inspections are not meant to replace professional repairs, but rather to allow you to address minor issues or involve the necessary support if a major problem is discovered.
Before delving into the inspection process, it is worth mentioning that each school may have its own specific guidelines and procedures regarding Chromebook inspections. It is advisable to consult with your school’s IT department or administration to ensure compliance with their policies.
Now, let’s dive into the step-by-step process of inspecting a school Chromebook to ensure its optimal functionality and longevity.
Step 1: Start with a Visual Inspection
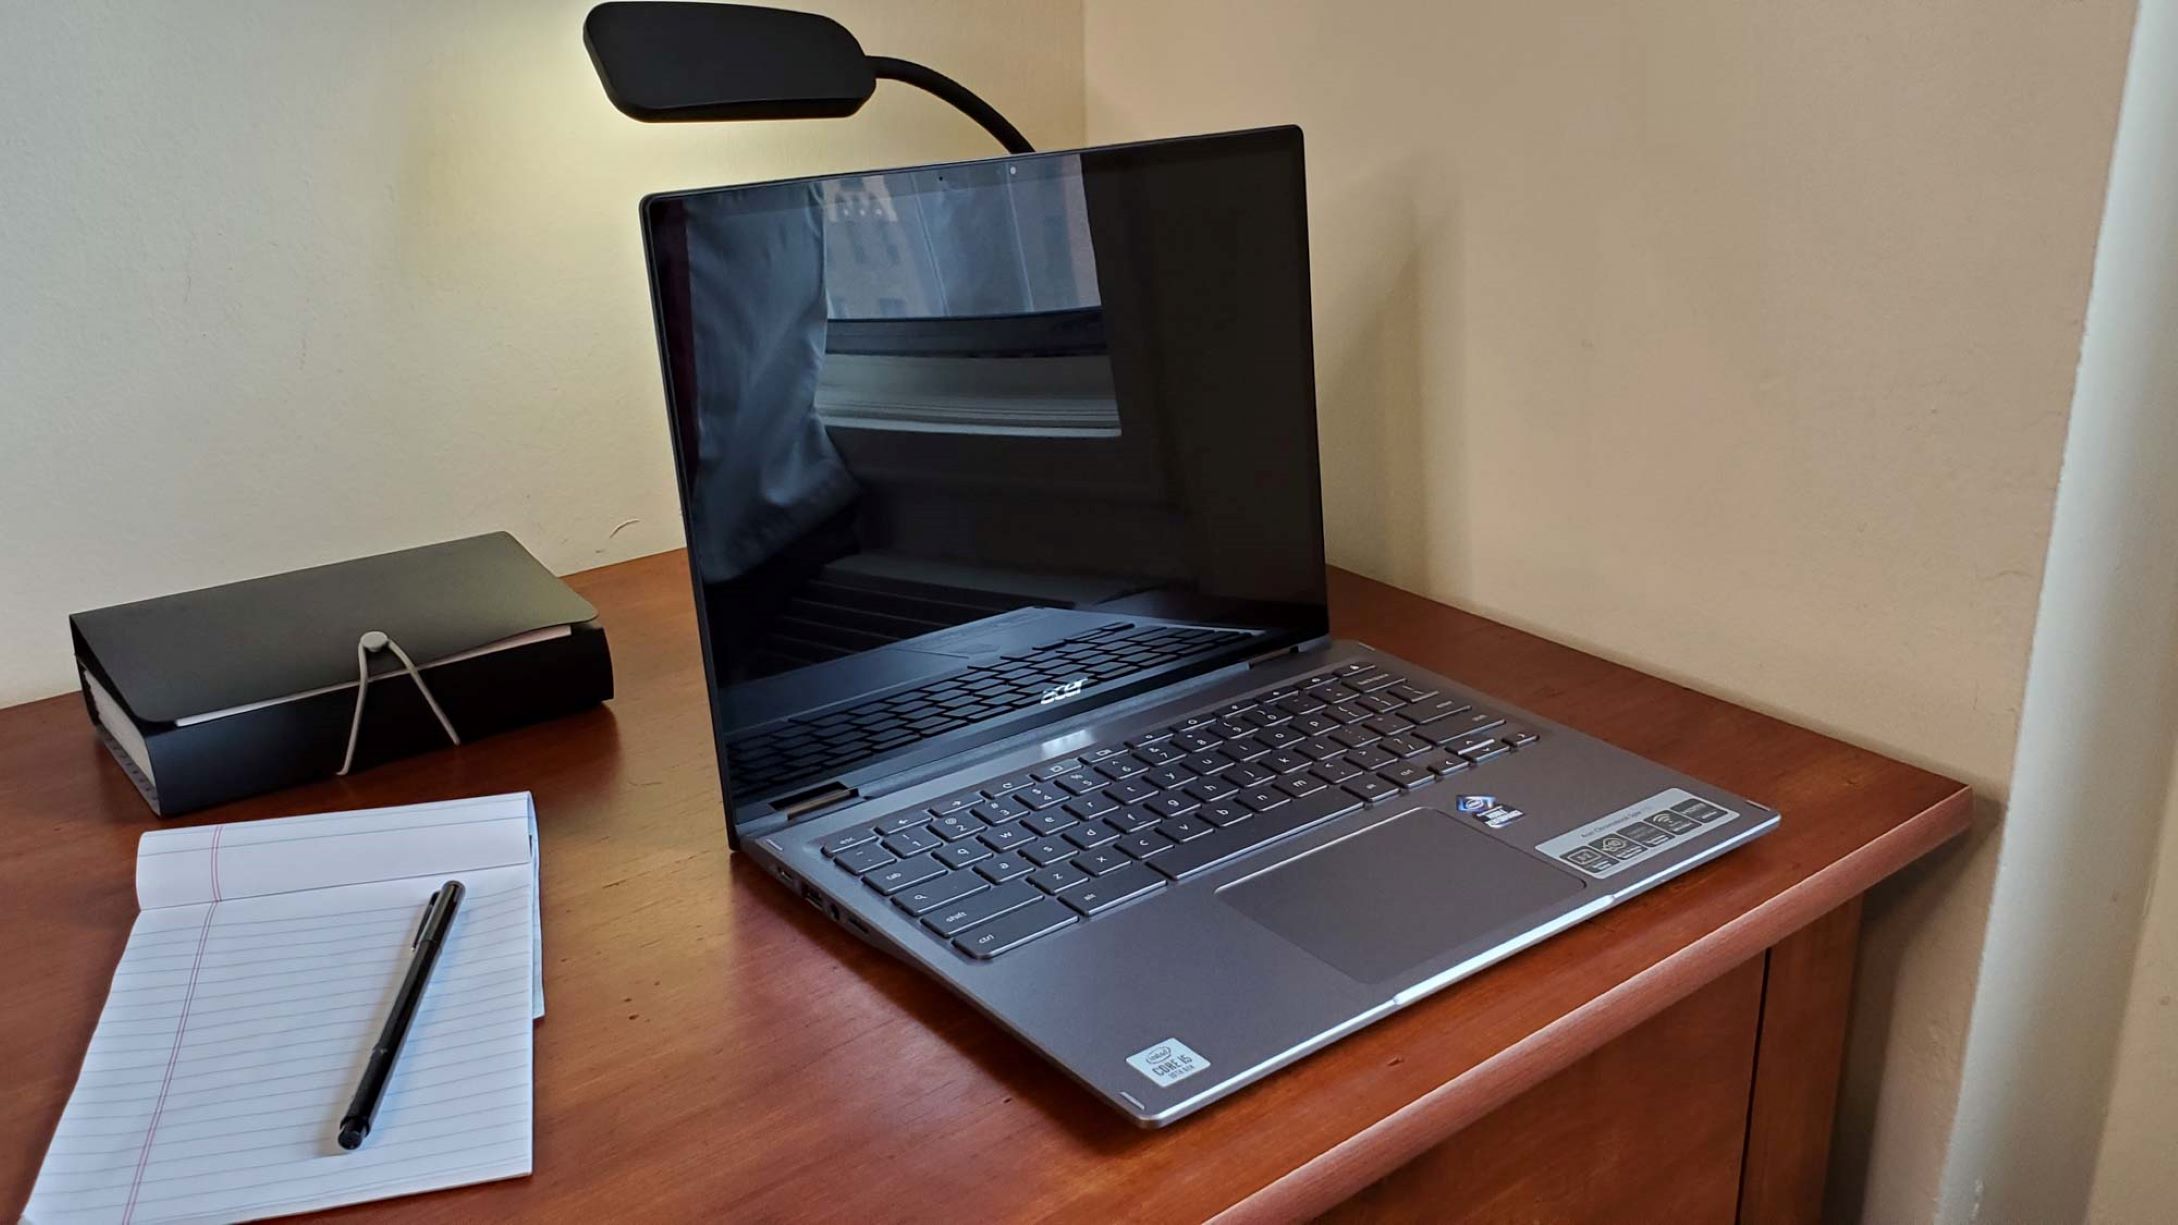
The first step in inspecting a school Chromebook is to conduct a visual inspection. This allows you to quickly assess the overall condition of the device and identify any visible damages or issues. Here’s what you need to do:
- Start by cleaning the exterior of the Chromebook using a soft, lint-free cloth. Remove any dust, fingerprints, or smudges that may hinder your inspection.
- Check the body of the Chromebook for any signs of physical damage such as cracks, dents, or scratches. Pay close attention to the edges and corners, as these areas are more prone to accidental damage.
- Inspect the screen for any visible damages such as cracks or dead pixels. Turn on the Chromebook and look for any abnormal discoloration or flickering.
- Examine the keyboard and touchpad. Look for missing or damaged keys, as well as any signs of liquid spillage. Press all the keys to ensure they are functioning properly, and test the touchpad for smooth and accurate navigation.
- Check the ports and connectors on the Chromebook. Make sure they are not loose or damaged. Test each port by plugging in a compatible device to ensure they are working correctly.
During the visual inspection, it’s important to document any damages or issues you come across. Take photographs if necessary, making sure to capture the details of the problem areas. This documentation will be helpful when communicating with the school’s IT department or support staff.
Remember, the visual inspection is only the first step in the overall process. It provides a general overview of the device’s condition and allows you to identify any immediate concerns. However, it does not provide a comprehensive analysis of the Chromebook’s internal components and functionality. To ensure a thorough inspection, continue with the following steps.
Step 2: Check the Exterior
After completing the visual inspection, it’s time to focus on the exterior of the school Chromebook. This step will allow you to examine specific components and features of the device to ensure they are in optimal condition. Follow these guidelines for a thorough exterior inspection:
- Inspect the hinges of the Chromebook. Open and close the lid multiple times to check for any stiffness or resistance. The hinges should operate smoothly without any grinding noises.
- Check the power button and volume buttons. Ensure they are responsive and not sticky or stuck in any way. Press them several times to confirm that they have a good tactile response.
- Examine the casing and bezel for any cracks or chips. Pay attention to the corners and edges, as they are vulnerable to impact damage. If you discover any structural damage, it’s crucial to have it addressed by a professional to prevent further complications.
- Inspect the ventilation grilles for any blockages or dust buildup. The free flow of air is essential for cooling the Chromebook’s components. If you notice excessive dust accumulation, gently clean the grilles using compressed air or a soft brush.
- Check the speakers for any damage or distortion. Play audio files or videos to ensure that the audio quality is clear and the speakers are functioning properly.
During the exterior inspection, keep an eye out for any loose parts or missing screws. If you find any, it’s advisable to have the Chromebook serviced by a professional technician to prevent further damage or internal component issues.
By thoroughly inspecting the exterior of the school Chromebook, you can detect any physical damage and determine the general state of the device. This information will help you decide whether additional action, such as repairs or replacements, is necessary. It’s important to remember that regular maintenance and care of the Chromebook’s exterior can contribute to its longevity and efficient performance.
Step 3: Inspect the Keyboard and Touchpad
The keyboard and touchpad of a school Chromebook are among the most frequently used components, making them essential for seamless operation. In this step, we will guide you on how to inspect these input devices and ensure they are functioning correctly. Follow these steps:
- Start by visually examining the keyboard for any visible damages such as missing keys, sticky keys, or worn-out symbols. Check that all keys are properly aligned and evenly spaced.
- Press each key individually to ensure they provide a satisfying tactile response. Make sure there are no stuck or unresponsive keys that could interfere with typing and productivity.
- Test the function keys (F1-F12) to ensure they are working correctly. Verify that they perform their designated functions, such as adjusting brightness, sound volume, or screen settings.
- Check the touchpad for smooth and accurate navigation. Move the cursor around the screen and perform various gestures, such as scrolling, zooming, and right-clicking, to ensure they are responsive.
- Inspect the touchpad buttons for any issues like stickiness or loose fittings. Click both buttons multiple times to verify their responsiveness and ease of use.
During the inspection, pay attention to any unusual sounds or sensations while using the keyboard and touchpad. These could indicate underlying mechanical issues that may require professional attention.
If you encounter any problems during the inspection, it’s recommended to document them and report them to the school’s IT department or support staff. They can provide further assistance and determine the appropriate actions to be taken.
By thoroughly inspecting the keyboard and touchpad, you can ensure that these critical input devices are in proper working condition. This will contribute to an efficient and hassle-free user experience while using the school Chromebook.
Step 4: Examine the Display
The display of a school Chromebook plays a vital role in delivering content and providing a visual interface for users. It’s important to inspect the display to ensure it is free from any defects or malfunctions that may hinder the learning experience. Follow these steps to examine the display:
- Turn on the Chromebook and adjust the screen brightness to a comfortable level. Inspect the display for any dead pixels or discolored areas. Dead pixels appear as small black spots that do not change color, while discoloration may manifest as abnormal shades or blotches on the screen.
- Check for any cracks or scratches on the display surface. Minor scratches are often unavoidable with regular use, but deep or extensive damage may impede visibility and require professional intervention.
- Look for any flickering or screen distortion while using the Chromebook. These issues may indicate a faulty display or a connection problem that needs attention.
- Test the touch functionality of the display, if applicable. Ensure that touch inputs are accurately registered and that there are no dead zones on the screen.
If you notice any issues during the display inspection, document them and report them to the appropriate personnel in your school. They can assess the severity of the problem and provide guidance on the necessary steps to resolve it.
A properly functioning display is crucial for an optimal learning experience. By thoroughly examining the display for any defects or irregularities, you can ensure that students have a clear and uninterrupted view of their educational content.
Step 5: Test the Audio
The audio capabilities of a school Chromebook are essential for multimedia activities, virtual meetings, and online learning. It is crucial to ensure that the audio is clear, functional, and at an appropriate volume level. Follow these steps to test the audio:
- Play a variety of audio files with different sound levels to assess the overall audio quality. Pay attention to any distortion, static, or other abnormalities that may indicate a speaker or audio hardware issue.
- Check the volume controls and make sure they respond appropriately. Increase and decrease the volume to verify that the audio adjusts accordingly.
- Test the headphone jack, if available, by plugging in a pair of headphones or external speakers. Ensure that the sound is transmitted correctly and that there are no connectivity issues or audio imbalances.
- Verify that any built-in microphones are functioning properly. Record a short audio clip and play it back to ensure that the microphone captures sound accurately without distortion or excessive background noise.
If you encounter any audio-related issues during testing, it is recommended to document the problem and report it to the school’s IT department or support staff. They can provide further assistance and determine the necessary steps for resolution.
By thoroughly testing the audio capabilities of the Chromebook, you can ensure that students can engage in online lessons, watch educational videos, and participate in virtual discussions with clarity and without any audio-related disruptions.
Step 6: Test the Webcam
The webcam on a school Chromebook is an essential component for virtual classes, video conferences, and online collaboration. It’s important to ensure that the webcam is functioning properly, providing clear video and audio to facilitate effective communication. Follow these steps to test the webcam:
- Launch a video conferencing or recording app that utilizes the webcam.
- Check the webcam settings within the app to ensure that the correct camera is selected and that the resolution is suitable for your needs.
- Position yourself in front of the webcam and observe the video feed. Ensure that the image is clear, well-focused, and free from any distortions or discoloration.
- Test the audio quality recorded by the webcam’s built-in microphone, if applicable. Speak clearly and listen back to ensure that the sound is clear and without crackling or excessive background noise.
- Move around or adjust the lighting in the room to see if the webcam adjusts accordingly and produces a clear image under different conditions.
- If necessary, connect external peripherals such as a USB webcam or microphone to test their functionality and compatibility with the Chromebook.
If you encounter any issues during the webcam test, such as poor video quality or audio problems, document the problem and report it to the appropriate personnel in your school’s IT department. They can provide further assistance and guide you on the necessary steps for resolution.
By thoroughly testing the webcam, you can ensure that students can actively participate in online classes, engage in video conferences, and collaborate effectively with their peers, ensuring a seamless and productive learning experience.
Step 7: Check the Connectivity
Good connectivity is crucial for a school Chromebook, as it allows students to access online resources, communicate with teachers and classmates, and participate in virtual learning activities. It’s important to ensure that the device is properly connected to the internet and capable of seamless data transfer. Follow these steps to check the connectivity:
- Connect to a reliable Wi-Fi network and verify that the Chromebook successfully connects without any error messages or connectivity issues.
- Open a web browser and visit a few websites to test the internet connection speed and responsiveness. Pay attention to any noticeable delays or timeouts.
- If applicable, connect to a wired network using an Ethernet cable and ensure that the Chromebook recognizes the connection and allows for stable data transfer.
- Test the Bluetooth functionality by connecting the Chromebook to a Bluetooth-enabled device such as headphones or a wireless mouse. Verify that the connection is stable and that data is transmitted without interruptions.
- If you have access to peripherals such as USB devices or external storage, connect and test them to ensure that the Chromebook recognizes and interacts with them properly.
If you encounter any connectivity issues during the testing process, consult with your school’s IT department or follow the appropriate troubleshooting steps provided by the Chromebook manufacturer. They can assist in resolving any connectivity-related problems.
By checking the connectivity, you ensure that students can seamlessly access online resources, collaborate effectively, and engage in virtual learning activities without interruptions or technical obstacles.
Step 8: Evaluate Battery Life
The battery life of a school Chromebook is crucial for students to work on assignments, participate in class activities, and engage in online learning without interruptions. It’s important to assess the battery performance and ensure that it can sustain the required usage throughout the school day. Follow these steps to evaluate the battery life:
- Begin with a fully charged battery. Make sure the Chromebook is connected to a power source and allow it to charge to 100%.
- Disconnect the Chromebook from the power source and use it normally for a predetermined period, such as a typical school day. Take note of the time it takes for the battery to drain.
- Observe any significant battery drains during idle periods. If the battery seems to deplete quickly even when the Chromebook is not in active use, there may be background processes or settings that are causing excessive power consumption.
- Take note of any specific applications or tasks that significantly impact the battery life. Some resource-intensive processes, such as video streaming or running multiple applications simultaneously, can drain the battery faster.
- If possible, compare your battery life results with similar Chromebook models or consult the manufacturer’s specifications to determine if the battery performance is within the expected range.
If you notice any issues with the battery life, such as extremely short operating times or unusually rapid draining, it’s advisable to contact your school’s IT department or the Chromebook manufacturer for further assistance and possible solutions.
By evaluating the battery life, you can ensure that students can rely on their Chromebooks for extended periods without the need for frequent recharging, enabling uninterrupted learning and productivity throughout the school day.
Step 9: Test the Performance
The performance of a school Chromebook is paramount to ensure smooth operation and efficient completion of tasks. Testing the performance allows you to identify any potential slowdowns or bottlenecks that may affect the overall user experience. Follow these steps to thoroughly evaluate the performance of the Chromebook:
- Open multiple applications or tabs simultaneously and observe how the Chromebook handles the load. Pay attention to any significant delays, lags, or system freezes.
- Launch resource-intensive applications, such as video editing software or web-based tools, to assess how the Chromebook handles demanding tasks. Note any performance issues encountered, such as slow rendering or excessive CPU usage.
- Test the Chromebook’s multitasking capabilities by switching between different applications and tasks. Verify the responsiveness of the system and check for any noticeable delays or sluggishness.
- Observe how long it takes for the Chromebook to boot up from a cold start. Similarly, test the wake-up time from sleep mode. A slow startup or waking process may indicate possible performance issues.
- Run a system update to ensure that the Chromebook is running the latest software version. Updates often include bug fixes and performance enhancements.
If you encounter any performance-related issues during the testing process, it’s recommended to consult with your school’s IT department or refer to the documentation provided by the Chromebook manufacturer. They can provide further guidance on optimizing performance or suggest any necessary software adjustments.
By thoroughly testing the performance of the Chromebook, you can ensure that students can seamlessly work on their assignments, engage in online activities, and navigate educational resources without experiencing frustrating slowdowns or system issues.
Step 10: Check the Chrome OS Settings and Software
The Chrome OS settings and software play a vital role in the functionality and customization of a school Chromebook. It’s important to check these settings and ensure that the necessary software is up to date and properly configured. Follow these steps to complete this final inspection:
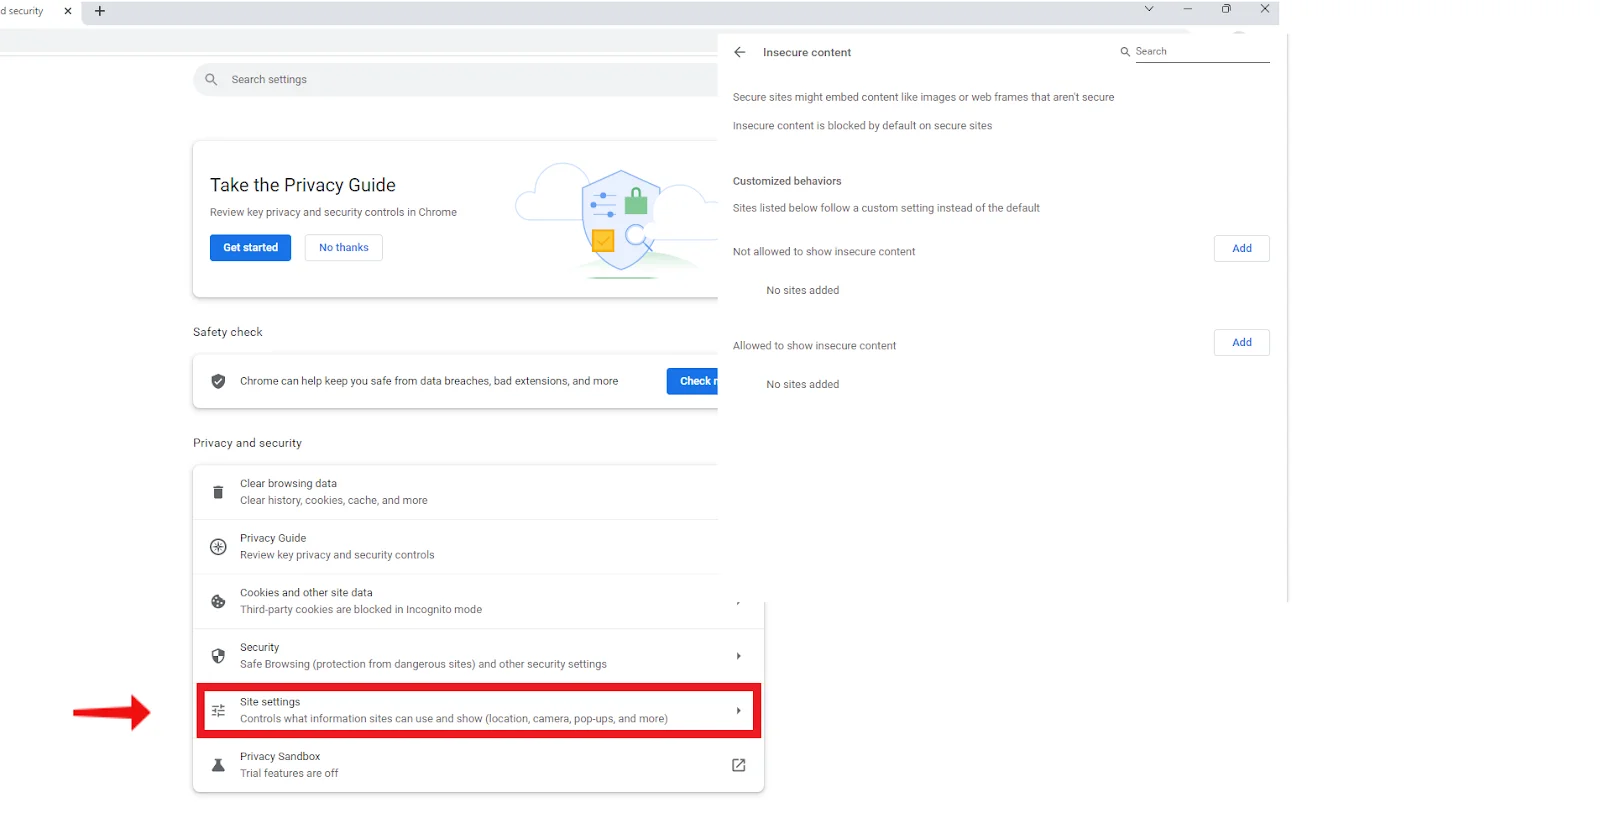
- Access the Chrome OS settings by clicking on the system tray in the bottom right corner of the screen and selecting the gear icon.
- Review the system settings, such as network preferences, display settings, and power management options. Ensure that they are appropriately configured to meet your requirements.
- Check the security settings to verify that the Chromebook is protected with a strong password or PIN and that automatic updates and malware protection are enabled.
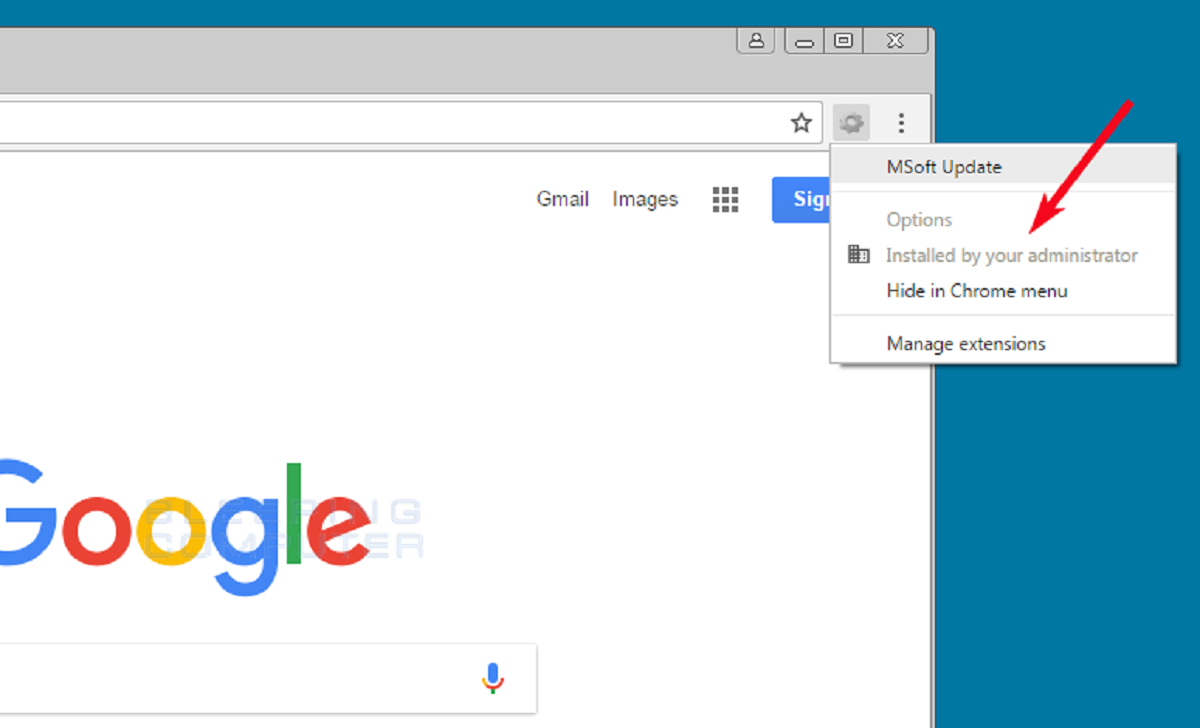
- Inspect the Chrome extensions and apps installed on the Chromebook. Remove any unnecessary or outdated extensions to improve performance.
- Update the Chrome browser and any other software installed on the Chromebook to the latest versions. This ensures the inclusion of new features, bug fixes, and security patches.
- Review the privacy settings to ensure that personal information is protected and shared only as desired.
If you encounter any issues or difficulties while navigating the settings or updating the software, consult the help documentation provided by Chrome OS or seek assistance from your school’s IT department.
By checking the Chrome OS settings and software, you can ensure that the Chromebook is running the latest software versions, is optimized for your needs, and maintains adequate privacy and security measures.
Conclusion
Inspecting a school Chromebook is a critical task to ensure that it functions optimally, providing students with a reliable tool for their educational needs. By following the step-by-step process outlined in this article, you can thoroughly assess the various components, settings, and performance aspects of the Chromebook. Here’s a recap of the steps:
- Start with a visual inspection to identify any visible damages or issues.
- Check the exterior, including hinges, buttons, and casing, for any physical damage.
- Inspect the keyboard and touchpad for functionality and any signs of wear or damage.
- Evaluate the display for any defects, cracks, or discolorations.
- Test the audio and ensure that speakers and microphones are working properly.
- Verify the functionality of the webcam and its video and audio quality.
- Check the connectivity for Wi-Fi, Ethernet, and Bluetooth connections.
- Evaluate the battery life to ensure it meets the demands of a typical school day.
- Thoroughly test the performance by running various applications and multitasking.
- Review the Chrome OS settings and software to optimize functionality and security.
By conducting regular inspections and addressing any identified issues or concerns, you can maintain the longevity and efficiency of the school Chromebook. It’s important to collaborate with your school’s IT department or support staff for further assistance or professional repairs when needed.
Remember, these inspections are not meant to replace regular maintenance or professional repairs, but rather to empower you to identify minor issues and take appropriate action. With a well-maintained and properly functioning Chromebook, students can enjoy seamless educational experiences and maximize their learning potential.