Introduction
Chrome extensions are powerful tools that enhance the functionality and user experience of the Chrome browser. They can help improve productivity, block unwanted ads, provide additional security measures, and much more. However, on school Chromebooks, these extensions can sometimes cause distractions, security risks, or exploit the school’s acceptable use policy.
While some Chrome extensions may be beneficial for educational purposes, it is important for schools to have control over the extensions that are installed on their Chromebooks. In this article, we will guide you through the process of disabling Chrome extensions on school Chromebooks, ensuring a focused and secure learning environment.
By disabling or removing unnecessary extensions, schools can prevent students from accessing distracting content, reduce the risk of malware or unwanted pop-ups, and ensure compliance with school policies. Furthermore, disabling extensions can also help improve the overall performance and speed of the Chromebook, ensuring a smoother online experience for students and teachers alike.
Now, let’s explore the different methods to disable Chrome extensions on school Chromebooks, allowing for a more controlled and productive learning environment.
Why Disable Chrome Extensions on School Chromebook?
While Chrome extensions can offer a plethora of functionality and convenience, they can also pose potential risks and challenges in a school setting. Here are several reasons why schools may choose to disable Chrome extensions on their Chromebooks:
- Distractibility: Some Chrome extensions, although designed for productivity, can inadvertently become distractions for students. From social media blockers to video game add-ons, these extensions can divert students’ attention and disrupt their focus on educational tasks.
- Security concerns: Certain Chrome extensions can compromise the security and privacy of student information. Extensions with questionable permissions or vulnerabilities in their code can potentially collect sensitive data or expose students to risks online.
- Compliance with acceptable use policies: Schools often have acceptable use policies that dictate the responsible and appropriate use of technology. Disabling certain extensions ensures that students adhere to these policies and use the Chromebooks for educational purposes only.
- Bandwidth and performance: Chrome extensions, especially those that run in the background, consume system resources and slow down the overall performance of Chromebooks. By disabling unnecessary extensions, schools can improve the efficiency and speed of their devices.
- Consistency: To ensure a uniform and consistent learning environment, schools may choose to disable extensions that provide additional features or functionality not available across all devices. This approach helps create an equal and fair experience for all students.
By understanding and addressing these concerns, schools can create a controlled and secure digital environment that fosters focused learning and promotes responsible technology usage.
Step 1: Access the Chrome Extension Settings
Disabling Chrome extensions on a school Chromebook is a straightforward process. Follow these steps to access the Chrome extension settings:
- Open the Chrome browser on your school Chromebook.
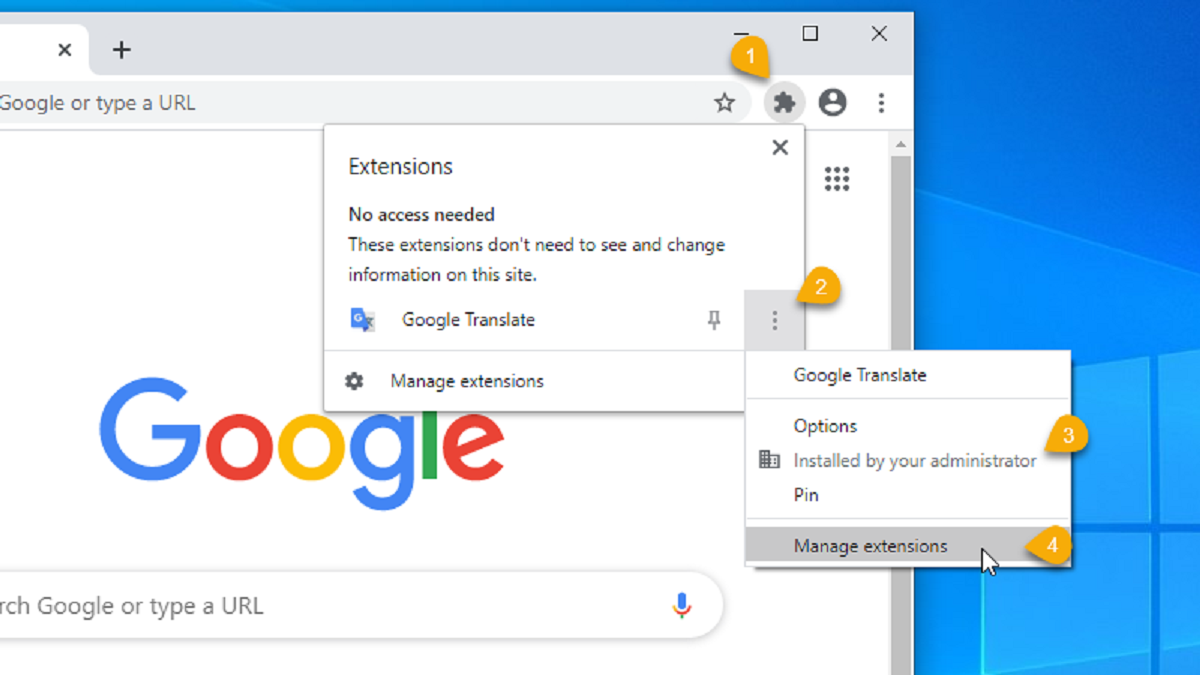
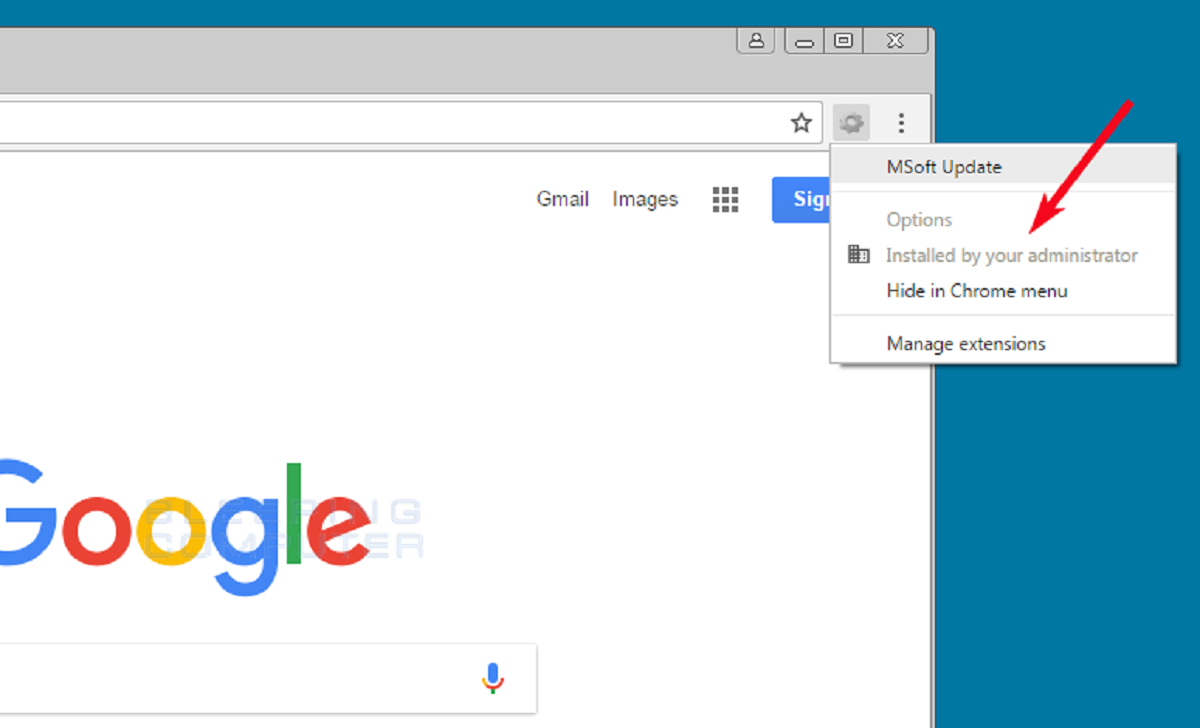
- Click on the three vertical dots located in the top-right corner of the browser window. This will open a drop-down menu.
- From the drop-down menu, select “More Tools,” then click on “Extensions.”
- A new tab will open, displaying a list of all the extensions installed on your Chromebook.
In the Chrome extensions settings, you will find various options for managing and controlling the extensions installed on the Chromebook. You can disable individual extensions, remove them completely, or adjust their settings as needed.
It is important to note that accessing the Chrome extension settings may require administrative privileges on the school Chromebook. If you do not have the necessary access, reach out to your school’s IT department or administrator for assistance. They can provide you with the required permissions or guide you through the process.
Now that you know how to access the Chrome extension settings, let’s move on to the next step and learn how to disable specific extensions on your school Chromebook.
Step 2: Disable Specific Chrome Extensions
Once you have accessed the Chrome extension settings on your school Chromebook, follow these simple steps to disable specific extensions:
- In the “Extensions” tab, you will see a list of all the extensions that are currently installed on your Chromebook.
- To disable an extension, locate it in the list and toggle the switch next to it from “Enabled” to “Disabled.”
- Once disabled, the extension’s functionality will be turned off, and it will no longer be active on your Chromebook.
Disabling extensions allows you to retain them on your Chromebook, but they won’t run in the background or have any impact on your browsing experience. This is particularly useful for temporarily disabling extensions that you may need at a later time.
If you wish to enable a disabled extension, simply toggle the switch back to “Enabled.” The extension will become active again, and you can use its features as before.
By disabling specific Chrome extensions, you can eliminate distractions and ensure a more focused learning environment on your school Chromebook. It gives you the control to customize your browsing experience and only enable the extensions that are essential for your educational needs.
Now that you know how to disable specific Chrome extensions, let’s move on to the next step and learn how to remove and uninstall extensions completely.
Step 3: Remove and Uninstall Chrome Extensions
In some cases, you may want to completely remove and uninstall Chrome extensions from your school Chromebook rather than just disabling them. Follow the steps below to remove and uninstall Chrome extensions:
- In the “Extensions” tab of the Chrome browser, locate the extension you wish to remove and click on the “Remove” button next to it.
- A pop-up dialog box will appear, asking you to confirm the removal of the extension. Click on “Remove” to proceed.
- The extension will be uninstalled from your Chromebook, and its files will be removed.
It is important to note that once an extension is uninstalled, you will no longer have access to its features and functionality. If you later decide to use the extension again, you will need to reinstall it from the Chrome Web Store.
Removing and uninstalling Chrome extensions can be beneficial in scenarios where the extension is causing issues, consuming significant system resources, or no longer serves a purpose for your educational needs.
By regularly reviewing and uninstalling unnecessary extensions, you can keep your school Chromebook clutter-free and optimize its performance. This allows for a smoother and more efficient browsing experience, enhancing your productivity and learning activities.
Now that you know how to remove and uninstall Chrome extensions, let’s move on to the next step and discover how to block or restrict extensions with admin access.
Step 4: Block or Restrict Chrome Extensions with Admin Access
Admin access is required to block or restrict Chrome extensions on school Chromebooks. This step is crucial for schools to maintain control over the extensions that students can install and use. Here’s how you can block or restrict Chrome extensions with admin access:
- As an administrator, log in to the Chromebook management console.
- Navigate to the settings menu and select “Extensions.”
- In the extensions settings, you have several options to manage extensions:
- Block specific extensions: You can block specific extensions by adding them to the blocked list. Once an extension is blocked, it cannot be installed or used on any school Chromebook.
- Restrict by organizational unit: If your school has different organizational units, such as classes or grade levels, you can restrict extensions to specific units. This ensures that only the approved extensions are available to the designated units.
- Manage by group policy: For advanced management, you can use group policies to control and enforce extension settings across all school Chromebooks. This gives you more granular control over the use of extensions.
By blocking or restricting Chrome extensions, schools can ensure a safe and controlled learning environment. It allows administrators to have oversight over the extensions being used, preventing potential distractions, security risks, or policy violations.
Now that you know how to block or restrict Chrome extensions with admin access, let’s move on to the final step and learn how to enable and disable Chrome extensions on a temporary basis.
Step 5: Enable and Disable Chrome Extensions on a Temporary Basis
Sometimes, you may need to enable or disable Chrome extensions temporarily on your school Chromebook. This can be useful for specific tasks or situations where you require the functionality of certain extensions for a limited time. Follow these steps to enable and disable Chrome extensions on a temporary basis:
- Access the Chrome extension settings by clicking on the three vertical dots in the top-right corner of the browser window, selecting “More Tools,” and then clicking on “Extensions.”
- In the “Extensions” tab, locate the extension you want to enable or disable temporarily.
- Toggle the switch next to the extension from “Enabled” to “Disabled” or vice versa.
By temporarily enabling or disabling Chrome extensions, you have the flexibility to customize your browsing experience based on your specific needs. This can be particularly useful for tasks such as online research, writing, or collaborating on projects.
It is important to note that enabling or disabling extensions on a temporary basis does not affect the overall status of the extension. Once you close the browser or restart your Chromebook, the extension will revert to its previous enabled or disabled state.
By having the ability to enable and disable Chrome extensions on a temporary basis, you can adapt your Chromebook’s functionality to suit your changing needs without permanently modifying the extension settings.
Congratulations! You have learned the steps to disable, remove, block, restrict, and temporarily enable or disable Chrome extensions on a school Chromebook. By following these steps, you can create a controlled and productive learning environment, ensuring that Chrome extensions are used responsibly and in accordance with your school’s policies.
Conclusion
Disabling Chrome extensions on school Chromebooks is a crucial step in creating a focused and secure learning environment. By following the steps outlined in this article, you can effectively manage and control the extensions installed on your Chromebook.
We discussed the reasons why schools may choose to disable Chrome extensions, including concerns about distractibility, security, policy compliance, and performance. Understanding these concerns is important for administrators, teachers, and students alike.
We walked through the step-by-step process of accessing the Chrome extension settings, disabling specific extensions, removing and uninstalling extensions, blocking or restricting extensions with administrator access, and enabling or disabling extensions on a temporary basis.
By implementing these steps, you can ensure that only necessary and approved extensions are installed and active on school Chromebooks. This promotes a focused and productive learning environment, minimizes distractions, and reduces security risks.
Remember, the ability to customize and control your Chromebook’s extension settings empowers you to tailor your browsing experience to your specific needs. Regularly reviewing and managing your extensions will help keep your Chromebook optimized and running smoothly.
By responsibly managing Chrome extensions on school Chromebooks, we can enhance the educational experience, facilitate productivity, and ensure the security and compliance of our digital environments. Embrace these steps and enjoy a more controlled and focused learning journey on your school Chromebook.