Introduction
Google Chrome is a popular web browser known for its user-friendly interface and a vast array of extensions that enhance the browsing experience. These extensions, also known as add-ons or plugins, offer a wide range of functionalities, from ad-blocking and productivity tools to language translation and social media integration. While extensions can be incredibly useful, there are instances when you may need to disable them. Whether an extension is causing compatibility issues, slowing down your browser, or simply no longer serving its purpose, knowing how to disable extensions in Chrome can be invaluable.
In this guide, we will walk you through the step-by-step process of disabling extensions in Google Chrome. Whether you're using the browser on a desktop or a mobile device, the steps are relatively straightforward and can help you regain control over your browsing experience. By following these instructions, you can effectively manage your extensions and ensure that your browser operates smoothly and efficiently.
So, if you've ever found yourself wondering how to disable a specific extension in Chrome, you're in the right place. Let's dive into the process and empower you with the knowledge to take charge of your browsing environment. Whether you're a seasoned Chrome user or just getting started, understanding how to manage extensions is a valuable skill that can enhance your overall browsing experience.
Step 1: Open Chrome Browser
To begin the process of disabling extensions in Google Chrome, the first step is to launch the Chrome browser on your device. Whether you're using a Windows PC, Mac, or mobile device, accessing the Chrome browser is the initial requirement for managing your extensions effectively.
If you're using a Windows computer, you can open Chrome by clicking on the Chrome icon located on your desktop or by searching for "Chrome" in the Windows Start menu. Once you locate the Chrome icon, simply double-click it to launch the browser.
For Mac users, opening Chrome is just as straightforward. You can access the browser by clicking on the Chrome icon in your Applications folder or by searching for "Chrome" using Spotlight. Once you've located the Chrome application, a single click will launch the browser, allowing you to proceed with the next steps.
If you're using a mobile device such as a smartphone or tablet, the process of opening Chrome is equally simple. Locate the Chrome app icon on your device's home screen or app drawer, then tap on it to launch the browser.
Once Chrome is open and ready for use, you're now prepared to move on to the next step in the process of disabling extensions. By ensuring that the browser is accessible and ready for interaction, you're setting the stage for a seamless experience as you navigate through the steps to manage your extensions effectively.
With Chrome now open on your device, you're ready to proceed to the next step and access the extensions menu, where you can begin the process of disabling specific extensions that may be impacting your browsing experience.
Step 2: Access the Extensions Menu
After successfully launching the Chrome browser, the next crucial step in the process of disabling extensions is to access the Extensions menu. This menu serves as the central hub for managing all installed extensions, allowing users to enable, disable, or remove them as needed.
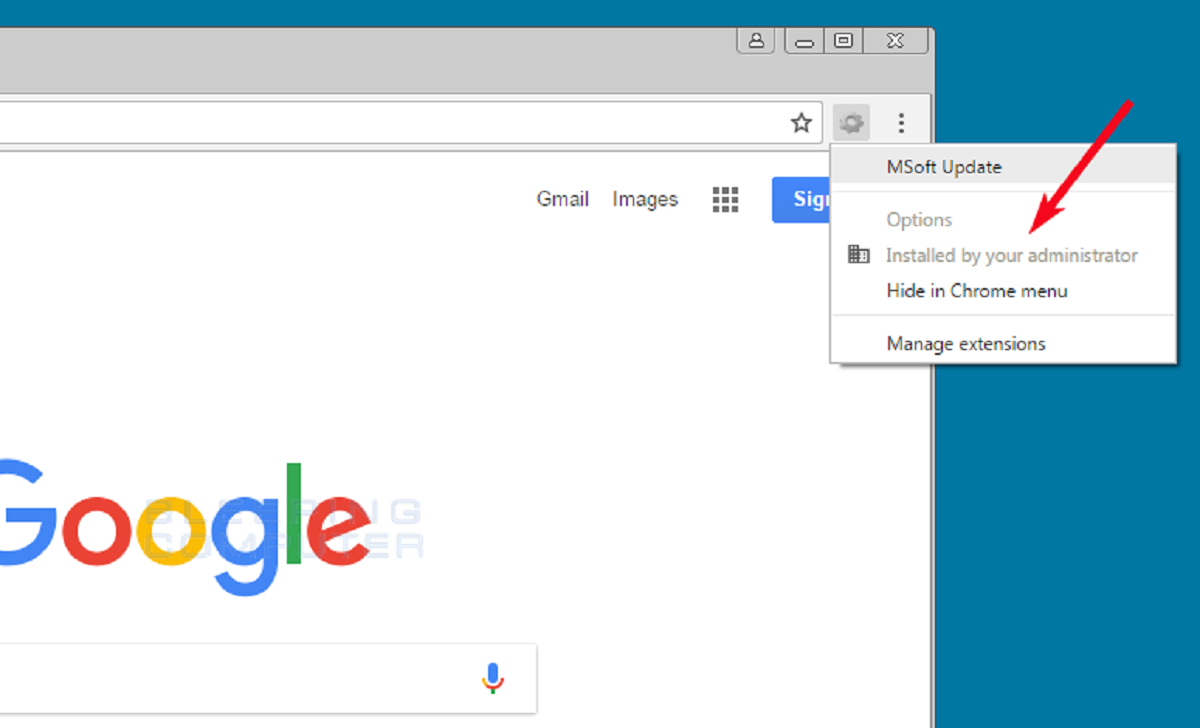
To access the Extensions menu, look to the upper-right corner of the Chrome window. You will notice an icon consisting of three vertically aligned dots, symbolizing the Chrome menu. Click on this icon to reveal a dropdown menu containing various options and settings for the browser.
Once the dropdown menu appears, navigate your cursor to the "More tools" option. Upon hovering over this selection, a secondary menu will expand to the right, presenting additional tools and features within Chrome. Among these options, you will find "Extensions." Click on "Extensions" to proceed to the dedicated extensions management page.
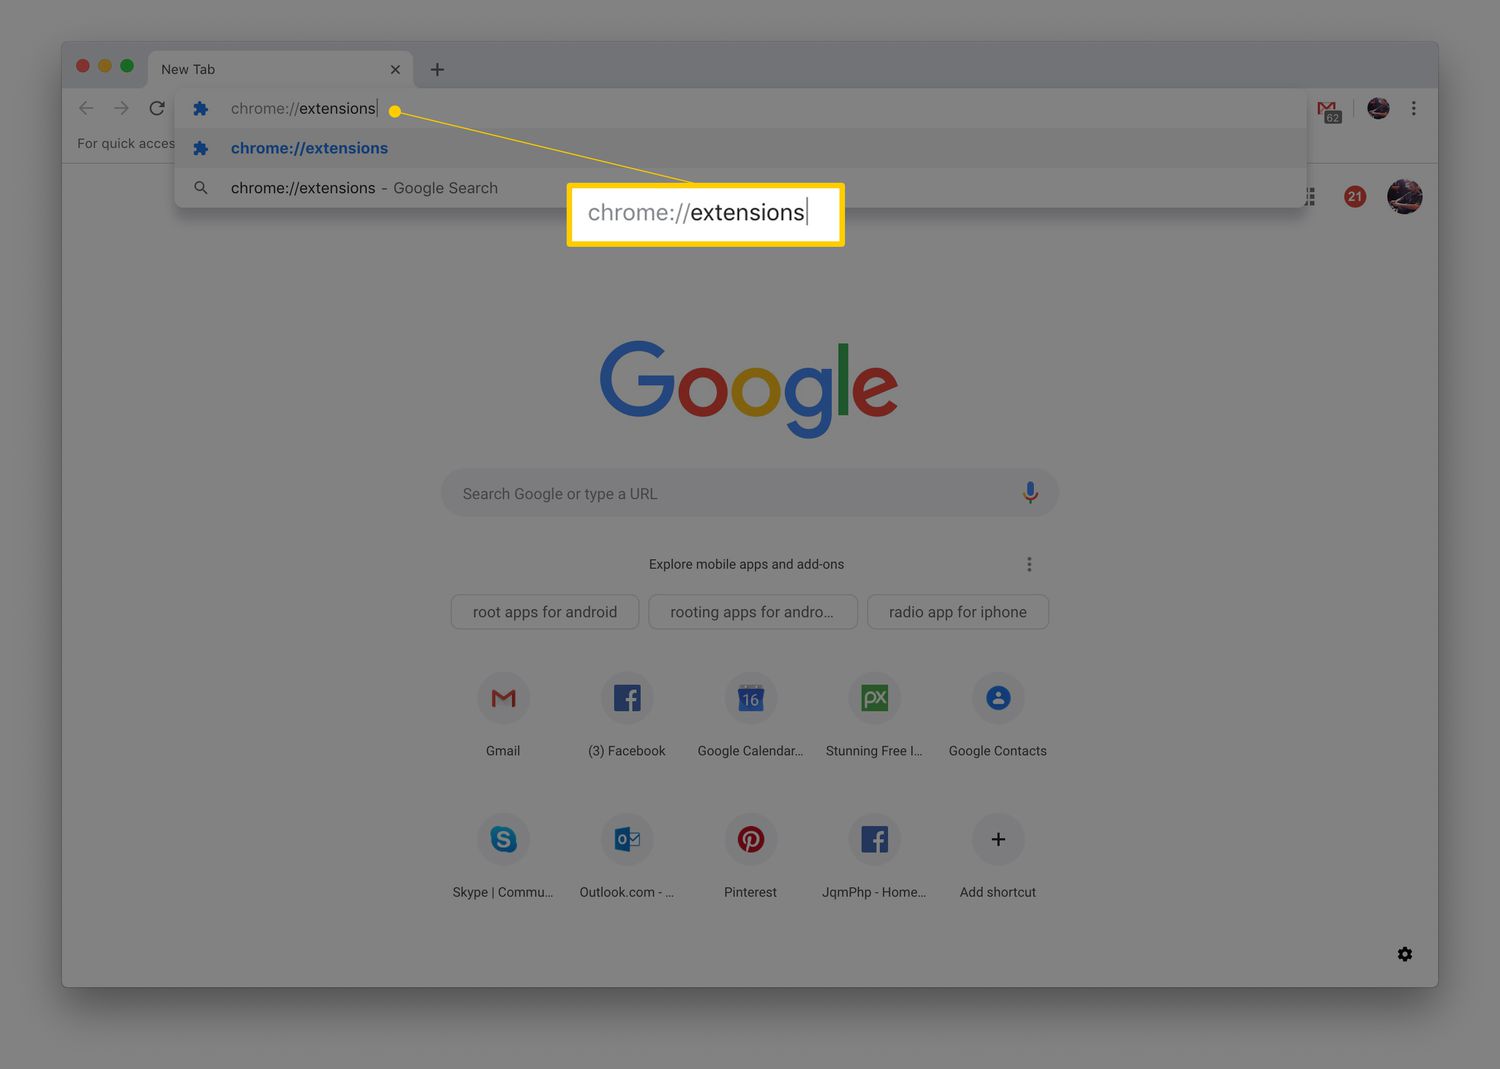
Alternatively, you can directly access the Extensions menu by typing "chrome://extensions/" into the address bar of the Chrome browser and pressing Enter. This action will instantly redirect you to the Extensions page, where all installed extensions are listed for easy management.
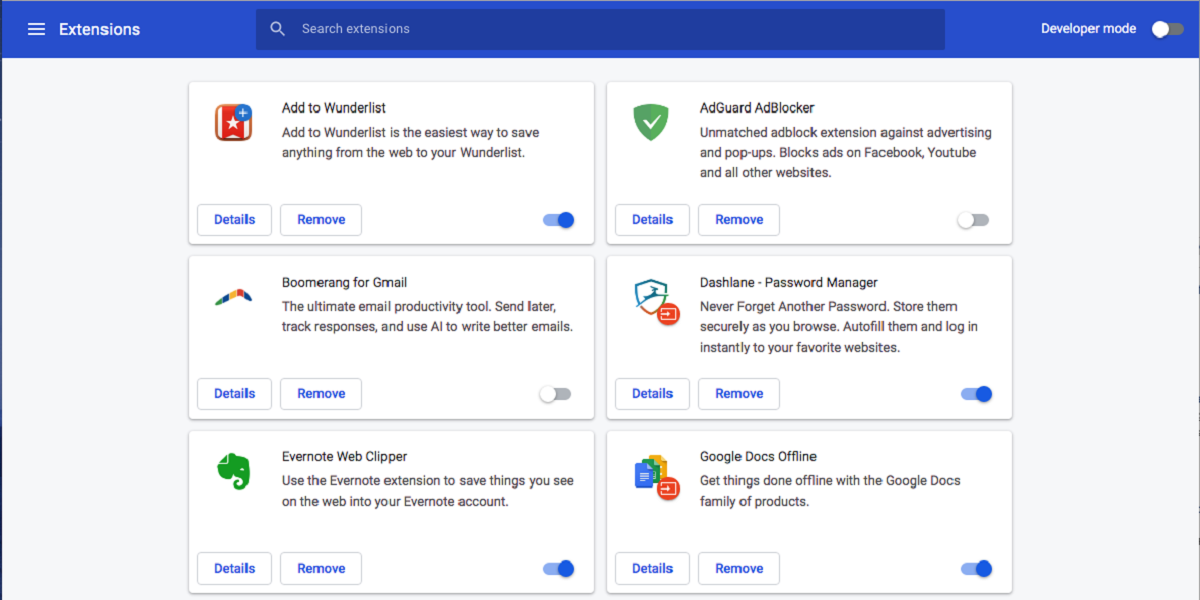
Upon reaching the Extensions page, you will be presented with a comprehensive overview of all the extensions currently installed in your Chrome browser. Each extension is accompanied by a toggle switch, allowing you to enable or disable it with a simple click.
At this point, you have successfully accessed the Extensions menu and are now ready to proceed with the next step of disabling a specific extension. By reaching this stage, you have gained direct access to the tools necessary for managing your extensions efficiently, empowering you to customize your browsing experience according to your preferences and requirements.
With the Extensions menu now accessible, you are well-positioned to continue the process of disabling specific extensions that may be impacting your browsing performance or overall user experience. This seamless access to the Extensions menu sets the stage for effective extension management, ensuring that you can tailor your browsing environment to align with your individual needs and preferences.
Step 3: Disable the Extension
Now that you have accessed the Extensions menu in Google Chrome, the next pivotal step is to disable the specific extension that you wish to deactivate. Disabling an extension can be a straightforward process, and Chrome provides a user-friendly interface to accomplish this task seamlessly.
Upon reaching the Extensions page, you will notice a list of all installed extensions, each accompanied by a toggle switch located next to its name. This toggle switch serves as the control mechanism for enabling or disabling individual extensions. To disable a particular extension, simply locate its entry in the list and click on the toggle switch. Upon doing so, the switch will move to the off position, indicating that the extension has been successfully disabled.
As you disable an extension, Chrome will instantly halt its functionality, ensuring that it no longer operates within the browser environment. This can be particularly useful if you have identified a specific extension that is causing compatibility issues, consuming excessive system resources, or interfering with your browsing experience in any way.
It's important to note that disabling an extension does not remove it from your browser entirely. Instead, it temporarily deactivates its features and prevents it from running until you choose to re-enable it. This flexibility allows you to experiment with different configurations, enabling you to tailor your browsing environment to suit your specific needs and preferences.
By effectively disabling unnecessary or problematic extensions, you can optimize the performance of your Chrome browser, reduce clutter, and ensure a smoother and more efficient browsing experience. Whether you're streamlining your browser for improved productivity or troubleshooting compatibility issues, the ability to disable extensions in Chrome empowers you to take control of your browsing environment with ease.
With the extension now successfully disabled, you have taken a proactive step towards managing your browsing experience effectively. This seamless process allows you to fine-tune your Chrome browser according to your preferences, ensuring that you can enjoy a personalized and optimized browsing environment that aligns with your individual needs and requirements.
Step 4: Confirm the Disablement
After disabling an extension in Google Chrome, it's essential to confirm that the disablement has been successfully applied. This confirmation step ensures that the extension is no longer active within the browser environment, providing you with the assurance that its features are effectively deactivated.
To confirm the disablement of an extension, you can visually inspect the Extensions page in Chrome. Upon returning to this page after disabling an extension, you should notice that the toggle switch associated with the specific extension is in the "off" position. This visual cue serves as a clear indicator that the extension has been successfully disabled and is no longer operational within the browser.
In addition to the visual confirmation on the Extensions page, you can also verify the disablement by observing the behavior of the browser itself. Once an extension has been disabled, its functionalities, such as additional buttons, menus, or pop-ups, should no longer be present during your browsing sessions. This absence of the extension's influence further validates that the disablement has been effectively implemented.
Furthermore, you can test the impact of the disablement by navigating to websites or web-based applications where the extension's features were previously active. By interacting with these platforms, you can confirm that the extension's functionalities, such as pop-up notifications, content modifications, or additional toolbars, are no longer interfering with your browsing experience. This hands-on approach allows you to directly assess the effects of the disablement, providing you with tangible evidence of its successful application.
By confirming the disablement of an extension, you can ensure that your browsing environment remains streamlined, efficient, and tailored to your specific needs. This proactive verification step empowers you to take full control of your Chrome browser, allowing you to manage extensions with confidence and precision.
With the disablement successfully confirmed, you have completed the essential steps to effectively manage your extensions in Google Chrome. By following this comprehensive guide, you have gained the knowledge and skills necessary to disable specific extensions, optimize your browsing experience, and maintain a clutter-free and efficient browser environment.
Conclusion
In conclusion, the ability to disable extensions in Google Chrome is a valuable skill that empowers users to take control of their browsing environment. By following the step-by-step process outlined in this guide, you have gained the knowledge and proficiency necessary to manage your extensions effectively, ensuring a streamlined and optimized browsing experience.
The process begins with opening the Chrome browser on your device, followed by accessing the Extensions menu, where all installed extensions are listed for easy management. Once in the Extensions menu, you can seamlessly disable specific extensions by utilizing the toggle switches associated with each extension entry. This straightforward approach allows you to deactivate extensions that may be causing compatibility issues, consuming excessive system resources, or interfering with your browsing experience.
After disabling an extension, it's crucial to confirm the disablement to ensure that the extension is no longer active within the browser environment. This confirmation step provides you with the assurance that the disablement has been successfully applied, allowing you to maintain a clutter-free and efficient browsing environment tailored to your specific needs and preferences.
By effectively managing your extensions in Google Chrome, you can optimize the performance of your browser, reduce clutter, and ensure a smoother and more efficient browsing experience. Whether you're streamlining your browser for improved productivity or troubleshooting compatibility issues, the ability to disable extensions empowers you to take control of your browsing environment with ease.
In essence, the process of disabling extensions in Google Chrome is a fundamental aspect of maintaining a personalized and optimized browsing environment. By leveraging the knowledge and skills acquired from this guide, you can navigate the complexities of extension management with confidence, ensuring that your browsing experience aligns with your individual needs and requirements.
With the comprehensive understanding of how to disable extensions in Chrome, you are well-equipped to tailor your browsing environment, enhance productivity, and enjoy a seamless and efficient browsing experience. By taking charge of your extensions, you can unlock the full potential of Google Chrome while ensuring a customized and clutter-free browsing experience.