Introduction
Google Chrome is one of the most popular web browsers, known for its speed, security, and extensive range of available extensions. These extensions are add-ons that you can install to enhance your browsing experience, offering everything from productivity tools to entertainment features.
However, with so many Chrome extensions out there, it’s important to know how to manage them effectively. Whether you want to enable or disable them, remove unwanted extensions, update them, or customize their settings, this guide will provide you with all the necessary steps.
Managing your Chrome extensions allows you to optimize your browser’s performance, ensuring it remains fast and efficient. You will have control over the functionality and appearance of your browser, tailoring it to suit your specific needs.
In this article, we will walk you through the different aspects of managing your Chrome extensions. By the end, you will have a clear understanding of how to enable or disable extensions, remove them when necessary, update them to ensure their compatibility, customize their settings, organize them for easy access, and troubleshoot any issues that may arise.
So, let’s dive in and explore how you can effectively manage your Chrome extensions to enhance your browsing experience and make the most out of this powerful web browser.
Enable or Disable Extensions
Enabling or disabling extensions in Google Chrome is a straightforward process. Follow the steps below:
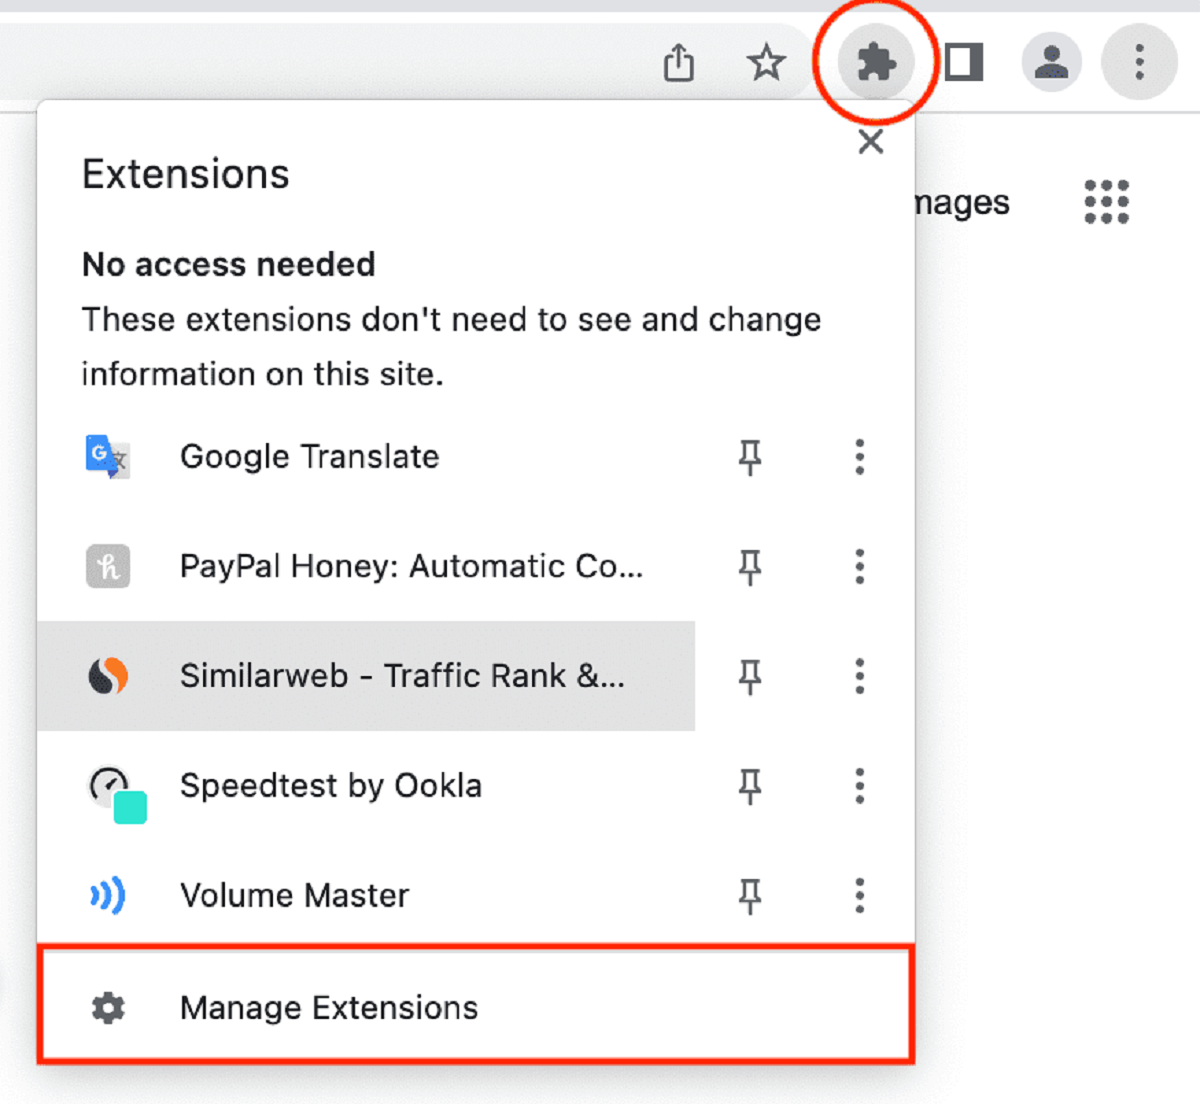
- Open Google Chrome and click on the three-dot menu icon in the top-right corner of the browser window.
- Select “More tools” from the drop-down menu, then click on “Extensions.”
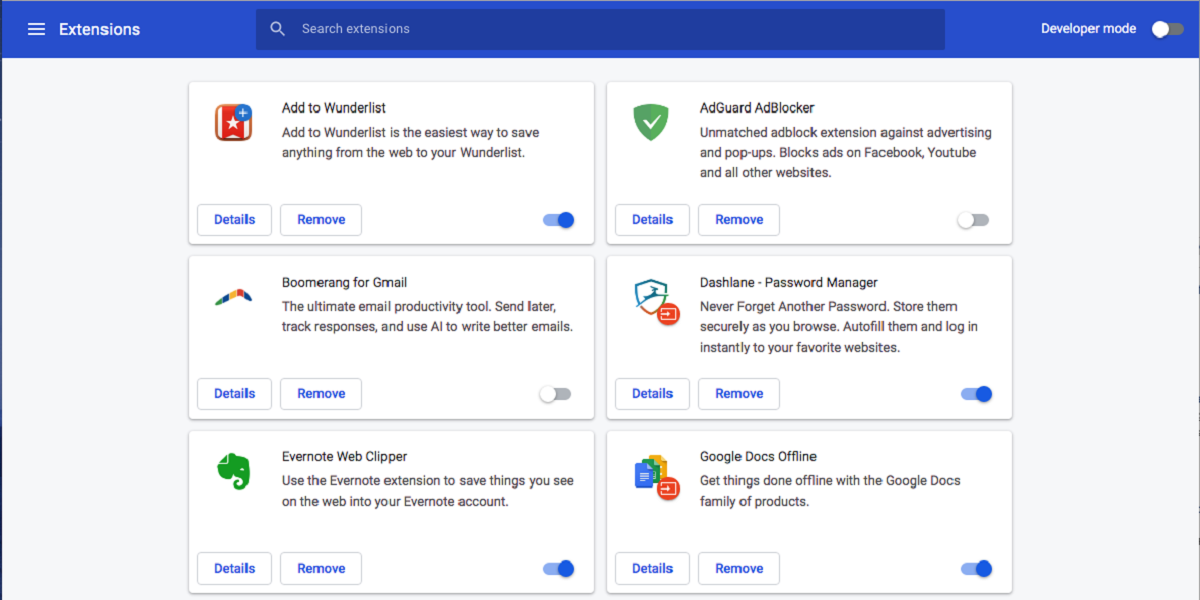
- On the Extensions page, you will see a list of all the extensions you have installed. To enable an extension, simply toggle the switch next to it to the “On” position. To disable an extension, toggle the switch to the “Off” position.
- Once you have enabled or disabled the desired extensions, close the Extensions tab.
Enabling an extension allows it to run and function within your browser, while disabling it temporarily turns off its functionality.
This feature is particularly useful if you have installed multiple extensions and want to disable some of them to free up system resources or resolve any compatibility issues.
Keep in mind that disabling an extension does not uninstall it. It simply stops it from actively running in the background. To completely remove an extension from Chrome, you will need to follow the steps outlined in the next section.
By enabling or disabling extensions based on your needs, you can optimize your browser’s performance and ensure that only the extensions you find most useful are actively running.
Remember to regularly review your extensions and disable any that you no longer need or use. This helps minimize unnecessary background processes and can contribute to a more efficient browsing experience.
Remove Extensions
If you no longer need or want a particular extension in Google Chrome, you can easily remove it by following these steps:
- Open Google Chrome and click on the three-dot menu icon in the top-right corner of the browser window.
- Select “More tools” from the drop-down menu, then click on “Extensions.”
- On the Extensions page, you will see a list of all the extensions you have installed. Locate the extension you want to remove and click on the “Remove” button next to it.
- A confirmation dialog box will appear asking if you want to remove the extension. Select “Remove” to proceed.
Once you confirm the removal, the extension will be permanently deleted from your Chrome browser.
Removing extensions that you no longer use or need can help improve your browsing speed and productivity. It reduces clutter and frees up system resources, ensuring that your Chrome browser remains in optimal condition.
Additionally, removing unnecessary extensions can enhance your online security. Some extensions may have access to your browsing data, and removing them eliminates potential privacy concerns.
Remember, if you ever change your mind and want to reinstall a previously removed extension, you can visit the Chrome Web Store and download it again.
Regularly reviewing and removing unnecessary extensions is a good practice to maintain a clean and efficient browsing environment.
Now that you know how to remove extensions, let’s move on to the next section to learn how to update them.
Update Extensions
Keeping your Chrome extensions up to date is important for ensuring compatibility with the latest browser features and security patches. Here’s how you can update your extensions:
- Open Google Chrome and click on the three-dot menu icon in the top-right corner of the browser window.
- Select “More tools” from the drop-down menu, then click on “Extensions.”
- On the Extensions page, you will see a list of all the installed extensions. If there are any available updates, you will notice an “Update” button next to the extension that requires updating.
- To update individual extensions, click on the “Update” button next to each extension that has an update available.
- If you want to update all the extensions at once, click on the “Update All” button in the top-right corner of the Extensions page.
Once the updates are complete, you will have the latest version of the extension installed in your Chrome browser.
Updating your extensions is crucial for maintaining their functionality and compatibility with the latest features and improvements introduced by Google Chrome. It also ensures that any security vulnerabilities are patched to keep your browsing experience safe.
By regularly checking for and updating your extensions, you can ensure that you are making the most out of their features and enjoying the best possible experience while browsing the web.
Now that you know how to update your extensions, let’s move on to the next section to learn how to manage their settings.
Manage Extension Settings
Managing the settings of your Chrome extensions allows you to customize their behavior and tailor them to your specific preferences. Here’s how you can manage extension settings:
- Open Google Chrome and click on the three-dot menu icon in the top-right corner of the browser window.
- Select “More tools” from the drop-down menu, then click on “Extensions.”
- On the Extensions page, you will see a list of all the installed extensions. Find the extension for which you want to manage the settings and click on the “Details” button beneath it.
- In the extension details page, you will find various settings and options specific to that extension. These settings can include toggles, sliders, input fields, and checkboxes.
- Adjust the settings according to your preference. Each extension will have a unique set of options, so explore the available settings to customize it to your liking.
- Once you have made the desired changes, click on the “Save” or “Apply” button to save the updated settings.
The ability to manage extension settings gives you control over how the extensions function and interact within your Chrome browser. You can customize their appearance, behavior, and functionalities to align with your browsing needs.
Keep in mind that not all extensions offer extensive customization options. Some may have minimal settings, while others may provide a wide range of customization possibilities. It depends on the individual extension and the level of control the developer has provided.
By managing the settings of your extensions, you can fine-tune and personalize your browsing experience, making it more efficient and enjoyable.
Now that you know how to manage the settings of your Chrome extensions, let’s move on to the next section to learn how to organize them effectively.
Organize Extensions
As you install more extensions in Google Chrome, it’s essential to keep them organized for easy access and navigation. Here are some tips to help you effectively organize your extensions:
- Open Google Chrome and click on the three-dot menu icon in the top-right corner of the browser window.
- Select “More tools” from the drop-down menu, then click on “Extensions.”
- On the Extensions page, you will see a list of all the installed extensions. To rearrange their order, simply click and drag an extension to a new position in the list.
- If you have a large number of extensions, you can create folders to group them. To do this, right-click on an empty space within the Extensions page and select “Create new folder” from the context menu. Give the folder a name and drag and drop the desired extensions into the folder.
- To access the extensions within a folder, click on the folder icon, and it will expand to display the contents. You can easily collapse or expand the folders as needed.
- If you want to remove an extension from a folder, simply drag it out of the folder and position it back in the main list.
By organizing your extensions and arranging them in a logical order or grouping them in folders, you can quickly locate and access the extensions you need. This helps declutter your browser and ensures a more streamlined browsing experience.
Remember to regularly evaluate and declutter your extensions. Remove any that you no longer use or need to keep your browser organized and efficient.
Now that you know how to organize your extensions effectively, let’s move on to the next section to learn how to troubleshoot any issues that may arise.
Troubleshoot Extensions
Sometimes, you may encounter issues with Chrome extensions, such as compatibility problems, performance issues, or unexpected behaviors. Here are some troubleshooting tips to help you resolve common extension-related issues:
- Disable or remove conflicting extensions: If you notice that a specific extension is causing problems, try disabling or removing it temporarily to see if the issue persists. Some extensions may conflict with each other or with certain websites.
- Clear cache and restart Chrome: Clearing your browser’s cache can help resolve various issues. To do this, click on the three-dot menu icon, go to “More tools,” choose “Clear browsing data,” and select the appropriate options. After clearing the cache, restart Chrome and see if the issue is resolved.
- Update Chrome: Keeping your browser updated helps ensure that you have the latest bug fixes and security patches. Go to the Chrome menu, click on “Help,” and select “About Google Chrome” to check for updates.
- Disable hardware acceleration: In some cases, hardware acceleration can cause conflicts with certain extensions. Disabling it can help resolve the issue. Go to Chrome settings, click on “Advanced,” and under the “System” section, disable the “Use hardware acceleration when available” option.
- Reset Chrome settings: If you’re experiencing persistent issues with extensions, you can reset Chrome settings to their default values. Go to Chrome settings, click on “Advanced,” scroll to the bottom, and click on “Reset settings.” Confirm the action, and Chrome will be reset to its original state.
- Contact extension developer or support: If none of the above steps resolve the issue, reach out to the developer or support team of the problematic extension. They may have specific troubleshooting steps or a solution for the problem.
By following these troubleshooting steps, you can effectively address common extension-related issues and enjoy a smoother browsing experience.
It’s important to note that extensions are created by third-party developers, and Chrome does not have direct control over their behavior or troubleshooting. Therefore, it’s crucial to only install extensions from trusted sources and regularly update them for the best experience.
Now that you’re armed with troubleshooting knowledge, you can tackle extension issues with confidence.
Conclusion
Managing your Chrome extensions is essential for optimizing your browsing experience and ensuring that your browser remains efficient and secure. With the ability to enable or disable extensions, remove unwanted ones, update them, customize their settings, organize them, and troubleshoot issues, you have full control over your extensions.
By enabling or disabling extensions, you can ensure that only the ones you need are actively running, conserving system resources and minimizing compatibility conflicts. Removing unnecessary extensions not only declutters your browser but also improves performance and security. Updating your extensions regularly ensures that they are compatible with the latest features and patches.
Customizing the settings of your extensions allows you to tailor their functionalities and behaviors to suit your specific needs and preferences. Organizing your extensions in folders or arranging them in a logical order makes them easily accessible, enhancing your browsing efficiency.
However, if you ever encounter issues with extensions, using troubleshooting techniques such as disabling conflicting extensions, clearing cache, updating Chrome, disabling hardware acceleration, or resetting Chrome settings can help you resolve the problem.
Remember to review your extensions periodically, remove the ones you no longer need, and ensure that you only install extensions from reputable sources to maintain a secure browsing environment.
By effectively managing your Chrome extensions, you can enhance your browsing experience, increase productivity, and enjoy the full potential of this powerful web browser.