Introduction
Welcome to the exciting world of Chrome extensions! With millions of users worldwide, Google Chrome is one of the most popular web browsers available today. Chrome extensions provide developers with the opportunity to enhance the browsing experience and add extra functionality to the browser. Whether you’re a seasoned developer looking to expand your skills or a beginner dipping your toes into the world of programming, creating Chrome extensions can be a rewarding and fulfilling endeavor.
So, what exactly is a Chrome extension? In simple terms, it’s a small software program that extends the functionality of the Google Chrome browser. From productivity tools and ad blockers to language translators and social media enhancements, the possibilities are endless when it comes to creating Chrome extensions. These extensions can be installed directly from the Chrome Web Store, making them easily accessible to users.
There are several benefits to creating Chrome extensions. For developers, it’s an opportunity to showcase your skills, learn new technologies, and contribute to the ever-expanding world of web development. Not only can you add value to users’ browsing experiences, but you can also monetize your extensions by offering premium features or displaying ads. In addition, developing Chrome extensions can be a great way to build your reputation and network with other developers.
For users, Chrome extensions provide a way to customize and personalize the browsing experience. You can tailor your browser to suit your needs, whether it’s blocking unwanted ads, managing your passwords, or improving your productivity. Extensions offer a wide range of features and functionalities, helping you to save time, stay organized, and enhance your online activities.
In this article, we’ll explore the process of creating Chrome extensions from start to finish. We’ll cover the necessary setup, the structure of an extension, and the various components involved. Whether you’re a developer looking to create your first extension or an entrepreneur with a brilliant idea for a Chrome extension, this guide will provide you with the necessary knowledge to get started.
So, let’s dive in and embark on this exciting journey of creating Chrome extensions!
Benefits of Creating Chrome Extensions
Creating Chrome extensions offers a multitude of benefits for developers and entrepreneurs alike. Let’s explore some of the advantages of venturing into the world of Chrome extension development.
1. Enhanced User Experience: By developing Chrome extensions, you have the power to enhance users’ browsing experiences. You can provide useful features, improve productivity, and tailor the browser to meet specific needs. Whether it’s simplifying complex tasks, blocking intrusive ads, or integrating useful tools, extensions can make browsing more enjoyable and efficient.
2. Monetization Opportunities: Chrome extensions provide various avenues for generating income. While some developers offer their extensions for free, others capitalize on premium features, in-app purchases, or advertising. This allows you to monetize your skills and effort, creating a potential source of passive income.
3. Showcasing Your Skills: Creating Chrome extensions is a fantastic way to showcase your programming prowess. It gives you the platform to demonstrate your technical expertise, innovative ideas, and problem-solving abilities. This can be valuable when building your professional portfolio or seeking employment opportunities in the web development industry.
4. Networking and Collaboration: The Chrome extension development community is vibrant and supportive. Engaging in conversations, participating in forums, and contributing to open-source projects can help you network with like-minded developers. Collaborating on projects and sharing knowledge can foster personal growth and expand your professional connections.
5. Learning Opportunities: Developing Chrome extensions allows you to acquire new skills and knowledge. You can explore diverse technologies such as HTML, CSS, JavaScript, and Chrome APIs. Building extensions encourages experimentation, problem-solving, and critical thinking – all essential skills for any developer.
6. Reach a Global Audience: The Chrome Web Store provides a platform for you to distribute your extensions to a vast global audience. Users from around the world can discover, install, and benefit from your creations. This global reach offers immense exposure and potential recognition for your work.
7. Solve Real-World Problems: Chrome extensions can address specific pain points or challenges faced by users. Whether it’s automating repetitive tasks, improving security, or streamlining workflows, extensions have the potential to make a meaningful impact in users’ lives. This sense of purpose and accomplishment can be incredibly fulfilling.
8. Stay Up-to-Date with Web Technologies: In the rapidly evolving world of web development, creating Chrome extensions enables you to stay current with the latest technologies and trends. You’ll be exposed to the newest features and APIs offered by the Chrome browser, keeping your skills sharp and relevant.
With these exciting benefits, it’s no wonder that creating Chrome extensions has gained popularity among developers and entrepreneurs alike. Whether you’re looking to make a profit, showcase your skills, or enhance users’ online experiences, the world of Chrome extension development is full of possibilities.
Getting Started with Chrome Extensions
If you’re ready to dive into the world of Chrome extension development, let’s get started with the essential steps to set up your environment and begin creating your first extension.
1. Install Google Chrome: The first step is to ensure you have the latest version of Google Chrome installed on your computer. Chrome extensions are designed to work specifically with the Chrome browser, so having it installed is crucial.
2. Set Up a Development Environment: To create Chrome extensions, you’ll need a code editor for writing your extension’s code. Popular options include Visual Studio Code, Sublime Text, or Atom. Choose the code editor that you’re most comfortable with and ensure it’s installed and ready to use.
3. Obtain Knowledge of Web Technologies: Chrome extensions primarily rely on web technologies such as HTML, CSS, and JavaScript. Having a solid understanding of these languages will greatly benefit your extension development journey. If you’re new to web development, consider taking online courses or tutorials to acquire the necessary skills.
4. Familiarize Yourself with Chrome Extension Structure: Chrome extensions have a specific structure consisting of various components. These include the manifest file, content scripts, background scripts, HTML, and CSS files, among others. Take some time to familiarize yourself with these components and how they interact with each other.
5. Explore Chrome Extension Documentation: The Chrome Extension Developer Guide is an invaluable resource that provides detailed documentation on how to develop Chrome extensions. It covers a wide range of topics, from the basics of extension structure to advanced concepts like permissions and debugging. Refer to the documentation whenever you have questions or need guidance.
6. Start with Simple Examples: To gain hands-on experience, start with simple examples and gradually work your way up to more complex extensions. The Chrome Extension Samples repository on GitHub provides a collection of sample extensions with well-documented code. Analyzing these examples will give you insights into best practices and help you understand how things work.
7. Join Developer Communities: Engaging with fellow Chrome extension developers can be incredibly helpful. Participate in forums, discussion boards, and developer communities to share knowledge, exchange ideas, and seek assistance when needed. The Chrome Developers Google Group is a great place to connect with experienced developers.
8. Test and Debug Your Extension: As you develop your extension, it’s essential to test and debug it to ensure its functionality and resolve any issues. Chrome provides various tools like the Chrome DevTools and the Chrome Extension Debugger to aid in testing and debugging. Utilize these tools to fine-tune your extension and ensure it works as intended.
By following these steps, you’ll be well on your way to creating your first Chrome extension. Remember to start small, gain a solid understanding of the extension structure, and leverage the available resources and developer communities.
Now that you have the foundation, let’s explore the various components of a Chrome extension and learn how they work together to create a powerful and functional extension.
Setting Up Your Environment
Before you start creating your Chrome extension, it’s important to set up your development environment. Here are the essential steps to get your environment ready for extension development.
1. Install a Code Editor: Choose a code editor that suits your preferences and install it on your computer. Popular code editors for web development include Visual Studio Code, Sublime Text, and Atom. These editors provide powerful features, syntax highlighting, and extensions that can assist you in writing clean and efficient code.
2. Install Chrome Extension Development Tools: To make your extension development process smoother, you’ll need to install a few tools specifically designed for Chrome extensions. The following tools are highly recommended:
- Chrome Browser: Make sure you have the latest version of Google Chrome installed on your computer. This will enable you to test and see the changes in real-time as you develop your extension.
- Chrome Developer Tools: This built-in tool in Chrome allows you to inspect and debug web pages and your extension. It will be invaluable during the development process to identify and fix any issues that arise.
- Chrome Extension Developer Mode: Enable Developer Mode in Chrome to load and test your extension directly from your local machine. This mode allows you to install and uninstall your extension easily.
3. Set Up a Project Folder: Create a dedicated folder on your computer where you will store all the files related to your Chrome extension. This folder will help keep your project organized and easily accessible.
4. Acquire Web Development Skills: A solid understanding of web technologies is essential for Chrome extension development. Take the time to familiarize yourself with HTML, CSS, and JavaScript. These languages form the backbone of a Chrome extension and will be used to create the user interface and implement functionality.
5. Learn Chrome Extension APIs: Chrome provides various APIs that allow your extension to interact with the browser and its features. Familiarize yourself with the available APIs and their capabilities. The Chrome Extensions API documentation is a valuable resource for learning about the different APIs and how to utilize them in your extension.
6. Install Extensions for Development: There are several Chrome extensions available that can aid in your development process. Consider installing extensions like “Chrome Extensions Reloader” to help automatically reload your extension when changes are made and “JSON Formatter” to easily read and manipulate JSON data.
By following these steps, you’ll have a well-equipped development environment ready for creating your Chrome extension. Remember to regularly update your tools and stay up-to-date with the latest web development best practices and Chrome extension guidelines. Now that your environment is set up, let’s move on to understanding the anatomy of a Chrome extension.
Anatomy of a Chrome Extension
To create a successful Chrome extension, it’s important to understand its structure and the different components that make up an extension. Let’s explore the anatomy of a Chrome extension.
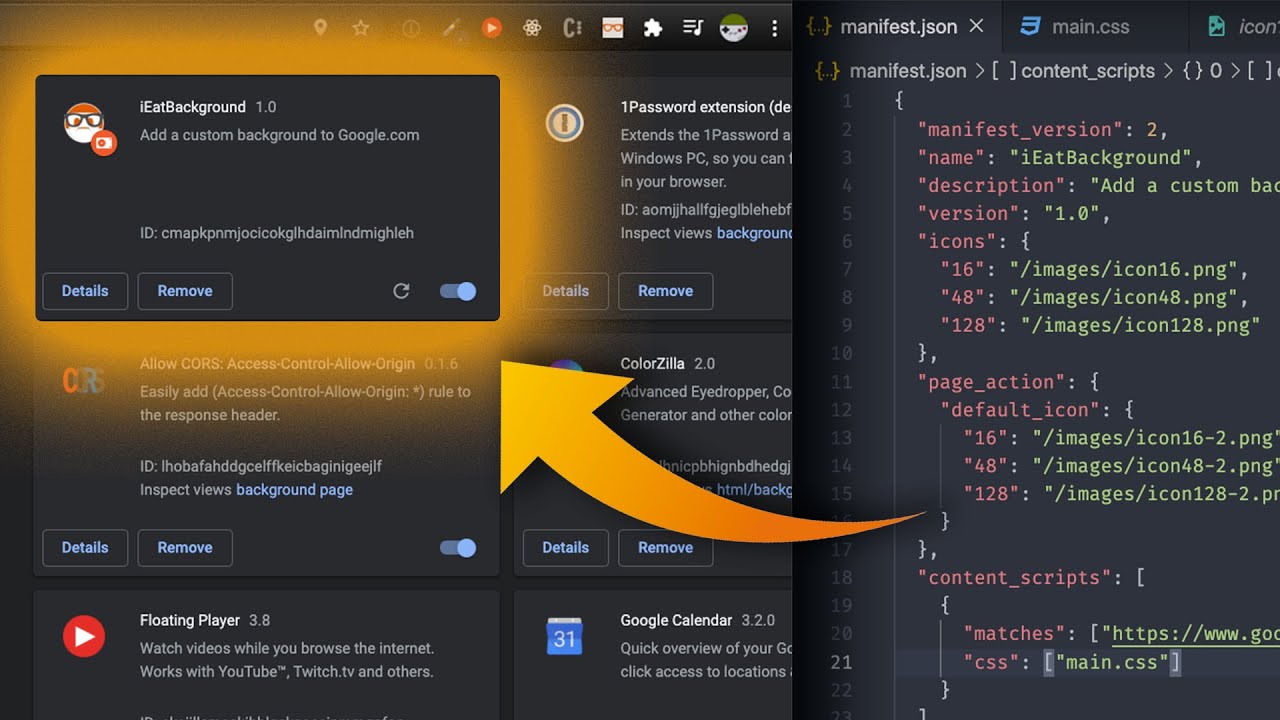
1. Manifest File: The manifest.json file is a crucial component of a Chrome extension. It acts as the “blueprint” for your extension and contains essential information such as the extension’s name, version, description, permissions, and background scripts. This file is responsible for defining the extension’s behavior and features.
2. Content Scripts: Content scripts enable you to interact with web pages and modify their appearance or behavior. These scripts run in the context of the web page and can manipulate the DOM, inject CSS styles, or listen for events. Content scripts are specified in the manifest file and are used to extend and customize the functionality of web pages.
3. Background Scripts: Background scripts run separately from the web page and can perform tasks in the background, even when the extension’s popup or options page is not open. They handle events, manage communication between different parts of the extension, and perform tasks that require continuous running, such as interacting with APIs or monitoring browser events.
4. User Interface (UI): The user interface refers to the visual elements of the extension that users interact with. It includes the extension’s popup, options page, and any UI components like buttons, menus, forms, or notifications. The UI is created using HTML, CSS, and JavaScript and is specified in the manifest file.
5. Icons and Images: Icons and images play a vital role in the visual representation of your extension. You will need to include icons of different sizes and resolutions to ensure your extension looks visually appealing and professional. Icons are specified in the manifest file and should adhere to the Chrome extension icon guidelines.
6. Permissions: Chrome extensions require explicit permissions to access certain resources or interact with specific features of the browser. Permissions are declared in the manifest file and can include access to websites, browsing history, tabs, bookmarks, or other sensitive data. It’s important to request only the necessary permissions to maintain user trust and privacy.
7. Options Page: An options page allows users to configure settings and personalize the extension based on their preferences. It provides a user-friendly interface where users can modify various aspects of the extension, such as enabling or disabling specific features, adjusting behavior, or entering custom data. The options page is typically created using HTML, CSS, and JavaScript.
8. Internationalization: Internationalization is the process of adapting an extension for multiple languages and regions. Chrome provides support for localization by allowing you to define and include string resources for different languages. This ensures that your extension can reach a global audience and provide a localized experience for users.
Understanding the different components of a Chrome extension and how they interact with each other is crucial for successful extension development. Now that we have explored the anatomy of a Chrome extension, let’s dive into the process of creating the manifest.json file, which serves as the foundation for your extension.
Creating the manifest.json file
The manifest.json file is a crucial component of a Chrome extension, serving as the blueprint that outlines the extension’s structure, functionality, and permissions. Let’s explore the steps involved in creating the manifest.json file for your Chrome extension.
1. Start with the Essentials: Begin by defining the basic information about your extension. Include the name, version, and description of your extension in the manifest.json file. This information will be displayed to users in the Chrome Web Store and when they install the extension.
2. Add Permissions: Declare the necessary permissions that your extension requires to function properly. Permissions include access to specific websites, tabs, bookmarks, the clipboard, or other browser resources. Be mindful of requesting only the permissions that are essential for your extension’s functionality to ensure user privacy and security.
3. Specify Icons and Images: Include icons of different sizes in your extension to ensure a visually appealing presentation. Specify the icons in the manifest.json file using the “icons” property. The icons should adhere to the Chrome extension icon guidelines to ensure a consistent and professional look.
4. Define Content Scripts: If your extension requires interaction with web pages, specify the content scripts in the manifest.json file. Content scripts enable you to modify web pages, access the DOM, inject CSS styles, or interact with page events. Specify the URLs or patterns of web pages where the content scripts should be injected.
5. Include Background Scripts: If your extension requires continuous running tasks or handling events in the background, include background scripts in the manifest.json file. Background scripts are separate from the web page and can perform tasks even when the extension’s popup or options page is closed.
6. Add Browser Actions or Page Actions: If you want to create a visible user interface for your extension, consider adding browser actions or page actions. Browser actions typically appear in the Chrome toolbar, allowing users to interact with your extension. Page actions are specific to certain web pages and appear in the Chrome toolbar when relevant.
7. Configure Options Page: If your extension requires user configuration, provide an options page where users can adjust settings and personalize the extension. Specify the URL or HTML file for the options page in the manifest.json file and create the page using HTML, CSS, and JavaScript.
8. Internationalize Your Extension: If you plan to localize your extension for multiple languages, define the language resources in the manifest.json file. This allows users to use your extension in their preferred language, enhancing the accessibility and usability of your extension for a global audience.
Remember to validate your manifest.json file using the Chrome Extension Validator or an online JSON validator to ensure it is semantically correct and error-free. Pay attention to any warnings or errors during validation and address them accordingly.
Creating the manifest.json file sets the foundation for your Chrome extension. It defines the extension’s characteristics, permissions, and functionality. With the manifest.json file in place, you’re ready to proceed with creating the content scripts, background scripts, user interface, and other components that make up your extension’s functionality.
Using Content Scripts
Content scripts are a powerful feature of Chrome extensions that allow developers to interact with web pages and modify their appearance and behavior. Let’s explore how to use content scripts effectively in your Chrome extension.
1. Defining the Content Script: Start by specifying the content script in the manifest.json file. Define which web pages or URLs the content script should be injected into using the “matches” property. This ensures that the content script is only injected into the pages where it is needed.
2. Manipulating the DOM: Content scripts have direct access to the Document Object Model (DOM) of the web page. This allows you to interact with and modify the web page’s structure, elements, and styles. You can dynamically add or remove elements, modify existing ones, or change the layout and appearance of the web page.
3. Listening for Page Events: Content scripts can listen for various events occurring on the web page, such as clicks, form submissions, or changes in the DOM. You can use event listeners to trigger actions or modify the page based on user interactions. For example, you can listen for the click event on a button and perform a specific action when it is clicked.
4. Injecting CSS: In addition to modifying the DOM, content scripts can inject custom CSS styles to change the appearance of the web page. This allows you to customize the styling of specific elements, hide or highlight certain content, or override existing styles to achieve the desired visual effect.
5. Communicating with Background Scripts: Content scripts can communicate with the background script of your extension, enabling communication between different components. This allows you to send messages, share data, or trigger actions in the background script based on events or user interactions in the content script.
6. Handling Cross-Origin Restrictions: Content scripts are subject to cross-origin restrictions, meaning they can only interact with web pages from the same origin as the extension. To interact with web pages from different origins, you may need to use the extension’s background script as a mediator or leverage cross-origin messaging techniques like postMessage.
7. Managing Execution Order: Content scripts are executed in the context of the web page and may have dependencies on other scripts or libraries. Make sure to consider the execution order of your content scripts to ensure that all necessary scripts are loaded before your content script starts executing.
8. Testing and Debugging: During the development process, it’s crucial to test and debug your content scripts to ensure their functionality and identify any issues. You can use the Chrome Developer Tools to inspect the DOM, monitor events, and debug JavaScript code in your content script. Utilize console.log statements and breakpoints to troubleshoot and fix any errors encountered.
By effectively utilizing content scripts, you can extend and enhance the functionality of web pages within your Chrome extension. Content scripts provide the means to interact with the DOM, modify appearance, listen for events, and communicate with other components of your extension. Understanding and utilizing content scripts will help you create powerful and dynamic extensions that transform the browsing experience for your users.
Creating HTML and CSS for your Extension
When developing a Chrome extension, creating engaging and visually appealing user interfaces is essential to attract and retain users. Let’s explore the key aspects of creating HTML and CSS for your extension to provide a seamless and enjoyable user experience.
1. Plan the User Interface: Begin by planning the layout and structure of your extension’s user interface. Consider the functionality, features, and content you want to include. Sketch out wireframes or create a design mockup to visualize the placement of elements and the overall look and feel.
2. Use HTML for Structure: HTML serves as the backbone of web pages and extensions. Use HTML to define the structure of your extension’s user interface. Identify the different sections and components that make up your extension and create HTML elements accordingly. Use semantic HTML tags to provide meaning and improve accessibility.
3. Enhance with CSS Styling: CSS allows you to style and customize the appearance of your extension. Write CSS rules to define the colors, fonts, sizes, and positioning of elements. Use CSS classes and selectors to target specific elements and apply styles accordingly. Consider using CSS frameworks such as Bootstrap or Materialize to streamline the styling process and ensure a consistent visual design.
4. Be Responsive: Ensure your extension’s user interface is responsive and adapts to different screen sizes and resolutions. Use CSS media queries to adjust the layout, font sizes, and element positioning based on the device or viewport dimensions. This ensures a seamless user experience across desktop and mobile devices.
5. Keep it Simple and Intuitive: Prioritize simplicity and ease of use in your extension’s user interface. Avoid clutter and unnecessary elements that can overwhelm users. Ensure clear and intuitive navigation, concise instructions, and straightforward interactions. Strive for a clean and minimalist design that promotes effortless user engagement.
6. Implement Interactive Elements: Make your extension more user-friendly and interactive by incorporating JavaScript functionality. Use JavaScript to add interactivity to buttons, form submissions, or other user input elements. Implement event handlers to respond to user actions and provide real-time feedback or perform actions based on user interactions.
7. Leverage Animation and Transitions: Add subtle animations and transitions to enhance the visual experience of your extension. Use CSS transitions or animation libraries like Animate.css to create smooth transitions, fade-ins, or sliding effects. Be mindful not to overuse animations, as they should support the user experience rather than distract or slow down the interface.
8. Test and Refine: Regularly test your HTML and CSS in different environments and browsers to ensure consistent rendering. Validate your HTML markup using tools like the W3C HTML Validator to spot any potential errors or issues. Seek feedback from users or colleagues to gather insights on the usability, accessibility, and visual appeal of your extension’s interface.
By applying effective HTML and CSS techniques, you can create a visually appealing and user-friendly interface for your Chrome extension. Remember to focus on simplicity, responsiveness, and intuitive design while leveraging interactive elements and subtle animations. Regular testing and refinement will help ensure that your users have a seamless and delightful experience with your extension.
Using Background Scripts
Background scripts are an integral part of Chrome extensions, enabling developers to perform tasks that run in the background and provide continuous functionality. Let’s explore how to effectively use background scripts in your Chrome extension.
1. Defining the Background Script: Specify the background script in the manifest.json file of your extension. The background script is responsible for handling events, managing communication between different components of your extension, and executing tasks that require continuous running.
2. Handling Extension Events: Background scripts can listen for various extension events, such as when the extension is installed, uninstalled, or updated. Utilize event listeners to respond to these events and run appropriate actions or routines. This allows you to initialize your extension’s state, perform necessary setup, or clean up resources when needed.
3. Managing Communication: Background scripts facilitate communication between different parts of your extension, such as content scripts, popup pages, or options pages. Use message passing techniques to send and receive messages between background scripts and other components. This enables you to sync data, trigger actions, or exchange information in real-time.
4. Interacting with Browser APIs: Background scripts have access to a wide range of Chrome browser APIs, allowing you to interact with browser features and functionality. Utilize these APIs to perform tasks like manipulating tabs, accessing browser history, capturing screenshots, or interacting with bookmarks. Leverage the available APIs to extend the capabilities of your extension and provide enhanced functionality.
5. Offloading Heavy Tasks: Background scripts are particularly useful for offloading heavy or time-consuming tasks from content scripts or other components. By delegating resource-intensive operations to the background script, you can prevent performance issues and keep the user interface responsive. This is especially important for tasks like data processing, network requests, or API interactions.
6. Working with Persistent Data: Background scripts can maintain persistent data and state throughout the lifespan of your extension. Utilize local storage, sync storage, or other external storage options provided by Chrome to store and retrieve data as needed. This allows you to retain user preferences, settings, or cached information that can be accessed across different sessions and components of your extension.
7. Debugging and Error Handling: During development, it’s crucial to monitor background script behavior and handle errors effectively. Utilize console.log statements or the Chrome Developer Tools console to log relevant information and debug your background script. Implement error handling mechanisms to gracefully handle unexpected situations or API failures.
8. Testing and Optimization: Regularly test your background script to ensure its functionality and performance. Test scenarios with varying workloads, data sizes, and browser conditions to identify and address potential bottlenecks or performance issues. Optimize your background script code by utilizing asynchronous operations, minimizing unnecessary calculations, and avoiding excessive CPU or memory usage.
By effectively utilizing background scripts, you can enhance the functionality and performance of your Chrome extension. Leveraging events, communication, and browser APIs in the background script enables seamless interaction between different components and provides continuous functionality to users. Remember to test, debug, and optimize your background script to ensure a smooth and efficient user experience.
Adding Permissions to Your Extension
Permissions in Chrome extensions ensure that users grant explicit access to specific resources or features required by your extension. It’s important to request only the necessary permissions to maintain user trust and protect their privacy. Let’s explore how to add permissions to your Chrome extension effectively.
1. Identify Required Permissions: Determine the permissions your extension will need to access specific resources or interact with certain features. Consider the functionality of your extension and the APIs it will utilize. Examples of common permissions include accessing web pages, capturing screenshots, managing bookmarks, or interacting with browser tabs.
2. Add Permissions to manifest.json: Specify the required permissions in the manifest.json file of your extension. Use the “permissions” field to list the permissions your extension needs. Ensure that each permission is declared as a string value within square brackets.
3. Request the Minimum Required Permissions: Request only the permission(s) essential for your extension’s core functionality. Excessive or unnecessary permissions may raise user concerns and lead to a decrease in trust and user adoption. Be transparent with users about why your extension needs specific permissions and how it benefits their experience.
4. Request Optional Permissions Dynamically: If your extension requires additional permissions for optional features or functionality, consider requesting them dynamically. By implementing a permission request flow within your extension’s user interface, users can grant or deny optional permissions based on their preferences and needs.
5. Handle Permission Changes: Be prepared to handle scenarios where users grant or revoke permissions after installing your extension. Monitor the status of permissions using the chrome.permissions API and adjust your extension’s behavior accordingly. Communicate with users effectively when permissions change to ensure a smooth and consistent user experience.
6. Test Permission Restrictions: During the development and testing phase, simulate scenarios where users deny certain permissions to ensure your extension gracefully handles these situations. Verify that your extension provides informative messages or alternative workflows when required permissions are not granted, ensuring a seamless user experience even in restricted conditions.
7. Update Permissions with Caution: If you need to modify or add permissions to your extension after its initial release, exercise caution and thoroughly consider the implications. Requesting additional permissions might require users to re-evaluate their trust in your extension. Transparently communicate the reason for the requested changes and provide clear instructions for users who might need to manually update their permissions.
8. Be Mindful of User Privacy: Respect user privacy and ensure that your extension requests permissions only for legitimate purposes. Avoid collecting or misusing sensitive user data without their explicit consent. Regularly review and update your privacy policy to align with any changes in permissions or data handling practices.
By carefully selecting and managing permissions in your Chrome extension, you can provide a trustworthy and user-centric experience. Request only the necessary permissions, implement dynamic permission requests where appropriate, and handle permission changes gracefully. Prioritize user privacy and convey the value and benefits of the permissions you request to establish and maintain user trust.
Testing and Debugging your Extension
Thorough testing and effective debugging are essential for ensuring the functionality, stability, and quality of your Chrome extension. Let’s explore some key practices and tools to help you test and debug your extension effectively.
1. Manual Testing: Start by manually testing your extension to confirm that it functions as intended. Interact with the user interface, trigger various actions and scenarios, and verify that the expected results are produced. Test across different browsers, devices, and operating systems to ensure cross-compatibility.
2. Automated Testing: Consider implementing automated tests to streamline the testing process and catch potential issues more efficiently. Use testing frameworks such as Selenium, Puppeteer, or Jasmine to automate repetitive tasks, simulate user interactions, and validate the expected behavior of your extension.
3. Test Different Contexts: Test your extension in different contexts to ensure compatibility and robustness. For example, test in Incognito mode, within frames or iframes, or with other extensions installed. This helps uncover potential conflicts or limitations that may arise in specific contexts.
4. Utilize Chrome Developer Tools: Chrome Developer Tools is a powerful debugging toolset that can assist you throughout the development process. Utilize features like the Console, Network panel, Elements panel, and Debugger to inspect, debug, and troubleshoot your extension’s code and behavior.
5. Logging and Console Output: Incorporate console.log statements strategically throughout your extension’s code to output relevant information. Use console.log to monitor the flow of data, detect potential errors, or trace the execution of your code. Leverage the Chrome Developer Tools console to view and analyze these logs.
6. Test Data Handling: Test how your extension handles a variety of data scenarios. Validate how your extension handles data inputs, manipulates data, stores data, and retrieves data from external sources. Ensure data consistency, integrity, and proper error handling in various data scenarios.
7. Handle Exceptions and Errors: Implement effective error handling mechanisms to gracefully handle exceptions and errors that may arise during development and usage. Utilize try-catch blocks and error handling routines to prevent crashes, display informative error messages, and log detailed error information when needed.
8. Beta Testing and User Feedback: Engage in beta testing by releasing your extension to a select group of users for feedback. Gather insights, address user concerns or issues promptly, and iterate based on the feedback received. Encourage user feedback through reviews, surveys, or support channels to gain valuable insights and improve the overall user experience.
9. Embrace Continuous Improvement: Treat testing and debugging as an ongoing process, even after your extension’s initial release. Continuously monitor user feedback, proactively address reported issues, and strive for continuous improvement. Regularly update and test your extension to ensure compatibility with new browser versions or changes in Chrome’s APIs and policies.
By incorporating rigorous testing and effective debugging practices, you can catch potential issues early on, ensure a smooth user experience, and maintain the quality of your Chrome extension. Utilize a combination of manual and automated testing, leverage Chrome Developer Tools, handle errors gracefully, and embrace user feedback to continually refine and enhance your extension.
Publishing Your Extension
Once you have developed and thoroughly tested your Chrome extension, it’s time to publish it to the Chrome Web Store and make it available to a wider audience. The publishing process involves a few key steps to ensure a successful launch. Let’s explore how to effectively publish your extension.
1. Review the Chrome Web Store Policies: Familiarize yourself with the Chrome Web Store Developer Program Policies to ensure that your extension complies with all the guidelines. Pay close attention to policies regarding prohibited content, user data handling, and functionality requirements.
2. Prepare Your Extension Package: Prepare your extension package by bundling all the necessary files and assets into a compressed ZIP or CRX file. Be sure to include all the required files such as manifest.json, HTML, CSS, JavaScript, and any additional resources or icons.
3. Create a Developer Account: Sign up for a Chrome Developer Account on the Chrome Web Store Developer Dashboard. This account allows you to upload and manage your extensions on the Chrome Web Store. Provide the necessary information and complete the registration process.
4. Fill in Extension Details: In the Developer Dashboard, provide essential details about your extension, including its name, description, category, and supported languages. Craft a compelling and informative description that accurately highlights the features and benefits of your extension.
5. Upload and Publish: Upload your extension package to the Developer Dashboard. Follow the instructions provided to fill in any additional details and complete the publication process. Review all the information for accuracy before publishing your extension to the Chrome Web Store.
6. Test Deployment: After publishing your extension, test its installation and functionality on different devices and with different user accounts. Ensure that everything is working as expected, and verify that the extension is properly displayed in the Chrome Web Store.
7. Promote Your Extension: Create a marketing strategy to promote your Chrome extension. Leverage social media platforms, your website, or your existing user base to increase awareness and drive downloads. Consider creating a website or landing page specifically for your extension, highlighting its features, and providing support documentation.
8. Engage with User Feedback: Be attentive and responsive to user feedback and reviews on the Chrome Web Store. Address issues, questions, and feature requests promptly to build a positive reputation among users. Continuously monitor feedback to gain insights, prioritize improvements, and enhance the user experience.
9. Update and Maintain: Regularly update and maintain your extension to address bugs, introduce new features, or ensure compatibility with browser updates. Stay up-to-date with the latest Chrome Developer guidelines, policies, and API changes to keep your extension in good standing and maximize its reach.
By following these steps, you can successfully publish your Chrome extension to the Chrome Web Store and make it available to a wider audience. Keep in mind that continuously refining your extension, engaging with user feedback, and promoting your extension are ongoing processes that contribute to the success and growth of your extension.
Conclusion
Congratulations on completing this comprehensive guide to creating and publishing Chrome extensions! Throughout this journey, we have explored the benefits of developing extensions, setting up the development environment, understanding the anatomy of a Chrome extension, and implementing various components like content scripts, background scripts, and user interfaces.
By creating Chrome extensions, you have the opportunity to enhance users’ browsing experiences, showcase your skills as a developer, and potentially generate income. Remember to prioritize user experience, simplicity, and privacy in your extension’s design and functionality. Regularly test, debug, and optimize your extension to ensure its reliability and performance.
When it comes to publishing your extension, carefully review the Chrome Web Store policies, fill in all the necessary details, and promote your extension effectively. Engage with user feedback and continuously update and maintain your extension to ensure its relevance and success in the ever-evolving landscape of web development.
As you continue on your journey as a Chrome extension developer, continue learning, exploring new features and APIs, and staying informed about the latest web development trends. Leverage the vibrant developer community, engage in discussions, and collaborate with fellow developers to expand your skills and knowledge.
Remember, the possibilities with Chrome extensions are vast. Whether you’re building a productivity tool, a game, a social media enhancement, or a creative utility, the ability to create extensions empowers you to make a meaningful impact and provide added value to users’ browsing experiences.
So, go ahead and bring your innovative ideas to life, create compelling and functional Chrome extensions, and make your mark in the dynamic world of web development!