Introduction
Creating a browser extension can significantly enhance your browsing experience by adding custom functionalities and features to your favorite web browser. Whether you want to streamline repetitive tasks, block distracting content, or access specific tools directly from your browser, developing your own extension can provide a tailored solution to meet your unique needs.
Browser extensions, also known as add-ons or plugins, are small software programs that modify and enhance the functionality of web browsers. They can be designed to perform a wide range of tasks, such as altering the appearance of web pages, automating tasks, integrating with third-party services, or providing quick access to information.
By creating your own extension, you have the freedom to customize your browsing experience according to your preferences. Whether you are a developer looking to streamline your workflow, a student seeking to optimize research processes, or a casual user interested in enhancing your browsing experience, the ability to craft your own extension empowers you to tailor your browser to suit your specific needs.
In this comprehensive guide, we will walk you through the process of creating a Chrome extension, from setting up your development environment to packaging and publishing your extension. By following these steps, you will gain a deeper understanding of the intricacies involved in extension development and be well-equipped to bring your ideas to life in the form of a functional and impactful browser extension.
So, let's embark on this exciting journey of creating a Chrome extension, where you will harness your creativity and technical skills to build a powerful tool that enhances your browsing experience and potentially benefits other users in the vast online community.
Step 1: Set Up Your Development Environment
Setting up your development environment is the crucial first step in creating a Chrome extension. This process involves preparing the necessary tools and resources to facilitate the smooth development and testing of your extension. Here's a detailed guide on how to set up your development environment for Chrome extension creation:
-
Install a Text Editor: Begin by selecting a reliable text editor that suits your preferences and supports coding in HTML, CSS, and JavaScript. Popular choices include Visual Studio Code, Sublime Text, and Atom. These editors offer features such as syntax highlighting, code completion, and integrated terminal, which are essential for efficient development.
-
Download Google Chrome: If you don't already have Google Chrome installed on your computer, download and install the latest version. This will serve as the primary platform for testing and debugging your Chrome extension during the development process.
-
Set Up Chrome Developer Tools: Familiarize yourself with Chrome's developer tools, which provide a comprehensive set of utilities for debugging, profiling, and analyzing web pages. Access these tools by right-clicking on any web page, selecting "Inspect," and navigating to the "Console" tab. Understanding and utilizing these tools will be invaluable as you develop and troubleshoot your extension.
-
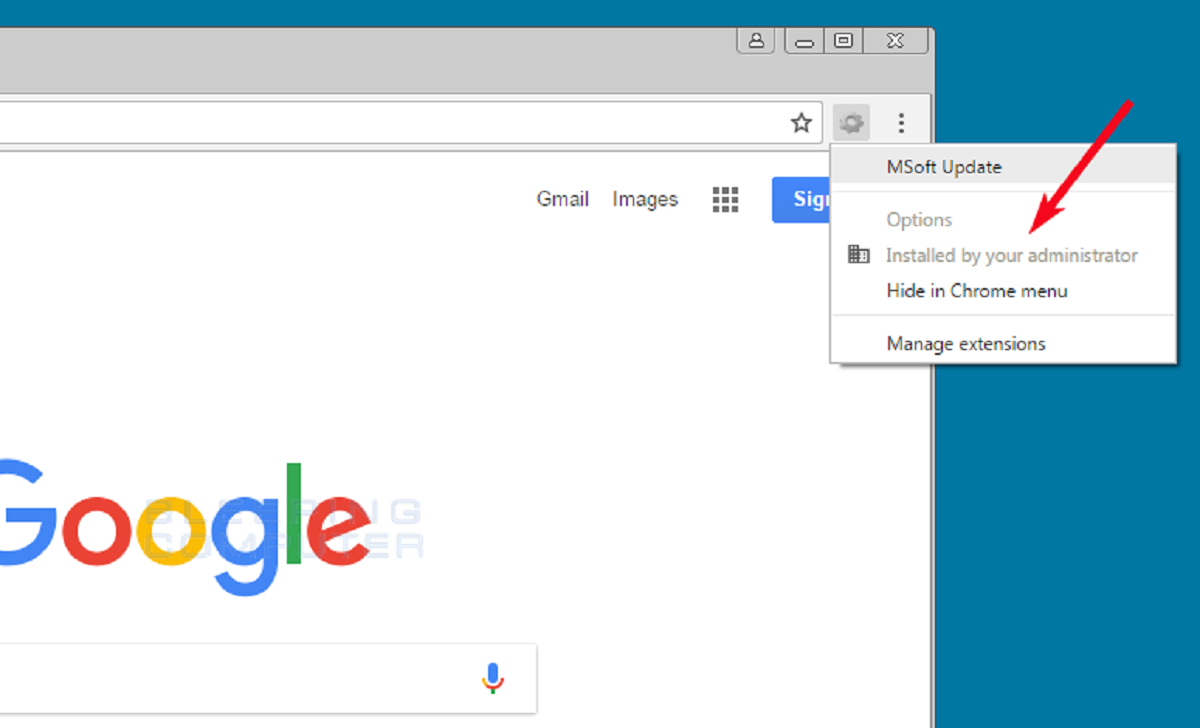
Enable Developer Mode in Chrome: To enable the development of extensions, you need to activate the Developer Mode in Chrome. This can be done by navigating to the "Extensions" page within Chrome, located under the "More Tools" menu. Once there, toggle the "Developer mode" switch to the on position.
-
Create a Workspace: Organize your development files into a dedicated workspace or folder on your computer. This will help maintain a structured approach to your extension's code and resources, making it easier to manage and modify as you progress with the development.
-
Set Up a Version Control System: Consider using a version control system such as Git to track changes and collaborate with others on your extension's codebase. Platforms like GitHub and Bitbucket offer hosting services for Git repositories, allowing you to store and manage your code securely.
By following these steps to set up your development environment, you will establish a solid foundation for creating your Chrome extension. With the necessary tools and resources in place, you are now ready to delve into the exciting process of crafting the functionality and features that will define your extension's unique value proposition.
Step 2: Create a Manifest File
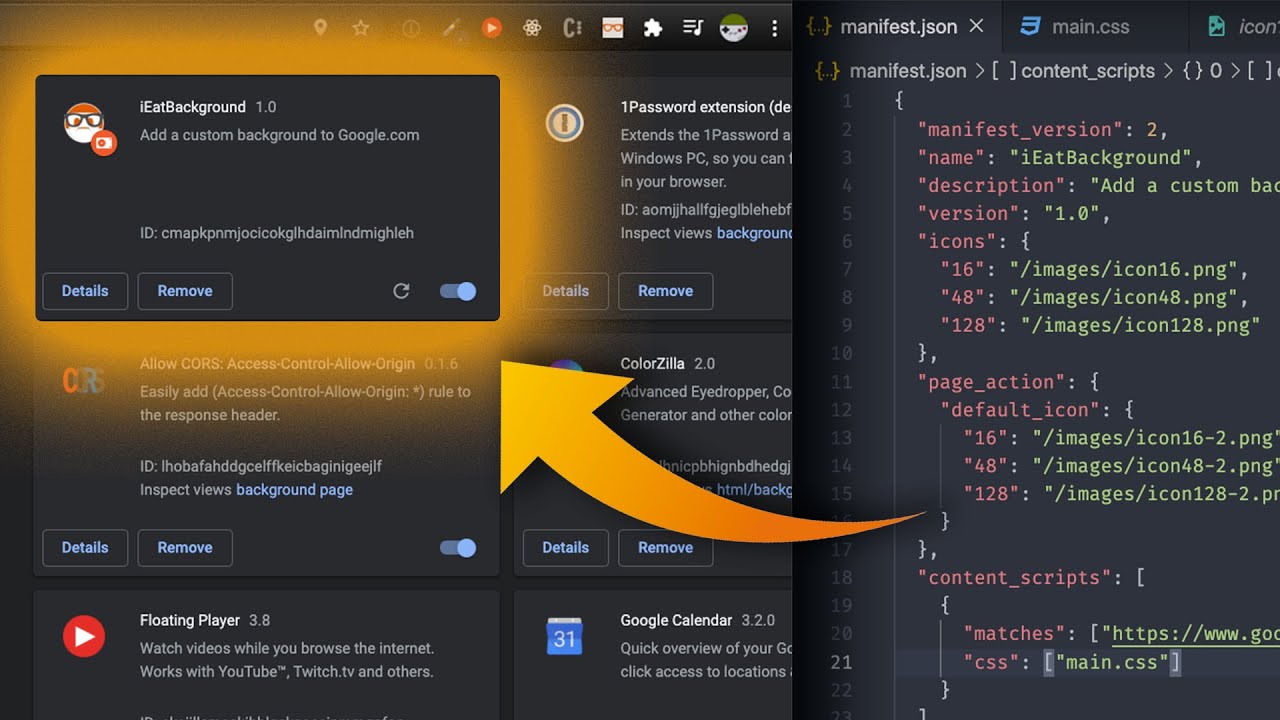
The manifest file serves as the backbone of your Chrome extension, providing essential metadata and configuration details that define its behavior and functionality. This file, named manifest.json, acts as a roadmap for Chrome, outlining how the extension should be handled, its permissions, and its various components. Here's a detailed breakdown of the key elements involved in creating the manifest file for your Chrome extension:
Understanding the Structure
The manifest file is a JSON (JavaScript Object Notation) file that encapsulates crucial information about your extension. It consists of various fields, each serving a specific purpose in defining the extension's behavior and capabilities. These fields include the extension's name, version, description, permissions, content scripts, background scripts, and more.
Defining Basic Information
Begin by specifying fundamental details such as the extension's name, version, and description within the manifest file. The name should be concise and reflective of the extension's purpose, while the version number should follow the semantic versioning format (e.g., 1.0.0). Additionally, a clear and informative description will help users understand the extension's functionality and benefits.
Declaring Permissions
Permissions define the level of access the extension has to various browser features and external resources. Whether it's accessing tabs, managing bookmarks, or communicating with external servers, permissions play a critical role in ensuring the extension functions as intended without compromising user privacy and security. Carefully consider the permissions required by your extension and declare them within the manifest file.
Configuring Content Scripts
Content scripts enable the extension to interact with and modify the content of web pages. These scripts can manipulate the DOM (Document Object Model) of web pages to achieve specific functionalities, such as injecting custom styles, modifying page elements, or capturing data. By configuring content scripts in the manifest file, you define where and how these scripts should be injected into web pages.
Implementing Background Scripts
Background scripts, also known as background pages, facilitate persistent operations and event handling for the extension. They run in the background, independent of any specific web page, and can perform tasks such as monitoring tab changes, handling network requests, and managing extension state. By specifying background scripts in the manifest file, you establish the core functionality and event-driven behavior of your extension.
Incorporating Icons and Resources
Icons and other resources, such as images and localized assets, are integral to the visual representation and usability of your extension. Including these resources in the manifest file ensures that the extension's icon is displayed consistently across different interfaces, such as the browser toolbar, extension management page, and notifications.
Validating the Manifest File
Once you have defined all the necessary components and details in the manifest file, it's crucial to validate its syntax and structure to ensure compliance with Chrome's extension development guidelines. Any errors or inconsistencies in the manifest file can lead to issues during the installation and execution of the extension, making thorough validation an essential step in the creation process.
By meticulously creating and configuring the manifest file for your Chrome extension, you establish a solid foundation for defining its functionality, permissions, and visual identity. This pivotal step sets the stage for the subsequent development and testing phases, where you will bring your extension to life and refine its capabilities to deliver a seamless and impactful browsing experience.
Step 3: Write Your Extension's Code
Writing the code for your Chrome extension is where your creative vision and technical expertise converge to bring your extension to life. This step involves crafting the functionality, behavior, and user interactions that define the core essence of your extension. Here's a detailed exploration of the key aspects involved in writing your extension's code:
Implementing Functionality
The heart of your extension lies in its functionality. Whether it's automating tasks, enhancing user interactions, or integrating with external services, the code you write will dictate how your extension behaves and the value it delivers to users. By leveraging HTML, CSS, and JavaScript, you can create intuitive user interfaces, manipulate web page content, and interact with browser APIs to achieve your desired functionalities.
Utilizing Content Scripts
Content scripts play a pivotal role in extending the capabilities of your extension to interact with web pages. By writing and implementing content scripts, you can dynamically modify the DOM of web pages, capture and process data, and inject custom styles and elements. This enables your extension to seamlessly integrate with web content and deliver tailored experiences to users based on their browsing activities.
Harnessing Background Scripts
Background scripts empower your extension to perform persistent operations and respond to events across the browsing session. Whether it's monitoring tab changes, managing network requests, or maintaining extension state, the code written in background scripts drives the core functionality and event-driven behavior of your extension. This behind-the-scenes processing ensures a seamless and responsive user experience.
Integrating Browser APIs
Chrome provides a rich set of APIs that enable your extension to access browser features and interact with the underlying platform. By utilizing APIs for tabs, storage, notifications, and more, you can enhance the capabilities of your extension and deliver a cohesive and integrated browsing experience. Writing code to interface with these APIs unlocks a myriad of possibilities for extending and customizing the browser environment.
Ensuring Security and Performance
As you write the code for your extension, it's essential to prioritize security and performance considerations. Implementing secure coding practices, handling user data responsibly, and optimizing the performance of your code will contribute to a trustworthy and efficient user experience. By adhering to best practices and guidelines, you can mitigate potential security risks and ensure that your extension operates seamlessly across diverse browsing scenarios.
Testing and Iterating
Throughout the code-writing process, testing and iteration play a crucial role in refining and enhancing your extension's functionality. Conduct thorough testing across various browsing scenarios, user interactions, and edge cases to identify and address any issues or inconsistencies. Iteratively refining your code based on testing feedback will lead to a robust and polished extension that delivers a seamless and reliable user experience.
By immersing yourself in the process of writing your extension's code, you have the opportunity to shape its capabilities and user interactions with precision and creativity. This phase of development lays the groundwork for the subsequent testing and refinement stages, where you will fine-tune your code to deliver a compelling and impactful browsing experience to users.
Step 4: Test Your Extension
Testing your Chrome extension is a critical phase that ensures its functionality, compatibility, and user experience meet the intended standards. Thorough testing not only validates the reliability of your extension but also uncovers potential issues and areas for improvement. Here's an in-depth exploration of the essential aspects involved in testing your Chrome extension:
Manual Testing
Conduct comprehensive manual testing across different browsing scenarios and user interactions to evaluate the extension's behavior and responsiveness. Verify that the core functionalities, user interface elements, and integration with browser features operate as intended. Test the extension across various websites and web applications to assess its compatibility and performance in diverse environments.
User Experience Testing
Put yourself in the shoes of the end user and assess the overall user experience provided by your extension. Evaluate the intuitiveness of the user interface, the clarity of instructions or prompts, and the impact of the extension on browsing workflows. Solicit feedback from potential users or colleagues to gain insights into their interactions with the extension and identify areas for enhancing the user experience.
Compatibility Testing
Verify the compatibility of your extension with different versions of Google Chrome to ensure consistent functionality across a broad user base. Test the extension on multiple devices and screen sizes to confirm its responsiveness and adaptability to diverse browsing environments. Additionally, assess the interaction of your extension with other installed add-ons or plugins to preempt any compatibility conflicts.
Error Handling and Edge Cases
Deliberately introduce edge cases and unexpected scenarios during testing to assess the robustness of your extension. Validate the error handling mechanisms, such as gracefully managing network errors, handling user input validation, and recovering from unexpected states. By addressing edge cases, you fortify your extension against potential failures and enhance its resilience in real-world usage.
Security and Privacy Assessment
Conduct a thorough security assessment to identify and address any vulnerabilities or privacy concerns within your extension. Scrutinize the handling of user data, interactions with external services, and adherence to Chrome's security best practices. By prioritizing security and privacy, you instill trust in users and safeguard their browsing experiences from potential risks.
Automation Testing
Consider implementing automated testing processes, such as unit tests and integration tests, to streamline the validation of your extension's functionalities. Automation testing can help identify regressions, validate complex interactions, and expedite the testing process, ultimately contributing to the overall reliability and stability of your extension.
By diligently testing your Chrome extension across these critical dimensions, you ensure that it delivers a seamless, secure, and impactful browsing experience to users. The insights gained from testing enable you to refine and optimize your extension, setting the stage for a successful deployment and widespread adoption within the vibrant ecosystem of Chrome extensions.
Step 5: Package and Publish Your Extension
Packaging and publishing your Chrome extension mark the culmination of your development journey, transforming your creation into a tangible asset that can benefit users across the web. This pivotal step involves preparing your extension for distribution, ensuring it meets the necessary guidelines, and making it accessible to a global audience. Here's a detailed exploration of the essential processes involved in packaging and publishing your Chrome extension:
Finalizing the Package
Before proceeding with the publication of your extension, it's crucial to finalize the package by ensuring that all necessary files, resources, and configurations are in place. This includes verifying the completeness and correctness of the manifest file, organizing the codebase and assets within the designated structure, and addressing any outstanding issues or bugs identified during testing.
Generating a Unique ID
Each Chrome extension requires a unique identifier, known as the extension ID, to distinguish it from other extensions within the Chrome Web Store. Generate a unique ID for your extension, ensuring that it adheres to the specified format and does not conflict with existing extensions. This ID serves as a fundamental identifier for your extension throughout its lifecycle.
Complying with Guidelines
Review and adhere to the Chrome Web Store's developer guidelines and policies to ensure that your extension meets the platform's requirements for publication. This includes complying with content policies, adhering to security best practices, and providing accurate and descriptive metadata for your extension.
Creating a Developer Account
To publish your extension on the Chrome Web Store, you need to create a developer account. This involves registering as a developer, agreeing to the developer agreement, and paying a one-time registration fee. Once your developer account is set up, you gain access to the Chrome Web Store Developer Dashboard, where you can manage and publish your extensions.
Packaging the Extension
Package your extension into a compressed .zip file containing all the necessary files, including the manifest file, codebase, assets, and any additional resources. This packaged file serves as the deployable unit of your extension and is required for submission to the Chrome Web Store.
Uploading to the Chrome Web Store
Navigate to the Chrome Web Store Developer Dashboard and initiate the process of uploading your packaged extension. Provide detailed information about your extension, including its name, description, screenshots, and categorization. Additionally, specify the countries where you intend to distribute your extension and configure pricing and payment settings if applicable.
Review and Publication
Submit your extension for review, during which the Chrome Web Store team assesses its compliance with guidelines and policies. Upon successful review, your extension is published to the Chrome Web Store, making it available for installation by users worldwide. Regularly monitor user feedback and engagement metrics to iterate and enhance your extension based on user insights.
By meticulously packaging and publishing your Chrome extension, you unlock its potential to reach and enrich the browsing experiences of users globally. This process marks the transition from development to deployment, empowering you to share your creation with the vast community of Chrome users and contribute to the diverse landscape of browser extensions.