Introduction
Are you looking for a simple and efficient way to convert HTML files to PDF format using Google Chrome? Whether you're a student, professional, or simply someone who frequently deals with web content, the ability to convert HTML to PDF can be incredibly useful. Fortunately, with the right tools and a few simple steps, you can accomplish this task seamlessly.
In this article, we will explore the process of converting HTML files to PDF using a Chrome extension. By following the steps outlined below, you'll be able to transform web pages, online articles, and other HTML content into PDF documents with ease. This method is not only convenient but also ensures that the original formatting and layout of the HTML content are preserved in the resulting PDF file.
So, if you're ready to streamline your workflow and gain the ability to create PDFs from HTML content directly within your Chrome browser, let's dive into the step-by-step process. Whether you're archiving web pages for future reference, sharing content in a more accessible format, or simply organizing digital information, this guide will equip you with the necessary knowledge to accomplish your goal.
Step 1: Install a Chrome Extension
To begin the process of converting HTML files to PDF in Google Chrome, the first step is to install a reliable Chrome extension that facilitates this functionality. One of the most popular and user-friendly extensions for this purpose is "Save as PDF," which seamlessly integrates into the Chrome browser and provides a straightforward solution for converting web content to PDF format.
Here's how you can install the "Save as PDF" extension:
-
Open Chrome Web Store: Launch your Google Chrome browser and navigate to the Chrome Web Store.
-
Search for the Extension: In the search bar located at the top left corner of the Chrome Web Store, type "Save as PDF" and press Enter. This will display a list of extensions related to PDF conversion.
-
Select the Extension: From the search results, identify the "Save as PDF" extension and click on it to access the extension's details and download page.
-
Add to Chrome: On the extension's page, click the "Add to Chrome" button. A confirmation dialog will appear, asking for your permission to add the extension to Chrome. Click "Add extension" to proceed.
-
Confirmation: Once the extension is successfully added, you will see its icon appear in the Chrome toolbar, indicating that it is now ready for use.
By following these simple steps, you can quickly install the "Save as PDF" extension and prepare your Chrome browser for effortless HTML to PDF conversion. With this extension in place, you'll have the necessary tool to seamlessly convert web pages, articles, and other HTML content to PDF format directly within your browser.
Now that you have successfully installed the Chrome extension, you are ready to proceed to the next step, where we will explore how to open the HTML file in Chrome and initiate the conversion process.
Step 2: Open the HTML File in Chrome
Now that you have successfully installed the "Save as PDF" extension, the next step is to open the HTML file in your Chrome browser. This process is straightforward and allows you to access the HTML content that you intend to convert to PDF format.
Here's how you can open the HTML file in Chrome:
-
Locate the HTML File: Begin by locating the HTML file on your computer or device. Whether it's a locally saved web page, an HTML document from your files, or content generated by a web application, ensure that you know the file's location and name.
-
Open Chrome Browser: Launch your Google Chrome browser by clicking on its icon in your taskbar or desktop. If Chrome is already open, ensure that you are on a new tab or a tab where you intend to view the HTML content.
-
Drag and Drop: One of the simplest methods to open an HTML file in Chrome is by using the drag-and-drop functionality. Simply navigate to the location of the HTML file in your file explorer or desktop, click and hold the file, then drag it into the Chrome browser window. Once the file is positioned over the browser window, release the mouse button to drop the file. Chrome will automatically load and display the HTML content from the file.
-
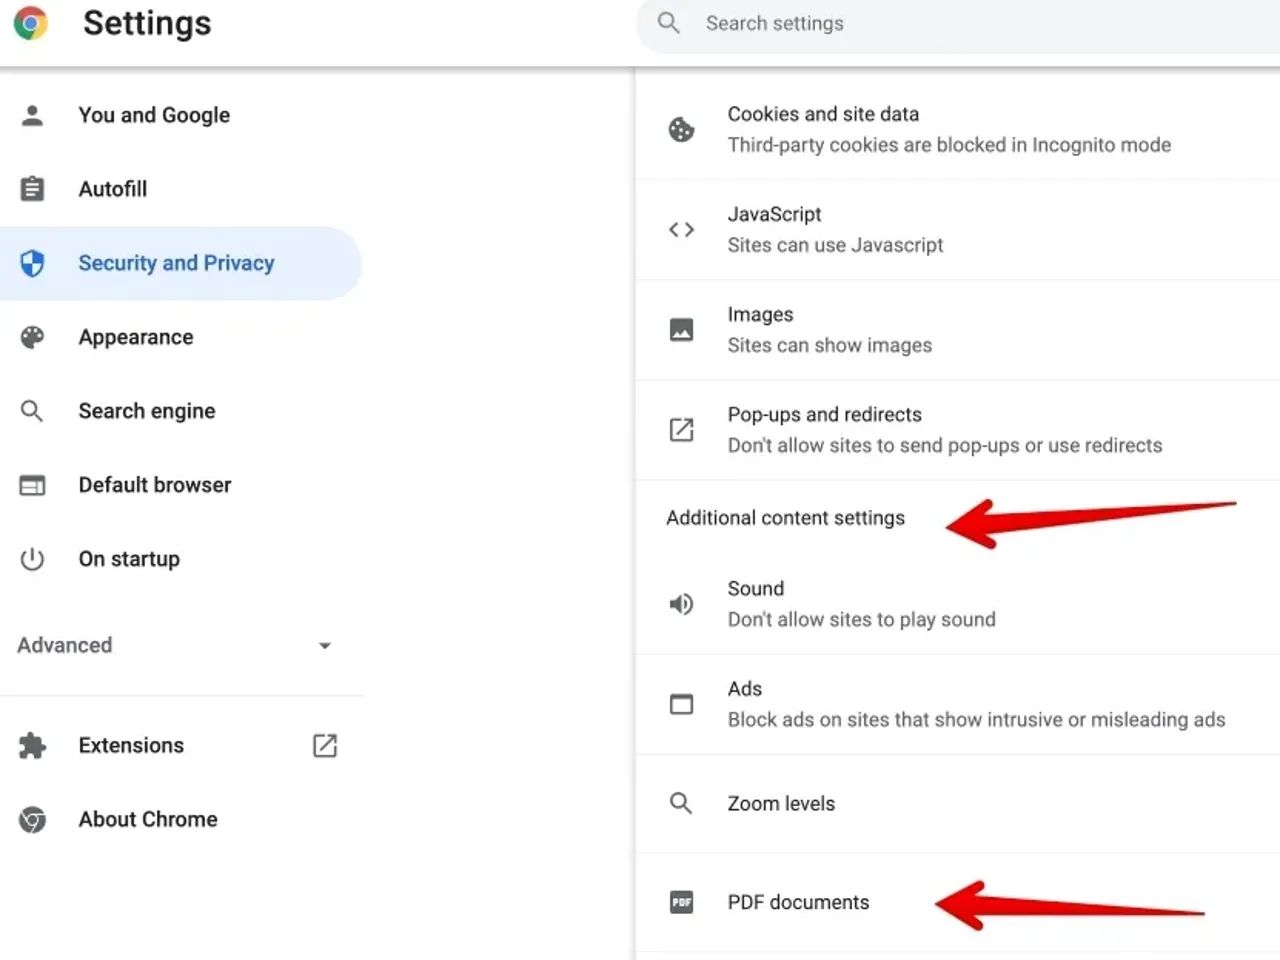
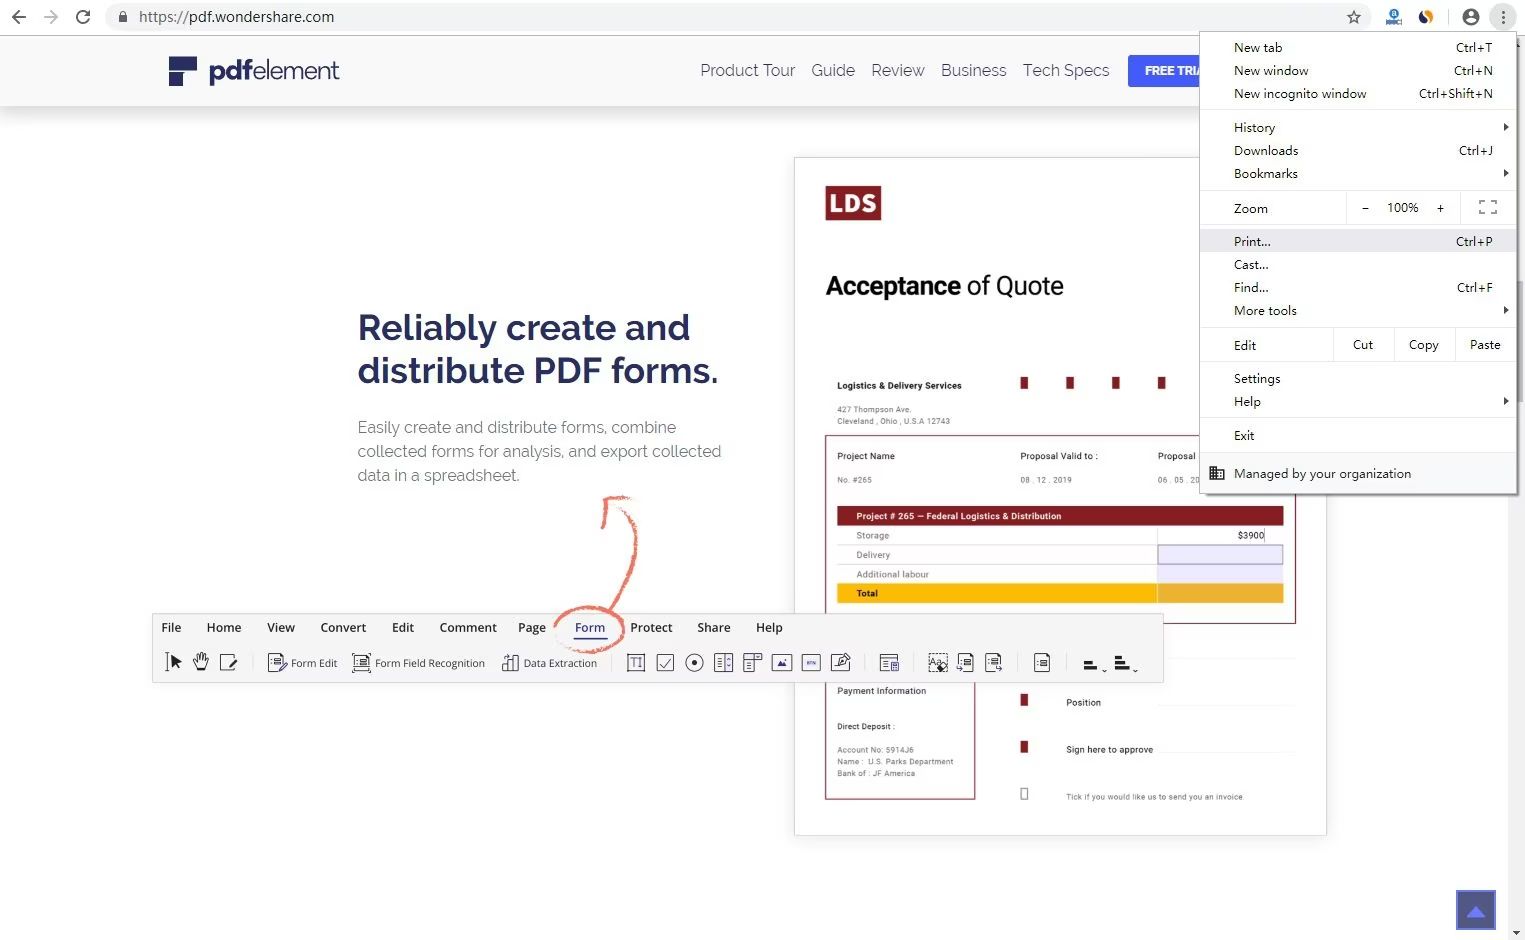
Use the File Menu: Alternatively, you can use the Chrome browser's file menu to open the HTML file. Click on the three-dot menu icon located in the top-right corner of the Chrome window to open the menu. From the menu, select "Open file" and navigate to the location of the HTML file on your computer. Once you've located the file, select it and click "Open" to load the HTML content in the Chrome browser.
By following these steps, you can effortlessly open the HTML file in your Chrome browser, preparing it for the next stage of the process: converting the HTML content to PDF format using the "Save as PDF" extension. With the HTML content now accessible in your browser, you are ready to proceed to the next step and initiate the conversion process.
Step 3: Convert HTML to PDF
With the HTML file open in your Chrome browser and the "Save as PDF" extension successfully installed, you are now ready to convert the HTML content to PDF format. This process is streamlined and allows you to create a PDF document that faithfully preserves the original layout and formatting of the HTML content. Here's how you can convert the HTML file to PDF using the "Save as PDF" extension:
-
Access the Extension: Locate the "Save as PDF" extension icon in the Chrome toolbar. It typically appears as a small PDF icon, representing its functionality. Click on this icon to access the extension's options and features.
-
Initiate the Conversion: Upon clicking the "Save as PDF" extension icon, a menu or dialog will appear, presenting various options for customizing the PDF conversion process. You may have the opportunity to adjust settings such as page orientation, paper size, margins, and more, depending on the capabilities of the extension. Take a moment to review and configure these settings according to your preferences.
-
Start the Conversion: Once you have configured the desired settings, initiate the conversion process by selecting the appropriate option within the extension's menu or dialog. This action will prompt the extension to begin converting the HTML content displayed in your Chrome browser into a PDF document.
-
Monitor the Progress: Depending on the complexity and length of the HTML content, the conversion process may take a few moments to complete. During this time, the extension will work to capture and transform the web page or HTML document into a PDF file while preserving its visual elements and structure.
-
Review the PDF Output: Once the conversion process is finished, the "Save as PDF" extension will typically present the resulting PDF document for your review. Take a moment to inspect the PDF file, ensuring that it accurately reflects the original HTML content and meets your expectations in terms of layout, formatting, and overall appearance.
-
Save the PDF File: After confirming the quality of the PDF output, proceed to save the document to a location of your choice. The extension will likely provide options for naming the PDF file and selecting a destination folder on your computer or device. Once you've specified these details, complete the process by saving the PDF file.
By following these steps, you can effectively convert the HTML content displayed in your Chrome browser to a high-quality PDF document using the "Save as PDF" extension. This seamless conversion process empowers you to create PDF files from web pages, articles, and other HTML content with ease, allowing for convenient archiving, sharing, and offline access.
Step 4: Save the PDF File
After successfully converting the HTML content to a PDF document using the "Save as PDF" extension in your Chrome browser, the final step involves saving the resulting PDF file to a location of your choice. This crucial stage ensures that the newly created PDF document is stored securely and conveniently accessible for future use. Here's a detailed overview of the process to save the PDF file:
-
Review the PDF Content: Before proceeding to save the PDF file, take a moment to review the content and ensure that it accurately captures the original HTML material. Verify that the layout, formatting, images, and text elements are faithfully preserved in the PDF document. This review step allows you to confirm the quality and integrity of the converted PDF content.
-
Name the PDF File: When saving the PDF file, it's essential to assign a descriptive and recognizable name that reflects the content it contains. Consider using a clear and concise title that accurately represents the web page, article, or HTML material from which the PDF was generated. This thoughtful naming approach facilitates easy identification and retrieval of the PDF file in the future.
-
Select the Destination: Choose a suitable destination folder or directory on your computer or device where you intend to store the PDF file. Organizing your digital files effectively ensures that the PDF document is housed within a logical and accessible location, making it effortless to locate when needed. Whether it's a dedicated folder for PDFs or a specific project directory, select the destination thoughtfully.
-
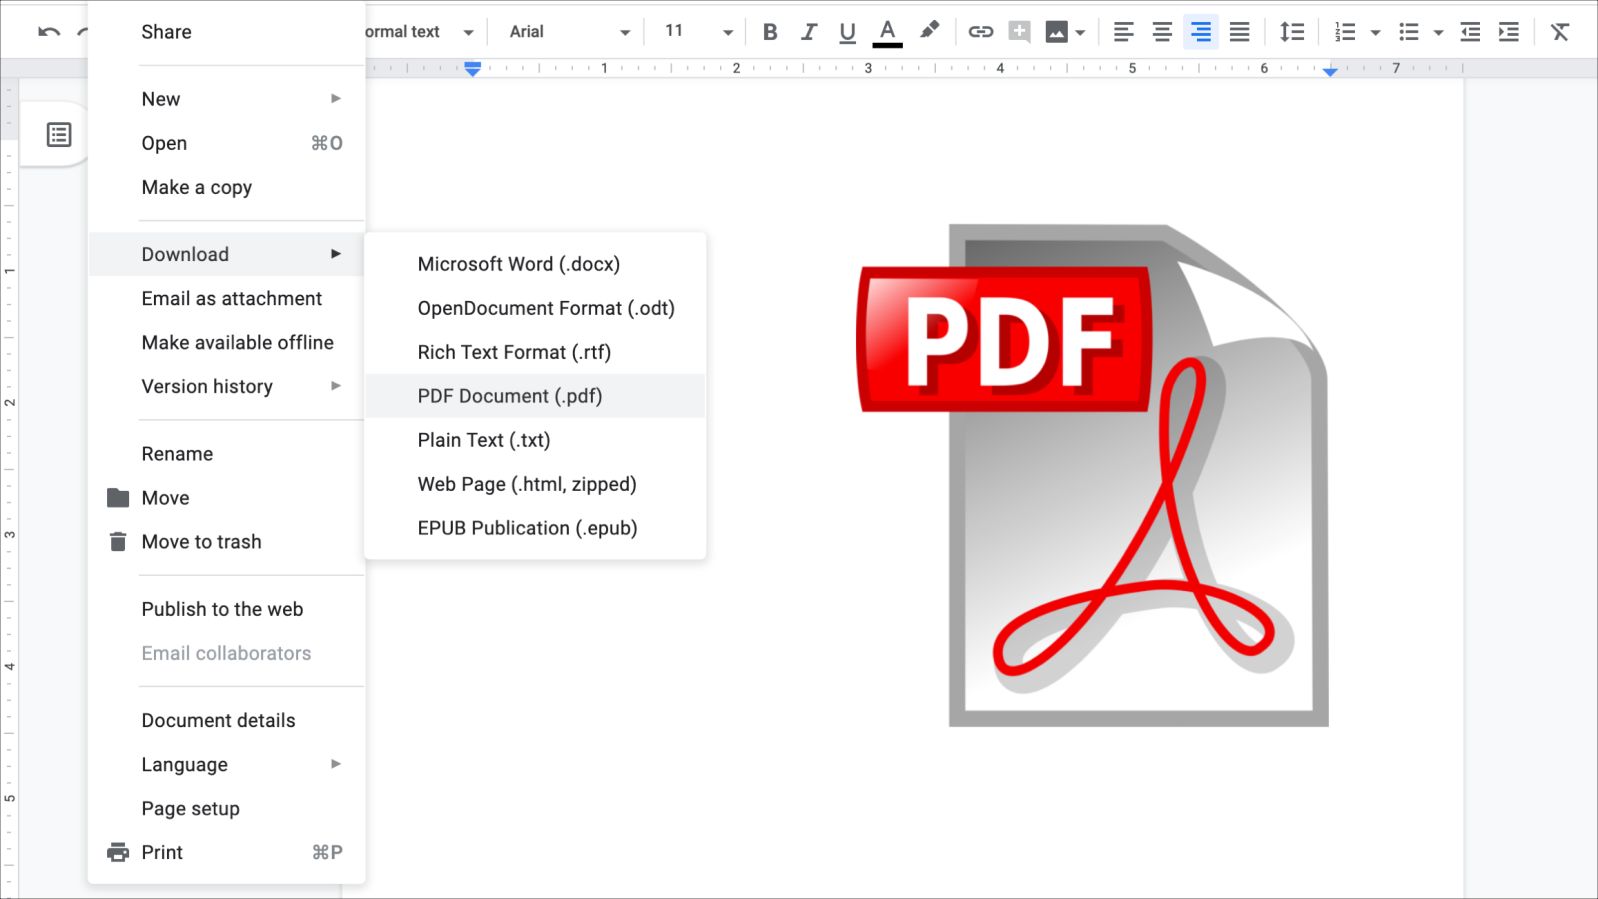
Save the PDF: Once you've reviewed the PDF content, named the file, and chosen the destination, proceed to save the PDF document. Depending on the capabilities of the "Save as PDF" extension, you may encounter a standard file-saving dialog that allows you to specify the file name, select the destination folder, and confirm the save action. Follow the prompts to complete the saving process.
-
Confirmation and Accessibility: After saving the PDF file, take a moment to confirm that the document is successfully stored in the designated location. Access the destination folder to ensure that the PDF file is present and accessible. This verification step provides peace of mind, knowing that the converted PDF document is securely saved and ready for use.
By following these steps, you can effectively save the PDF file resulting from the HTML to PDF conversion process. This ensures that the converted PDF document is appropriately named, securely stored, and readily available for future reference, sharing, or archival purposes. With the PDF file safely saved, you have successfully completed the process of converting HTML to PDF using the "Save as PDF" extension in Google Chrome.
Conclusion
In conclusion, the ability to convert HTML files to PDF format directly within the Google Chrome browser offers a convenient and efficient solution for a wide range of users. By following the step-by-step process outlined in this guide, you can seamlessly transform web pages, articles, and other HTML content into high-quality PDF documents with ease.
The installation of the "Save as PDF" Chrome extension provides a user-friendly and accessible tool for initiating the HTML to PDF conversion process. This extension, readily available from the Chrome Web Store, integrates seamlessly into the browser, empowering users to convert web content to PDF format without the need for complex software or external tools.
Opening the HTML file in Chrome sets the stage for the conversion process, allowing users to access and display the desired HTML content within the browser window. Whether through drag-and-drop functionality or the use of the Chrome file menu, the process of opening HTML files in Chrome is straightforward and ensures that the content is readily available for conversion.
The conversion itself, facilitated by the "Save as PDF" extension, offers a streamlined and customizable experience. Users have the opportunity to configure settings such as page orientation, paper size, and margins, tailoring the PDF output to their specific preferences. The extension's ability to faithfully capture and preserve the original layout and formatting of the HTML content ensures that the resulting PDF documents accurately reflect the source material.
Saving the PDF file marks the final step in the process, allowing users to securely store the converted documents in designated locations on their computers or devices. Thoughtful naming and organization of the PDF files contribute to efficient file management, ensuring that the converted documents are easily identifiable and accessible for future use.
In essence, the ability to convert HTML files to PDF using Google Chrome and the "Save as PDF" extension empowers users to streamline their workflows, facilitate content sharing, and organize digital information effectively. Whether for archiving web pages, creating accessible document formats, or simply managing digital content, this method offers a valuable and user-friendly solution for a diverse range of needs.
By leveraging the capabilities of the "Save as PDF" extension and following the outlined steps, users can harness the power of Google Chrome to seamlessly convert HTML content to PDF format, unlocking a versatile and practical tool for managing digital information.