Introduction
Welcome, students and tech enthusiasts! Have you ever found yourself in the predicament of trying to bypass a School Chromebook’s restrictions? You’re not alone. School Chromebooks are widely used in educational institutions for their practicality and reliability. However, the built-in restrictions can sometimes be too limiting, preventing you from accessing certain websites or using specific applications. If you’re looking for ways to bypass these limitations, you’ve come to the right place.
Before we dive into the various methods of bypassing a School Chromebook, let’s first understand what exactly a School Chromebook is. A School Chromebook is a type of laptop that runs on Google’s Chrome operating system (Chrome OS) and is specifically designed for educational purposes. These devices come with a range of built-in security measures and content filtering systems to ensure that students use them responsibly and safely.
However, there are times when you may have a valid reason to bypass these restrictions. Perhaps you need to access a website for research purposes that is blocked by the school’s firewall, or you want to install a specific application that is not available on the Chrome Web Store. It’s important to note that bypassing a School Chromebook’s restrictions may violate your school’s policies, so proceed with caution and only do so if you have a genuine need.
Before we explore the different methods to bypass a School Chromebook, it’s crucial to understand the risks and consequences involved. Attempting to bypass these restrictions may breach your school’s acceptable use policy (AUP), which could result in disciplinary actions or loss of privileges. It’s important to weigh the potential consequences against the benefits of bypassing the restrictions before proceeding.
Now that we have a better understanding of School Chromebooks and the reasons why someone might want to bypass them, let’s delve into the various methods that can help you regain control over your device. From using developer mode to leveraging VPNs and proxy servers, we will explore step-by-step instructions on how to bypass these restrictions and make the most out of your School Chromebook. So, buckle up and get ready to unlock the true potential of your device!
What is a School Chromebook?
A School Chromebook is a specialized type of laptop that runs on Google’s Chrome operating system (Chrome OS) and is primarily designed for use in educational settings. These devices have gained popularity in schools due to their affordability, simplicity, and integration with Google’s suite of educational tools.
Chromebooks are built with the goal of providing students and educators a reliable and secure platform for learning and collaboration. They typically feature a lightweight and portable design, long battery life, and fast boot-up times. The Chrome OS is a simplified and streamlined operating system that focuses on web-based applications and cloud computing.
One of the key features of School Chromebooks is their ability to seamlessly integrate with Google’s suite of educational tools, such as Google Classroom, Google Docs, and Google Drive. This integration allows teachers to easily assign and collect assignments, facilitate collaboration among students, and provide immediate feedback.
Another crucial aspect of School Chromebooks is their built-in security measures. Chrome OS utilizes multiple layers of security to protect users from malware, viruses, and other cyber threats. These security features include automatic system updates, sandboxing of applications, and verified boot, which ensures the integrity of the operating system during startup.
Furthermore, School Chromebooks offer content filtering and parental control options to ensure that students use these devices responsibly and safely. Schools can customize the level of internet access, restrict access to specific websites or applications, and monitor student activity to maintain a secure learning environment.
Additionally, School Chromebooks come equipped with Google’s Safe Browsing technology, which warns users about potential phishing attacks, malicious downloads, and dangerous websites. This feature enhances the overall security of the device and protects students from online threats.
Overall, School Chromebooks have revolutionized the education industry by providing a cost-effective and efficient tool for teaching and learning. Their lightweight and portable design, seamless integration with educational tools, robust security features, and content filtering options make them an ideal choice for schools and students alike.
Now that we understand what a School Chromebook is and its core features, let’s continue exploring the various methods to bypass the restrictions and unlock the full potential of your device.
Why would someone want to bypass a School Chromebook?
While School Chromebooks are designed to provide a safe and controlled learning environment, there may be legitimate reasons why someone would want to bypass the restrictions imposed by these devices. Here are a few common scenarios where bypassing a School Chromebook can be desirable:
- Accessing blocked websites: School networks often employ content filtering systems to restrict access to certain websites deemed inappropriate or non-educational. However, there may be instances where you need to access a website for research purposes or to gather information that is restricted. Bypassing the restrictions allows you to access these blocked websites for legitimate reasons.
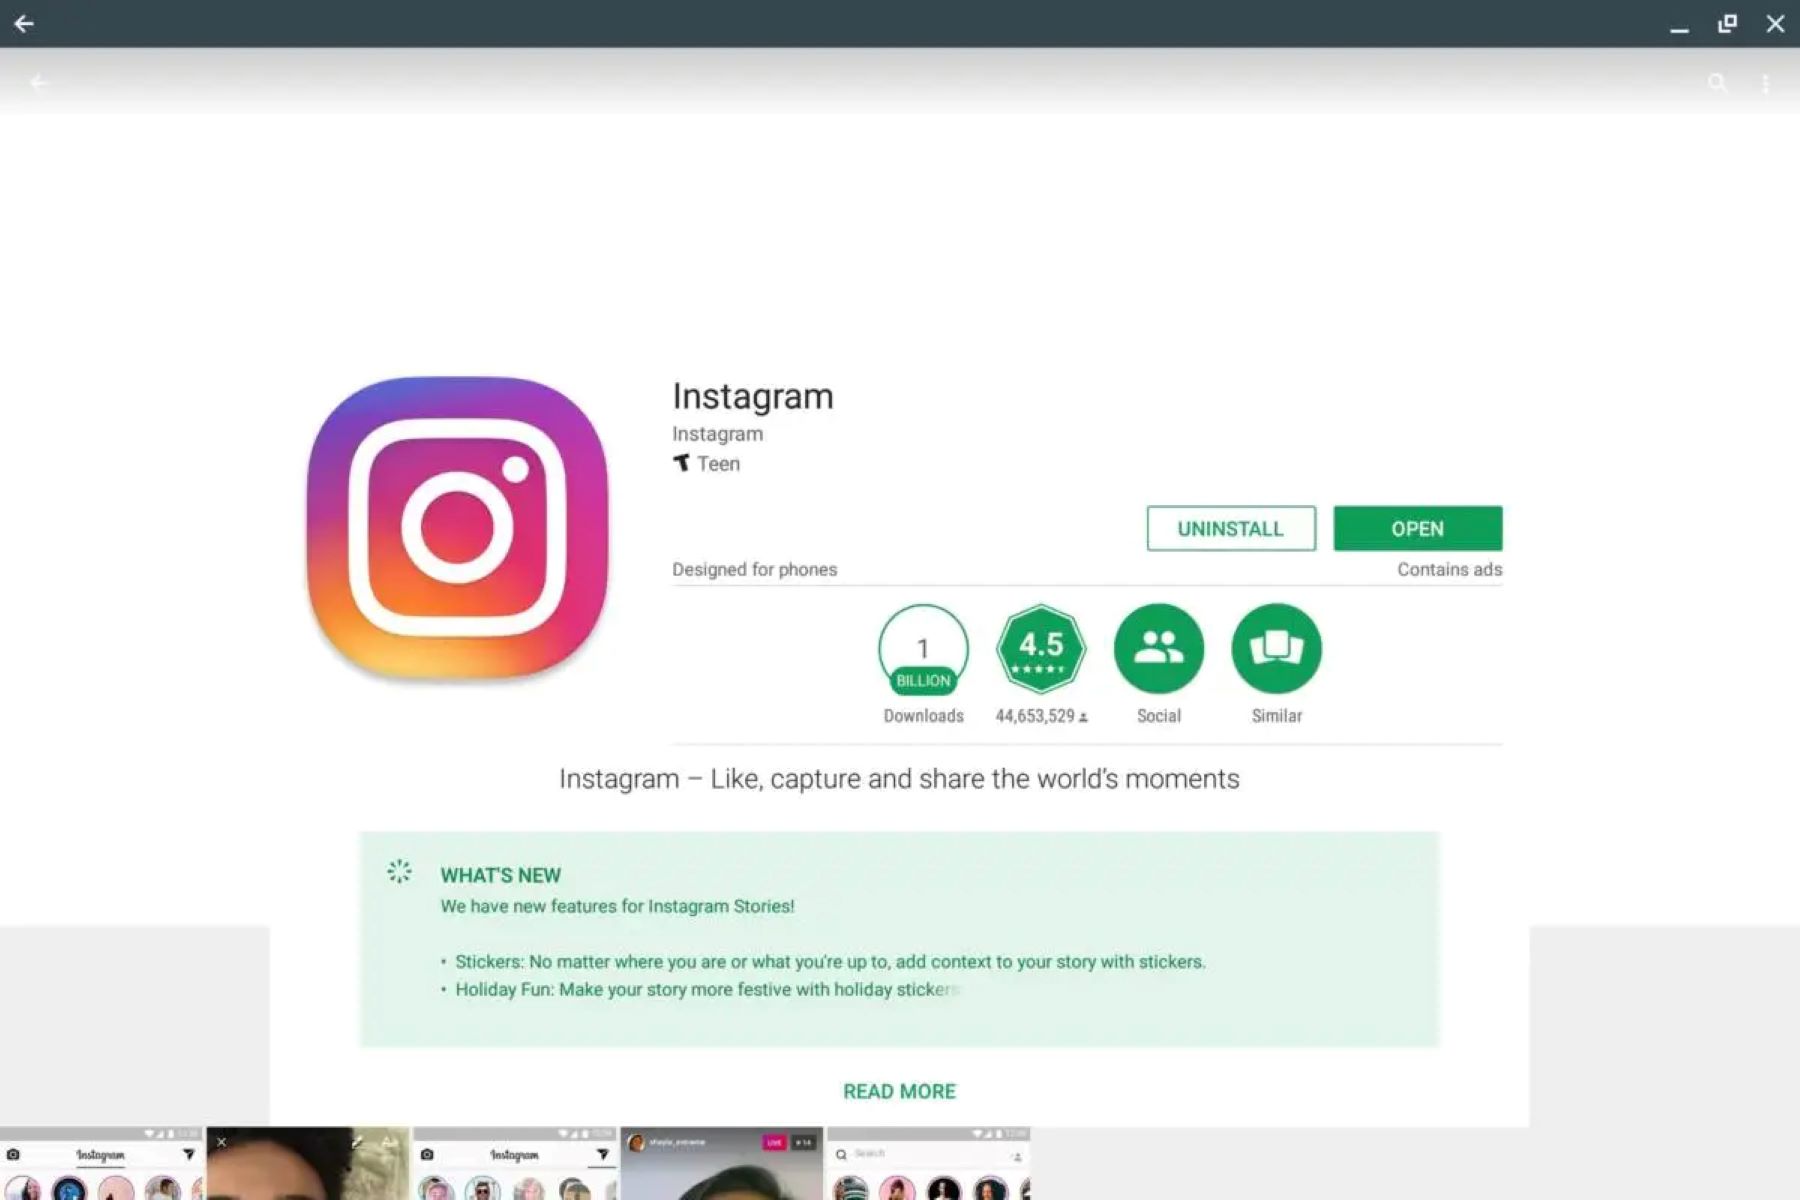
- Using specific applications: School Chromebooks typically come with a limited selection of applications available on the Chrome Web Store. However, there may be instances where you need to use a specific application that is not available or approved by the school. Bypassing the restrictions allows you to install and use these applications for educational or productivity purposes.
- Customizing the device: School Chromebooks are often managed by the school, which means certain settings and configurations are locked down. Bypassing the restrictions allows you to customize the device according to your preferences, such as installing different themes or modifying system settings for a more personalized experience.
- Enhancing productivity: School Chromebooks may have restrictions that limit the ability to utilize certain productivity tools or extensions. By bypassing these restrictions, you can enhance your productivity by accessing a wider range of tools and extensions that can streamline your workflow and improve your efficiency.
It is essential to note that bypassing the restrictions on a School Chromebook may violate your school’s acceptable use policy (AUP) and can have consequences. It is crucial to consider the potential risks and weigh them against the benefits before attempting to bypass the restrictions. It is best to have a genuine need and ensure that any actions taken align with your school’s policies and guidelines.
Now that we understand the motivations behind bypassing a School Chromebook, let’s explore the different methods that can help you achieve this and regain control over your device.
Risks and consequences of bypassing a School Chromebook
While bypassing the restrictions on a School Chromebook may seem enticing, it is essential to be aware of the potential risks and consequences involved. It is important to note that bypassing these restrictions often goes against the acceptable use policy (AUP) set by your school, and doing so may lead to the following risks and consequences:
- Violation of school policies: Most schools have strict policies in place regarding the use of technology and acceptable behavior. Bypassing the restrictions on a School Chromebook typically violates these policies and can result in disciplinary action. This may include anything from a warning to suspension or expulsion, depending on the severity of the violation.
- Loss of privileges: If you are found to have bypassed the restrictions on your School Chromebook, you may face consequences in terms of access to certain privileges. This could include revoking your internet access, blocking your ability to install additional applications, or limiting your access to specific resources or tools.
- Compromising device security: By bypassing the built-in security measures on your School Chromebook, you potentially expose your device to various security risks. This may include malware infections, unauthorized access to sensitive data, and potential damage to the device’s functionality. It is crucial to consider the potential impact on both your personal security and the security of the overall school network.
- Damage to reputation and trust: Bypassing restrictions on a School Chromebook can damage your reputation and erode the trust that others, including teachers and administrators, have in you. This can lead to strained relationships, reduced support, and potential negative consequences in your academic or social life.
- Legal implications: In certain cases, bypassing restrictions on a School Chromebook may violate local or federal laws, such as hacking or unauthorized access to computer systems. Engaging in illegal activities can have severe legal consequences, including fines and potential criminal charges.
It is critical to consider these risks and consequences before attempting to bypass the restrictions on your School Chromebook. Make sure to familiarize yourself with your school’s AUP and seek permission from the relevant authorities if there is a legitimate reason for needing to access specific websites or applications that are restricted.
Remember, the primary purpose of the restrictions on a School Chromebook is to create a safe and productive learning environment for all students. It is important to use technology responsibly and respect the guidelines and policies established by your school.
Now that we are aware of the potential risks and consequences, let’s explore the different methods that can be employed to bypass the restrictions on a School Chromebook.
Method 1: Using Developer Mode
One of the popular methods to bypass the restrictions on a School Chromebook is by enabling Developer Mode. Developer Mode provides users with more control over their device’s settings and allows for the installation of third-party applications that are not typically available on a standard School Chromebook. Here’s how you can enable Developer Mode:
- Start by turning off your School Chromebook completely.
- Press and hold the Esc key, Refresh key (the curved arrow), and the Power button simultaneously.
- A screen with a yellow exclamation mark will appear. Press Ctrl+D on the keyboard to enter Developer Mode.
- On the warning screen, press Enter to proceed.
- Your School Chromebook will then reboot and may take a few moments to transition into Developer Mode.
- Once the transition is complete, you’ll see a screen that states “OS verification is off.”
With Developer Mode enabled, you have more control over your School Chromebook, but it’s important to note the following considerations:
- Data privacy: Developer Mode disables some of the built-in security features, leaving your device more vulnerable. Always ensure that you understand the potential risks and take necessary precautions to protect your privacy and sensitive information.
- Warranty limitations: Enabling Developer Mode may void the warranty on your School Chromebook. If you encounter any hardware-related issues, it’s important to consider the implications of voiding the warranty before proceeding.
- Loss of data: Transitioning into Developer Mode may result in the loss of data stored on the device. It is recommended to back up any essential files or documents before enabling Developer Mode.
- Reverting to normal mode: If at any point you wish to return to the standard operating mode of your School Chromebook, you can do so by pressing the space bar when the screen with the yellow exclamation mark appears during the boot process.
Enabling Developer Mode can provide you with more flexibility and control over your School Chromebook. However, exercise caution and be aware of the potential risks and limitations associated with this method. It is also advisable to consult with your school’s IT department or seek permission from the school administration before making any changes to your device.
Now that you have learned about the first method of using Developer Mode to bypass the restrictions on a School Chromebook, let’s explore another method: using a VPN (Virtual Private Network).
Method 2: Using a VPN
A Virtual Private Network, commonly known as a VPN, is another effective method to bypass restrictions on a School Chromebook. By using a VPN, you can establish a secure and encrypted connection to a remote server, effectively masking your IP address and bypassing any network restrictions put in place by your school. Here’s how you can use a VPN on your School Chromebook:
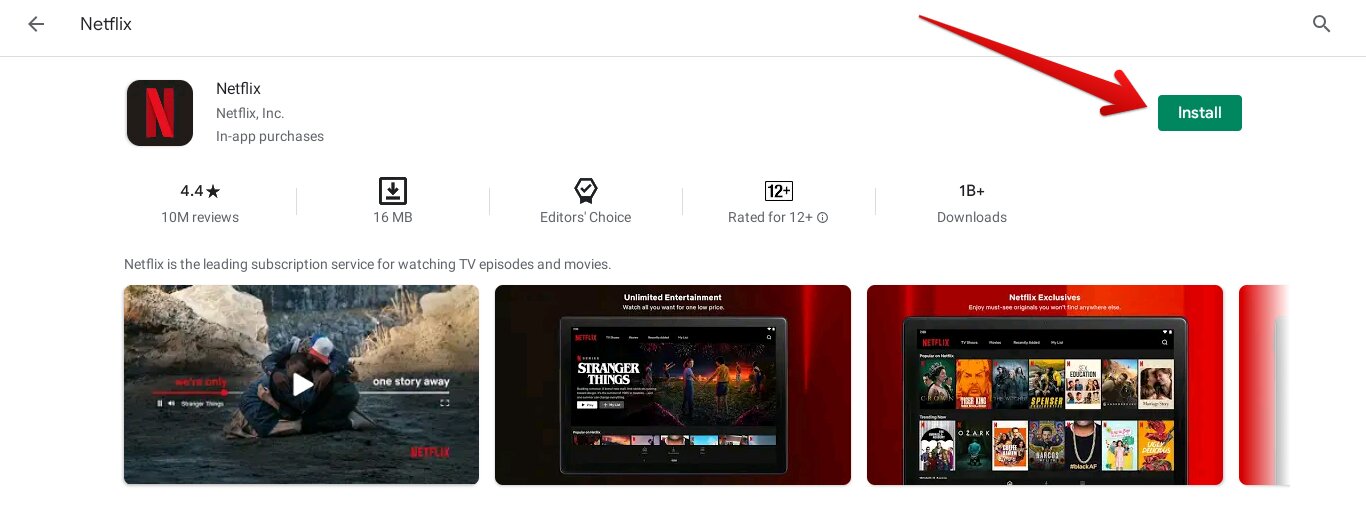
- Open the Google Play Store on your School Chromebook.
- Search for a VPN app of your choice, such as NordVPN, ExpressVPN, or CyberGhost.
- Install the VPN app on your School Chromebook.
- Launch the VPN app and create an account if required.
- Connect to a VPN server location of your choice.
Once connected to a VPN, your internet traffic will be routed through the VPN server, making it appear as if you are accessing the internet from a different location. This can bypass any network restrictions and allow you to access blocked websites or services on your School Chromebook.
Keep in mind the following considerations when using a VPN on your School Chromebook:
- Privacy and security: While a VPN can provide enhanced privacy and security by encrypting your internet connection, it’s important to choose a reputable VPN provider that prioritizes privacy and does not log your online activities.
- Internet speed: Using a VPN may result in slower internet speeds as your internet traffic is routed through a remote server. This is especially true if the VPN server is located far away from your actual physical location.
- Compliance with school policies: Even though a VPN can help bypass network restrictions, it’s essential to understand and comply with your school’s acceptable use policy (AUP). Using a VPN may still violate your school’s policies, so it’s crucial to exercise caution and use a VPN for legitimate purposes only.
By using a VPN on your School Chromebook, you can bypass network restrictions and access blocked websites or services. However, ensure that you do so responsibly and respect your school’s policies and guidelines.
Now that you’ve learned about using a VPN to bypass restrictions on a School Chromebook, let’s dive into another method: using proxy servers.
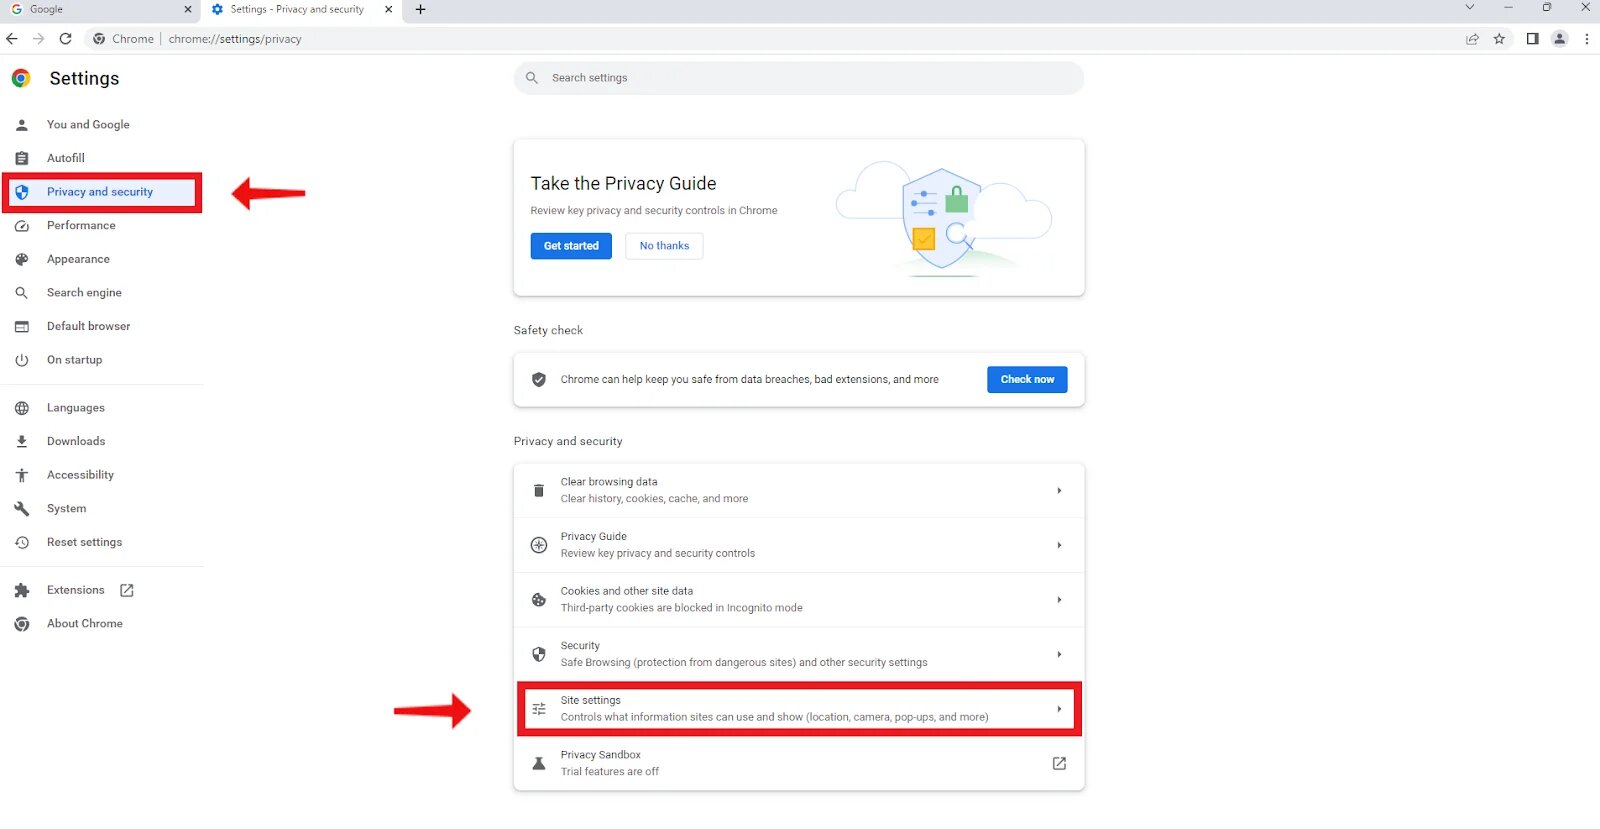
Method 3: Using Proxy Servers
Another method to bypass restrictions on a School Chromebook is by using proxy servers. A proxy server acts as an intermediary between your device and the internet, allowing you to access websites and bypass network restrictions. Here’s how you can use proxy servers on your School Chromebook:
- Start by finding a reliable and trustworthy proxy server. There are several free proxy websites available, such as HideMyAss, KProxy, and Proxysite.
- Open your web browser on the School Chromebook.
- Visit the selected proxy server website.
- Enter the URL of the website you want to access into the provided field on the proxy server website.
- Click on the “Go” or “Browse” button, and the proxy server will fetch the requested website and display it for you.
Proxy servers work by relaying your web traffic through their own server, effectively masking your IP address and bypassing any network restrictions. However, it’s important to note the following considerations when using proxy servers:
- Security risks: Proxy servers may not offer the same level of security as other methods, such as VPNs. Your data may not be encrypted, leaving it vulnerable to interception. Avoid submitting any sensitive information when using proxy servers.
- Reliability and speed: The performance of proxy servers can vary, and some may be slower than others. Additionally, free proxy servers can be overcrowded, leading to slower browsing speeds and potential connection issues.
- Potential for misuse: Proxy servers can be used to access blocked or inappropriate content, which may violate your school’s policies. It’s crucial to use proxy servers responsibly and only for legitimate purposes.
Using proxy servers on your School Chromebook can be a quick and accessible method to bypass network restrictions and access blocked websites. However, exercise caution and be aware of the potential risks and limitations associated with using proxy servers.
Now that you’re familiar with using proxy servers, let’s explore another method: utilizing browser extensions to bypass restrictions on a School Chromebook.
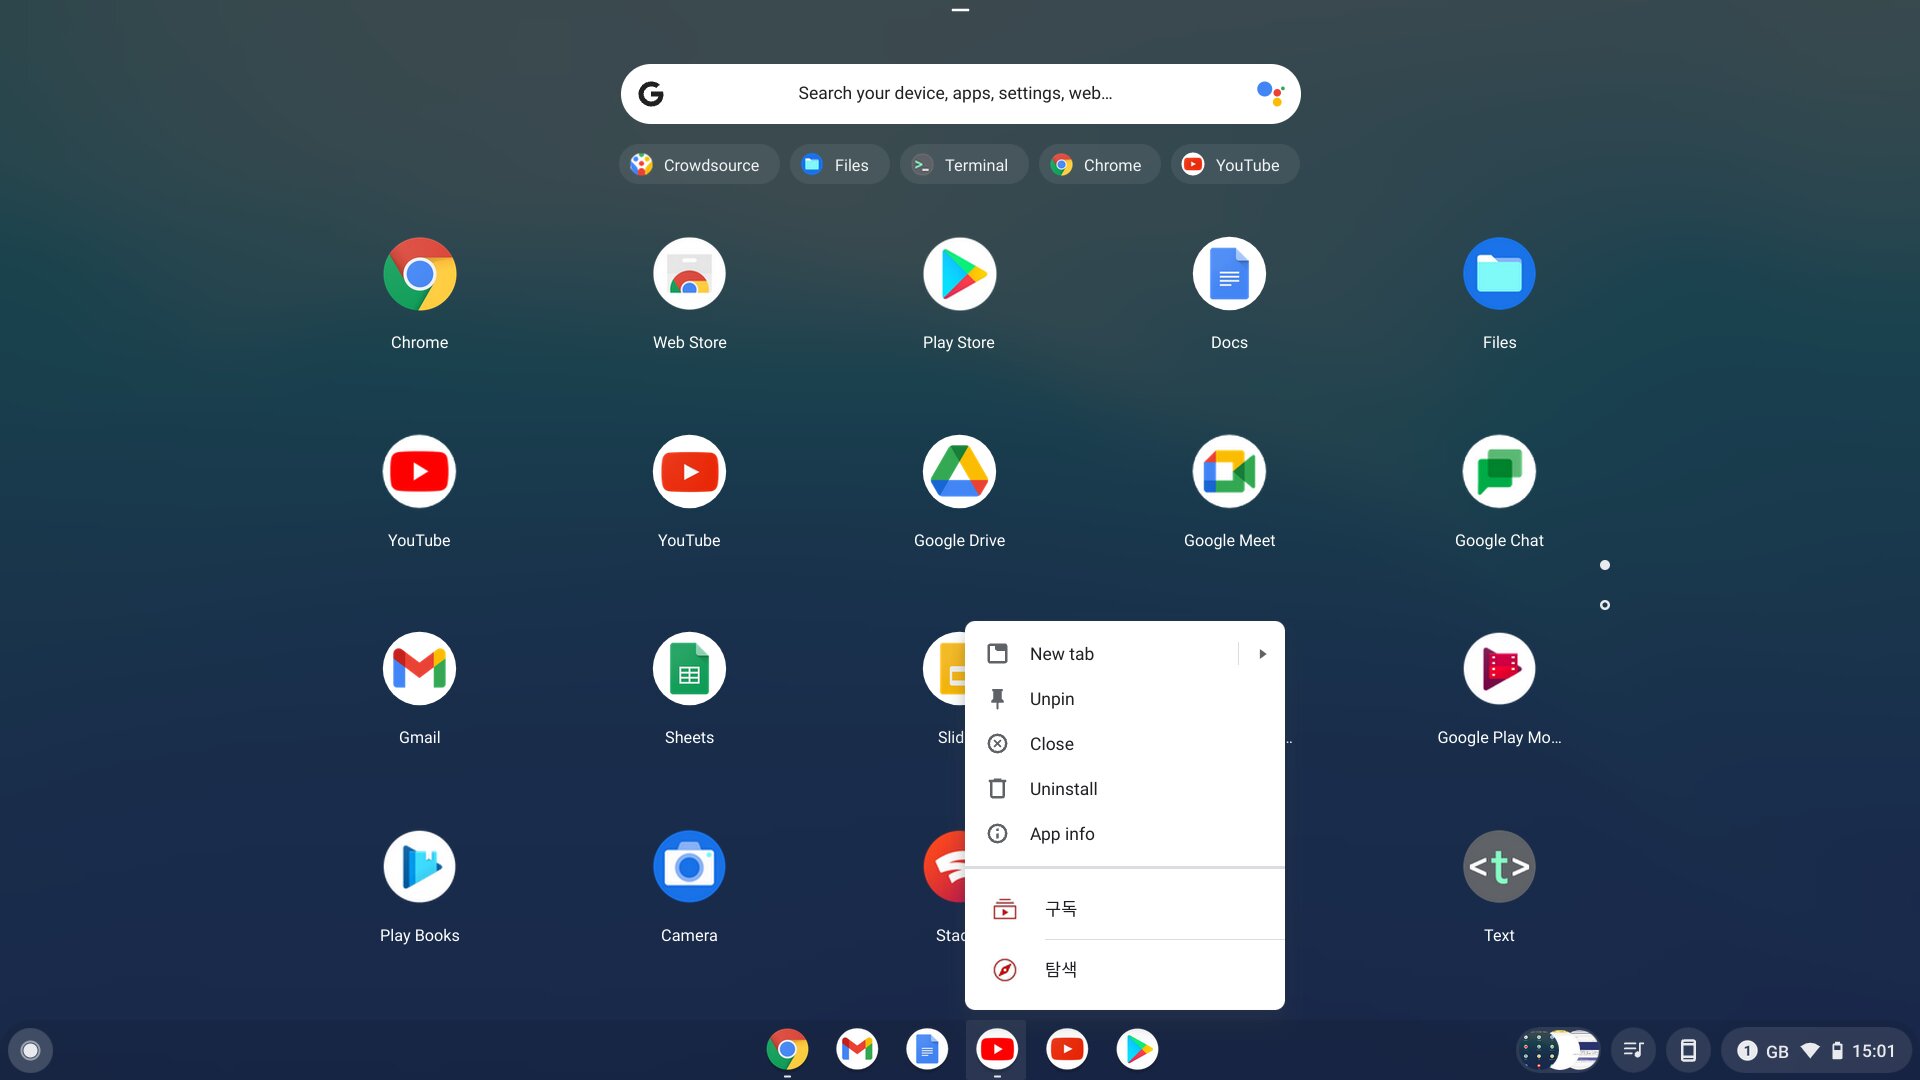
Method 4: Using Browser Extensions
Using browser extensions is another effective method to bypass restrictions on a School Chromebook. These extensions can add additional functionality to your web browser, including the ability to bypass network restrictions and access blocked websites. Here’s how you can use browser extensions to bypass restrictions:
- Open the Google Chrome Web Store on your School Chromebook.
- Search for a reputable VPN or proxy extension, such as Hola VPN, ZenMate VPN, or Browsec VPN.
- Install the desired extension on your School Chromebook.
- Follow the instructions provided by the extension to set it up and configure the desired settings.
- Once the extension is activated, you can bypass network restrictions and access blocked websites.
Browser extensions work by rerouting your web traffic through their own servers, effectively bypassing network restrictions and allowing access to blocked content. However, it’s important to consider the following considerations when using browser extensions:
- Privacy and security: Ensure that you choose a reputable VPN or proxy extension from a trusted developer. Be cautious when granting permissions or providing personal information to extensions, as some may compromise your privacy and security.
- Reliability and compatibility: Not all browser extensions may work on a School Chromebook, as the device and its operating system have certain limitations. Verify compatibility and reliability by checking user reviews and ratings before installing an extension.
- Compliance with school policies: While browser extensions can assist in bypassing restrictions, it’s important to adhere to your school’s acceptable use policy (AUP). Be aware of the potential consequences and only use extensions for legitimate and educational purposes.
Using browser extensions can be a convenient and user-friendly method to bypass restrictions on a School Chromebook. However, exercise caution and choose reputable extensions from trusted sources to ensure your privacy and security.
Now that you’ve learned about using browser extensions, let’s move on to another method: changing DNS settings.
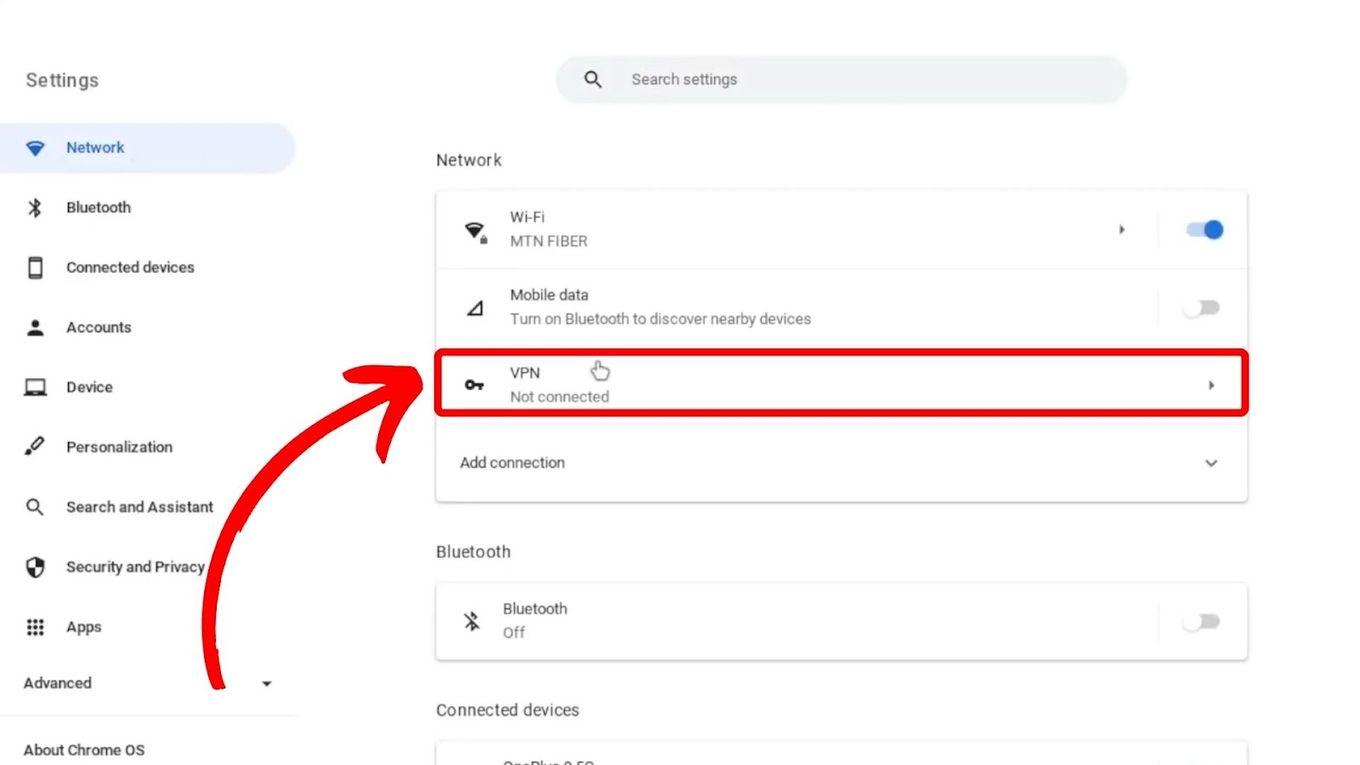
Method 5: Changing DNS Settings
Changing the Domain Name System (DNS) settings on your School Chromebook is another method to bypass restrictions and access blocked websites. DNS is responsible for translating domain names into IP addresses and can be configured to use different servers, potentially bypassing network restrictions. Here’s how you can change the DNS settings on your School Chromebook:
- Click on the system tray at the bottom-right corner of your School Chromebook’s screen.
- Select the gear-shaped “Settings” icon to open the Chrome OS settings menu.
- Scroll down and click on “Wi-Fi” or “Internet connection.”
- Find your active Wi-Fi connection and click on the network name.
- In the pop-up window, click on the “Network” tab.
- Under the “Name servers” section, click on “Custom name servers.”
- Enter the preferred DNS server addresses. You can use public DNS servers like Google DNS (8.8.8.8, 8.8.4.4), Cloudflare (1.1.1.1, 1.0.0.1), or OpenDNS (208.67.222.222, 208.67.220.220).
- Click on “Save” to apply the changes to your School Chromebook’s DNS settings.
By changing the DNS settings, you can bypass certain network restrictions and access blocked websites. However, it’s essential to consider the following considerations:
- Effectiveness of bypassing restrictions: Changing DNS settings may not always bypass all restrictions implemented by your school’s network. The effectiveness may vary depending on the specific restrictions and configurations in place.
- Compatibility and network setup: Changing DNS settings on a School Chromebook may require administrative access or modification of specific network settings. This method may not be feasible or allowed in all school environments.
- Network connectivity issues: Incorrect configuration or improper DNS settings may cause network connectivity issues on your School Chromebook. Make sure to take note of the original DNS settings in case you need to restore them.
Changing DNS settings on your School Chromebook can be an effective way to bypass certain network restrictions and access blocked websites. However, it’s essential to be aware of the limitations and potential impact on your device’s network connectivity.
Now that you understand how to change DNS settings, let’s move on to another method: using Virtual Private Networks (VPNs).
Method 6: Using Virtual Private Networks (VPNs)
Using a Virtual Private Network (VPN) is a reliable and secure method to bypass restrictions on a School Chromebook. VPNs create a secure and encrypted connection between your device and a remote server, allowing you to access the internet and bypass network restrictions. Here’s how you can use a VPN on your School Chromebook:
- Open the Google Play Store on your School Chromebook.
- Search for a reputable VPN app, such as NordVPN, ExpressVPN, or CyberGhost.
- Install the chosen VPN app on your School Chromebook.
- Open the VPN app and create an account if necessary.
- Choose a server location from the available options.
- Click on the “Connect” button to establish a VPN connection.
Once connected to a VPN, your internet traffic is encrypted and routed through the VPN server, masking your IP address and bypassing network restrictions. However, it’s important to consider the following considerations when using a VPN:
- Choosing a reputable VPN: Select a VPN provider that has a strong reputation for privacy, security, and reliable performance. Look for providers that do not log or track your online activities.
- Network speed and performance: VPNs can sometimes impact your internet speed due to the encryption and rerouting of your traffic. Test different servers and VPN providers to find the one that offers optimal performance on your School Chromebook.
- Compliance with school policies: While VPNs can help bypass network restrictions, it’s important to abide by your school’s acceptable use policy (AUP). Be aware of the potential consequences and use VPNs for legitimate and educational purposes only.
Using a VPN on your School Chromebook is an effective way to bypass network restrictions and access blocked websites. However, always prioritize your privacy, security, and compliance with school policies when utilizing a VPN.
Now that you’ve learned about using VPNs, let’s explore another method: performing a factory reset on a School Chromebook.
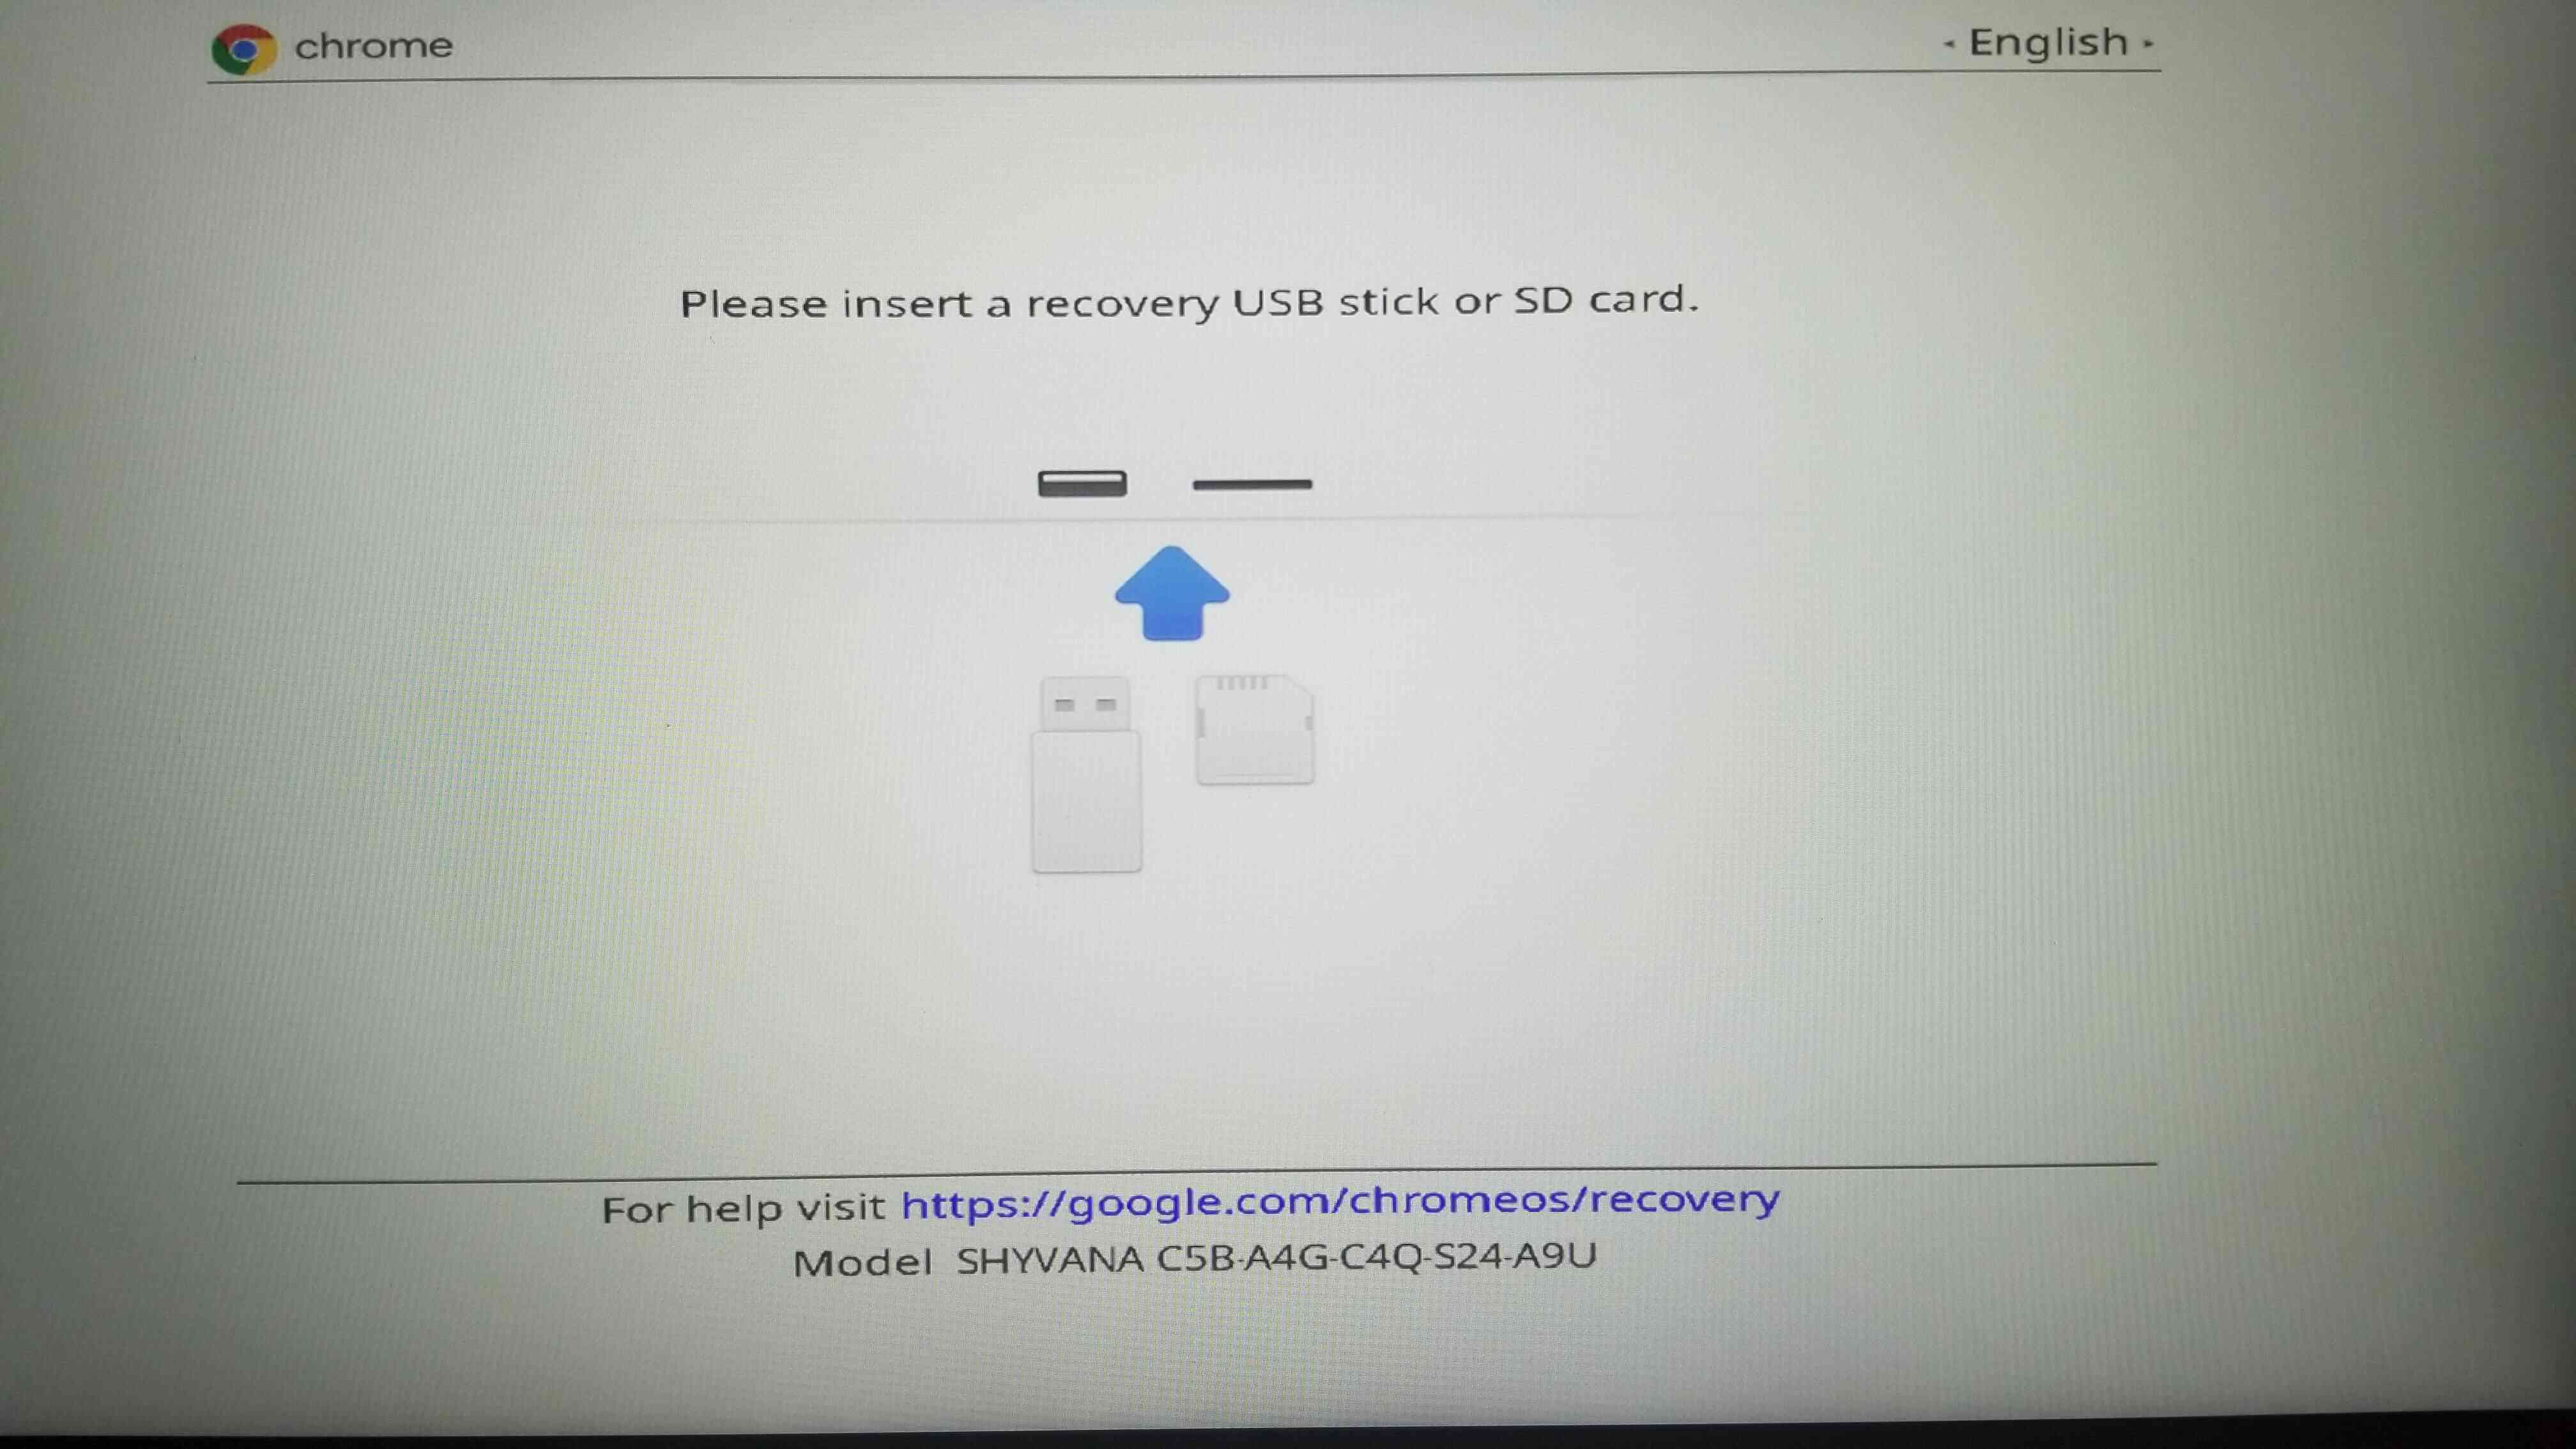
Method 7: Factory Reset a School Chromebook
If other methods to bypass restrictions on your School Chromebook have not been successful, performing a factory reset can be a viable option. A factory reset erases all data and settings on your device, essentially restoring it to its original factory state. Here’s how you can perform a factory reset on your School Chromebook:
- Click on the system tray at the bottom-right corner of your School Chromebook’s screen.
- Select the gear-shaped “Settings” icon to open the Chrome OS settings menu.
- Scroll down and click on “Advanced” to expand the Advanced settings options.
- Under the “Reset settings” section, click on “Powerwash” or “Factory reset this Chromebook.”
- A confirmation window will appear, notifying you that all data will be deleted. Read the information and click on “Restart” to proceed with the factory reset.
- Follow the on-screen instructions to set up your School Chromebook as a new device.
Performing a factory reset on your School Chromebook can help remove any restrictions and configurations imposed by the school. However, it’s crucial to note the following considerations:
- Data loss: A factory reset will erase all data and settings on your School Chromebook. Make sure to back up any essential files or documents before proceeding with the reset.
- Loss of school-managed configurations: If your School Chromebook is managed by the school’s IT department, a factory reset may remove any configurations they have set. This could include restrictions, apps, or settings specific to your school’s network.
- Permissions and setup: After the factory reset, you will need to set up your School Chromebook as a new device, including signing in with your Google account and configuring settings as desired.
A factory reset should be considered as a last resort to bypass restrictions on your School Chromebook. Before performing a factory reset, ensure that you have exhausted all other methods and consult with your school’s IT department or seek permission from the relevant authorities.
Now that you’ve learned about performing a factory reset, let’s explore the final method: using Linux on a School Chromebook.
Method 8: Using Linux on a Chromebook
Using Linux on a Chromebook is an advanced method that requires technical know-how and may involve enabling Developer Mode. By installing a Linux distribution, such as Ubuntu or GalliumOS, on your School Chromebook, you can gain access to a full-fledged operating system with fewer restrictions. Here’s how you can use Linux on your School Chromebook:
- Enable Developer Mode on your School Chromebook. Refer to the earlier section on “Method 1: Using Developer Mode” for step-by-step instructions.
- Once Developer Mode is enabled, you can install a Linux distribution of your choice. Follow detailed guides and tutorials specific to your Chromebook model to install Linux successfully.
- After installing Linux, you will have access to a new operating system alongside Chrome OS on your School Chromebook.
- Linux provides a wider range of applications and customization options, allowing you to bypass many of the restrictions imposed by Chrome OS.
While using Linux on a School Chromebook provides greater flexibility, it’s crucial to consider the following considerations:
- Technical expertise: Installing and using Linux on a Chromebook requires advanced technical skills. If you’re not familiar with Linux or the installation process, it’s recommended to seek assistance from someone experienced or consult online resources for detailed instructions.
- Compatibility: Not all Chromebook models support Linux installations, and compatibility can vary. Make sure to research and verify that your specific Chromebook model is compatible with the Linux distribution you intend to install.
- Modification of system settings: Enabling Developer Mode and installing Linux on your School Chromebook may void the warranty and alter the system settings. Be aware of the implications and potential consequences before proceeding.
Using Linux on a School Chromebook can provide you with expanded options and capabilities beyond the limitations of Chrome OS. However, it’s important to have the necessary technical expertise, consider compatibility, and understand the potential risks and consequences before attempting this method.
Now that you’ve learned about the various methods to bypass restrictions on a School Chromebook, it’s important to evaluate the risks, consequences, and compliance with your school’s policies before taking any action. Make sure to use these methods responsibly and only for legitimate purposes.
Conclusion
Throughout this article, we have explored various methods to bypass restrictions on a School Chromebook. It is important to note that bypassing these restrictions may violate your school’s policies and can have serious consequences. Always consider the potential risks and weigh them against the benefits before attempting to bypass any restrictions.
We began by understanding what a School Chromebook is and why someone might want to bypass its limitations. From accessing blocked websites and using specific applications to customizing the device and enhancing productivity, there can be valid reasons behind the desire to bypass these restrictions.
We then discussed the risks and consequences associated with bypassing a School Chromebook. Violating school policies, loss of privileges, compromising device security, and damage to reputation are just a few of the potential outcomes. It is crucial to consider these factors and make informed decisions.
We explored multiple methods to bypass restrictions, including enabling Developer Mode, using VPNs and proxy servers, utilizing browser extensions, changing DNS settings, performing a factory reset, and even using Linux on a Chromebook. Each method has its own advantages, considerations, and level of technical expertise required.
Remember that using these methods responsibly is essential. Always prioritize your privacy, security, and compliance with your school’s policies. Make sure to seek permission from the appropriate authorities or consult with your school’s IT department before making any changes to your School Chromebook.
In conclusion, while it’s possible to bypass restrictions on a School Chromebook, it’s important to proceed with caution and understand the potential consequences. Always prioritize your education, follow your school’s rules, and use technology responsibly. By doing so, you can make the most out of your School Chromebook while maintaining a safe and productive learning environment.