Introduction
Changing the proxy server in Chrome can be a crucial step for users seeking to enhance their online privacy, access region-restricted content, or troubleshoot network connectivity issues. A proxy server acts as an intermediary between a user's device and the internet, allowing for various benefits such as improved security, anonymity, and the ability to bypass geo-blocked content. By understanding how to change the proxy server settings in Chrome, users can gain greater control over their online experience.
In this guide, we will explore the step-by-step process of changing the proxy server in Chrome, empowering users to customize their browsing environment according to their specific needs. Whether it's for safeguarding sensitive data, accessing websites that are otherwise inaccessible in their region, or optimizing network performance, the ability to modify proxy settings can be a valuable skill for both casual and advanced users alike.
By following the instructions outlined in this article, users will be equipped with the knowledge and tools necessary to navigate the intricate landscape of proxy servers within the Chrome browser. With a clear understanding of how to modify these settings, users can tailor their browsing experience to align with their individual preferences and requirements. Let's delve into the practical steps that will enable users to change their proxy server settings in Chrome, unlocking a world of possibilities and customization options.
Step 1: Open Chrome Settings
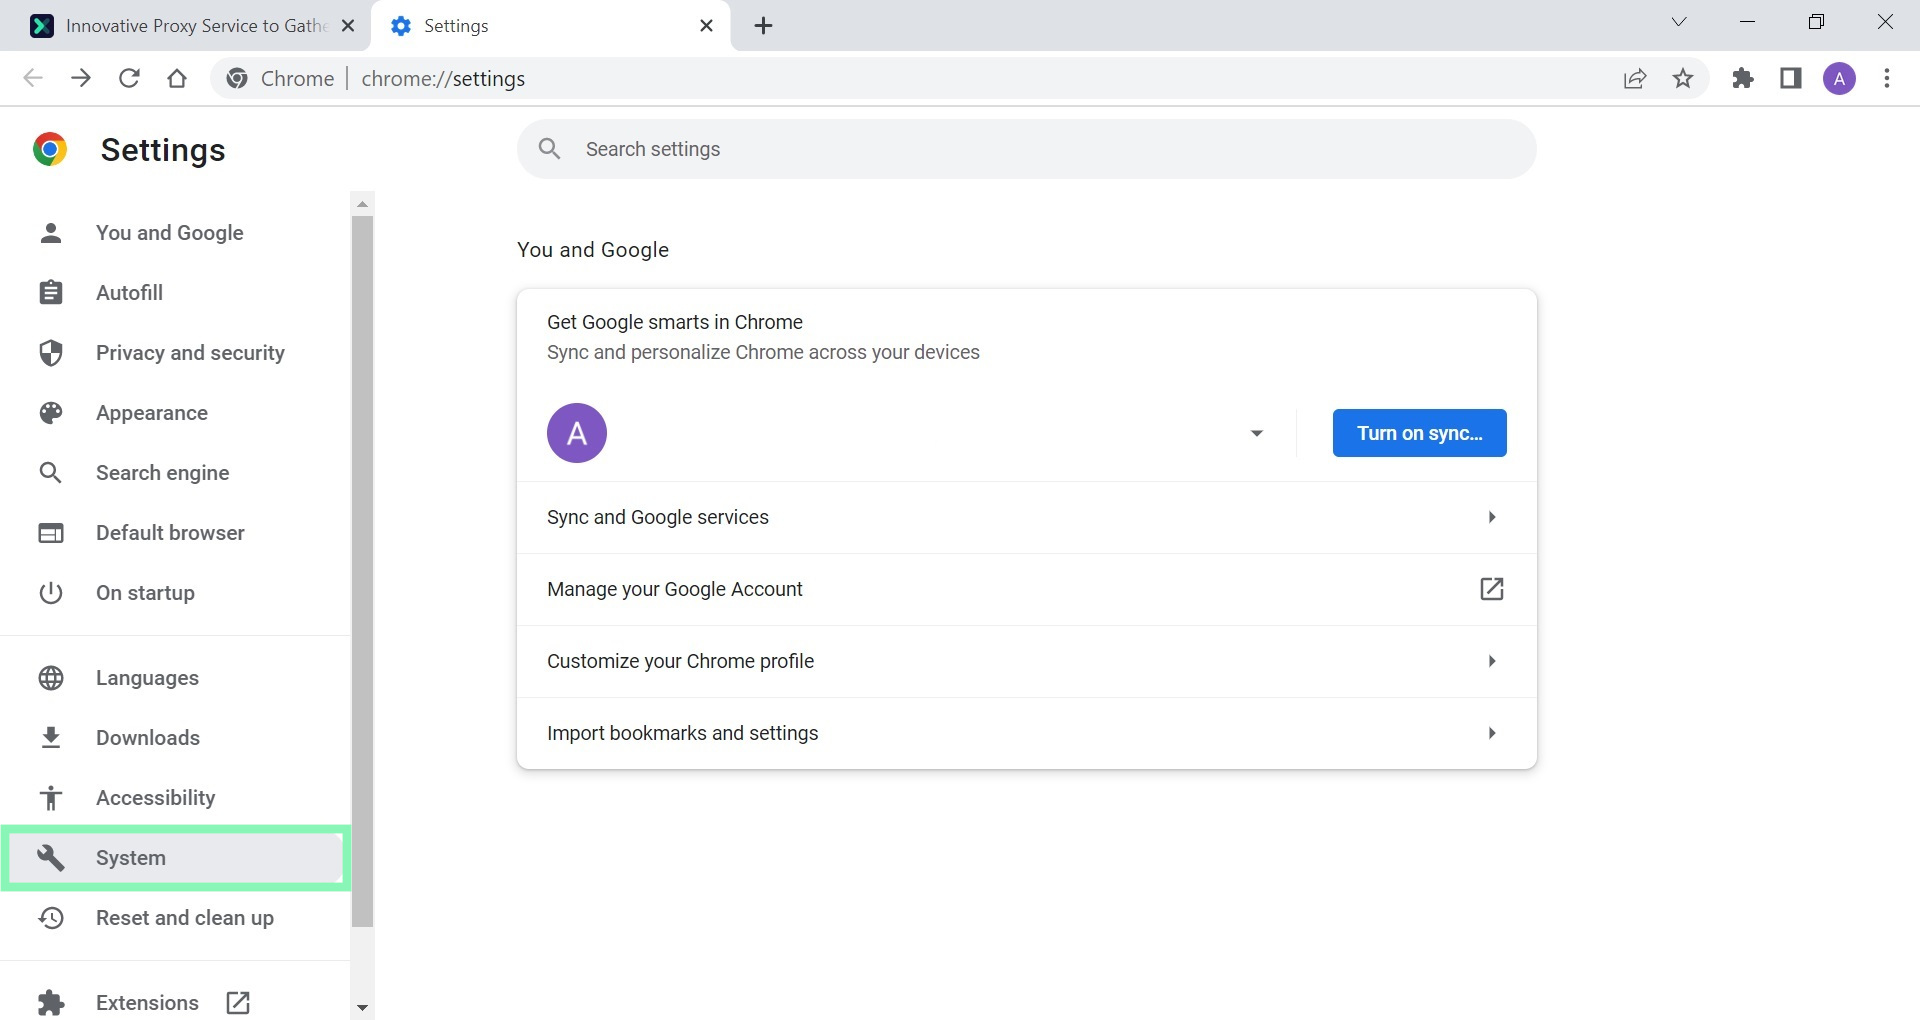
To begin the process of changing the proxy server in Chrome, the first step is to access the browser's settings. This can be accomplished by clicking on the three vertically aligned dots located in the top-right corner of the browser window. These dots represent the Chrome menu, which contains a plethora of options for customizing the browser's behavior and appearance.
Upon clicking the menu, a dropdown list will appear, presenting various features and settings. At the bottom of this list, there will be an option labeled "Settings." Clicking on this option will redirect the user to the Chrome Settings page, where a wide array of customization options are available.
The Settings page serves as a central hub for managing Chrome's features, including privacy and security settings, appearance customization, and advanced configurations. This page is designed to provide users with a comprehensive toolkit for tailoring their browsing experience to suit their individual preferences and requirements.
Upon reaching the Settings page, users will be presented with a user-friendly interface that organizes the available options into distinct categories. These categories encompass various aspects of the browser's functionality, making it easy for users to navigate and locate the specific settings they wish to modify.
By opening the Chrome Settings, users gain access to a wealth of customization options, empowering them to personalize their browsing environment according to their unique needs. This initial step sets the stage for the subsequent actions required to change the proxy server settings, laying the foundation for a seamless and intuitive process.
In essence, opening the Chrome Settings serves as the gateway to a world of customization possibilities, allowing users to take control of their browsing experience and tailor it to align with their preferences. This pivotal step marks the beginning of the journey toward modifying the proxy server settings, setting the stage for a streamlined and user-centric approach to browser customization.
Step 2: Click on "Advanced" to Expand Settings
Upon reaching the Chrome Settings page, users will notice a sidebar on the left-hand side, featuring a list of categories such as "Privacy and security," "Autofill," "Site settings," and more. To proceed with modifying the proxy server settings, users should direct their attention to the bottom of the sidebar, where they will find an option labeled "Advanced." This pivotal step involves clicking on "Advanced" to expand the settings and gain access to additional customization options.
By clicking on "Advanced," users will unlock a treasure trove of advanced settings and features that delve deeper into the inner workings of the Chrome browser. This expansion of settings is designed to cater to users who seek a higher degree of control and customization over their browsing experience. It signifies a transition from the standard settings to a realm of advanced configurations, providing users with the tools necessary to fine-tune their browsing environment according to their specific requirements.
Upon clicking "Advanced," the sidebar will expand to reveal a new set of categories and options, offering a more comprehensive view of the browser's capabilities. Users will find additional sections such as "Privacy and security," "System," "Reset and clean up," and more. This expansion of settings reflects Chrome's commitment to empowering users with a diverse range of customization options, ensuring that individuals can tailor their browsing experience to align with their unique preferences and needs.
Furthermore, the "Advanced" section houses a myriad of features that cater to users with varying levels of technical expertise and specific requirements. From managing site settings and configuring privacy options to fine-tuning system configurations, the expanded settings offer a wealth of possibilities for users to explore and leverage.
In essence, clicking on "Advanced" serves as a gateway to a realm of advanced customization options, enabling users to delve deeper into the intricacies of the Chrome browser. This pivotal step sets the stage for a more nuanced and personalized approach to modifying the proxy server settings, empowering users to harness the full potential of Chrome's advanced features and configurations.
By expanding the settings through the "Advanced" section, users gain access to a wealth of tools and options that cater to their diverse needs, laying the groundwork for a more tailored and refined browsing experience. This expansion of settings marks a significant milestone in the journey toward modifying the proxy server settings, paving the way for a more comprehensive and user-centric approach to browser customization.
Step 3: Click on "Open your computer's proxy settings"
After expanding the settings through the "Advanced" section, users will encounter a category labeled "System" within the expanded sidebar. This section houses a range of system-related configurations and options, including the crucial setting for managing proxy server configurations. To proceed with modifying the proxy server settings, users should focus their attention on the "System" category and locate the option labeled "Open your computer's proxy settings."
Clicking on "Open your computer's proxy settings" initiates a seamless transition from the Chrome browser to the system-level proxy settings on the user's computer. This pivotal step represents a bridge between the browser's configurations and the broader system-level network settings, enabling users to access and modify the proxy configurations that govern their entire network connectivity.
Upon clicking this option, users will be directed to the system settings page that governs proxy configurations at the operating system level. This page provides users with a centralized platform for managing a wide array of network-related settings, including proxy configurations that impact the entire system's internet connectivity.
The system-level proxy settings page offers a comprehensive view of the current proxy configurations, allowing users to modify and customize these settings according to their specific requirements. Users can leverage this platform to input custom proxy server addresses, configure authentication settings, and fine-tune other parameters that dictate the behavior of the proxy server at the system level.
Furthermore, accessing the system-level proxy settings from within the Chrome browser streamlines the process of modifying these configurations, eliminating the need to navigate through complex system menus and settings. This seamless integration between the browser and the system-level proxy settings enhances user convenience and accessibility, ensuring that users can efficiently manage their proxy configurations without encountering unnecessary complexities.
In essence, clicking on "Open your computer's proxy settings" serves as a pivotal gateway to the broader network configurations that govern the system's internet connectivity. This seamless transition from the browser to the system-level settings empowers users to exert greater control over their network environment, enabling them to tailor their proxy configurations to align with their specific needs and preferences.
By accessing the system-level proxy settings from within the Chrome browser, users can seamlessly modify these configurations, fostering a more streamlined and user-centric approach to managing proxy server settings. This pivotal step sets the stage for a more integrated and intuitive process of customizing proxy configurations, empowering users to navigate the intricate landscape of network settings with ease and efficiency.
Step 4: Change Proxy Settings
Upon accessing the system-level proxy settings, users are presented with a comprehensive platform for modifying and customizing their proxy configurations. This pivotal step involves navigating through the various options available within the system settings to make the necessary changes to the proxy server settings.
Users can begin by identifying the specific proxy configurations that require modification, such as the proxy server address, port number, and authentication settings. These parameters dictate the behavior of the proxy server and play a crucial role in shaping the user's network connectivity and browsing experience.
To change the proxy settings, users can input the desired proxy server address and port number into the designated fields within the system settings. Additionally, users can configure authentication settings if required, ensuring that the proxy server recognizes and authenticates the user's credentials for seamless connectivity.
Furthermore, users may have the option to specify exceptions or bypass rules for certain websites or resources, allowing them to define specific conditions under which the proxy server should be bypassed. This level of granularity empowers users to tailor their proxy configurations to accommodate specific browsing requirements and network scenarios.
By modifying the proxy settings within the system-level configurations, users can exert precise control over their network connectivity and browsing behavior. Whether it's for enhancing privacy, accessing region-restricted content, or optimizing network performance, the ability to customize proxy settings at this level empowers users to align their browsing experience with their individual preferences and requirements.
In essence, changing the proxy settings within the system-level configurations represents a pivotal stage in the process of customizing the proxy server settings. This step equips users with the tools and flexibility necessary to tailor their network environment to suit their specific needs, fostering a more personalized and refined browsing experience.
By navigating through the system settings and making the required modifications to the proxy configurations, users can harness the full potential of proxy servers to enhance their online experience, safeguard their privacy, and overcome network-related challenges. This step marks a significant milestone in the journey toward optimizing and customizing the proxy server settings within the Chrome browser.
Step 5: Save and Apply Changes
After making the necessary modifications to the proxy settings within the system-level configurations, the final step involves saving and applying these changes to ensure that the customized proxy configurations take effect. This pivotal stage serves as the culmination of the entire process, consolidating the user's adjustments and integrating them into the network environment to reflect the desired browsing preferences and requirements.
Upon completing the modifications to the proxy settings, users should navigate to the appropriate controls within the system settings to save and apply the changes. This typically involves locating a "Save" or "Apply" button within the system settings interface, which serves as the mechanism for finalizing the customized proxy configurations and implementing them within the network environment.
By clicking on the "Save" or "Apply" button, users initiate the process of committing their modifications to the proxy settings, signaling to the system that these custom configurations should be adopted for the user's network connectivity. This action ensures that the user's preferences for proxy server address, port number, authentication settings, and any specified bypass rules are seamlessly integrated into the network environment, shaping the user's browsing experience in accordance with their specific requirements.
Furthermore, saving and applying the changes to the proxy settings represents a crucial checkpoint in the customization process, validating the user's efforts to tailor their network environment to align with their individual preferences. This action solidifies the user's influence over their network connectivity, affirming their ability to exert precise control over their browsing behavior and network interactions.
In essence, the act of saving and applying the changes to the proxy settings signifies the user's proactive engagement in shaping their online experience, leveraging the flexibility and customization options available within the Chrome browser and system-level configurations. By finalizing the customized proxy configurations, users affirm their agency in optimizing their network environment to suit their unique browsing needs, thereby fostering a more tailored and refined online experience.
By completing the process of saving and applying the changes to the proxy settings, users can confidently navigate the digital landscape with a network environment that reflects their preferences and requirements, empowering them to harness the full potential of customized proxy configurations within the Chrome browser. This final step marks the culmination of the journey toward modifying the proxy server settings, encapsulating the user's ability to shape their browsing experience according to their individualized specifications.