Introduction
Chrome Autofill is a convenient feature that saves time and effort by automatically populating forms with frequently used information, such as addresses, phone numbers, and email addresses. However, there are instances when you may need to update or change the email address associated with your Chrome Autofill settings. Whether you've created a new email account, updated your contact information, or simply want to use a different email address for form autofill, Chrome provides a straightforward process to make these adjustments.
In this guide, we will walk through the step-by-step process of changing your email address in Chrome Autofill. By following these simple instructions, you can ensure that your Chrome browser accurately reflects your current email information, streamlining your online form-filling experience. Whether you're a seasoned Chrome user or new to the platform, this tutorial will equip you with the knowledge to manage your Autofill settings with ease.
Let's dive into the process of updating your email address in Chrome Autofill, empowering you to maintain accurate and up-to-date information for seamless browsing and form completion.
Step 1: Open Chrome Settings
To begin the process of changing your email address in Chrome Autofill, the first step is to access the Chrome browser settings. Opening the settings menu provides you with the necessary entry point to manage various aspects of your browsing experience, including Autofill settings.
-
Launch Chrome Browser: Start by opening the Chrome browser on your computer or laptop. You can easily locate the Chrome icon on your desktop or in the taskbar. Alternatively, you can search for "Chrome" in the Windows Start menu or click on the Chrome app in the Applications folder on a Mac.
-
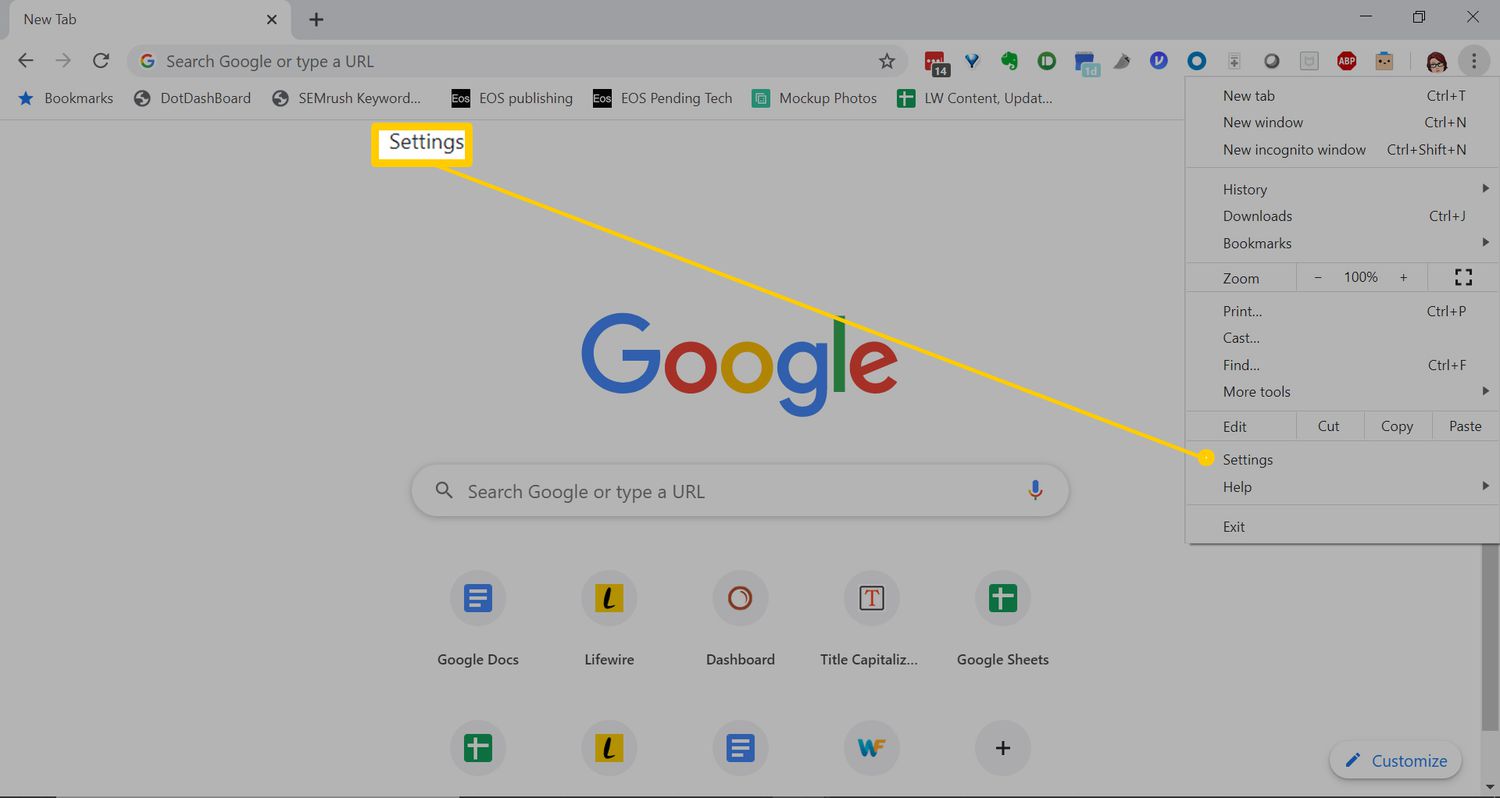
Access Settings Menu: Once the Chrome browser is open, look for the three vertical dots located in the top-right corner of the window. These dots represent the Chrome menu. Click on the dots to reveal a dropdown menu.
-
Navigate to Settings: Within the dropdown menu, scroll down and locate the "Settings" option. Click on "Settings" to access the Chrome settings interface.
-
Alternative Method: Another way to access the settings is by typing "chrome://settings/" in the address bar and pressing Enter. This direct URL will take you to the Chrome settings page without the need to navigate through the dropdown menu.
Upon reaching the Chrome settings page, you have successfully completed the first step in the process of updating your email address in Chrome Autofill. This initial step lays the foundation for further adjustments to your Autofill settings, enabling you to seamlessly manage your browsing information.
With the Chrome settings now accessible, you are ready to proceed to the next step, which involves accessing the specific Autofill settings where you can edit your email address. This seamless transition from opening the Chrome settings to modifying the Autofill information underscores the user-friendly nature of Chrome's interface, empowering users to efficiently customize their browsing experience.
Step 2: Access Autofill Settings
After successfully navigating to the Chrome settings interface, the next crucial step in updating your email address in Chrome Autofill is to access the specific Autofill settings. Chrome's Autofill feature not only streamlines form completion but also offers a user-friendly approach to managing and customizing the information it stores. By accessing the Autofill settings, you gain the ability to modify and update your email address with ease.
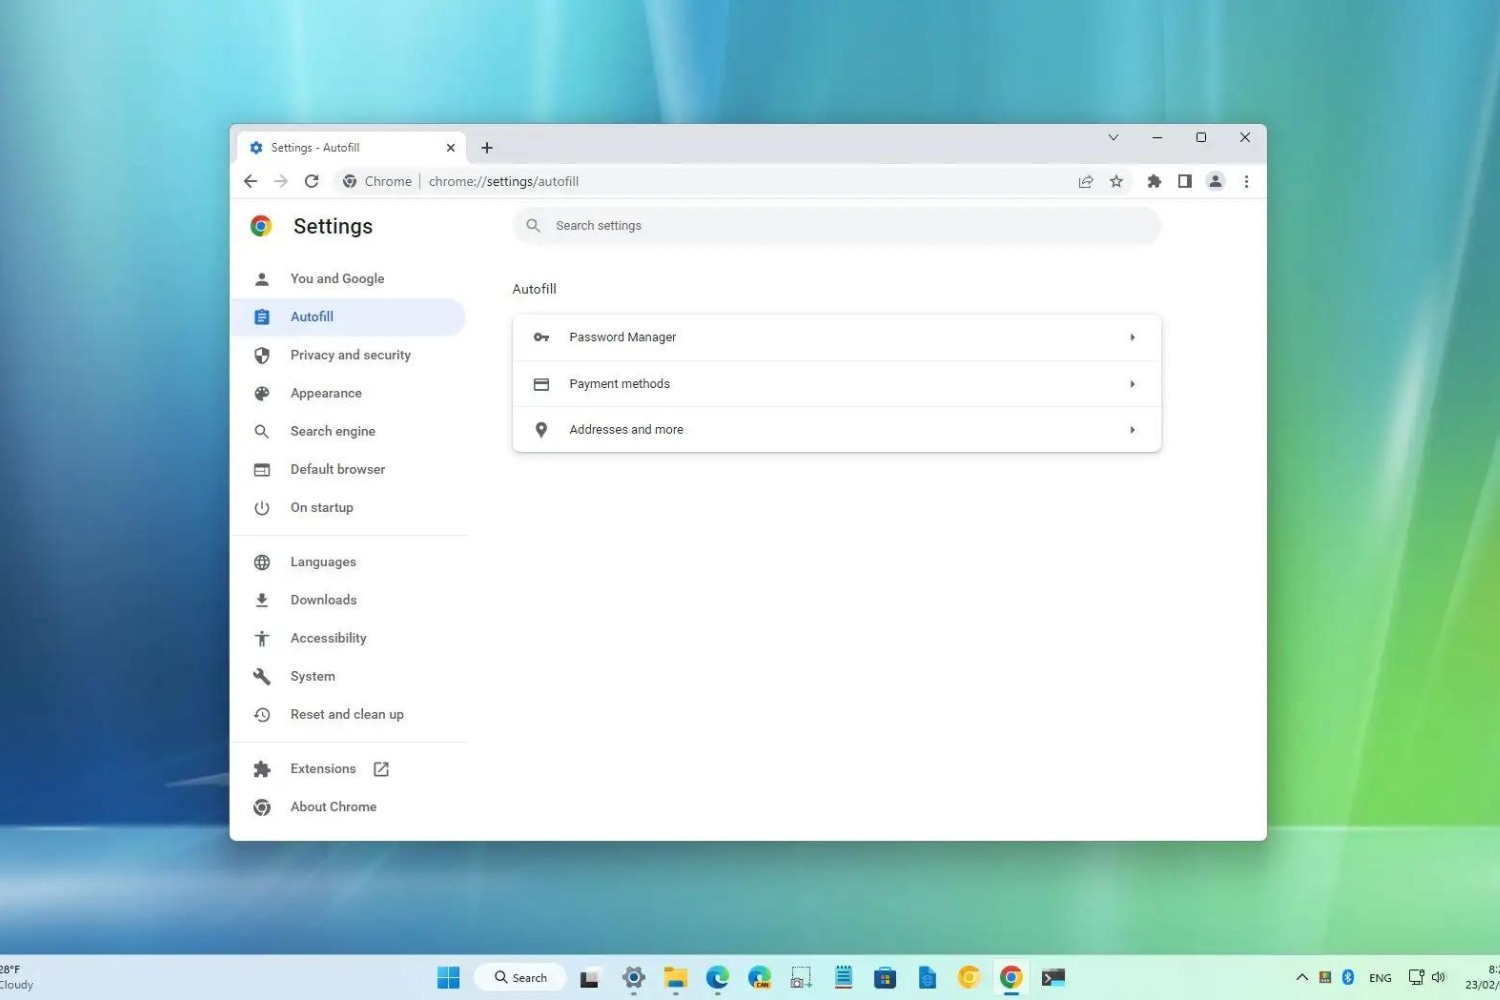
Upon reaching the Chrome settings page, you will notice a list of categories on the left-hand side of the screen. These categories encompass various aspects of Chrome's functionality, including Privacy and Security, Appearance, and Autofill. To access the Autofill settings, follow these steps:
-
Navigate to Autofill Settings: Locate and click on the "Autofill" category within the list of settings options. This action directs you to the Autofill settings page, where you can manage and edit the information stored for form autofill purposes.
-
Access Email Address Section: Within the Autofill settings, you will find a section dedicated to email addresses. Click on the "Email addresses" option to enter the specific area where your stored email information is managed.
-
Review Existing Email Addresses: Once you have accessed the email addresses section, you will see a list of email addresses currently stored in Chrome's Autofill. This list may include multiple email addresses that you have used for form completion in the past.
By following these steps, you have successfully accessed the Autofill settings within Chrome, specifically entering the email addresses section where your stored email information is managed. This pivotal step sets the stage for the subsequent action of editing your email address, ensuring that your Autofill data accurately reflects your current contact information.
With the Autofill settings now accessible, you are poised to proceed to the next step, which involves editing your email address within Chrome's Autofill. This seamless transition from accessing the Autofill settings to modifying the stored email information underscores Chrome's intuitive interface, empowering users to effortlessly manage their browsing data.
Step 3: Edit Email Address
With the Autofill settings accessible and the email addresses section within Chrome's interface open, you are now ready to proceed with the pivotal step of editing your email address in Chrome Autofill. This step is essential for ensuring that your browsing experience accurately reflects your current contact information, streamlining the process of form completion and enhancing overall efficiency.
To edit your email address in Chrome Autofill, follow these straightforward steps:
-
Locate the Email Address: Upon entering the email addresses section within the Autofill settings, you will see a list of email addresses currently stored in Chrome's Autofill. Scan through the list to locate the specific email address that you intend to edit. This may be the email address associated with your primary contact information or a secondary email used for form completion.
-
Click on the Email Address: Once you have identified the email address that requires editing, click on it to initiate the modification process. This action directs you to a detailed view of the selected email address, where you can make the necessary adjustments.
-
Edit the Email Address: Within the detailed view of the selected email address, you will find an option to edit the information. Click on the edit button or icon, typically represented by a pencil or similar edit symbol. This action enables you to modify the email address, ensuring that it accurately reflects your current contact information.
-
Enter the Updated Email Address: After clicking the edit option, a text field or input box will appear, allowing you to enter the updated email address. Carefully input the new email information, ensuring accuracy and completeness. Double-check the entered email address to avoid any typographical errors.
-
Save the Changes: Once you have entered the updated email address, look for the "Save" or "Update" button within the detailed view of the email address. Click on this button to save the changes and confirm the modification of the email address in Chrome Autofill.
By following these steps, you have successfully edited your email address in Chrome Autofill, ensuring that your browsing data aligns with your current contact information. This seamless process empowers you to maintain accurate and up-to-date Autofill information, enhancing your browsing experience and simplifying form completion.
With the email address now updated in Chrome's Autofill, you are prepared to proceed to the final step, which involves saving the changes to solidify the modification and ensure that your browsing data reflects the latest email information. This seamless transition from editing the email address to saving the changes underscores Chrome's user-friendly interface, enabling effortless management of Autofill data.
Step 4: Save Changes
After successfully editing your email address in Chrome Autofill, the final step involves saving the changes to ensure that the updated information is securely stored and reflected in your browsing data. This pivotal action solidifies the modification made to your email address, ensuring that your Autofill settings accurately capture your current contact information.
To save the changes and confirm the updated email address in Chrome Autofill, follow these straightforward steps:
-
Review the Modified Email Address: Before proceeding with saving the changes, take a moment to review the modified email address displayed within the detailed view of the email addresses section. Ensure that the updated email information is accurately entered and free from any typographical errors.
-
Confirm the Accuracy: Double-check the updated email address to verify its accuracy and completeness. It is essential to ensure that the modified email information aligns with your current contact details, enabling seamless form completion and accurate Autofill functionality.
-
Locate the Save Button: Within the detailed view of the email address, look for the "Save" or "Update" button. This button is typically located near the area where you made the modifications. It serves as the final step in confirming the changes to your email address in Chrome Autofill.
-
Click on Save: Once you have reviewed and confirmed the accuracy of the updated email address, click on the "Save" or "Update" button. This action finalizes the modification and securely stores the updated email information within Chrome's Autofill settings.
-
Confirmation Message: Upon clicking the save button, you may receive a confirmation message indicating that the changes have been successfully saved. This message serves as a reassurance that the updated email address is now securely stored and will be utilized for form autofill purposes.
By following these steps, you have successfully saved the changes to your email address in Chrome Autofill, ensuring that your browsing data accurately reflects your current contact information. This seamless process empowers you to maintain up-to-date Autofill information, enhancing your browsing experience and streamlining form completion.
With the changes now securely saved, you have effectively completed the process of updating your email address in Chrome Autofill. Your browsing data is now equipped with the latest email information, optimizing the Autofill functionality and ensuring a seamless form completion experience.
This concludes the step-by-step guide to changing your email address in Chrome Autofill, empowering you to efficiently manage your browsing data and maintain accurate contact information within the Chrome browser.
Conclusion
In conclusion, the ability to change your email address in Chrome Autofill provides a valuable opportunity to ensure that your browsing experience is aligned with your current contact information. By following the step-by-step process outlined in this guide, you have gained the knowledge and confidence to seamlessly manage your Autofill settings, empowering you to maintain accurate and up-to-date information for form completion.
The process of updating your email address in Chrome Autofill begins with accessing the Chrome settings, followed by navigating to the specific Autofill settings where you can edit your stored email information. By carefully editing and saving the changes to your email address, you have effectively optimized your browsing data, enhancing the functionality of Chrome's Autofill feature.
It is important to emphasize the significance of maintaining accurate Autofill information, as it directly impacts your browsing efficiency and form completion experience. Whether you have created a new email account, updated your contact details, or simply prefer to use a different email address for form autofill, Chrome's intuitive interface and streamlined process enable you to manage your browsing data with ease.
By taking control of your Autofill settings and ensuring that your email address is accurately reflected, you are poised to experience a more seamless and personalized browsing experience. The convenience of having your frequently used information readily available for form completion is further enhanced when it aligns with your current contact details.
As technology continues to evolve, the ability to effortlessly manage browsing data becomes increasingly valuable. Chrome's Autofill feature, coupled with the straightforward process of updating your email address, exemplifies the user-centric approach to browsing customization and efficiency.
In essence, the process of changing your email address in Chrome Autofill is a testament to Chrome's commitment to empowering users with intuitive and customizable features. By embracing these capabilities, you are not only optimizing your browsing experience but also staying in control of your digital footprint.
In conclusion, the seamless process of updating your email address in Chrome Autofill underscores the user-friendly nature of the Chrome browser, empowering you to maintain accurate and up-to-date browsing information. With your email address now aligned with your current contact details, you are well-equipped to navigate the digital landscape with enhanced efficiency and personalized convenience.