So you’ve participated in a couple of virtual meetings and recorded the most crucial moments. But where do Zoom recordings go in the first place? This guide will help you understand the basic rules for Zoom recordings, including where they go, how you can locate them, and how you can create a unique file path for your future recordings. Let’s dive in.
Why Save a Zoom Recording?

We’ve all been there: attending an online meeting and having a hard time keeping up with the discussion. This may be because of the speaker’s pace or the fact that you had to leave the room for some unknown reason. If you want to keep track of everything that happens in the meeting, the most efficient way to do so is to record a video of the meeting.
Saving your Zoom recordings gives you the chance to review the events of the meeting at a later time. You can use the recorded file to either create notes or transcribe the events of the meeting. Typing your notes on your computer or even on your phone is arguably a lot faster than writing them down when it comes to taking notes. Check out this list of the best note-taking apps you can use. It’s also a great way to facilitate asynchronous meetings; that is, you can record a meeting with a specific group and share that with another group.
Where Do Zoom Recordings Go?
But where exactly do Zoom recordings go in the first place? There are two potential storage places for your Zoom recordings, and that includes either the Zoom cloud or your desktop computer.
If you have a free Zoom account, Zoom will automatically save all of your recordings to a specially-assigned folder on your desktop. That is, the software will create a Zoom folder within the Documents panel of your desktop the moment you download the application. This folder will serve as the default location for all of your recordings.
On the other hand, if you have a paid account, you can choose whether to have your recordings saved on your desktop or the Zoom cloud storage. It’s worth noting that the amount of storage that you get depends on the subscription tier you signed up for.
How to Find Zoom Recordings via Desktop

If you are using a free account, you should automatically have a default folder in which to store all of your recordings. This Zoom folder will be tucked within your Documents folder no matter what operating system you use — Windows, Mac, or Linux. Take note of the following file paths for each folder, depending on the type of system you are using:
- Mac: /Users/[Username]/Documents/Zoom
- Windows: C:\Users\[Username]\Documents\Zoom
- Linux: home/[Username]/Documents/Zoom
- Each time you stop recording, you can also access a .mp4 file with the full Zoom recording. Note that you can also pull up an MP4 version of the recording, should you require it.
How to Find Your Zoom Recordings via Zoom Cloud

As we’ve mentioned, users with premium subscriptions (Pro, Business, and Enterprise) can save their recordings straight into the cloud. They also have the option to automate the upload of the recordings into the Zoom cloud.
There are two ways to access a copy of a recording after it has been uploaded into the cloud. You can wait for Zoom to send you a link to the file via your email. Alternatively, you can manually search for the recording through the Zoom portal. Access your recordings on the web portal with the following steps:
- Log in to the Zoom web portal from zoom.us/signin.
- If you’re an admin, click on “Account Management,” then select “Recording Management.” If you are a standard user, simply head to the recordings tab and all the options for recording and controls will be available there.
- If you wish, you can filter your meetings by status or date. You can also search for a specific recording by keying in meeting details (i.e., meeting ID, host, topic). As a last resort, you can play the recording as a video or an MP4 file through the portal to check its contents.
How to Customize Your Recording File Path

Just because Zoom designates a specific folder to save your files in doesn’t mean your files have to go there. In truth, you can determine where your recordings go. However, this option only applies to files that you save on your desktop and not into the cloud.
Another word of caution before you proceed: customizing your recording file path only works for the desktop version of Zoom and not the mobile version. In other words, you must use your desktop computer or laptop to reconfigure your file path. Once you’re signed into the desktop platform, follow these steps:
- Click on your profile picture from the upper-right corner of the page.
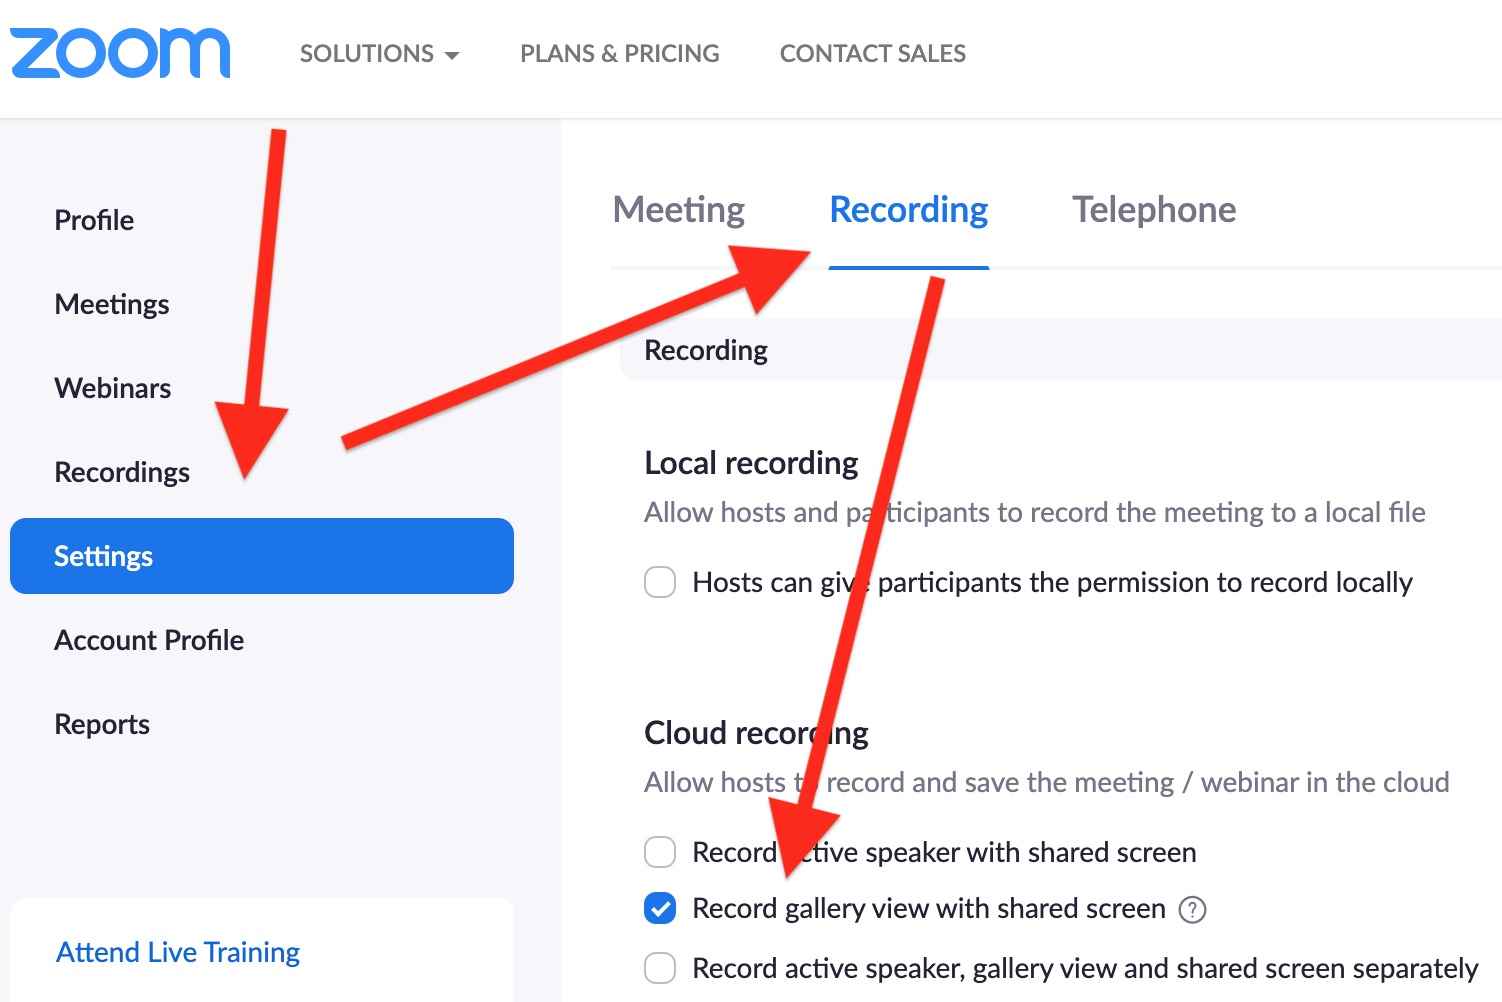
- Click on “Settings,” followed by the “Recording” option.
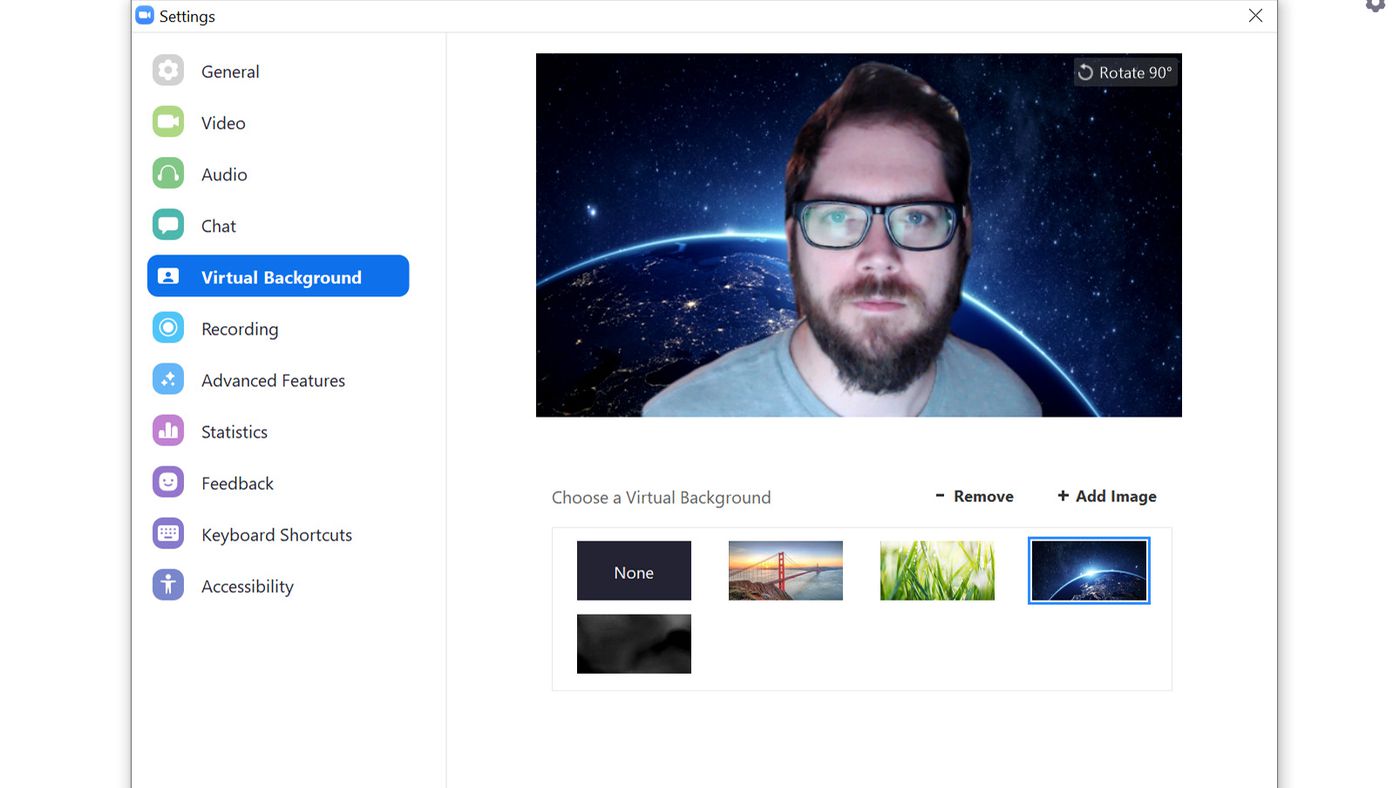
- Next to “Local Recording,” click on “Change” to update your recording location.
- Just like that, you should have a custom file path for all of your Zoom recordings.
How to Share Your Zoom Recordings

Now that you’ve located your Zoom meetings, the next relevant step is to share them with other members of the team who were not able to attend the meeting. Locating your files is one thing, but sharing them with others is another matter entirely. Not to worry, though, since we will show you how to go about sharing your meetings with other members in a few quick steps.
Share Your Cloud Meetings

Zoom will send you a link to each recording via email when it comes to cloud recordings. Simply copy this link and forward it to your colleagues or classmates. However, if you are unsure which file was sent to you at which time, you can first check the file from your Zoom web portal.
From there, you can head back to the “Recording Management” section. This is the same section that the platform uses to store your files. Once you’ve found the recording file you want to share, click on the “Share” button to grab the file link you can send to other members of your team.
If you would prefer to upload your file into a third-party platform before sharing it with others, you can do so easily by first downloading the file from Zoom. After that, you can already upload the file onto a cloud-based service like Google Drive or Dropbox and share the link with others in your team. You can also upload your files to a video-sharing platform like YouTube or Vimeo. But of course, this isn’t advisable for confidential files.
Share Your Local Recordings
When it comes to recordings stored on your local drive, there is no direct way to share the files unless you upload them onto a third-party cloud service before sharing them via email or chat.
The majority of email services have data caps for attachments. In other words, you can only send a certain volume of data in the form of attachments per email. Gmail, for example, has a 25 MB data cap for each email. This means you will likely have to put the video on some file-sharing site and email a link to it.
Luckily, there are a handful of reliable and affordable third-party cloud storage services available for you to choose from. However, we need to note that these services are normally subscription-based. In other words, the storage space only lasts for as long as you are keeping up with your monthly subscription. Nonetheless, having third-party cloud storage should give you enough space to store all of your recordings and share them via file links.
Share Your Files Using a Network-Attached Storage
Another highly practical way to share your files, especially work-related files, is to upload them into a network-attached storage device. Network-attached storage (NAS) is physically similar to a hard drive in that you can store files inside it. But unlike a hard drive, network-attached storage connects to a wireless network. In turn, all devices that are connected to that network will be able to access the files stored therein. That includes everything from documents to video recordings.
Storing your recordings on network-attached storage is possible for both cloud-based and local recordings. If the system uploads your recordings into the cloud, you can download them onto your computer and then upload them to the NAS. On the other hand, if the platform stores your recordings on your computer by default, you can go straight ahead and upload them to the NAS. Here is a list of some of the best network-attached storage devices you can use.
Final Thoughts on Where Do Zoom Recordings Go and How to Find Them

Locating your recordings from Zoom should be a relatively easy thing to do if you know exactly where to look. Lucky for us, Zoom has taken the initiative to store all of your recordings either on a pre-designated folder on your desktop or in the cloud. At the same time, you still have the option to choose the file path that you want for your files. This will come in handy when you have a lot of different files to manage on your desktop. So unless you delete your files by accident or a computer virus wipes them out, you should have no trouble gaining access to your files. Of course, one way to protect your files from online hacking is to use a reliable antivirus program.