Introduction
Welcome to the ultimate guide on how to download Zoom on Windows! With its seamless video conferencing features and easy-to-use interface, Zoom has become one of the most popular communication platforms for individuals and businesses alike. Whether you need to attend virtual meetings, collaborate with colleagues, or connect with friends and family, having Zoom installed on your Windows computer is essential.
In this comprehensive guide, we will walk you through the step-by-step process of downloading, installing, and setting up Zoom on your Windows system. No technical expertise is required, as we have simplified the instructions to ensure a smooth experience for users of all levels.
Before diving into the installation procedure, it’s important to ensure that your Windows computer meets the necessary system requirements to run Zoom seamlessly. This will prevent any compatibility issues and guarantee a glitch-free user experience.
So, let’s get started with the system requirements for Zoom on Windows!
System Requirements
Prior to downloading and installing Zoom on your Windows computer, it’s crucial to make sure that your system meets the minimum requirements for a smooth and optimal experience. Here are the system requirements for running Zoom on Windows:
- Operating System: Windows 7, 8, 8.1, or 10 (32-bit or 64-bit)
- Processor: Intel i5 dual-core processor or higher (or equivalent AMD processor)
- RAM: At least 4 GB
- Hard Disk Space: A minimum of 500 MB of free disk space
- Internet Connection: A stable internet connection with at least 1 Mbps upload and download speed for video calls
- Display: A monitor with a minimum resolution of 800×600 (720p) for video calls
- Audio: A microphone and speakers (built-in or external) for audio communication
It’s important to note that while Zoom can run on Windows 7, it is recommended to use the latest versions, such as Windows 8, 8.1, or 10, for optimal performance and security.
Now that you know the system requirements, let’s proceed to the next section to download and install Zoom on your Windows computer!
Step 1: Downloading Zoom
To begin the process of installing Zoom on your Windows computer, you’ll first need to download the Zoom application. Follow these steps:
- Open your preferred web browser on your Windows computer.
- Navigate to the official Zoom website by typing “zoom.us” in the address bar and pressing Enter.
- Once on the Zoom homepage, locate and click on the “Resources” tab in the top navigation menu.
- From the dropdown menu that appears, select “Download Zoom Client.
- You will be redirected to the Zoom Download Center page. Here, you will find various download options, including Zoom for Windows. Click on the “Download” button next to the Windows option.
- The Zoom installer file will start downloading automatically. Depending on your internet speed, this process may take a few moments.
- Once the download is complete, locate the Zoom installer file in your computer’s designated download folder.
- Double-click on the installer file to initiate the Zoom installation process.
That’s it! You have successfully downloaded the Zoom application onto your Windows computer. Now, let’s move on to the next section to learn how to install Zoom and get started with your video conferencing journey.
Step 2: Installing Zoom
Now that you have downloaded the Zoom installer file, it’s time to install Zoom on your Windows computer. Follow these steps to complete the installation process:
- Locate the Zoom installer file in your computer’s designated download folder.
- Double-click on the installer file to run it. You may be prompted to grant permission for the installer to make changes to your system. Click “Yes” or “Continue” to proceed.
- The Zoom installation wizard will open. Review the terms of the license agreement and click on the “I Agree” button to accept the terms and continue.
- Next, you will be prompted to choose the installation options. By default, all the necessary components will be selected. If you wish to customize the installation, you can specify the components you want to install or remove.
- Click on the “Install” button to begin the installation process. The progress bar will indicate the status of the installation.
- Once the installation is complete, you will see a confirmation message. Click on the “Finish” button to close the installation wizard.
Congratulations! You have successfully installed Zoom on your Windows computer. Now, let’s move on to the next section to learn how to sign up for a Zoom account and unlock the full potential of the application.
Step 3: Signing Up for a Zoom Account
Now that you have Zoom installed on your Windows computer, the next step is to sign up for a Zoom account. A Zoom account will give you access to various features and functionalities, including scheduling and hosting meetings, joining webinars, and managing your settings. Follow these steps to create your Zoom account:
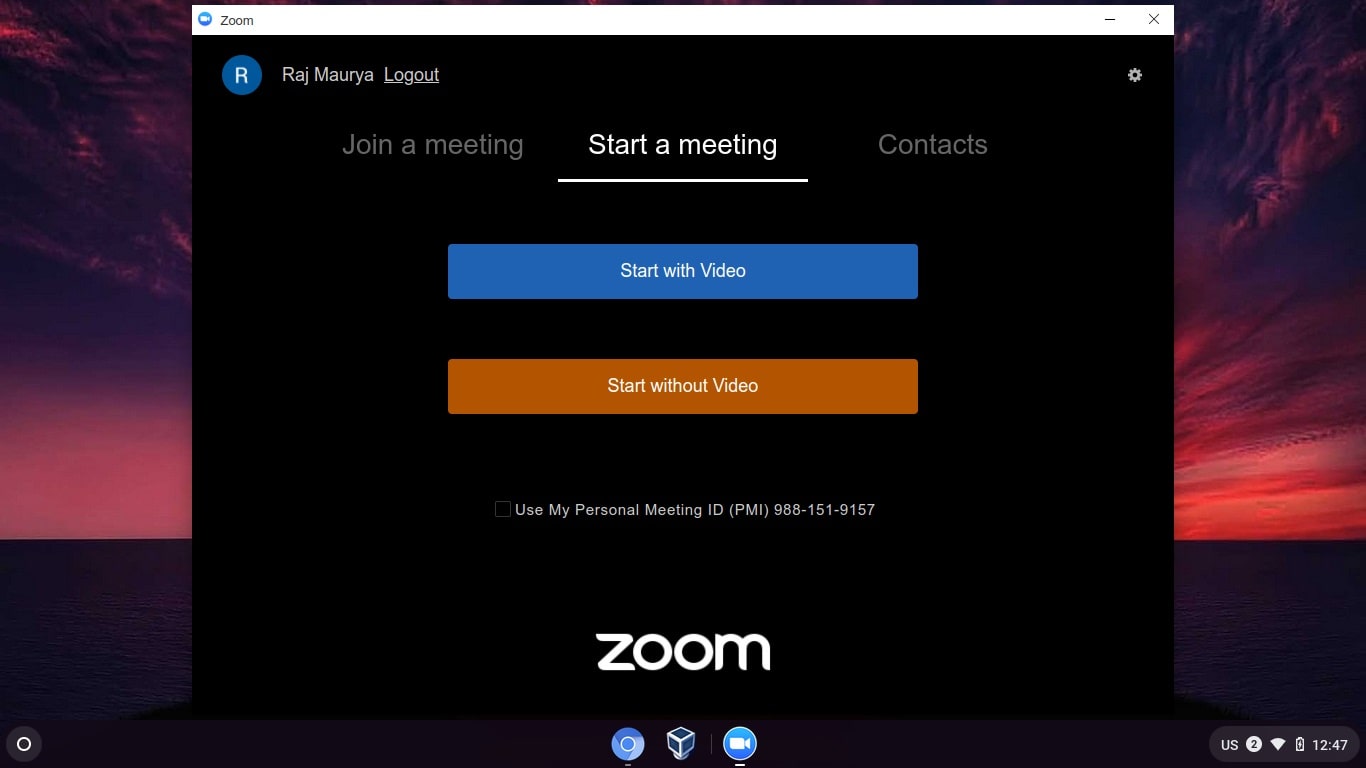
- Launch the Zoom application on your Windows computer by locating it in your applications or using the desktop shortcut.
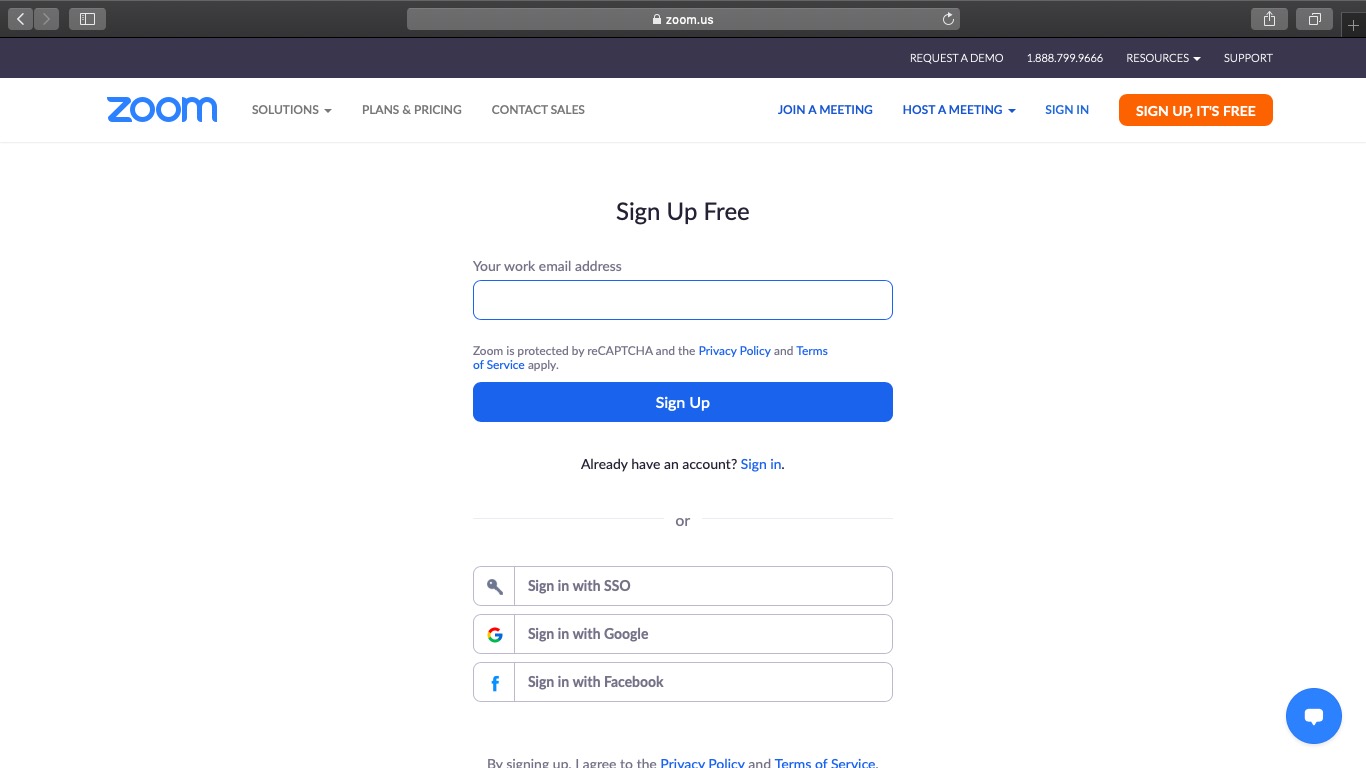
- On the Zoom application’s homepage, click on the “Sign Up” button to begin the account creation process.
- You will be presented with two options: “Sign Up with Work Email” or “Sign Up with Google” if you prefer to use your Google account. Choose the option that best suits your needs.
- If you selected “Sign Up with Work Email,” enter your work email address in the provided field.
- If you selected “Sign Up with Google,” you will be redirected to a Google sign-in page. Follow the prompts to sign in with your Google account.
- Once you provide the required information, click on the “Sign Up” button to proceed.
- An email will be sent to the provided email address with a confirmation link. Open your email inbox and click on the confirmation link to verify your account.
- After verifying your account, you will be redirected to the Zoom application. Here, you can set up your profile and customize your settings according to your preferences.
Congratulations! You have successfully signed up for a Zoom account. Now, you’re ready to start using Zoom for all your video conferencing needs.
In the next section, we will discuss how to configure Zoom settings to ensure a personalized and seamless experience.
Step 4: Configuring Zoom Settings
After signing up for a Zoom account, it’s important to configure the settings to optimize your user experience. Customizing your Zoom settings allows you to tailor the application according to your preferences and requirements. Follow these steps to configure your Zoom settings on Windows:
- Launch the Zoom application on your Windows computer.
- Sign in to your Zoom account using your credentials.
- Click on the profile icon or the gear icon at the top right corner of the Zoom application window to access the settings.
- In the settings menu, you will find various tabs and options to adjust different aspects of Zoom.
- Start by exploring the “General” tab, where you can customize settings such as your profile picture, display name, and email address.
- Next, navigate to the “Audio” and “Video” tabs to configure your preferred audio and video settings for meetings and webinars. Test your audio and video devices to ensure they are working correctly.
- Proceed to the “Meetings” tab to customize settings related to meeting invitations, breakout rooms, and screen sharing options.
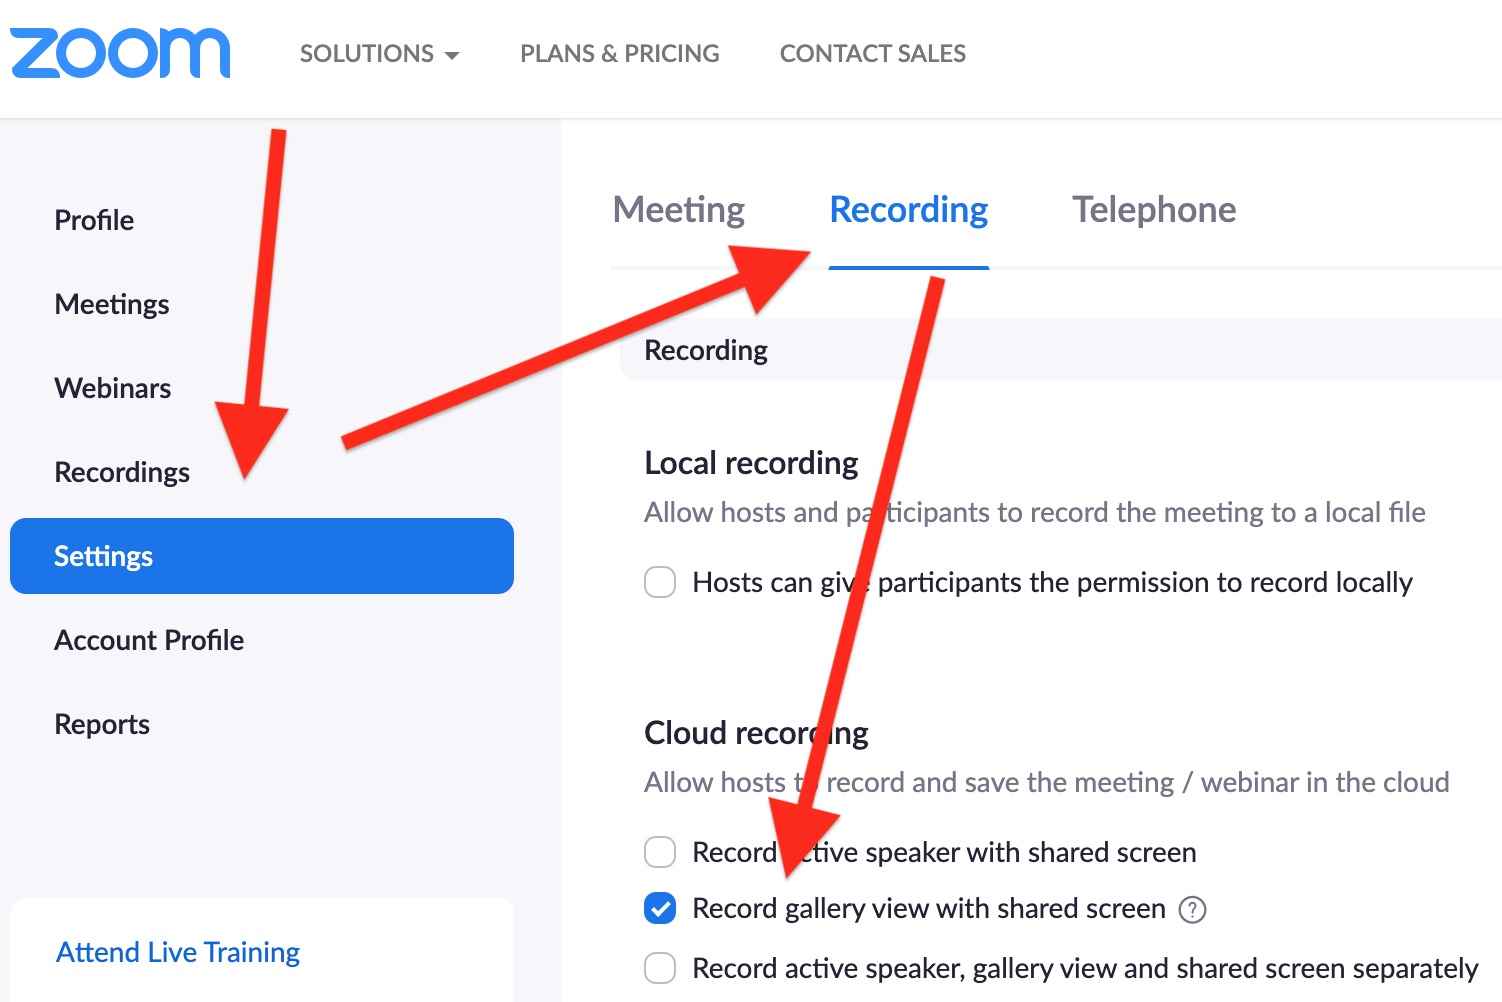
- Explore the “Accessibility” and “Recording” tabs to adjust settings that cater to specific accessibility requirements or recording preferences.
- Finally, review the “Advanced” tab for additional settings, including network and file transfer options.
- Make the desired changes to the settings according to your preferences. Remember to click on the “Save” or “Apply” button to save your changes.
By configuring your Zoom settings, you can enhance your video conferencing experience and ensure that Zoom is personalized to meet your specific needs and requirements.
Now that you have completed the configuration process, you are ready to start using Zoom on your Windows computer. Enjoy seamless communication, collaboration, and virtual meetings with Zoom!
Conclusion
Congratulations! You have successfully learned how to download, install, and configure Zoom on your Windows computer. With its seamless video conferencing capabilities and user-friendly interface, Zoom has become an essential tool for individuals and businesses alike.
In this guide, we covered the step-by-step process of downloading Zoom, ensuring your system meets the minimum requirements, installing the application, creating a Zoom account, and configuring the settings to personalize your experience.
Now that you have Zoom up and running on your Windows computer, you can enjoy the benefits of virtual meetings, collaboration, and communication with colleagues, friends, and family. Whether you’re attending work meetings, hosting webinars, or simply catching up with loved ones, Zoom provides a reliable platform for seamless and high-quality video conferencing.
Remember to keep your Zoom application updated to access the latest features and security enhancements. Additionally, don’t hesitate to explore the various advanced features that Zoom offers, such as screen sharing, recording options, and breakout rooms, to enhance your virtual interactions.
Thank you for following this guide on how to download Zoom on Windows. We hope this information has been helpful in getting you started with Zoom and making the most out of its features. Happy Zooming!