Introduction
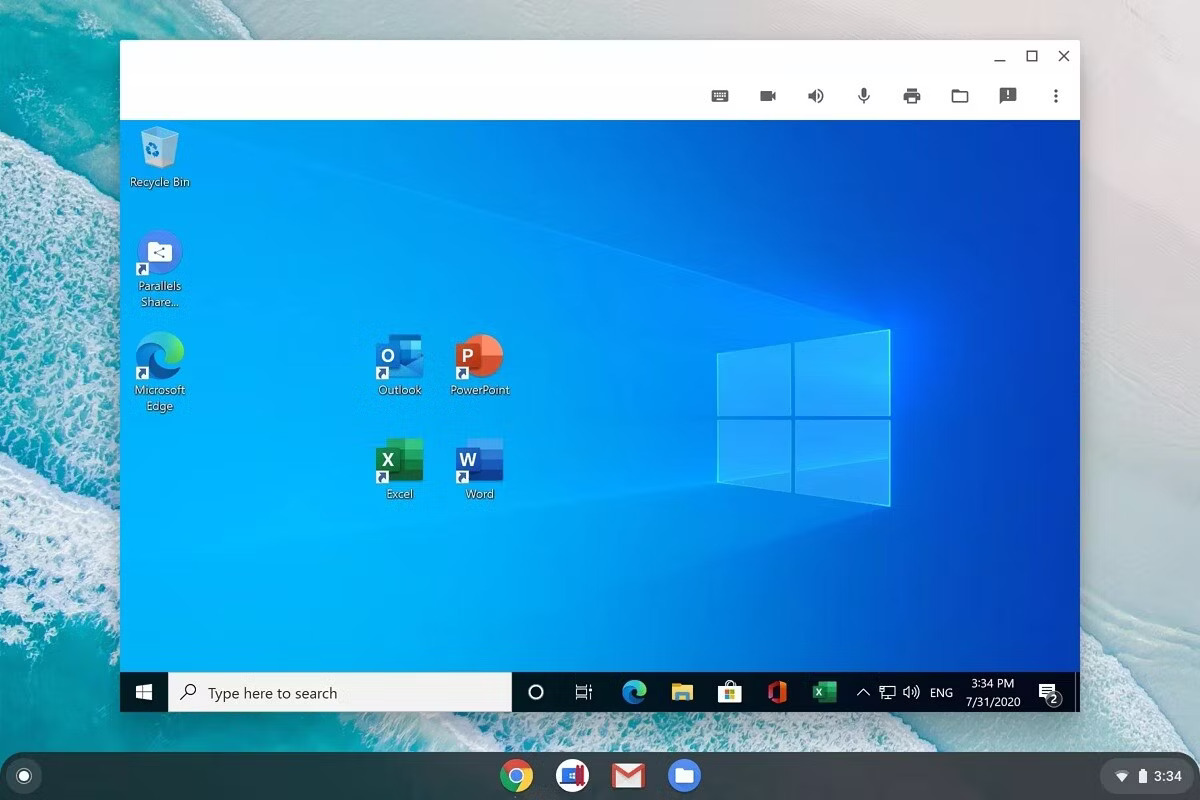
Welcome to this guide on how to download Windows 10 on a Chromebook. Chromebooks are known for their simplicity and efficiency, but if you need to use Windows-specific applications or prefer the Windows operating system, you may think that Chromebooks are not for you. However, with some clever workarounds, it is possible to install and run Windows 10 on your Chromebook.
Before we dive into the steps, it’s essential to understand that this process requires a bit of technical knowledge and may void your device’s warranty. Additionally, not all Chromebooks are compatible with this method, so it’s crucial to check your device’s compatibility beforehand.
In this guide, we will go through the steps required to install and run Windows 10 on a Chromebook. We’ll cover enabling developer mode, installing Linux, setting up Wine, downloading the Windows 10 ISO file, creating a bootable USB drive, and finally, installing Windows 10 on your Chromebook.
While the process may seem complex, don’t worry. We’ll break down each step into easy-to-follow instructions, and you’ll be running Windows 10 on your Chromebook in no time.
Please note that installing Windows 10 on a Chromebook involves making some changes to your device’s settings and potentially deleting data. Therefore, it’s crucial to back up any important files and documents before proceeding with the installation.
Now that we understand the scope of this guide, let’s move on to the first step: checking the compatibility of your Chromebook.
Step 1: Check Compatibility
Before you begin the process of installing Windows 10 on your Chromebook, it’s important to ensure that your device is compatible with this method. Not all Chromebooks can run Windows 10, so it’s crucial to check for compatibility to avoid any issues or frustrations later on.
The easiest way to check compatibility is by referring to the list of supported Chromebook models provided by the developer community. There are various online forums, websites, and communities dedicated to discussing and sharing information about running Windows on Chromebooks.
First, identify your specific Chromebook model by referring to the manufacturer’s documentation or checking the settings on your device. Once you have the model information, search for it in the compatibility list provided by the developer community.
If your Chromebook model is listed as compatible, you can proceed with the installation process. However, if your model is not listed, it means that this method may not work for your device. It’s worth noting that there may be alternative methods available for installing Windows on unsupported Chromebooks, but they require advanced technical knowledge and may not be as reliable.
It’s also important to consider the hardware specifications of your Chromebook. Running Windows 10 on a device with limited processing power or RAM may lead to sluggish performance and a subpar user experience. It’s recommended to have at least 4GB of RAM and a reasonably fast processor for optimal performance.
Once you have confirmed that your Chromebook is compatible and meets the necessary hardware requirements, you are ready to move on to the next step: enabling developer mode on your Chromebook.
Step 2: Enable Developer Mode
Enabling developer mode on your Chromebook is an essential step in the process of installing Windows 10. Developer mode allows you to access advanced settings and features that are not available in the standard mode. It’s important to note that enabling developer mode will erase all your Chromebook’s data, so be sure to back up any important files before proceeding.
To enable developer mode, follow these steps:
- Turn off your Chromebook completely by selecting the Shut Down option from the power menu.
- Once the device is powered off, press and hold the Esc key and the Refresh key (the key with a circular arrow) simultaneously.
- While keeping the Esc and Refresh keys pressed, press the Power button to turn on the Chromebook.
- You will see a yellow exclamation mark on the screen. Release all the keys.
- Press Ctrl + D on your keyboard to enter developer mode.
- A warning message will appear explaining that enabling developer mode will erase all data on the Chromebook. Read the message carefully and press Enter to proceed.
- The Chromebook will reboot and go through the process of enabling developer mode. This may take a few minutes.
- Once the process is complete, the Chromebook will display a screen indicating that developer mode has been enabled. Press Ctrl + D to proceed.
- Your Chromebook will then restart and enter developer mode.
After enabling developer mode, it’s important to note that each time you power on your Chromebook, you will see a warning screen indicating that developer mode has been enabled. To bypass this screen and continue booting, press Ctrl + D when prompted.
Enabling developer mode opens up new possibilities for customization and experimentation on your Chromebook. Now that developer mode is enabled, we can proceed to the next step: installing Linux on your device.
Step 3: Install Linux
Now that developer mode is enabled on your Chromebook, the next step is to install Linux. Linux will serve as the intermediary operating system that allows us to run Windows 10 on your Chromebook.
Here’s how you can install Linux on your Chromebook:
- Open the Chrome browser on your Chromebook and type “Linux (Beta)” in the search bar. Select the “Linux (Beta)” app from the search results.
- Click on “Turn on” to enable the Linux feature on your Chromebook. This will install a Linux container on your device.
- Once the installation is complete, open the Terminal app through the Launcher or by pressing Ctrl + Alt + T on your keyboard.
- In the Terminal, type
sudo apt updateand press Enter to update the package lists. - Next, type
sudo apt upgradeand press Enter to upgrade the installed packages to the latest versions. - After the upgrade is complete, you can proceed to install Wine, a compatibility layer that allows Windows applications to run on Linux.
Installing Linux on your Chromebook provides you with a sandboxed environment where you can run various Linux applications and utilities. It’s important to note that the Linux installation may take some time, depending on your internet connection and the specifications of your Chromebook.
With Linux successfully installed, we can now move on to the next step: installing Wine and preparing it for running Windows 10 applications on your Chromebook.
Step 4: Install Wine
With Linux installed on your Chromebook, the next step is to install Wine. Wine is a compatibility layer that allows you to run Windows applications on Linux, making it a crucial component in running Windows 10 on your Chromebook.
Follow these steps to install Wine on your Chromebook:
- Open the Terminal app on your Chromebook.
- Type the following command and press Enter to add the Wine repository to your system’s package sources:
sudo add-apt-repository ppa:ubuntu-wine/ppa - Enter your user password when prompted.
- Type
sudo apt updateand press Enter to update the package lists. - Once the update is complete, type
sudo apt install wine-stableand press Enter to install Wine on your Chromebook. - Confirm the installation by typing
yand pressing Enter when prompted. - Wait for Wine to be installed on your Chromebook. The process may take some time depending on your internet connection.
Once Wine is successfully installed, you will have the necessary compatibility layer to run Windows applications on your Chromebook through Linux. This is a significant step towards being able to download and install Windows 10.
With Wine installed, we can now proceed to the next step: downloading the Windows 10 ISO file for installation on your Chromebook.
Step 5: Download Windows 10 ISO
In order to install Windows 10 on your Chromebook, you will need to download the Windows 10 ISO file. The ISO file contains the installation files for the Windows operating system. You can obtain the Windows 10 ISO file directly from the official Microsoft website.
Follow these steps to download the Windows 10 ISO:
- Open a web browser on your Chromebook and navigate to the Microsoft Windows 10 download page.
- Click on the “Download tool now” button to download the Windows 10 Media Creation Tool.
- Once the download is complete, open the file to launch the Media Creation Tool.
- Accept the license terms and conditions.
- On the next screen, select the option “Create installation media (USB flash drive, DVD, or ISO file)” and click “Next”.
- Choose the language, edition, and architecture (32-bit or 64-bit) of Windows 10 that you want to download.
- Select the option “ISO file” and click “Next”.
- Choose a location on your Chromebook where you want to save the Windows 10 ISO file.
- Click “Save” to start the download. The download process may take some time depending on your internet connection.
Once the Windows 10 ISO file is downloaded, you will have the necessary installation files to proceed with installing Windows 10 on your Chromebook. It is important to ensure that you save the ISO file in a location where you can easily access it in the next step.
With the Windows 10 ISO file ready, we can now move on to the next step: creating a bootable USB drive to install Windows 10 on your Chromebook.
Step 6: Create a Bootable USB Drive
Creating a bootable USB drive is an essential step in the process of installing Windows 10 on your Chromebook. The bootable USB drive will contain the necessary installation files and enable you to install Windows 10 on your device.
Follow these steps to create a bootable USB drive:
- Connect a USB flash drive with a minimum capacity of 8GB to your Chromebook.
- Open a web browser on your Chromebook and search for “Rufus” – a popular tool for creating bootable USB drives.
- Download and install Rufus from the official website.
- Once Rufus is installed, launch the application.
- In the Rufus interface, select your connected USB drive under the “Device” section.
- Make sure the “File system” option is set to “FAT32”.
- Click on the “Select” button next to the “Boot selection” option.
- Navigate to the location where you saved the Windows 10 ISO file in the previous step and select it.
- Leave the other options as default and click on the “Start” button to begin creating the bootable USB drive.
- Wait for Rufus to format the USB drive and copy the Windows 10 installation files onto it. This process may take several minutes.
- Once the process is complete, you will have a bootable USB drive ready to install Windows 10 on your Chromebook.
It’s important to note that creating a bootable USB drive will erase all existing data on the drive. Be sure to back up any important files before proceeding with this step.
With the bootable USB drive created, we are now ready to move on to the final step: installing Windows 10 on your Chromebook.
Step 7: Install Windows 10 on Chromebook
You’ve reached the final step in the process of installing Windows 10 on your Chromebook. Now that you have a bootable USB drive containing the Windows 10 installation files, it’s time to proceed with the actual installation.
Follow these steps to install Windows 10 on your Chromebook:
- Start your Chromebook and insert the bootable USB drive into a USB port.
- Press the power button to turn on your Chromebook.
- When the Chromebook starts up, press the key combination that allows you to access the boot device selection menu. The specific key combination may vary depending on your Chromebook model, but it’s usually one of the function keys (F1, F2, etc.) or the Escape key (Esc).
- In the boot device selection menu, choose the USB drive as the boot option.
- Wait for the Windows 10 installation process to start. Follow the on-screen instructions to select your language, keyboard layout, and other configuration preferences.
- When prompted, enter the product key for your Windows 10 installation. If you don’t have a product key, you can choose the option to continue without entering one, but some features may be limited.
- On the installation type screen, choose the option to install Windows 10 on the entire hard drive or partition. This will erase any existing data on your Chromebook.
- Follow the remaining on-screen prompts to complete the installation of Windows 10 on your Chromebook. This may take some time, so be patient.
- Once the installation is complete, your Chromebook will restart, and you will be greeted with the Windows 10 setup wizard.
- Follow the setup wizard to personalize your Windows 10 settings, create user accounts, and configure other preferences.
After completing these steps, you will have successfully installed Windows 10 on your Chromebook. You can now enjoy using Windows-specific applications and benefit from the features and functionalities of the Windows operating system on your Chromebook.
Remember, this process involves modifying your Chromebook’s settings and installing a different operating system, which may void your device’s warranty. Additionally, it’s essential to back up any important files before proceeding with the installation to prevent data loss.
Congratulations on successfully installing Windows 10 on your Chromebook!
Conclusion
Congratulations on successfully completing the process of downloading and installing Windows 10 on your Chromebook. By following the steps outlined in this guide, you have transformed your Chromebook into a device capable of running Windows-specific applications and enjoying the features of the Windows operating system.
It’s important to keep in mind that the process of installing Windows 10 on a Chromebook requires technical knowledge and may void your device’s warranty. Additionally, not all Chromebook models are compatible with this method, so it’s essential to check for compatibility before proceeding.
Throughout this guide, we covered important steps such as enabling developer mode, installing Linux, setting up Wine, downloading the Windows 10 ISO file, creating a bootable USB drive, and finally, installing Windows 10 on your Chromebook. Each step is crucial in ensuring a successful installation and a smooth user experience.
Remember to always back up your important files and documents before proceeding with any installation process. While we have provided a comprehensive guide, variations in Chromebook models and software updates can impact the installation process. It’s always recommended to refer to the specific instructions and resources relevant to your device.
With Windows 10 now running on your Chromebook, you have unlocked a whole new world of possibilities. You can explore a vast range of Windows applications, productivity tools, games, and more, enhancing your Chromebook experience to suit your specific needs.
Enjoy the benefits of Windows 10 on your Chromebook, and make the most of your device’s versatility. Whether you need Windows-specific software for work, want to enjoy Windows gaming, or simply prefer the Windows operating system, this installation process opens up new opportunities for you.
Thank you for choosing this guide, and we hope it has been helpful in your journey to download and install Windows 10 on your Chromebook. Embrace the power of your Chromebook with the added functionality and flexibility of Windows 10!


