Introduction
Welcome to this guide on how to download voice recordings from your iPhone. Voice recordings can be incredibly important, whether they are personal memos, interviews, or important notes. Having a backup of these recordings is crucial in case your iPhone gets lost, damaged, or deleted accidentally. In this article, we will explore various methods that you can use to easily download your voice recordings and ensure their safety.
With advancements in technology, downloading voice recordings from your iPhone has become simpler and more convenient. Whether you want to download them directly from your iPhone or transfer them to another device, we will cover the different methods you can use to achieve the desired result.
From using iCloud and iTunes to third-party apps and AirDrop, there are several options available depending on your preferences and requirements. Each method has its own advantages and may vary in terms of ease of use or storage capacity. By exploring these methods, you will be able to choose the one that best suits your needs.
It is important to note that the methods we will discuss in this guide apply to most iPhone models running on iOS. However, there may be slight differences depending on your specific device and operating system version. Please make sure your iPhone is updated to the latest iOS version for optimal performance.
Now that we’ve covered the basics, let’s dive into the different methods you can use to download your voice recordings from your iPhone. Whether you’re a beginner or a tech-savvy individual, this guide will help you navigate the process easily and efficiently.
Method 1: Using iCloud
iCloud is a cloud storage service provided by Apple that allows you to securely store and access your data across multiple devices. One of the convenient features of iCloud is its ability to sync voice recordings from your iPhone to the cloud. This makes it easy to access your recordings from any device with an internet connection. To use iCloud to download your voice recordings, follow these steps:
- Ensure that iCloud is enabled on your iPhone. Go to Settings, tap on your name, and then tap on iCloud. Make sure the switch next to Voice Memos is toggled on.
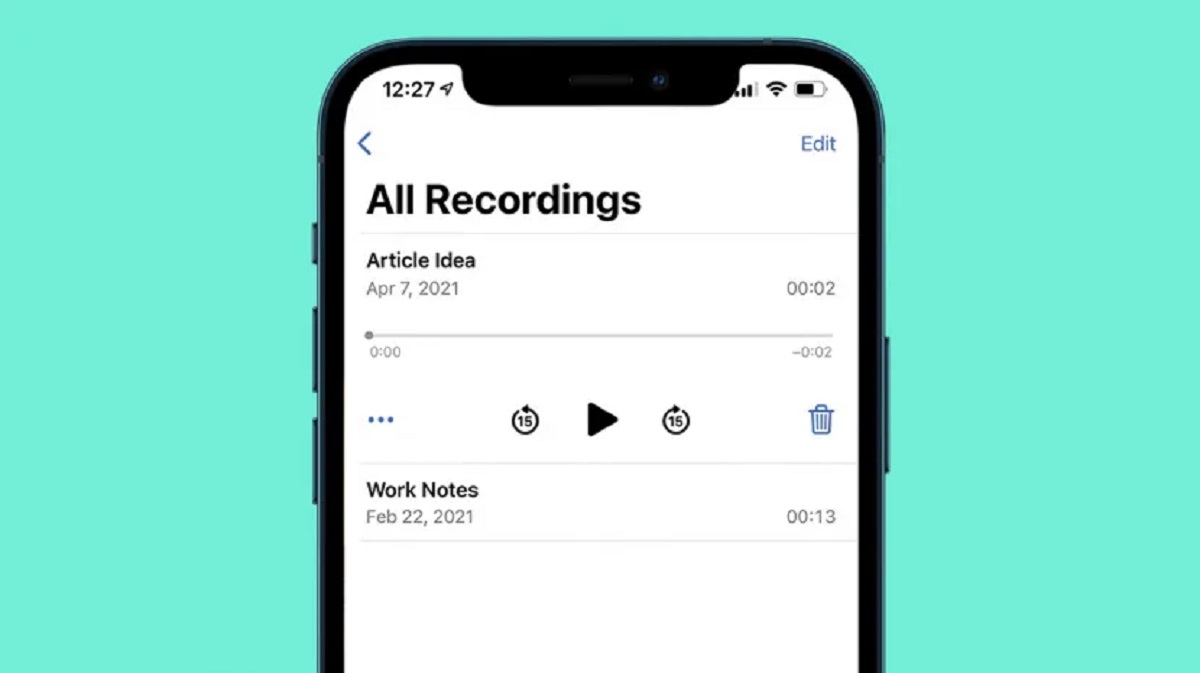
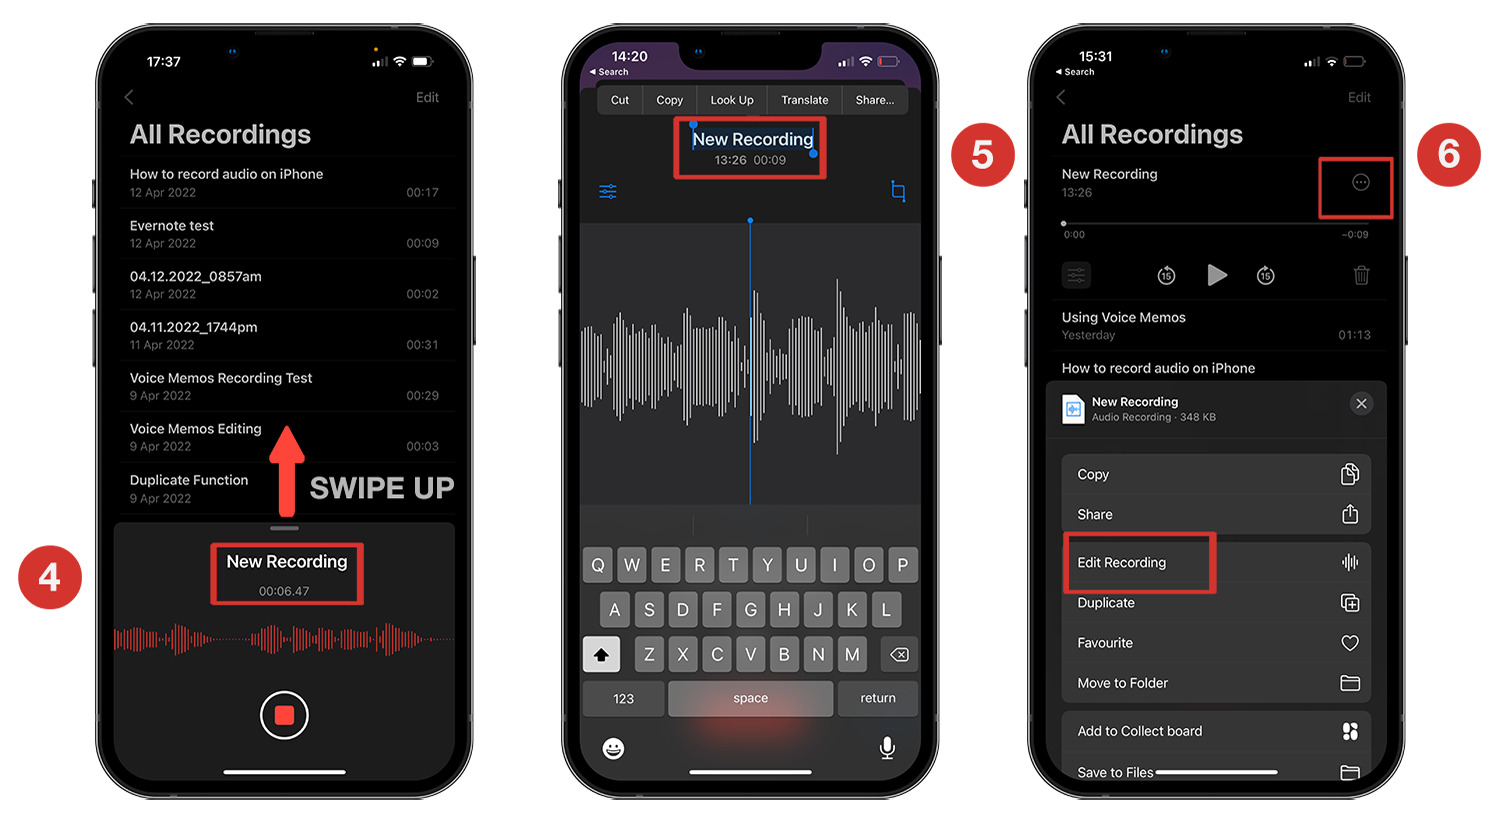
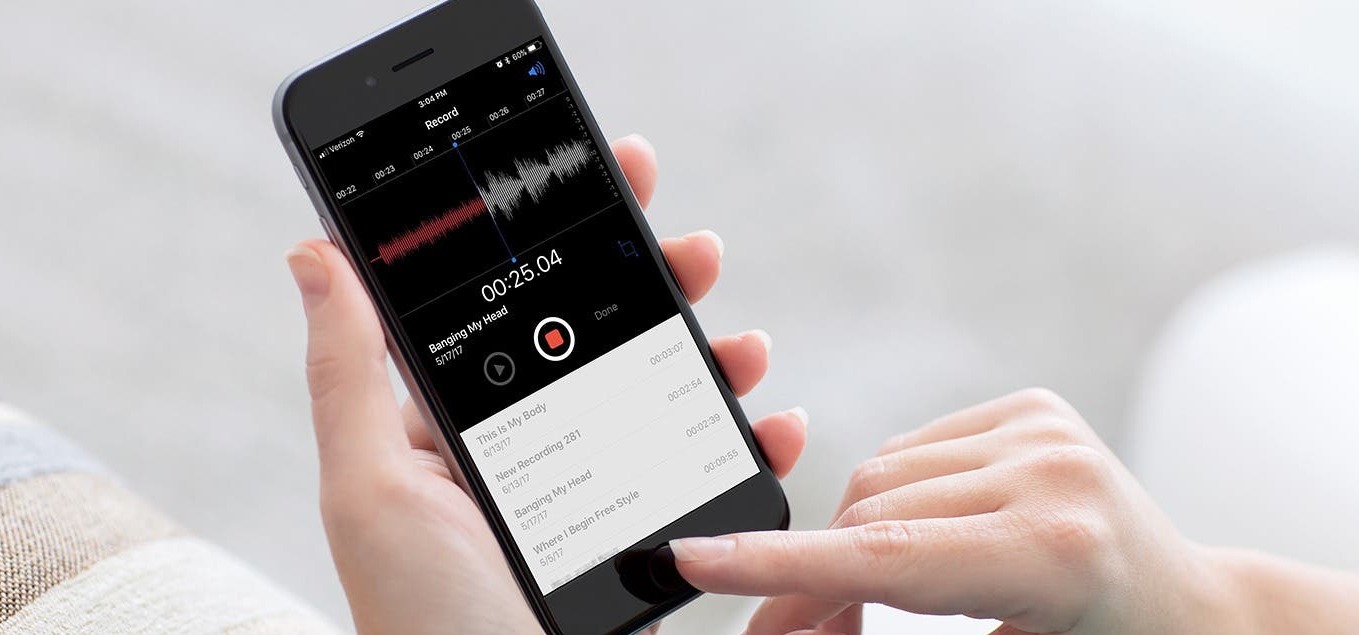
- Open the Voice Memos app on your iPhone and locate the recording you want to download.
- Tap on the recording to open it and then tap on the three-dot menu icon.
- Select the “Share” option from the menu and choose “Save to Files.”
- In the Files app, select the location where you want to save the recording. You can choose to save it on your iPhone or in a specific iCloud Drive folder.
- Tap on “Save” to download the recording to the selected location.
Once the voice recording is saved to your iCloud Drive, you can access it from any device that is logged in to the same iCloud account. Simply open the Files app on the device and navigate to the location where you saved the recording.
Using iCloud to download your voice recordings offers the advantage of seamless synchronization across devices. It ensures that your recordings are automatically backed up and easily accessible whenever you need them. However, it is important to note that iCloud storage is limited, and if you exceed the free storage capacity, you may need to upgrade to a paid plan to continue storing your recordings.
In this section, we explored the first method of downloading voice recordings from your iPhone using iCloud. The next section will cover another method using iTunes. Let’s continue our journey to find the perfect method for your needs.
Method 2: Using iTunes
iTunes is a software developed by Apple that allows you to manage and transfer media files between your iPhone and computer. This includes voice recordings that you have on your iPhone. If you prefer to download your voice recordings using iTunes, follow the steps below:
- Make sure you have the latest version of iTunes installed on your computer. If not, download and install it from the Apple website.
- Connect your iPhone to your computer using a USB cable.
- When prompted on your iPhone, select “Trust This Computer.”
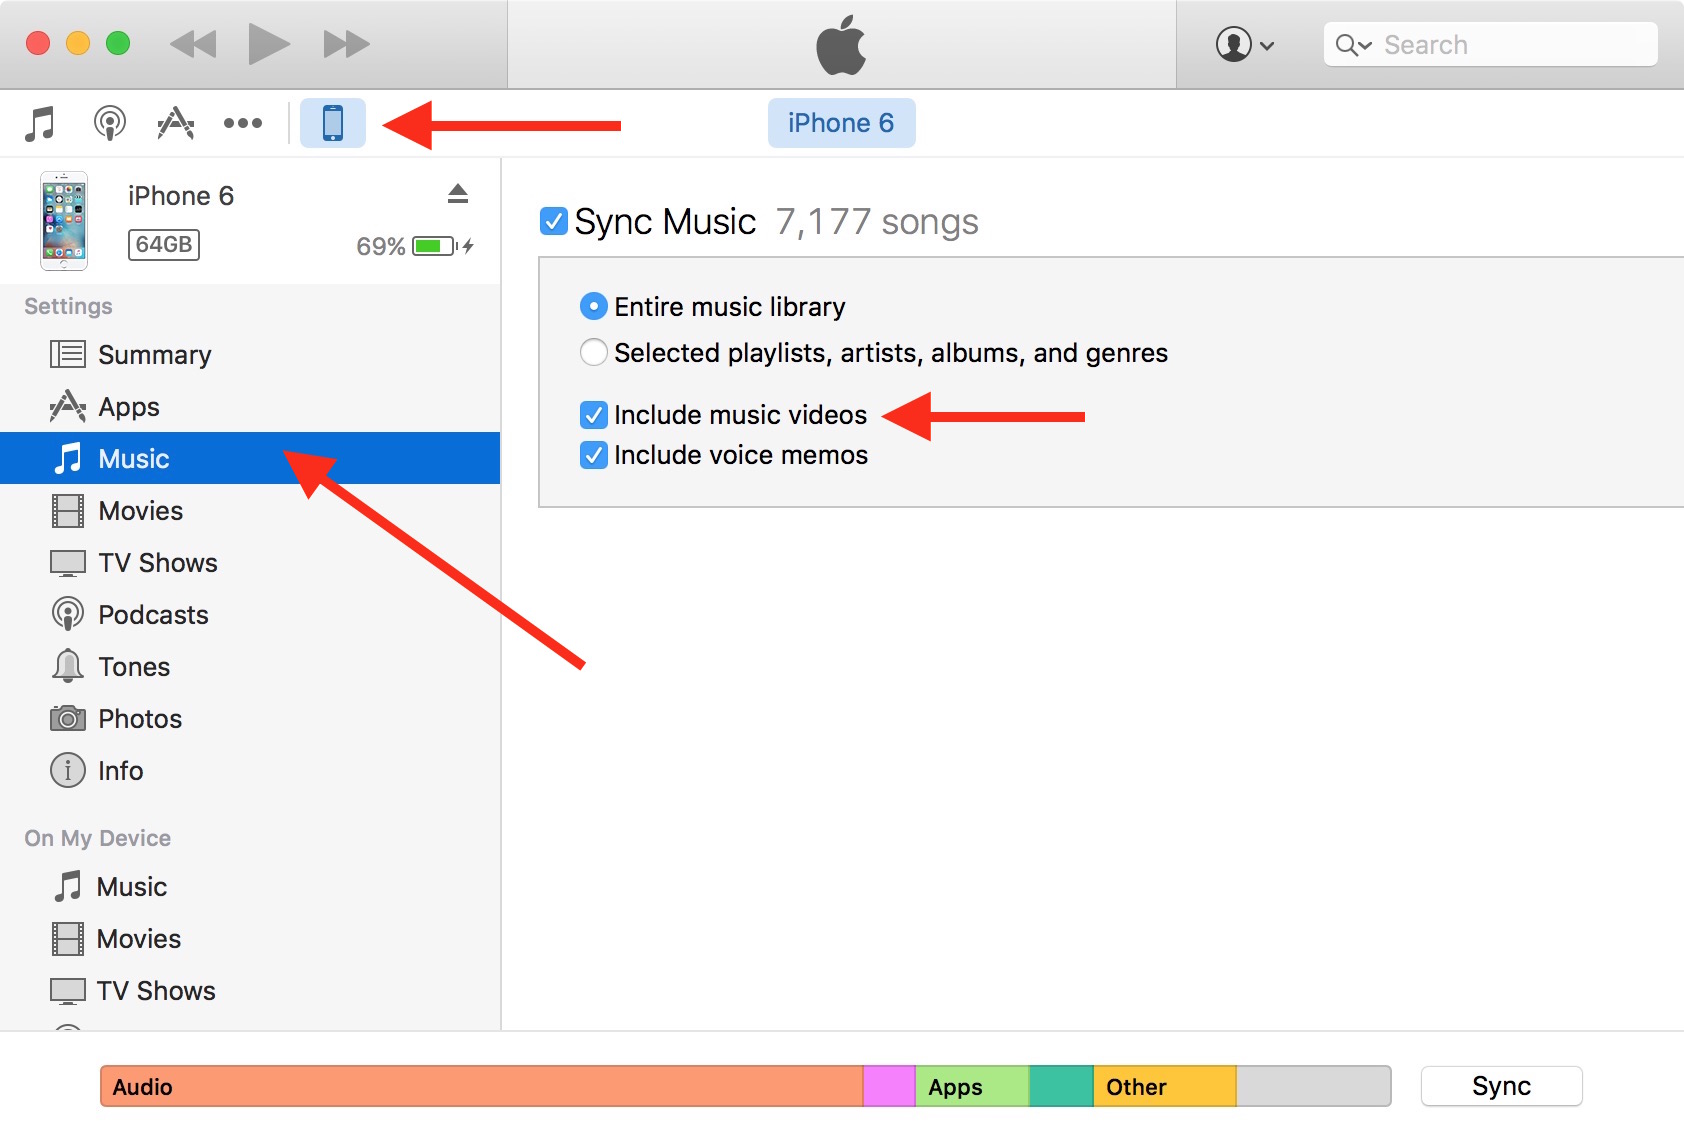
- Launch iTunes on your computer, and your iPhone should appear as a device in the top left corner of the iTunes window.
- Click on your iPhone to open its summary page in iTunes.
- In the left sidebar, click on “Music” to manage your music files. Then, check the box next to “Sync Music.”
- Scroll down to the “Voice Memos” section and check the box next to “Sync Voice Memos.”
- Click on the “Apply” button at the bottom of the iTunes window to start syncing your voice recordings.
- After the sync is complete, you can access your voice recordings on your computer by navigating to the designated folder in the iTunes library.
Using iTunes to download your voice recordings provides a reliable and direct method of transferring your files to your computer. It allows you to create a local backup of your voice recordings, ensuring that you have a copy even if you delete them from your iPhone.
Please note that iTunes is no longer available with macOS Catalina and newer versions. For these operating systems, you can use the Finder app on your Mac to manage and transfer files between your iPhone and computer.
In this section, we explored the second method of downloading voice recordings from your iPhone using iTunes. The next section will cover another method using third-party apps. Let’s continue our exploration to find the most suitable method for you.
Method 3: Using Third-Party Apps
If you’re looking for alternative methods to download your voice recordings from your iPhone, you can consider using third-party apps. These apps offer additional functionalities and flexibility compared to the built-in options provided by Apple. Here’s how you can download your voice recordings using third-party apps:
- Open the App Store on your iPhone and search for voice recording apps. Some popular options include Voice Recorder & Audio Editor, Voice Record Pro, or Evernote.
- Choose a reliable and highly rated app based on your preferences and the features it offers. Ensure that the app supports exporting or downloading recordings.
- Download and install the app on your iPhone.
- Open the voice recording app and locate the recording you want to download.
- Look for the export or download option within the app. This might be in the form of a share icon or an export button.
- Select the desired format or destination to download the recording. You can choose to save it to your iPhone’s storage, email it to yourself, or upload it to a cloud storage service like Dropbox or Google Drive.
- Follow the on-screen prompts to complete the download process.
Third-party apps can provide additional features such as advanced audio editing capabilities, cloud integration, and seamless sharing options. These apps allow you to customize your voice recordings and provide a range of export formats to suit your needs.
However, it is essential to exercise caution when downloading and using third-party apps. Verify the app’s permissions and reviews to ensure your data security. Stick to reputable apps from trusted developers to minimize any potential risks.
In this section, we explored the third method of downloading voice recordings from your iPhone using third-party apps. The next section will cover another method using AirDrop. Let’s keep exploring the different options to find the most suitable method for you.
Method 4: Using AirDrop
If you want to quickly transfer your voice recordings from your iPhone to another Apple device, AirDrop is a convenient option. AirDrop allows you to wirelessly transfer files between compatible Apple devices. To download your voice recordings using AirDrop, follow these steps:
- Ensure that both your iPhone and the receiving Apple device have their Wi-Fi and Bluetooth turned on.
- On your iPhone, open the Voice Memos app and locate the recording you want to download.
- Tap on the recording to open it, and then tap on the share icon.
- AirDrop will display a list of nearby Apple devices that are available for connection.
- Select the target device from the list.
- On the receiving device, a notification will appear, asking whether to accept the AirDrop file transfer.
- Confirm the transfer on the receiving device, and the voice recording will be downloaded and saved on that device.
AirDrop provides a quick and seamless way to transfer your voice recordings between Apple devices without the need for cables or additional software. It is particularly useful when you want to share recordings with friends or colleagues in close proximity.
It’s important to note that AirDrop requires compatible Apple devices and operating systems. Ensure that your devices are compatible and meet the necessary requirements to use AirDrop successfully.
In this section, we explored the fourth method of downloading voice recordings from your iPhone using AirDrop. The next section will cover another method using email or messaging apps. Let’s continue our journey to find the most suitable method for your needs.
Method 5: Using Email or Messaging Apps
If you want to download your voice recordings quickly and easily, using email or messaging apps can be a convenient option. Most email and messaging apps allow you to send and receive files, including voice recordings. Here’s how you can download your voice recordings using email or messaging apps:
- Open the Voice Memos app on your iPhone and locate the recording you want to download.
- Tap on the recording to open it, and then tap on the share icon.
- Select the email or messaging app you want to use to send the recording.
- Compose a new message or select an existing conversation to send the recording.
- Attach the voice recording file to the message.
- Enter the recipient’s email address or choose a contact from your messaging app.
- Send the message or conversation.
- On the receiving device, open the email or messaging app and locate the message or conversation.
- Download the attached voice recording file to the device’s storage.
Using email or messaging apps to download your voice recordings provides a simple and familiar method of transferring files. It allows you to send the recording to yourself or others, making it easy to access and download from multiple devices.
Keep in mind that there may be file size limitations when sending voice recordings through email or messaging apps. If the file size exceeds the app’s limit, you may need to compress the voice recording or consider using alternative methods such as cloud storage or file transfer services.
In this section, we explored the fifth and final method of downloading voice recordings from your iPhone using email or messaging apps. Now that we’ve explored various methods, let’s wrap up our discussion with a brief summary of what we’ve learned.
Conclusion
Downloading voice recordings from your iPhone can be essential for backup and accessibility purposes. In this guide, we explored five different methods that you can use to download your voice recordings. Let’s recap what we’ve covered:
First, we learned about using iCloud to sync and download voice recordings. This method offers seamless synchronization across devices and ensures that your recordings are easily accessible.
Next, we explored using iTunes (or the Finder on newer macOS versions) to transfer voice recordings to your computer. This method provides a reliable way to create local backups and manage your recordings.
Then, we discussed using third-party apps to download voice recordings. These apps offer additional features and customization options for your recordings, allowing you to tailor your experience.
We also explored using AirDrop for wireless transfer of voice recordings between Apple devices. This method provides a quick and convenient way to share recordings with others in close proximity.
Lastly, we covered using email or messaging apps to send and download voice recordings. This method allows for easy file sharing and access across different devices.
Each method has its own advantages and may be more suitable based on your preferences and requirements. Consider the available storage capacity, ease of use, and the need for customization when choosing the method that best fits your needs.
Remember to prioritize the security of your recordings and choose reputable apps or services when downloading or transferring files. Regularly backup your voice recordings to ensure you have a copy in case of device issues or accidental deletions.
With the information provided in this guide, you should now be equipped with the knowledge to download your voice recordings from your iPhone using various methods. Experiment with different options and find the one that works best for you. Never lose those important voice memos, interviews, or notes again!


