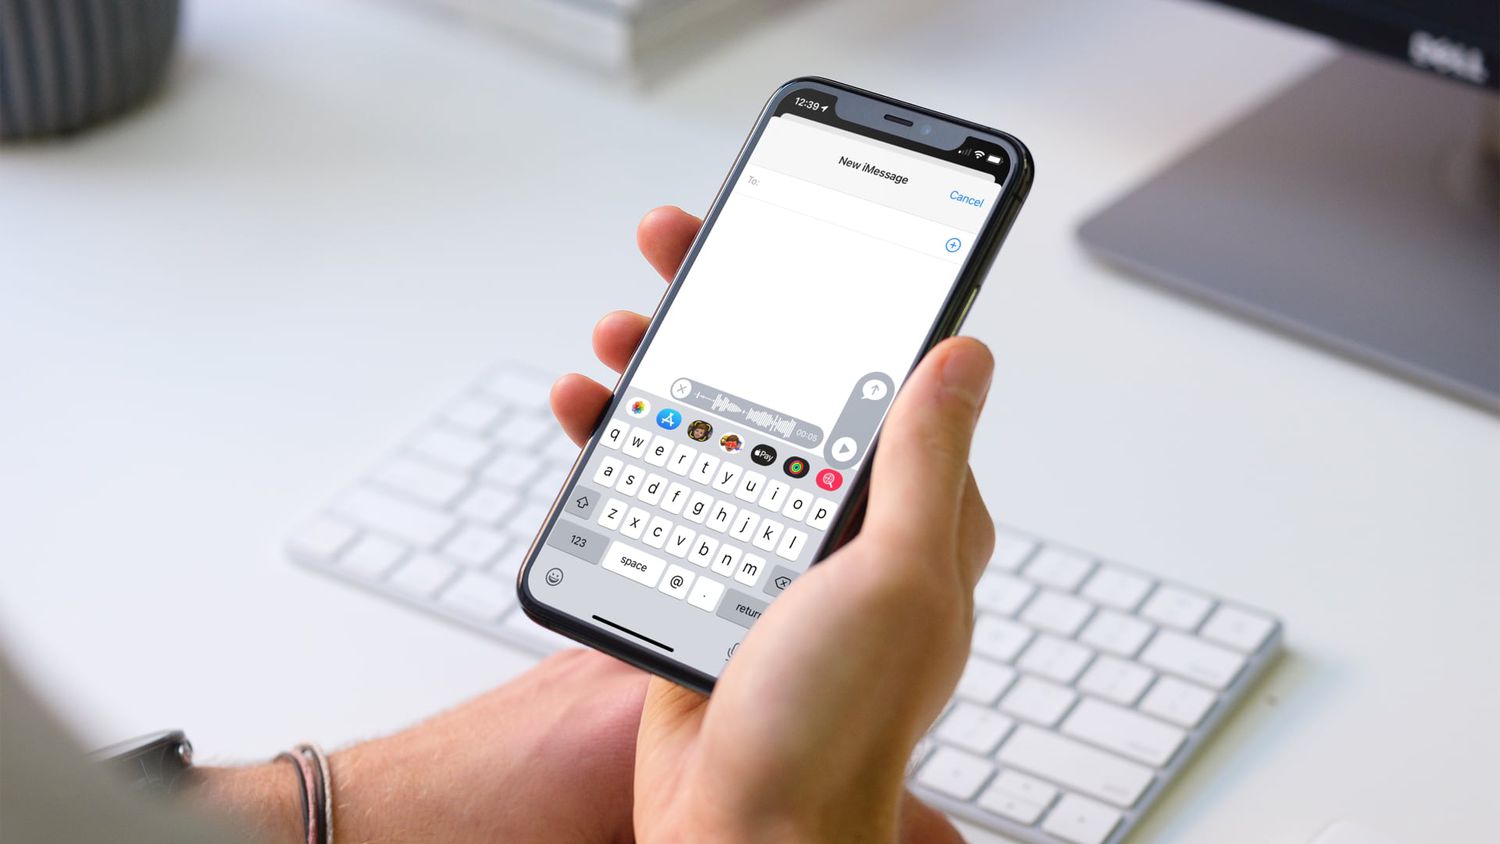
Choose the Right App to Record Podcast on iPhone
When it comes to recording a podcast on your iPhone, choosing the right app is crucial. With numerous options available on the App Store, finding the one that suits your needs can be a bit overwhelming. However, with some careful consideration, you can find the perfect app to help you create high-quality podcasts right from your phone.
First and foremost, ensure that the app you choose provides the necessary features for podcast recording. Look for an app that offers intuitive controls and a user-friendly interface, allowing you to easily navigate through the recording process. Some apps even provide additional features such as sound effects, editing tools, and the ability to add intros and outros to your episodes.
Additionally, consider the compatibility of the app with your iPhone and its operating system. Make sure the app is compatible with your specific device model and the iOS version you have installed. This will ensure smooth performance and minimize any potential compatibility issues during the recording process.
Furthermore, take into account the recording quality offered by the app. Look for an app that supports high-quality audio recording, preferably in a lossless format such as WAV or FLAC. This will ensure that your podcast episodes sound professional and captivating to your audience.
Another factor to consider is the availability of cloud storage or integration with popular podcast hosting platforms. This will allow you to easily upload and manage your podcast episodes without having to worry about storage limitations on your iPhone. Some apps even provide automatic backup options to protect your recordings in case of any unforeseen issues.
Lastly, take the time to read reviews and ratings from other podcasters who have used the app you are considering. This will give you invaluable insight into the user experience and the app’s overall performance. Look for apps that have positive reviews and a strong track record of delivering reliable and feature-rich podcast recording capabilities.
By carefully considering these factors, you can choose the right app to record your podcast on your iPhone. Remember, finding the perfect app for your needs is essential to ensure a smooth and enjoyable podcast creation process. So, take your time, explore your options, and create podcast episodes that captivate and engage your audience.
Set Up your iPhone for Podcast Recording
Before you start recording your podcast on your iPhone, it’s important to set up your device properly to ensure optimal audio quality and a seamless recording experience. By following a few simple steps, you can prepare your iPhone for podcast recording and capture professional-sounding episodes.
First, make sure your iPhone is updated to the latest iOS version. Software updates often include bug fixes and performance enhancements that can improve the recording capabilities of your device. To check for updates, simply go to Settings > General > Software Update and follow the prompts to install any available updates.
Next, consider the storage space on your iPhone. Podcast recordings can take up a significant amount of storage, especially if you’re recording lengthy episodes or using high-quality audio formats. To ensure you have enough space, delete any unnecessary files, apps, or photos that are taking up storage on your device. You can also transfer files to your computer or iCloud to free up additional space.
Another important aspect of setting up your iPhone for podcast recording is managing your device’s battery life. Recording podcasts can consume a significant amount of battery power, so it’s essential to have a fully charged battery or connect your iPhone to a power source during recording sessions. You can also enable Low Power Mode under Settings > Battery to conserve battery life while recording.
Consider using a dedicated podcast recording app for better control over recording settings and features. There are many apps available on the App Store specifically designed for podcast recording, offering options to adjust microphone sensitivity, enable background noise reduction, and apply audio effects. Choose an app that aligns with your recording needs and preferences.
Lastly, explore the accessibility options on your iPhone. Accessibility features, such as Live Listen and Mono Audio, can enhance the recording experience by allowing you to focus on the audio and customize it to your specific hearing needs. These options can be found under Settings > Accessibility.
By taking the time to set up your iPhone properly for podcast recording, you can ensure high-quality audio and a smooth recording process. Remember to update your iOS, manage storage space, monitor battery life, use dedicated podcast recording apps, and explore accessibility options. With a well-prepared iPhone, you’ll be ready to create engaging and professional podcasts that resonate with your audience.
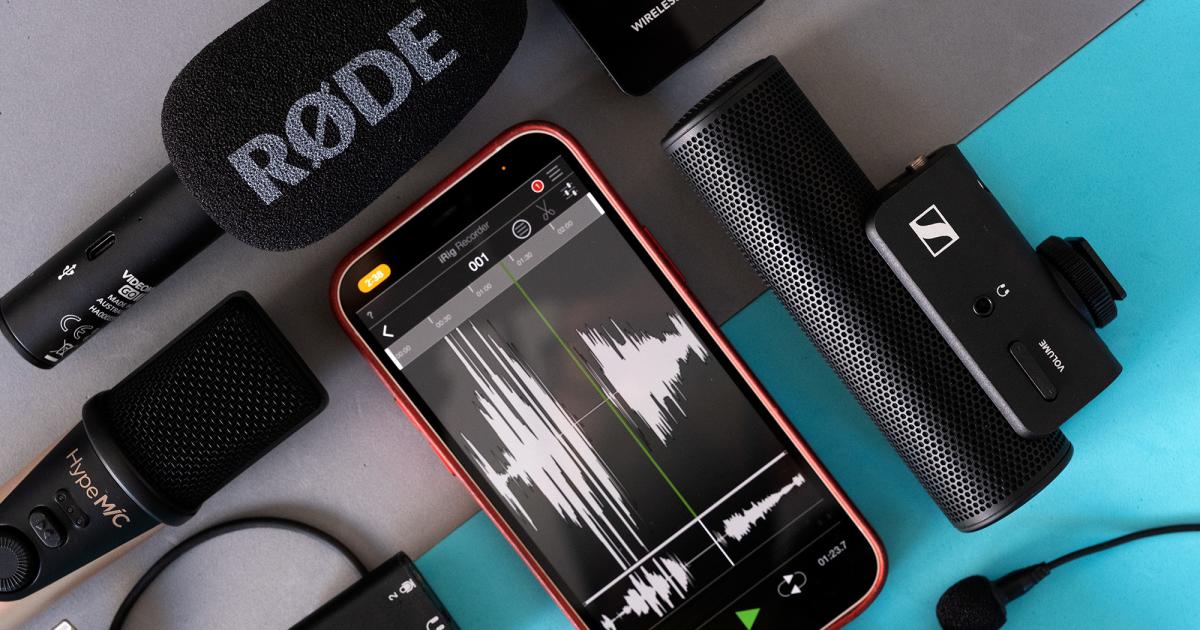
Select the Best Microphone for iPhone Podcasting
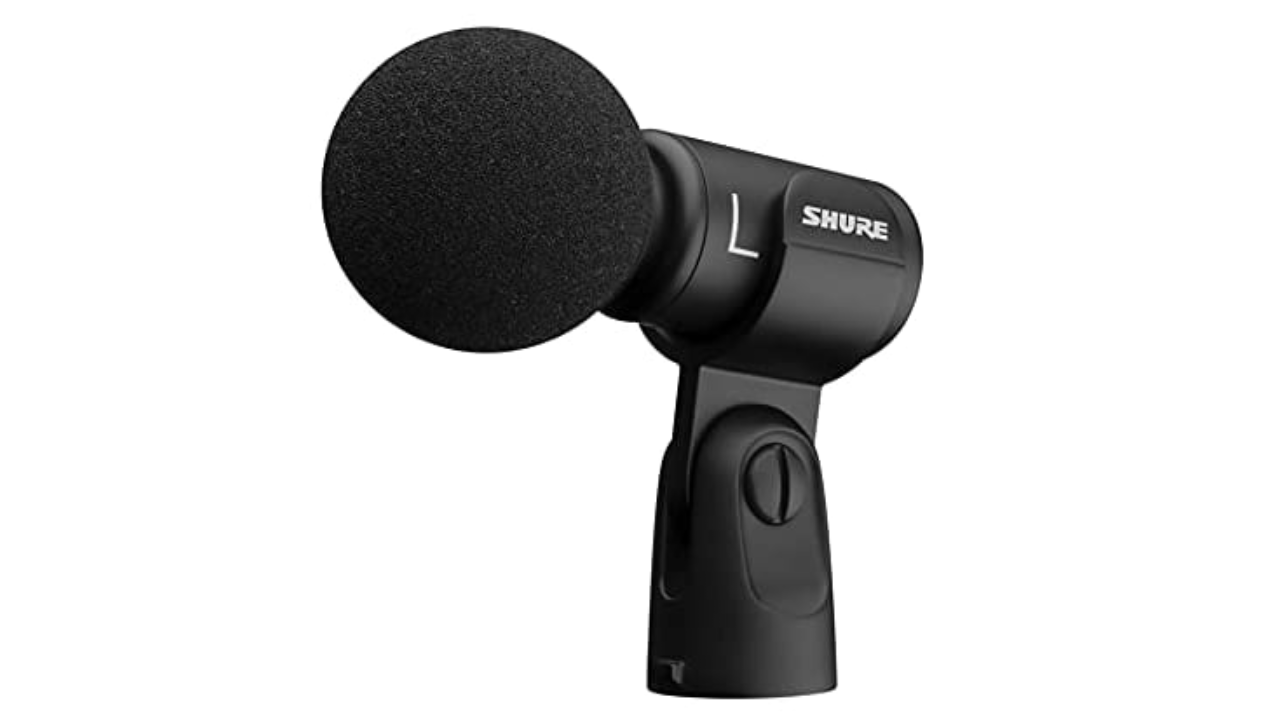
Choosing the right microphone is essential for capturing high-quality audio when recording podcasts on your iPhone. While the built-in microphone on your iPhone can do a decent job, investing in an external microphone can significantly improve the audio clarity, depth, and overall production value of your podcast episodes. Here are some factors to consider when selecting the best microphone for iPhone podcasting.
First, determine your recording environment. Are you planning to record in a quiet studio setting or on-the-go in various locations? If you’re recording in a controlled environment, a condenser microphone might be the ideal choice. They are highly sensitive and capture detailed sound, making them perfect for studio recording. However, if you’re often recording outside or in noisy environments, a dynamic microphone, which is more rugged and offers better background noise rejection, might be a better option.
Consider the microphone’s compatibility with your iPhone. Ensure that the microphone you choose is compatible with the iPhone’s lightning connector or the headphone jack, depending on the model of your iPhone. Some microphones may require an adapter, so double-check the compatibility before making a purchase.
Pay attention to the microphone’s polar pattern. The polar pattern determines the direction in which the microphone captures sound. For solo podcasts, a cardioid polar pattern, which captures sound primarily from the front and rejects sound from the sides and rear, is often the best choice. However, if you plan on recording interviews or group discussions, a microphone with an omnidirectional or bi-directional polar pattern might be more suitable.
Budget is another important factor to consider. While there are high-end microphones available with advanced features and exceptional sound quality, there are also budget-friendly options that offer decent performance. Determine your budget range and explore microphones within that range. Read reviews, compare specifications, and listen to sample recordings to make an informed decision.
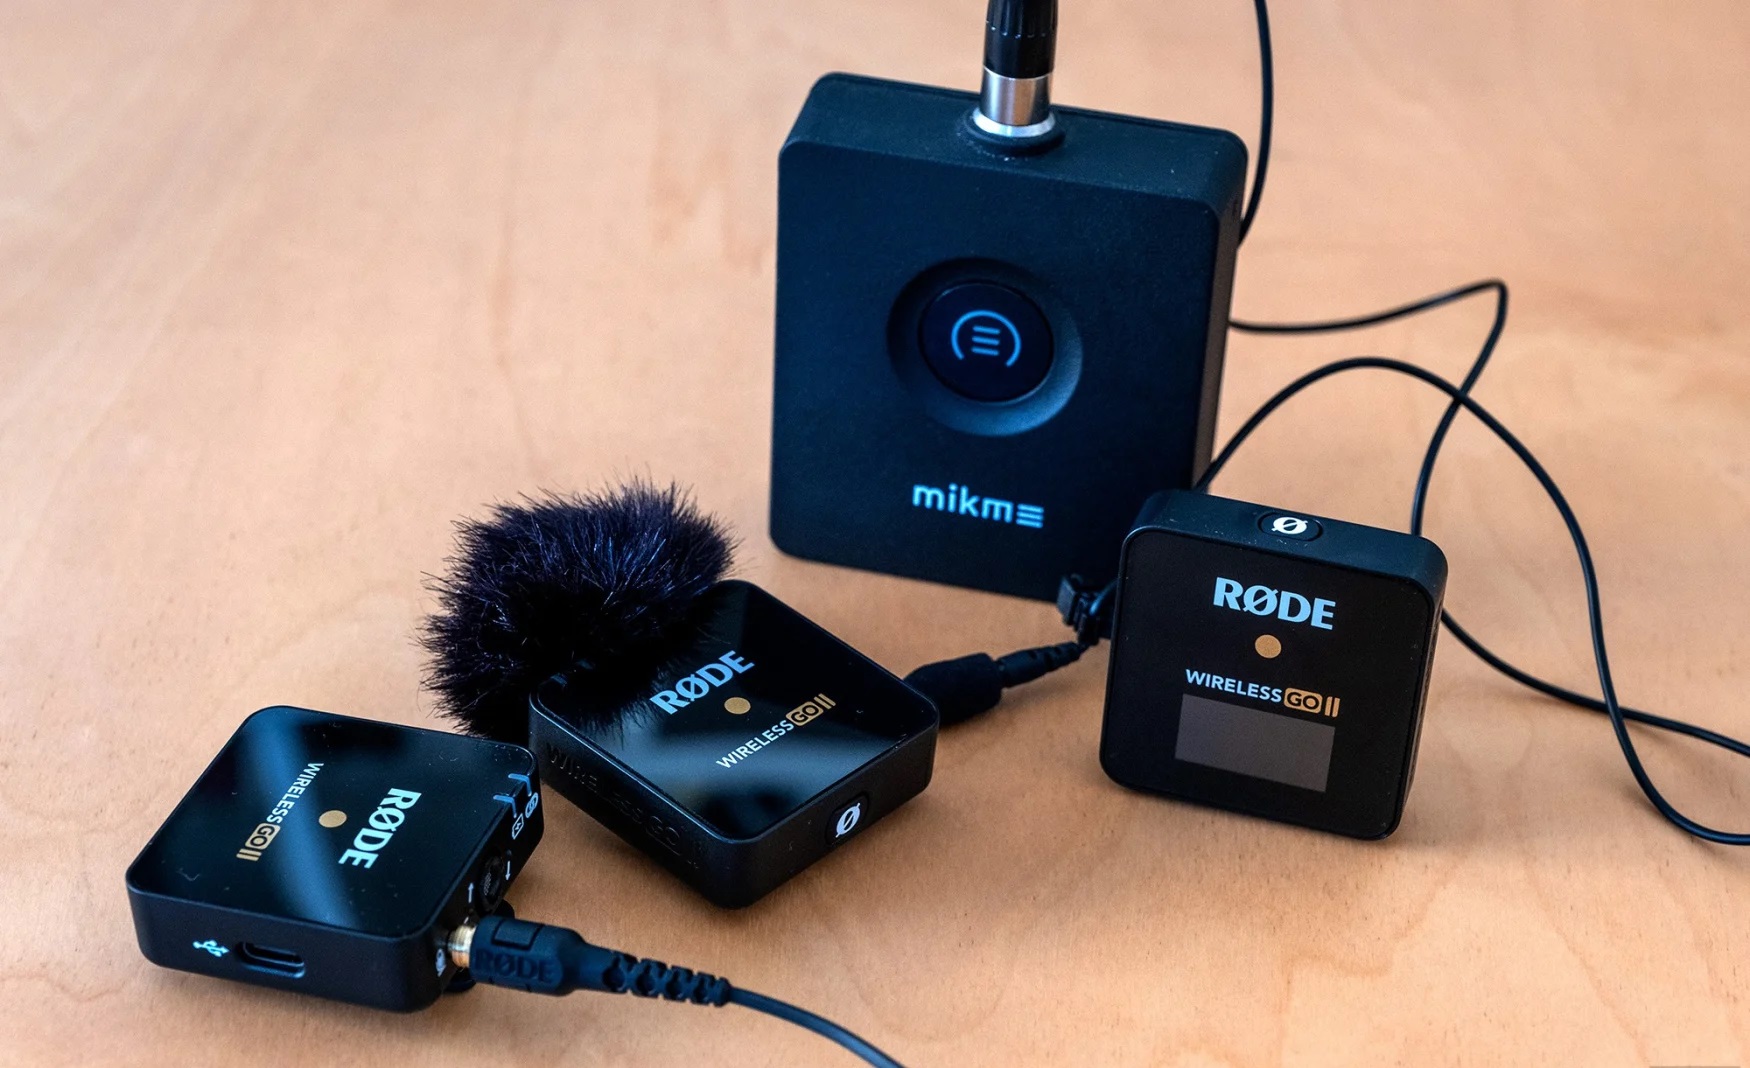
Furthermore, consider the microphone’s portability. If you’re frequently recording podcasts on-the-go or conducting interviews outside of a studio, a compact and lightweight microphone that is easy to carry and set up can be a convenient choice. Look for microphones specifically designed for mobile use, with features like built-in shock mounts or windshields to reduce handling noise and wind interference.
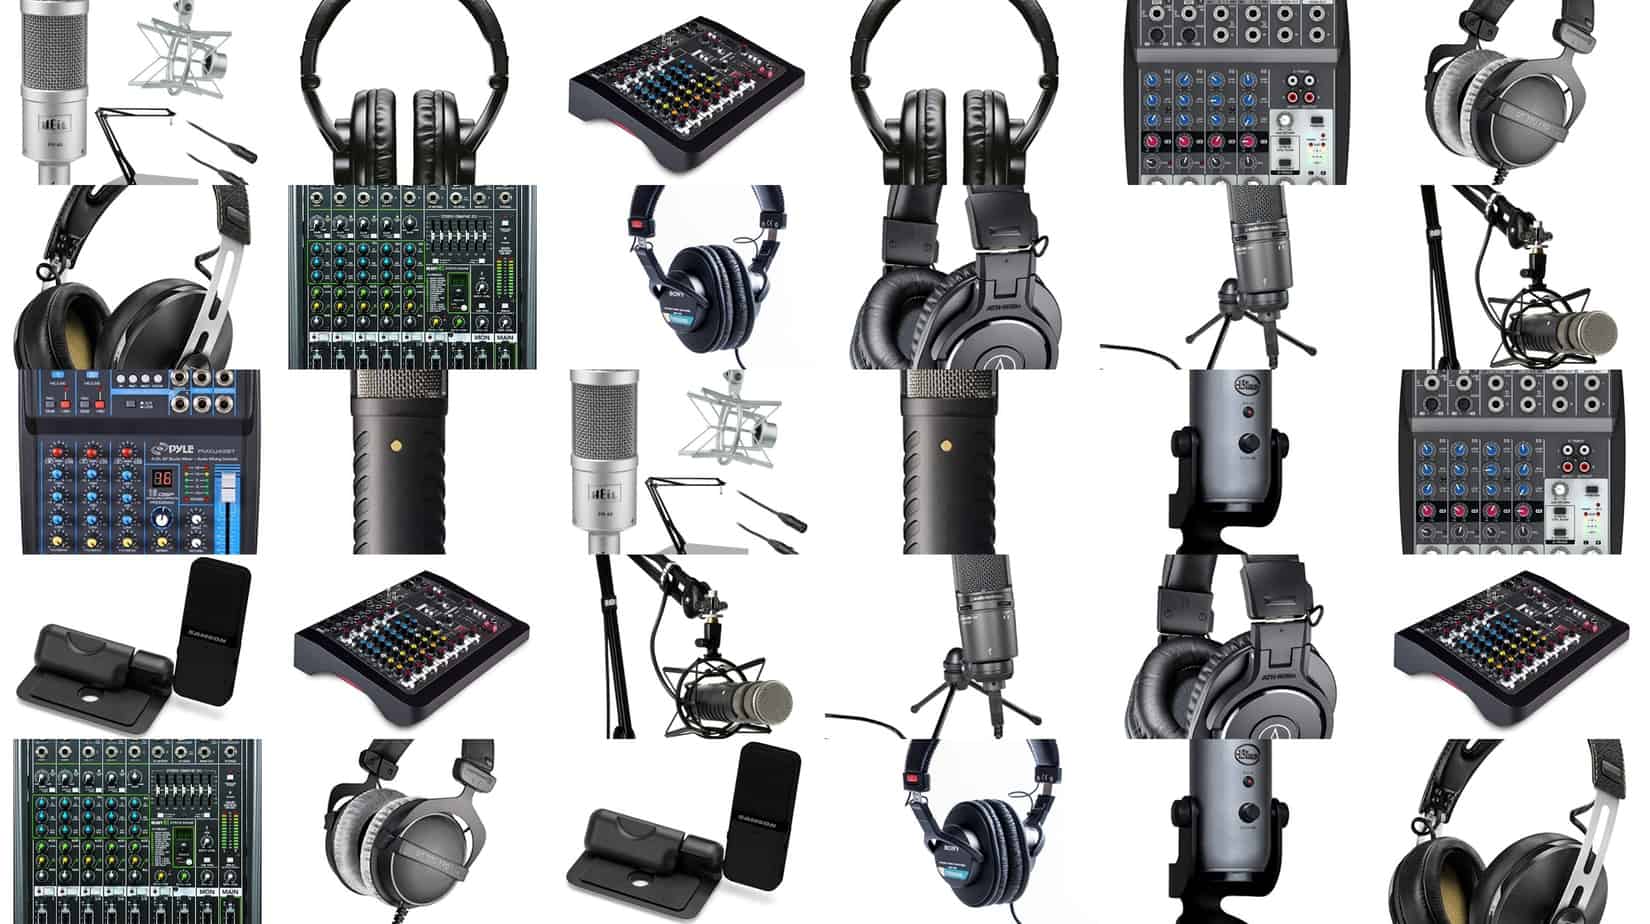
Lastly, don’t forget to consider additional accessories that can enhance your recording setup. Pop filters can help reduce plosive sounds caused by strong puffs of air hitting the microphone. A microphone stand or boom arm can provide stability and flexibility in positioning the microphone for optimal sound capture.
By considering factors such as recording environment, compatibility, polar pattern, budget, portability, and additional accessories, you can select the best microphone for iPhone podcasting that suits your needs and elevates the audio quality of your podcasts. Invest in a reliable microphone, and let your voice be heard with clarity and professionalism.
Connect your Microphone to iPhone for High-Quality Recording
Once you have selected the perfect microphone for your iPhone podcasting, the next step is to connect it properly to ensure high-quality recording. Connecting an external microphone to your iPhone requires the right cables or adapters and proper configuration. Here’s a step-by-step guide on how to connect your microphone to your iPhone for a seamless and professional recording experience.
Check the type of connector your microphone requires. Depending on the model and brand, your microphone may have different connector options such as USB, lightning, or 3.5mm. Ensure you have the necessary cables or adapters to connect your microphone to your iPhone. If your microphone uses a different connector than your iPhone, you might need to purchase an appropriate adapter.
If your microphone has a USB or lightning connector, connecting it to your iPhone is straightforward. Simply plug the USB or lightning end of the cable directly into the corresponding port on your iPhone. Your device should automatically recognize the microphone as the audio input source.
For microphones with a 3.5mm connector, you will need an adapter that converts the 3.5mm jack to either the lightning connector or USB. Once you have the appropriate adapter, plug the 3.5mm jack of your microphone into the adapter. Connect the adapter to the lightning port or use a USB adapter and insert it into the corresponding port on your iPhone.
After connecting the microphone, ensure that your iPhone’s audio input settings are correctly configured. To do this, go to Settings > Control Center > Customize Controls and add the “Audio Input” option to your Control Center. This will allow you to access and adjust the audio input settings easily.
Open the Control Center by swiping down from the top-right corner of your screen (for iPhones without a home button) or swiping up from the bottom of your screen (for iPhones with a home button). Tap on the “Audio Input” button and select your connected microphone as the input source.
Once your microphone is connected and selected as the audio input source, open your chosen podcast recording app and make sure it recognizes your microphone as the preferred input device. Most podcast recording apps allow you to select the audio input source within their settings or preferences.
Before you start recording, test the microphone to ensure that it’s functioning correctly. Speak into the microphone and monitor the audio levels on your iPhone. Adjust the microphone sensitivity or gain settings as needed for optimal sound quality. You can usually adjust these settings within the app or in the Control Center’s audio input settings.
With your microphone properly connected and configured, you’re ready to start recording high-quality podcasts on your iPhone. Check your sound levels, maintain a comfortable distance from the microphone, and speak clearly. Remember to monitor your audio throughout the recording to ensure consistent quality.
By following these steps and ensuring proper connections and configurations, you can connect your microphone to your iPhone and achieve professional-grade audio recording for your podcasts. Enjoy the improved sound quality and confidently share your voice with your audience.
Adjust Microphone Settings on iPhone for Optimal Sound Quality
Once you have connected an external microphone to your iPhone for podcast recording, it’s important to ensure that the microphone settings are adjusted correctly to achieve optimal sound quality. By fine-tuning the microphone settings on your iPhone, you can enhance the clarity, volume, and overall performance of your podcast recordings. Here are some steps to help you adjust the microphone settings on your iPhone for the best possible sound quality.
Start by accessing the audio settings on your iPhone. Go to Settings > Control Center > Customize Controls and add the “Volume” and “Microphone” options to your Control Center. This will allow you to easily access and adjust these settings.
Open the Control Center by swiping down from the top-right corner of your screen (for iPhones without a home button) or swiping up from the bottom of your screen (for iPhones with a home button). Tap on the “Microphone” button to access the microphone settings.
Adjust the microphone sensitivity or gain settings based on your recording environment. If you’re recording in a quiet environment, you can increase the sensitivity to capture even the subtlest sounds. Conversely, if you’re recording in a noisy environment, reducing the sensitivity can help minimize background noise. Find the right balance that best suits your recording needs.
Experiment with different microphone modes, if available. Some external microphones, especially those with multiple capsules or built-in audio processing, offer different recording modes such as cardioid, stereo, or omnidirectional. Use the mode that aligns with your recording scenario. For solo podcasting, the cardioid mode is often the best choice as it focuses on capturing sound from the front while minimizing side and rear noise.
Consider using a windscreen or pop filter to minimize plosives and reduce wind noise. These accessories can be particularly helpful when recording outdoors or in environments with a lot of air movement. Attach the windscreen or pop filter to your external microphone to improve the overall sound quality of your recordings.
Don’t forget to monitor your audio levels during recording. Use the “Volume” option in the Control Center to adjust the playback volume and ensure that it is at an appropriate level. Avoid excessive volumes that can lead to distortion or clipping, which can significantly impact the quality of your recording.
Regularly listen to test recordings to evaluate the sound quality and make necessary adjustments. Pay attention to any background noise, distortion, or other audio issues that may affect the clarity of your recordings. Making small tweaks to the microphone settings can make a big difference in the overall sound quality of your podcasts.
Remember to save your settings once you have adjusted them to your preference. This will ensure that your microphone settings remain consistent across recording sessions.
By taking the time to adjust the microphone settings on your iPhone, you can optimize the sound quality of your podcast recordings. Experiment with sensitivity, microphone modes, and accessories like windshields or pop filters. Regularly monitor your audio levels and test recordings to ensure that your podcasts sound professional and engaging.
Configure Recording Settings on your Podcast App
Configuring the recording settings on your podcast app is crucial to ensure that your recordings are optimized for high-quality sound and meet your specific requirements. Every podcast app has different settings and features, but here are some general steps to help you configure the recording settings on your podcast app for optimal results.
First, open your podcast app and navigate to the settings or preferences menu. Look for options specifically related to recording settings or audio input. Depending on the app, you may have options to adjust the microphone sensitivity, recording format, sample rate, and bit depth.
Adjust the microphone sensitivity to find the optimal level that captures your voice clearly without distortion. Some apps provide a sensitivity slider or gain control that allows you to increase or decrease the microphone input. Experiment with different settings until you achieve the desired sound quality.
Consider the recording format and choose a format that offers the best sound quality and compatibility with your editing software or podcast hosting platform. Common recording formats include WAV and MP3. WAV files provide lossless audio quality, while MP3 files are compressed and take up less storage space.
Determine the sample rate and bit depth for your recordings. Higher sample rates (e.g., 44.1kHz or 48kHz) generally offer better audio fidelity, while higher bit depths (e.g., 16 bit or 24 bit) capture a wider range of dynamic audio. However, keep in mind that higher sample rates and bit depths result in larger file sizes, so consider your storage capacity and podcast hosting limitations.
Explore additional options such as background noise reduction or audio effects if available. Some podcast apps offer features to reduce background noise and enhance the overall sound quality of your recordings. These options can be particularly useful if you’re recording in less-controlled environments.
Take advantage of any options to add metadata or chapter markers to your recordings. Adding metadata such as episode title, description, and artwork can make it easier to organize and publish your podcast episodes. Chapter markers can be useful for dividing your episodes into sections that allow listeners to skip to specific content.
Consider enabling automatic backup or cloud storage options if available. This ensures that your recordings are securely saved and easily accessible in case of device failure or accidental deletion. Use cloud storage services or integrate with podcast hosting platforms to streamline your workflow.
Finally, test your recording settings by creating a short sample recording and listening to it. Pay attention to the sound quality, any potential background noise, and the overall level of the recording. Make any necessary adjustments to ensure that your podcast recordings meet your desired standards.
Remember that these steps are general guidelines, and the specific settings and options may vary depending on your podcast app. Take the time to familiarize yourself with the app’s interface and explore all available settings and options. By configuring the recording settings on your podcast app, you can ensure that your recordings are optimized and ready to captivate your audience.
Position your iPhone to Capture Clear Audio
When recording podcasts on your iPhone, the position of your device plays a crucial role in capturing clear and professional audio. Proper placement of your iPhone ensures that the microphone captures your voice accurately while minimizing unwanted noise and interference. Here are some tips to help you position your iPhone for optimal audio quality.
First and foremost, hold your iPhone steady and securely. Shaky or unstable handling can lead to unintended noise and vibration that can degrade the quality of your recordings. Use both hands to hold the device or consider using a tripod or phone holder to keep it steady during recording.
The distance between your mouth and the microphone is crucial for clear audio capture. Position your iPhone at a distance of about 6 to 12 inches (15 to 30 centimeters) from your mouth to ensure that your voice is captured without distortion or muffled sounds. Experiment with different distances to find the sweet spot that works best for your voice and microphone setup.
Consider the orientation of your iPhone. For solo recordings, it’s generally advisable to position the device in portrait mode with the microphone facing you. This allows the microphone to capture your voice directly, while keeping other sounds to a minimum. If you’re recording interviews or group discussions, you can position the iPhone horizontally to capture audio from multiple participants.
Avoid covering or obstructing the microphone with your hands or fingers. The location of the microphone on your iPhone depends on the model, but it is often located at the bottom, near the charging port or on the top edge. Take note of the microphone’s location and make sure it remains uncovered while recording to prevent muffled or distorted sound.
Consider the acoustics of your recording environment. Try to record in a quiet space with minimal background noise and echoes that could interfere with the clarity of your audio. Sound-absorbing materials such as carpets, curtains, or foam panels can help reduce unwanted reflections and improve the overall sound quality.
If you’re recording on-the-go or in a busy environment, using a directional microphone attachment can help minimize background noise. These attachments typically allow you to focus the microphone’s pickup pattern on your voice while reducing noise from the sides and rear. Experiment with different microphone attachments to find the one that suits your recording environment best.
Consider using headphones with a built-in microphone if you’re in a noisy environment or if you need to monitor your audio during recording. Headphones with a microphone attachment allow for better control over audio quality and can help you detect any issues or interference while recording.
Regularly monitor your audio levels during recording. Ensure that the audio levels remain within an optimal range to avoid distortion or clipping. Many podcast recording apps provide visual indicators or meters to help you monitor the audio levels as you record.
By carefully positioning your iPhone, you can capture clear and professional audio for your podcasts. Follow these tips to hold your iPhone securely, find the right distance from the microphone, avoid covering the microphone, consider the orientation, and be mindful of the acoustics of your recording environment. With proper positioning, your iPhone will become a powerful tool for creating engaging and high-quality podcast episodes.
Test Recording Levels and Adjust as Needed
Testing and adjusting your recording levels is an essential step to ensure optimal audio quality and avoid issues such as distorted or too quiet audio in your podcast recordings. By properly setting and monitoring the recording levels on your iPhone, you can achieve clear and balanced audio. Here’s how to test your recording levels and make necessary adjustments as needed.
Start by opening your podcast recording app and setting up a test recording. Choose a quiet environment and speak in a normal volume to simulate typical podcast recording conditions.
Monitor the audio levels during the test recording. Look for visual indicators or meters that display the input volume or gain level in your podcast recording app. These indicators typically move in response to the sound picked up by the microphone.
Speak into the microphone at your intended recording volume. Aim to keep the audio levels within the optimal range, avoiding both too soft (low levels) and too loud (clipping) recordings.
If the audio levels are too low or soft, increase the microphone sensitivity or gain settings on your podcast recording app. This will boost the input volume and make your voice more audible. Be careful not to set the levels too high, as it may introduce unwanted distortion or clipping.
On the other hand, if the audio levels are too high or clipping, decrease the microphone sensitivity or gain settings accordingly. This will reduce the input volume and prevent distorted recordings. Ensure that the levels remain within a comfortable range that captures your voice clearly without overwhelming the listener.
Keep an eye on the audio meters or indicators as you make adjustments. Strive for a balanced recording level where the peaks of your voice reach close to the maximum level without exceeding it. This will provide ample headroom for post-production editing and ensure that your podcast episodes have consistent audio quality.
Perform multiple test recordings while adjusting the levels until you achieve the desired and consistent audio quality. Listen to the test recordings using headphones or speakers to evaluate the clarity, volume, and overall sound quality.
If you notice any issues such as excessive background noise, distortion, or inconsistent volume levels, continue to fine-tune the microphone sensitivity or gain settings. Additionally, consider making adjustments to the microphone position, recording environment, or using accessories such as pop filters or windshields to minimize any unwanted noise or interference.
Remember to save the settings once you have adjusted them to your preference. This will ensure that your recording levels remain consistent throughout your podcast episodes.
Regularly test and monitor your recording levels to maintain optimal audio quality in your podcast recordings. Being mindful of the audio levels during recording ensures that your voice is clear, balanced, and free from distortion. With properly adjusted recording levels, you can deliver engaging and professional podcasts that captivate your audience.
Tips for Recording Podcast Interviews on iPhone
Recording podcast interviews on your iPhone can be a convenient and effective way to capture engaging content. Whether you’re interviewing guests remotely or in person, there are several tips and techniques you can follow to ensure successful and high-quality interview recordings. Here are some tips to help you make the most out of recording podcast interviews on your iPhone.
1. Find a quiet and controlled environment: Choose a location that minimizes background noise and distractions. If possible, use a room with good acoustics or consider using soundproofing materials to reduce echo and reverberation.
2. Test the audio setup: Before starting the interview, conduct a quick test to ensure that both you and your guest can be heard clearly. Check the microphone and headphone connections, adjust the recording levels, and do a short sample recording to confirm the audio quality.
3. Use headphones: It’s recommended for both you and your guest to use headphones during the interview. This helps to eliminate echo or feedback caused by audio bleeding into the microphone. It also allows you to monitor the audio levels and quality in real-time.
4. Maintain a consistent distance from the microphone: Remind your guest to speak into their microphone at a consistent distance to maintain a clear and balanced sound. If necessary, provide guidance on microphone positioning and encourage them to speak clearly and directly into the microphone.
5. Conduct a pre-interview discussion: Before officially starting the interview, have a brief conversation with your guest to establish rapport and go over the interview structure. This helps to build a connection and put your guest at ease, leading to more natural and engaging responses during the interview.
6. Prepare a list of questions: Create a well-structured list of questions or topics to guide the interview. This ensures a smooth flow of conversation and helps you stay focused on the main objectives of the interview. However, be flexible and willing to deviate from the script to explore interesting or unexpected avenues.
7. Listen actively: During the interview, actively listen to your guest’s responses. This allows you to ask follow-up questions, dig deeper into certain topics, or redirect the conversation if necessary. Avoid interrupting, and give your guest enough time to express their thoughts and ideas fully.
8. Record backup tracks: To avoid any potential loss of data, consider recording backup tracks as a safety precaution. This can be done by using a separate recording app or running a backup recording on another device. It provides an extra layer of protection in case of technical issues or unexpected glitches.
9. Edit with care: After recording the interview, take the time to edit the audio carefully. Remove any unnecessary pauses, filler words, or background noise that may distract listeners. However, be mindful of maintaining the integrity of the conversation and avoid altering the essence of the interview.
10. Show appreciation: After the interview, express gratitude to your guest for their time and contribution. A simple thank you note or social media shout-out can go a long way in building professional relationships and fostering future collaborations.
By following these tips, you can ensure successful and high-quality podcast interview recordings on your iPhone. By creating a comfortable environment, using headphones, maintaining proper microphone technique, and conducting thorough editing, you can produce engaging and professional interviews that resonate with your audience.
Edit and Enhance your Podcast Recording on iPhone
Editing and enhancing your podcast recording on your iPhone is a critical step in refining the audio and creating a polished final product. With the right editing techniques and tools, you can remove any unwanted elements, enhance the quality of the sound, and improve the overall listening experience. Here are some tips to help you edit and enhance your podcast recording on your iPhone.
1. Select a reliable editing app: Choose a podcast editing app that is user-friendly, offers essential editing features, and suits your editing style. There are various apps available on the App Store that allow you to trim, cut, and rearrange audio clips easily. Some apps even provide advanced editing features like noise reduction, EQ adjustments, and audio effects.
2. Start with the basics: Begin by listening to your entire recording to familiarize yourself with the content and take note of any sections that require editing. Look for areas with long pauses, fillers, errors, or repetitive content that can be removed to maintain a smooth flow.
3. Trim and cut unwanted parts: Use the editing app’s tools to trim or cut out any unwanted parts of the recording. This can include excessive pauses, mistakes, or tangents that detract from the main content. Ensure that transitions between edited segments are natural and seamless.
4. Enhance audio quality: Most podcast editing apps offer tools to enhance the audio quality of your recording. This can range from basic functions such as adjusting the volume levels and equalization (EQ) to more advanced techniques such as noise reduction, de-essing, or compression. Experiment with these tools to optimize the overall sound and make it more pleasant to listen to.
5. Add intros, outros, and music: Consider adding an engaging intro and outro to your podcast episodes. This helps to establish your branding, create continuity among your episodes, and build anticipation for the content. In addition, you can enhance the listening experience by including background music or sound effects at appropriate moments, such as transitions or during storytelling segments.
6. Ensure consistent audio levels: Pay attention to the volume levels of your recording. Adjust any variations in volume to ensure a consistent listening experience across the entire episode. Normalizing the audio can help achieve this by bringing the overall volume to an optimal level without sacrificing the dynamic range.
7. Review for clarity and flow: After making edits and enhancements, listen to the edited recording as a whole. Ensure that the content flows smoothly and that there are no abrupt transitions or awkward pauses. Maintain the natural rhythm and pacing of the conversation while keeping the overall episode length in mind.
8. Export in a suitable format: Once you’re satisfied with the edits, export the final edited recording in a suitable format for distribution. Common formats include MP3, AAC, or WAV. Consider the file size, compatibility with podcast hosting platforms, and other guidelines provided by podcast directories.
9. Listen to the final version: Before publishing your episode, take the time to listen to the exported file one last time. Pay attention to any remaining mistakes, technical issues, or areas that may need further improvement. This final quality check ensures that your episode meets your standards and is ready to be shared with your audience.
10. Save and organize your files: It’s important to save and organize your edited podcast recordings properly. Create a dedicated folder or file structure on your iPhone or cloud storage to store all the edited and final episodes. This way, you’ll have easy access to the files for future reference or re-editing if necessary.
By following these tips and utilizing the editing tools available on your iPhone, you can edit and enhance your podcast recordings to create a professional and engaging listening experience. With careful trimming, audio enhancements, and attention to detail, you’ll be able to produce high-quality episodes that captivate your audience.
Export and Share your Podcast Episode from iPhone
Once you have edited and finalized your podcast episode on your iPhone, it’s time to export and share it with your audience. Exporting your podcast episode ensures that it’s saved in a suitable format and ready for distribution on various platforms. Here are the steps to export and share your podcast episode from your iPhone.
1. Save the edited episode: Before exporting, make sure to save the final, edited version of your podcast episode. This ensures that any changes made during the editing process are preserved.
2. Choose an appropriate file format: Determine the file format that is compatible with most podcast platforms and directories. The most common format is MP3, known for its versatility and small file size. However, you may also consider other formats like AAC or WAV depending on the requirements of the platforms you plan to distribute your episode to.
3. Export the episode from your editing app: Most podcast editing apps allow you to export the edited episode directly from the app. Look for options to export or save the file in the desired file format. Follow the prompts to select the destination where you want to save the file, such as your iCloud Drive or a specific folder on your iPhone.
4. Review the exported file: Before sharing the episode, take a moment to listen to the exported file to ensure that the audio quality, transitions, and edits are intact. Pay attention to any potential issues like audio glitches, unexpected editing artifacts, or volume inconsistencies. This final quality check helps to ensure that your episode meets your desired standards.
5. Add metadata and artwork: To make your podcast episode easily identifiable, add relevant metadata and artwork to your file. Metadata includes information such as the episode title, episode number, description, and other relevant details. Some podcast editing apps allow you to add this information directly within the app. You can also use third-party ID3 tag editors to add metadata after exporting the file. Additionally, create eye-catching artwork that represents your episode and adheres to the specifications provided by podcast directories.
6. Save your episode to a podcast hosting platform: To ensure seamless distribution and access to your podcast episode, consider using a podcast hosting platform. Upload your episode onto the platform, providing the necessary metadata and artwork. The hosting platform will generate an RSS feed, unique URL, and other features necessary for podcast syndication and distribution.
7. Share the episode on podcast directories: Submit your podcast to popular podcast directories such as Apple Podcasts, Spotify, Google Podcasts, and others. Each directory has its own submission process, so carefully follow their guidelines when providing the necessary information and submitting your podcast for inclusion.
8. Promote your episode: Don’t forget to promote your newly released episode on your podcast website, social media channels, and other platforms to increase visibility and attract listeners. Share snippets or highlights from the episode, engage with your audience, and encourage them to listen and subscribe. Engaging in promotional activities helps to generate buzz and expand your podcast’s reach.
9. Engage with your audience: Once your episode is live, actively engage with your audience by responding to comments, feedback, and questions. Encourage listeners to share their thoughts and suggestions. Building a community around your podcast fosters loyalty and encourages listeners to stay engaged and spread the word.
10. Monitor your podcast analytics: Utilize analytics provided by your hosting platform and podcast directories to gain insights into your podcast’s performance. Track metrics such as episode downloads, listener demographics, and listener behavior to understand your audience better and tailor your content accordingly.
By following these steps, you can export and share your podcast episode from your iPhone effectively. From exporting the file in the appropriate format to adding metadata and artwork, promoting your podcast, and engaging with your audience, you can successfully distribute and grow your podcast.