Introduction
Are you an avid YouTube fan who loves watching videos on your iPod? If so, you may have wondered how to download YouTube videos onto your iPod for offline viewing. Thankfully, with the help of a YouTube video downloader, you can easily save your favorite videos and enjoy them on your iPod anytime, anywhere.
In this guide, we will take you through a step-by-step process to download YouTube videos onto your iPod. Whether you want to watch music videos, tutorials, or entertaining content, this guide will provide you with all the necessary instructions to make it happen.
Before we dive into the process, it’s important to note that downloading videos from YouTube is against their terms of service. However, there are legal methods to download YouTube videos for personal use, such as offline viewing. It’s essential to respect the copyrights of content creators and use downloaded videos responsibly.
Now, let’s get started on how to download YouTube videos onto your iPod and enjoy your favorite videos whenever you want.
Step 1: Download a YouTube Video Downloader
The first step in downloading YouTube videos onto your iPod is to find and download a reliable YouTube video downloader. There are various software programs and online tools available that can assist you in this process.
You can start by searching for popular YouTube video downloader programs like 4K Video Downloader, YTD Video Downloader, or ClipGrab. These programs are widely used and trusted by users to download YouTube videos with ease.
If you prefer online tools, websites such as SaveFrom.net, KeepVid, or Y2Mate offer YouTube video downloading services directly from your web browser. Simply search for these websites, and you will find a user-friendly interface to download your desired videos.
Once you have chosen a YouTube video downloader that suits your preferences, proceed to the next step to install the software or utilize the online tool.
Remember, it’s essential to download YouTube video downloader software or use reputable online tools to ensure the safety of your device and protect your privacy. Be cautious of websites or software that may contain malware or unauthorized usage of your personal information.
Step 2: Install the YouTube Video Downloader
Once you have downloaded the YouTube video downloader software or chosen an online tool, it’s time to install it on your device. Follow these simple instructions to install the YouTube video downloader:
- Locate the downloaded software file or access the online tool through your web browser.
- If you downloaded software, double-click on the file to begin the installation process. Follow the on-screen instructions to complete the installation. If you are using an online tool, skip to the next step.
- Read and review the terms and conditions or user agreement, if prompted. Click “Agree” or “Accept” to proceed with the installation.
- Choose the destination folder where you want to install the YouTube video downloader. You can keep the default location or select a different folder by clicking “Browse” and navigating to the desired location.
- Click “Install” and allow the installation process to run. This may take a few moments, so be patient.
- Once the installation is complete, you may be asked to create a desktop shortcut for easy access to the YouTube video downloader. Select the option that suits your preference.
- Finally, click “Finish” to complete the installation process. The YouTube video downloader is now installed and ready to use.
It’s important to follow the installation instructions carefully to ensure a successful installation of the YouTube video downloader. If you encounter any issues during the installation process, refer to the troubleshooting guide provided by the software or seek help from their support team.
Now that you have installed the YouTube video downloader, proceed to the next step to learn how to launch the software or access the online tool.
Step 3: Launch the YouTube Video Downloader
After successfully installing the YouTube video downloader, it’s time to launch the software or access the online tool. Follow these steps to open the YouTube video downloader:
- Locate the icon of the installed software on your desktop, start menu, or application folder. Double-click on the icon to launch the YouTube video downloader. If you are using an online tool, open your preferred web browser and navigate to the website where the tool is accessible.
- Once the YouTube video downloader is launched, you should see the main interface of the software or the homepage of the online tool.
- If you are using software, you may be prompted to log in or create an account. Follow the on-screen instructions to complete this step. Most online tools do not require an account, but some may ask for verification or offer additional features if you sign up.
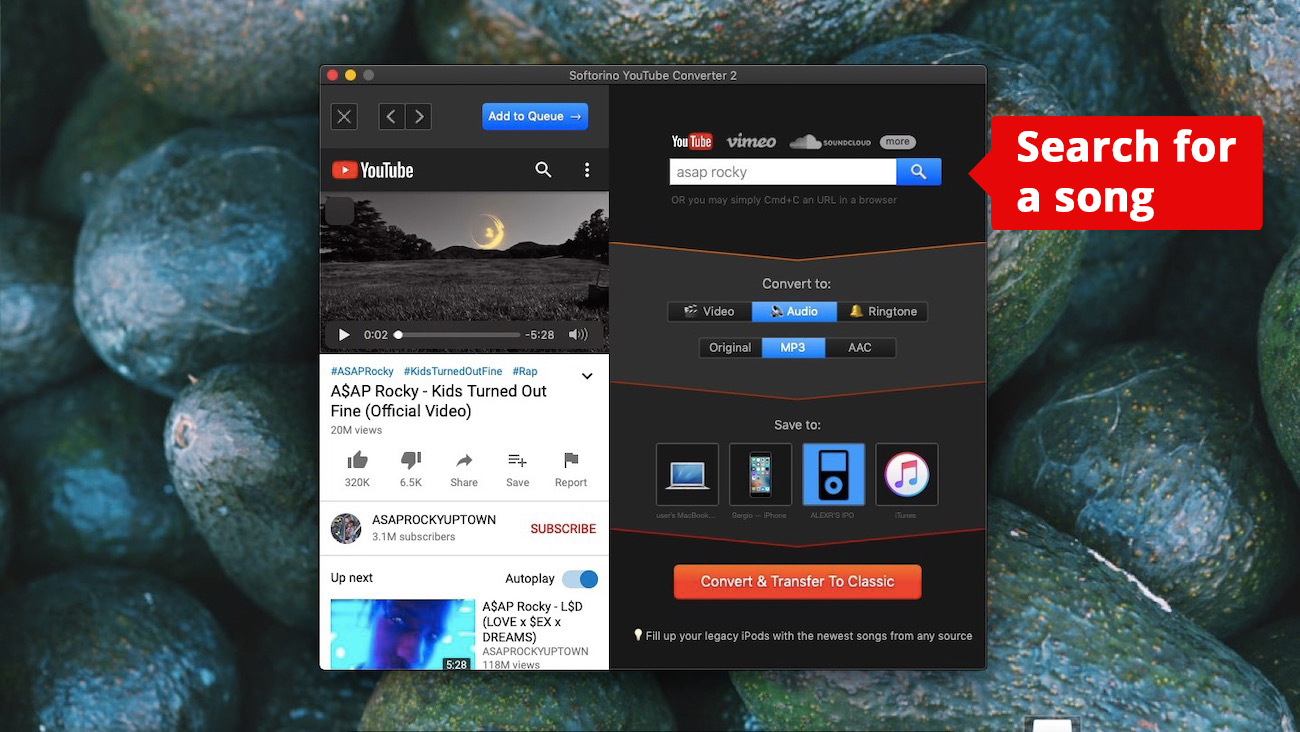
- Take a moment to familiarize yourself with the user interface of the YouTube video downloader. You will find options and buttons that allow you to copy and paste video URLs, choose the output format and quality, and start the video download process.
- Ensure that your iPod is connected to your computer via a USB cable if you plan to transfer the downloaded videos directly to your iPod.
Launching the YouTube video downloader is a crucial step as it allows you to access the necessary tools and features for downloading videos. Make sure to keep the software or online tool easily accessible for future use.
Now that you have launched the YouTube video downloader, it’s time to proceed to the next step to learn how to copy the URL of the YouTube video you want to download.
Step 4: Copy the URL of the YouTube Video
To download a YouTube video onto your iPod, you will need to copy the URL (web address) of the video you wish to download. Follow these steps to do so:
- Open your web browser and navigate to YouTube.
- Search for the video you want to download using the search bar or browse through your subscriptions or recommended videos.
- Once you have found the video, click on it to open the video playback page.
- Look at the address bar at the top of your web browser. You will see the URL of the current video. Select the entire URL by clicking and dragging your cursor over it or using the shortcut CTRL+A (CMD+A for Mac).
- To copy the URL, either right-click on the selected URL and choose “Copy,” or use the shortcut CTRL+C (CMD+C for Mac).
- Alternatively, many YouTube video downloader software and online tools offer browser extensions or buttons that make it easy to capture the URL directly from the video playback page. Look for these options in the interface of your YouTube video downloader.
Copying the URL of the YouTube video is a vital step as it provides the necessary information for the YouTube video downloader to identify the specific video you want to download. Make sure to copy the complete URL to avoid any issues in the download process.
Now that you have copied the URL of the YouTube video, let’s move on to the next step to learn how to paste the URL into the YouTube video downloader.
Step 5: Paste the URL into the YouTube Video Downloader
After copying the URL of the YouTube video you want to download, it’s time to paste it into the YouTube video downloader. Follow these steps to successfully paste the URL:
- Return to the interface of the YouTube video downloader, whether it is the software or the online tool.
- Look for a designated field or box where you can paste the URL. In most cases, you will find it labeled as “Paste URL” or “Enter video URL”.
- To paste the URL, right-click inside the designated field and choose “Paste,” or use the shortcut CTRL+V (CMD+V for Mac).
- Some YouTube video downloader software or online tools may automatically detect the copied URL and paste it into the appropriate field. In such cases, you may not need to manually paste the URL.
By pasting the URL into the YouTube video downloader, you are informing the software or online tool about the specific YouTube video you want to download. This step is crucial in ensuring the accuracy of the download process and obtaining the desired video.
Now that you have successfully pasted the URL, let’s proceed to the next step to learn how to choose the output format and quality for the downloaded video.
Step 6: Choose the Output Format and Quality
After pasting the URL into the YouTube video downloader, you have the option to choose the output format and quality for the downloaded video. Different YouTube video downloader software or online tools may offer varying options for formats and quality. Follow these steps to select your preferred settings:
- Look for the format or quality options within the YouTube video downloader interface. These options may be presented as drop-down menus, checkboxes, or buttons.
- For the format, you can typically choose from popular video file types such as MP4, AVI, MOV, or WMV. Select the format that is compatible with your iPod’s video playback capabilities.
- Regarding the quality, you may have the choice to download the video in different resolutions such as 480p, 720p, or 1080p. Consider the storage capacity of your iPod and the quality that meets your preferences.
- Some advanced YouTube video downloader tools may provide additional options like audio extraction or converting the video to a specific device format. Explore these options if they are relevant to your needs.
- Take note that higher quality videos may occupy more storage space on your iPod, so choose a balance between quality and available storage capacity.
Choosing the output format and quality allows you to customize the downloaded video according to your requirements and the capabilities of your iPod. Make sure to select the appropriate format and quality combination for the best viewing experience.
Now that you have chosen the output format and quality, let’s move on to the next step to learn how to select the destination folder to save the downloaded video.
Step 7: Select the Destination Folder to Save the Video
Once you have chosen the desired output format and quality for the downloaded video, the next step is to select the destination folder where you want to save the video on your computer. Follow these steps to select the destination folder:
- Within the YouTube video downloader interface, look for an option or field that allows you to choose the destination folder.
- Click on the folder icon or browse button to open a file explorer or directory window.
- Navigate to the location on your computer where you want to save the downloaded video. You can choose an existing folder or create a new one specifically for your downloaded videos.
- Select the desired folder by clicking on it, and then click “OK” or “Choose” to set it as the destination folder.
- Make sure to note the selected folder or its location for future reference.
- If you are planning to transfer the video directly to your iPod, ensure that the destination folder is easily accessible for the transfer process.
Selecting the destination folder is important as it determines where the downloaded video will be saved on your computer. Keeping your video files organized in designated folders will make it easier to locate and manage them in the future.
Now that you have selected the destination folder, let’s move on to the next step to start the video download process.
Step 8: Start the Video Download Process
With the URL copied, the format and quality selected, and the destination folder determined, it’s time to initiate the video download process. Follow these steps to start the download:
- Double-check that all the necessary settings, including the URL, format, quality, and destination folder, are correctly configured within the YouTube video downloader interface.
- Click on the “Start” button, “Download” button, or similar action button within the YouTube video downloader.
- The YouTube video downloader will now begin to analyze the URL and retrieve the video data from YouTube.
- Depending on the size of the video and your internet connection speed, the download process may take some time. Be patient and avoid interrupting the process.
- Once the download is complete, you will receive a notification or see a progress bar indicating the successful download.
During the download process, make sure not to navigate away from the YouTube video downloader or close the application or browser window. Doing so may interrupt or cancel the video download.
After the video has been successfully downloaded, you can locate the saved file in the designated destination folder on your computer. From there, you can further organize, rename, or transfer it to your iPod for offline viewing.
Now that you have started the video download process, let’s proceed to the next step to learn how to transfer the downloaded video to your iPod.
Step 9: Transfer the Downloaded Video to iPod
Now that you have successfully downloaded the video onto your computer, the final step is to transfer it to your iPod for offline viewing. Here’s how you can transfer the downloaded video to your iPod:
- Connect your iPod to your computer using the appropriate USB cable.
- Open iTunes or any other media management software that is compatible with your iPod.
- In iTunes, select your iPod from the list of connected devices. If your iPod doesn’t appear, refer to the troubleshooting guide provided by the manufacturer or consult their support.
- Navigate to the “Movies,” “Videos,” or “Library” section within iTunes or your media management software.
- Drag and drop the downloaded video file from your computer into the appropriate section within iTunes. Alternatively, you can use the “Add File” or “Import” option to select the video file from your computer.
- Wait for the file to sync with your iPod. The sync process may take a few moments, depending on the size of the video file and the performance of your computer.
- Once the sync is complete, safely disconnect your iPod from your computer.
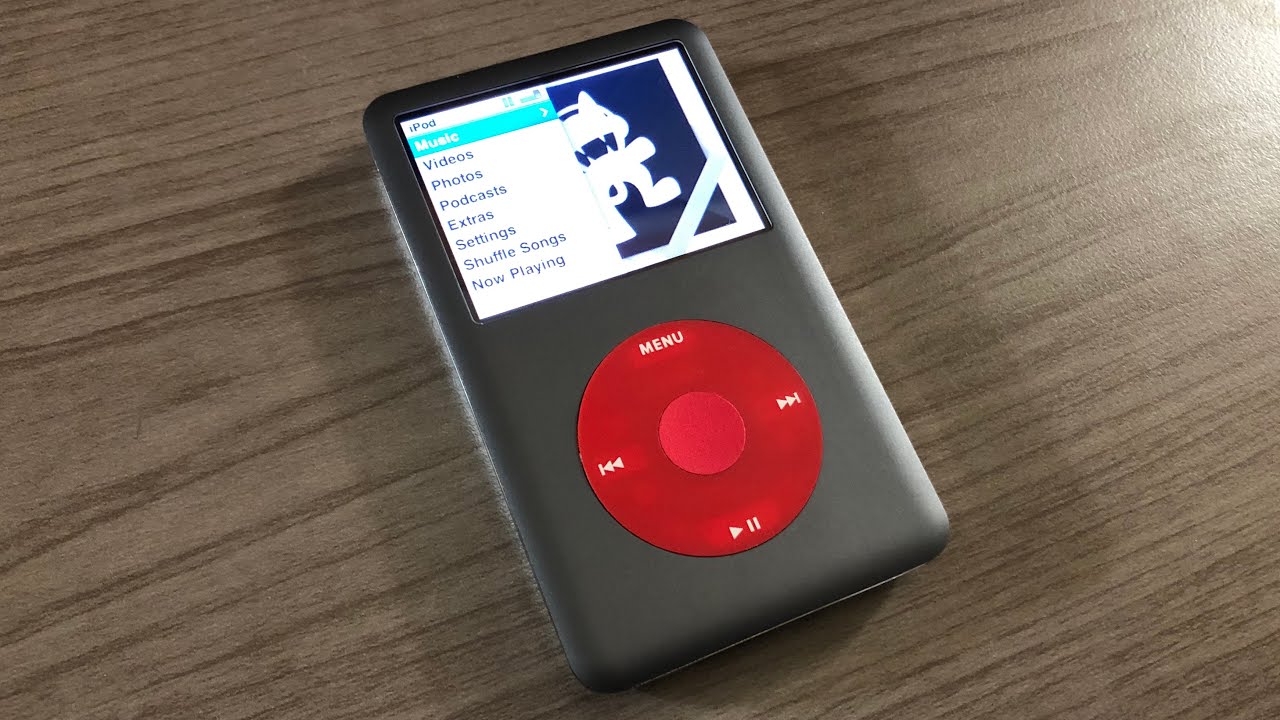
After disconnecting your iPod, you should now be able to navigate through the “Videos” or “Movies” section on your iPod and find the transferred video. You can now enjoy watching the downloaded YouTube video offline on your iPod whenever and wherever you desire.
Remember to regularly manage the storage capacity of your iPod as video files can be relatively large. You may need to delete or transfer older videos to make room for new downloads.
Congratulations! You have now successfully downloaded and transferred a YouTube video onto your iPod. Enjoy your favorite videos on the go!
Conclusion
Downloading YouTube videos onto your iPod for offline viewing is a convenient way to enjoy your favorite videos anytime, anywhere. By following the step-by-step process outlined in this guide, you can easily download videos and transfer them to your iPod for on-the-go entertainment.
Starting with downloading a reliable YouTube video downloader, installing and launching the software or accessing the online tool, copying the URL of the desired video, and pasting it into the downloader were the initial steps. Choosing the output format and quality, selecting the destination folder, and finally initiating the download process were crucial in obtaining the desired video. And lastly, transferring the downloaded video to your iPod completed the process.
Remember to always respect copyright laws and use downloaded videos for personal use only. Be cautious when downloading and installing software or using online tools, ensuring their safety and legitimacy.
Now that you have successfully learned how to download YouTube videos onto your iPod, you can enjoy a wide range of content offline – from music videos and tutorials to vlogs and entertaining videos. Embrace the flexibility and convenience of having your favorite videos readily available on your iPod.
Keep exploring and discovering new videos to download, and enjoy the benefits of offline viewing. Happy downloading and watching!