Introduction
Welcome to the world of digital screenshots! Capturing and sharing screenshots has become an essential part of our day-to-day activities, whether we want to save a funny meme, create a tutorial, or capture an important piece of information. One of the most popular and user-friendly tools for capturing screenshots on Windows is the Snipping Tool.
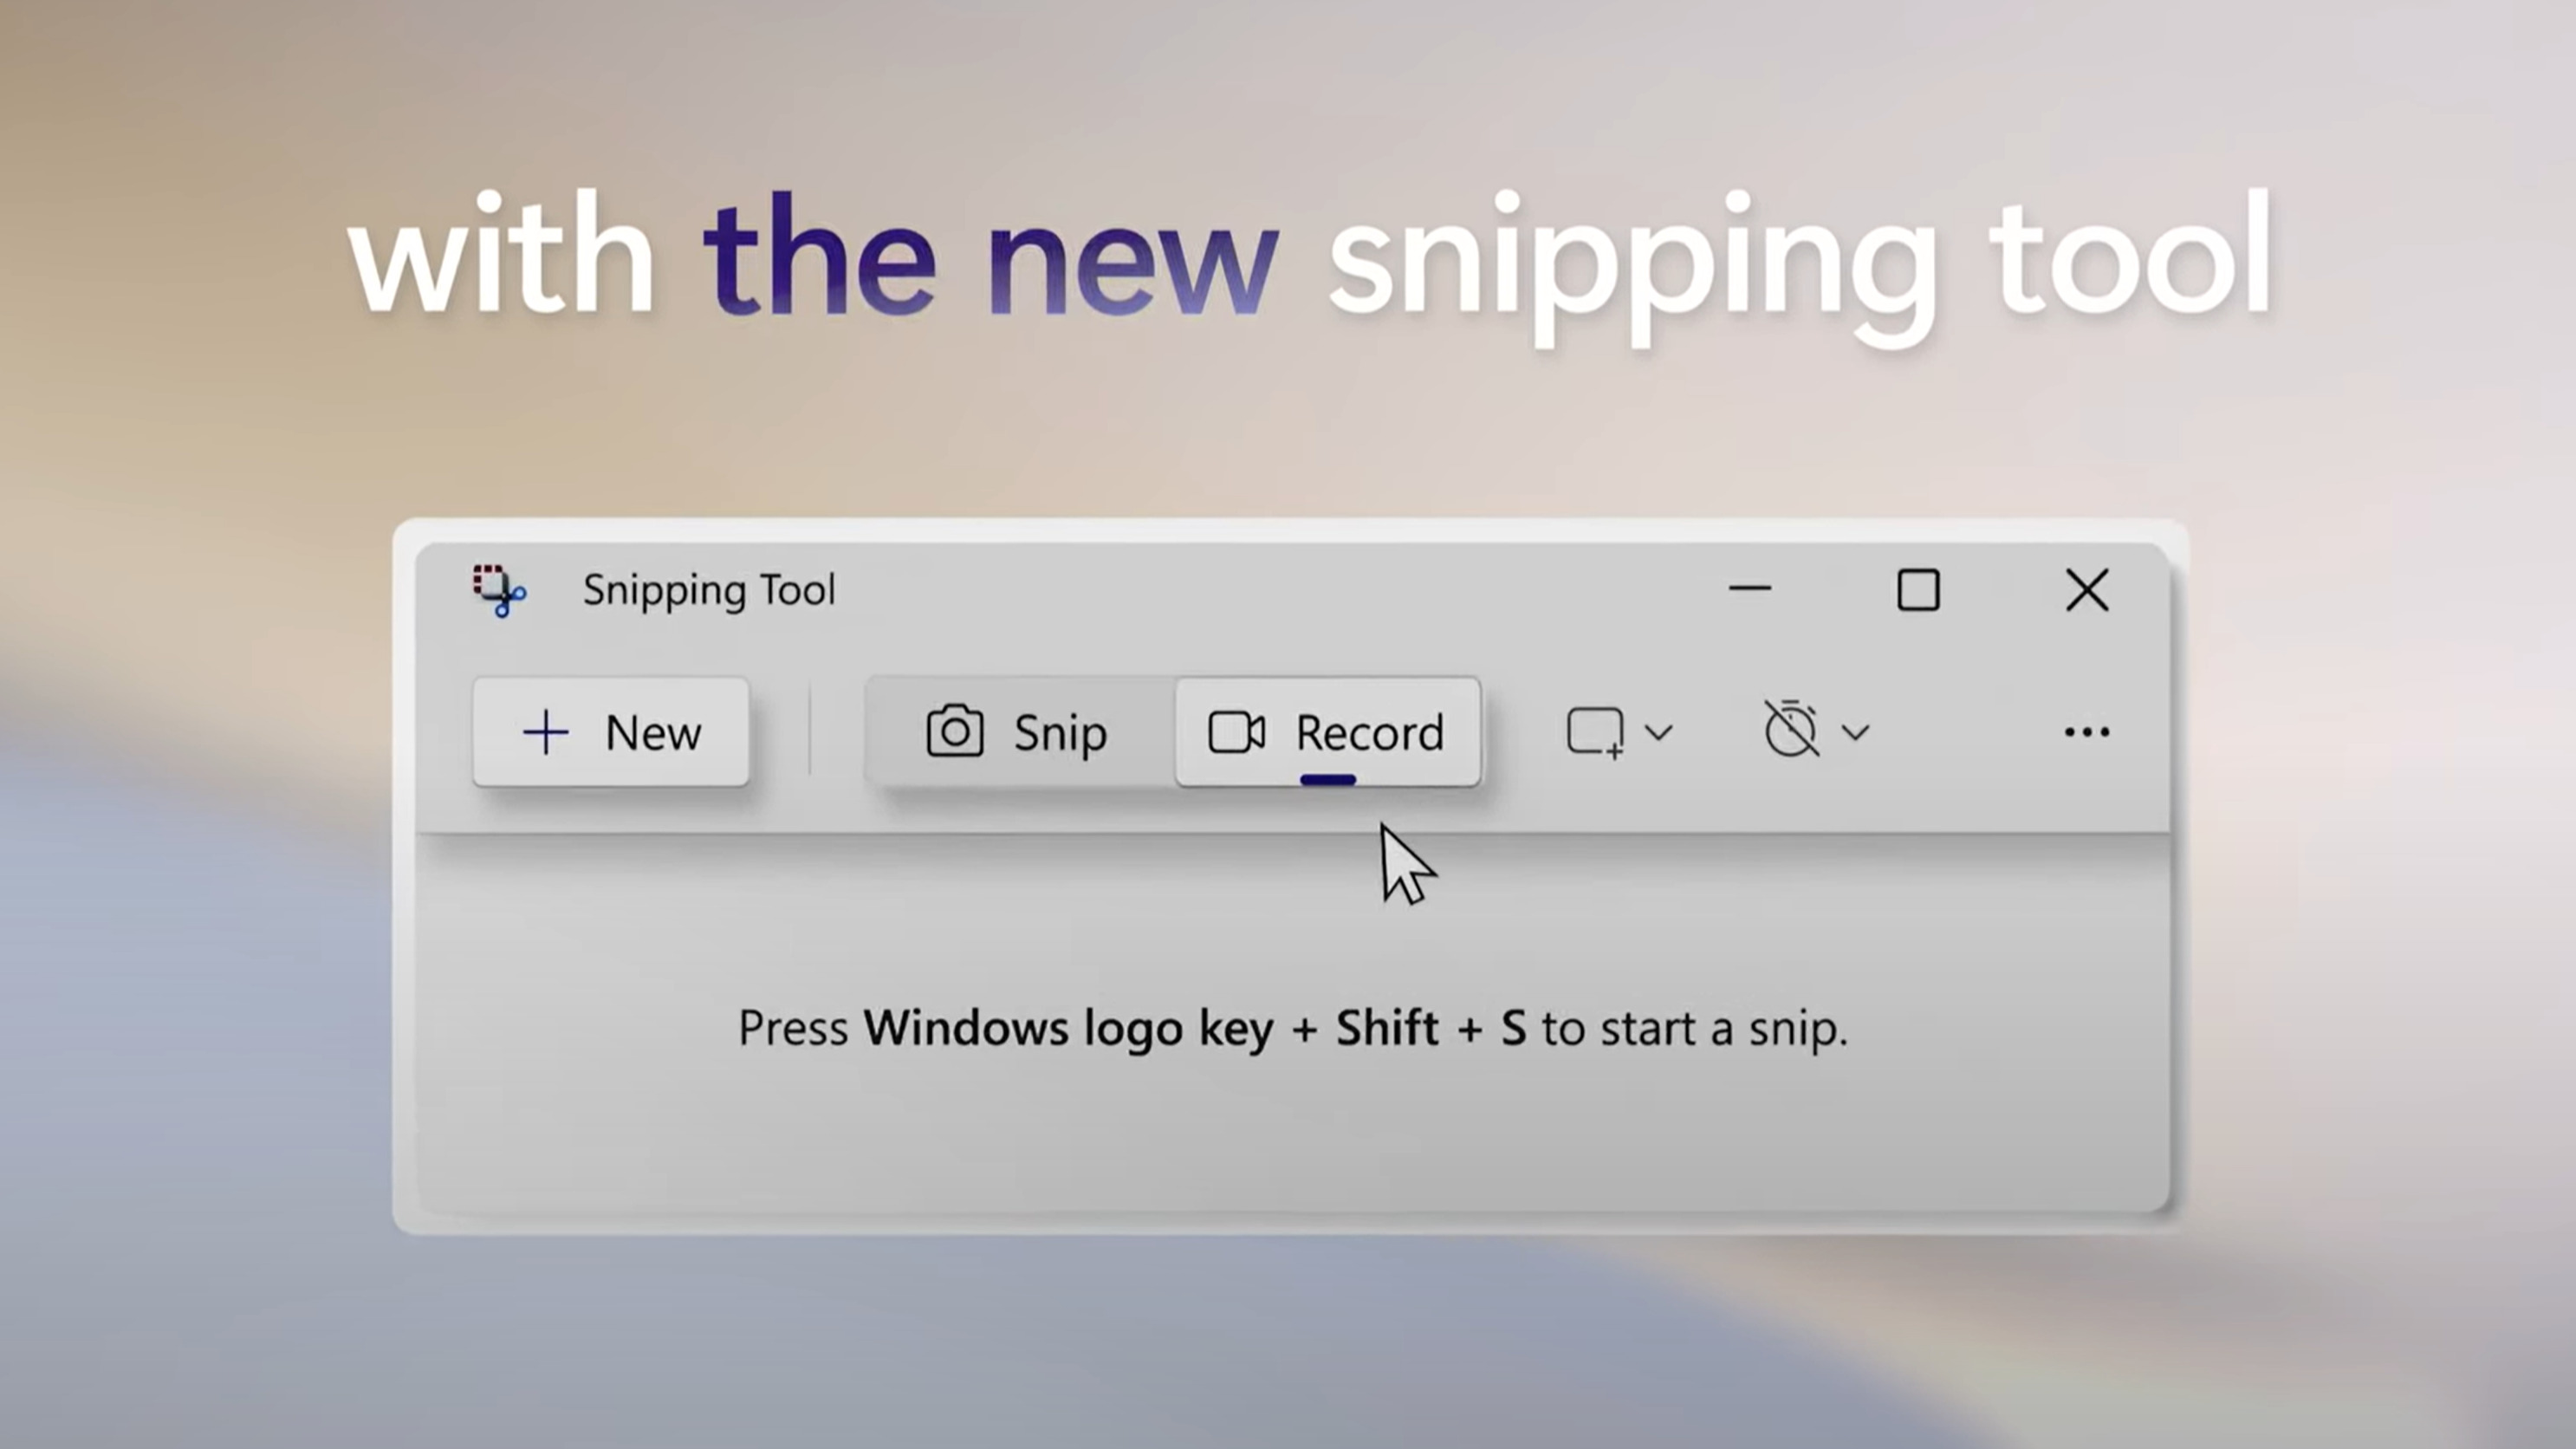
The Snipping Tool is a built-in screen capture utility that allows you to create custom screenshots of selected regions, full windows, or the entire screen. It offers various annotation options, such as highlighting, adding text, or drawing shapes, making it a versatile tool for professionals and casual users alike.
In this article, we will explore different methods to download and install the Snipping Tool on your Windows device. Whether you’re using an older version of Windows or the latest Windows 10, there are multiple ways to access this handy tool.
If you’re ready to take your screen captures to the next level, let’s dive into the various methods you can use to download and install the Snipping Tool!
Method 1: Installing Snipping Tool through Windows Features
If you’re using a Windows operating system, chances are that the Snipping Tool is already included as a built-in feature. However, in some cases, it may not be enabled by default. Here’s how you can install the Snipping Tool through Windows Features:
- Open the Start menu and search for “Control Panel”. Click on it to open the Control Panel.
- In the Control Panel, select “Programs” or “Programs and Features”, depending on your Windows version.
- Click on the “Turn Windows features on or off” option. This will open the “Windows Features” dialog box.
- Scroll down the list of features and locate “Tablet PC Optional Components.
- Click on the “+” sign next to “Tablet PC Optional Components” to expand the category.
- Check the box next to “Tablet PC Components” and click on “OK”.
- Windows will now install the required files and enable the Snipping Tool feature on your system.
- Once the installation is complete, you can access the Snipping Tool by searching for it in the Start menu or the search bar.
By following these simple steps, you can quickly enable the Snipping Tool and start capturing screenshots on your Windows device.
Note that the steps mentioned above may vary slightly depending on your Windows version. If you’re using Windows 10, the process is similar, but you need to search for “Windows Features” in the search bar instead of going through the Control Panel.
Method 2: Download Snipping Tool from Microsoft Store
If you’re unable to find the Snipping Tool through the Windows Features, another option is to download it from the Microsoft Store. Here’s how you can do it:
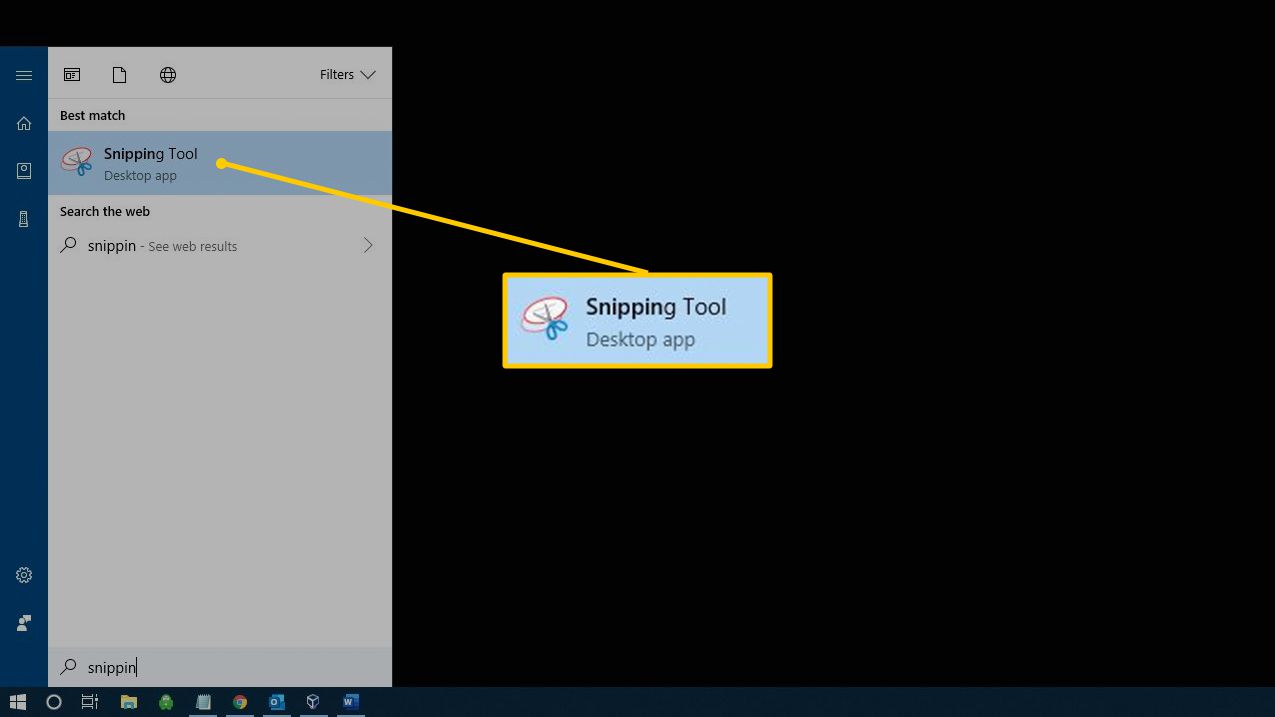
- Open the Microsoft Store by clicking on the “Microsoft Store” icon in your taskbar or searching for it in the Start menu.
- In the Microsoft Store search bar, type “Snipping Tool” and press Enter.
- From the search results, click on the Snipping Tool app to open its page.
- Click on the “Get” or “Install” button to begin the download and installation process.
- Wait for the download and installation to complete. This may take a few moments depending on your internet speed.
- Once the Snipping Tool is installed, you can open it by searching for it in the Start menu or clicking on its icon in the list of installed apps in the Start menu.
Downloading the Snipping Tool from the Microsoft Store ensures that you have the latest version of the tool, and it also provides a convenient way to update or uninstall the app in the future.
Note that this method is only applicable to Windows 10 users, as the Microsoft Store is not available on older versions of Windows.
Now that you know how to download and install the Snipping Tool from the Microsoft Store, you can start capturing screenshots with ease!
Method 3: Using Third-Party Screen Capture Tools as an Alternative
While the Snipping Tool is a powerful and convenient built-in option for capturing screenshots on Windows, there are also several third-party screen capture tools available that offer additional features and customization options. Here are some popular alternatives to consider:
- Greenshot: Greenshot is a comprehensive screen capture tool that allows you to capture screenshots, annotate them with text and shapes, and easily share them. It also offers advanced features like capturing entire web pages and scrolling windows.
- Lightshot: Lightshot is a lightweight and user-friendly screen capture tool that lets you capture specific areas, full windows, or the entire screen. It includes an editor with annotation tools and provides options to save or share your screenshots.
- Snagit: Snagit is a professional-grade screen capture and video recording tool. It offers advanced editing features, extensive annotation options, and the ability to capture scrolling webpages and multi-page documents.
- PicPick: PicPick is a versatile screen capture tool that allows you to capture screenshots, edit them with various effects and annotations, and share them easily. It also includes a built-in image editor and a color picker tool.
- ShareX: ShareX is a powerful open-source screen capture tool that offers a plethora of features, including various capture methods, custom hotkeys, image and text annotations, and automatic sharing options to cloud services or social media platforms.
These third-party screen capture tools can be downloaded and installed from their respective websites. They provide additional flexibility and functionality compared to the Snipping Tool, making them a great alternative for users with specific requirements or preferences.
When choosing a third-party screen capture tool, consider your individual needs, such as the desired capture options, annotation features, sharing capabilities, and compatibility with your Windows operating system.
Now you have the option to explore and choose a third-party screen capture tool that suits your requirements and enhances your screenshot-taking experience on Windows!
Conclusion
Screen capturing has become an essential aspect of our digital lives, whether for personal or professional purposes. In this article, we explored various methods to download and install the Snipping Tool on your Windows device. We learned how to enable it through Windows Features, download it from the Microsoft Store, and even considered alternative third-party screen capture tools.
The Snipping Tool, a built-in screen capture utility on Windows, provides a user-friendly interface and various annotation options to enhance your screenshots. By following the steps outlined in Method 1, you can easily enable the Snipping Tool through Windows Features.
If the Snipping Tool is not available through Windows Features, Method 2 guides you through downloading and installing it from the Microsoft Store. This method ensures you have the latest version and easy access to future updates and uninstallation.
For users seeking more advanced features and customization options, Method 3 introduced several third-party screen capture tools as alternatives. These tools, such as Greenshot, Lightshot, Snagit, PicPick, and ShareX, offer additional functionality and flexibility for your screenshot-taking needs.
When deciding which method to choose, consider your specific requirements, such as the desired capture options, annotation features, and sharing capabilities. This will help you determine the most suitable option for capturing and sharing screenshots effectively on your Windows device.
Whether you opt for the Snipping Tool, download it from the Microsoft Store, or explore third-party alternatives, capturing and sharing screenshots on Windows has never been easier. So go ahead and let your creativity flow as you capture and share moments, information, and ideas with the world!