Introduction
As a student using a Chromebook at school, you may need to take screenshots of your screen for various reasons. Whether it’s capturing an important piece of information from a webpage, saving a funny conversation with your friends, or documenting an error message for troubleshooting, knowing how to take a screenshot on your school Chromebook is essential.
In this article, we will explore multiple methods to help you easily and quickly capture screenshots on your school Chromebook. From using keyboard shortcuts to leveraging handy Chrome extensions, we’ve got you covered with various options to suit your needs. So, let’s dive in and learn some effective ways to capture those important moments on your Chromebook screen!
Note that the methods mentioned in this article are specifically tailored for school Chromebooks. While some of these methods may also work on other Chromebook models, it’s always best to consult your school’s IT department or refer to your device’s instructions for the most accurate information.
Method 1: Using Keyboard Shortcuts
One of the quickest and easiest ways to capture a screenshot on your school Chromebook is by utilizing keyboard shortcuts. Chrome OS offers several keyboard shortcuts specifically designed for capturing screenshots. Here’s how you can use them:
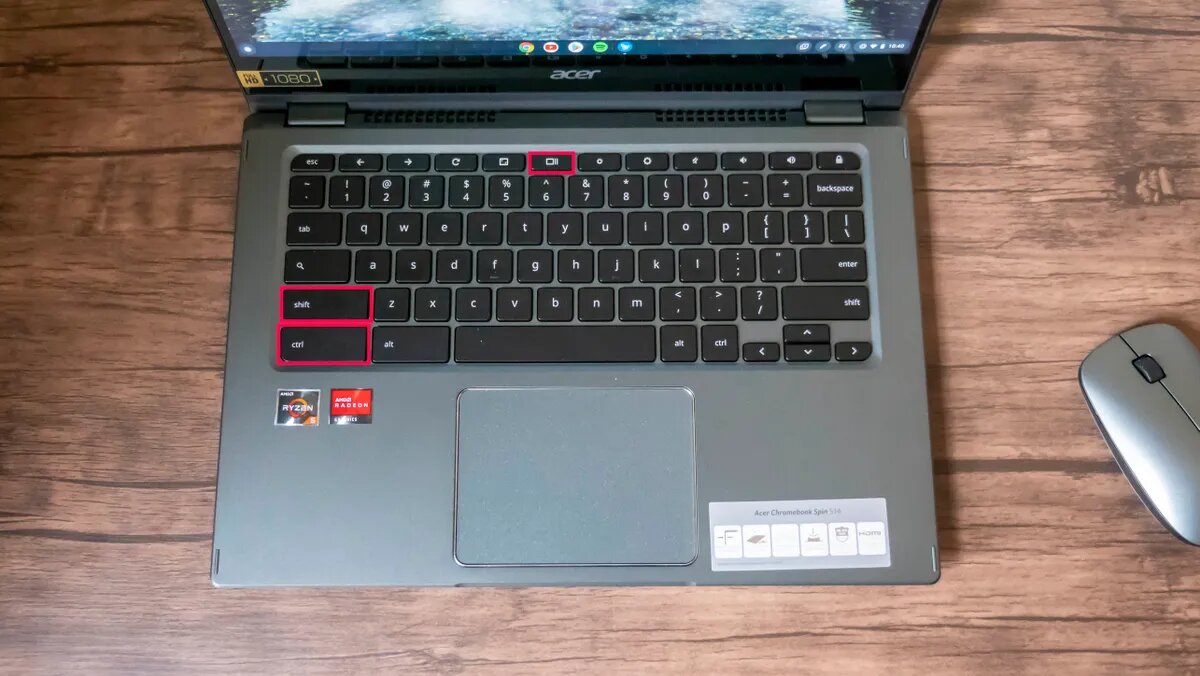
- Full-Screen Screenshot: To capture the entire screen, press the Ctrl + Switch Window keys simultaneously. The Switch Window key is usually located in the top row, between the Fullscreen and Brightness keys.
- Partial Screenshot: If you only need to capture a specific portion of the screen, you can use the Ctrl + Shift + Switch Window keys. Once pressed, your cursor will turn into a crosshair. Click and drag to select the area you want to capture.
- Screenshot Copy to Clipboard: To take a screenshot and copy it directly to your clipboard without saving it as a file, you can use the Ctrl + Window Switcher + Ctrl combination. The captured screenshot will be stored in your clipboard and can be pasted into any application or document.
- Screenshot of a Specific Window: If you want to capture a specific window, press Alt + Switch Window keys together. This will capture the active window and save it as an image file.
Once you’ve taken a screenshot using any of these keyboard shortcuts, you can access it in the ‘Downloads’ folder of your Chromebook. From there, you can rename, move, or share the captured image as needed.
Keyboard shortcuts provide a fast and convenient way to capture screenshots on your school Chromebook. However, if you prefer more options or additional features, you might want to explore alternative methods like using Chrome extensions or dedicated screenshot tools.
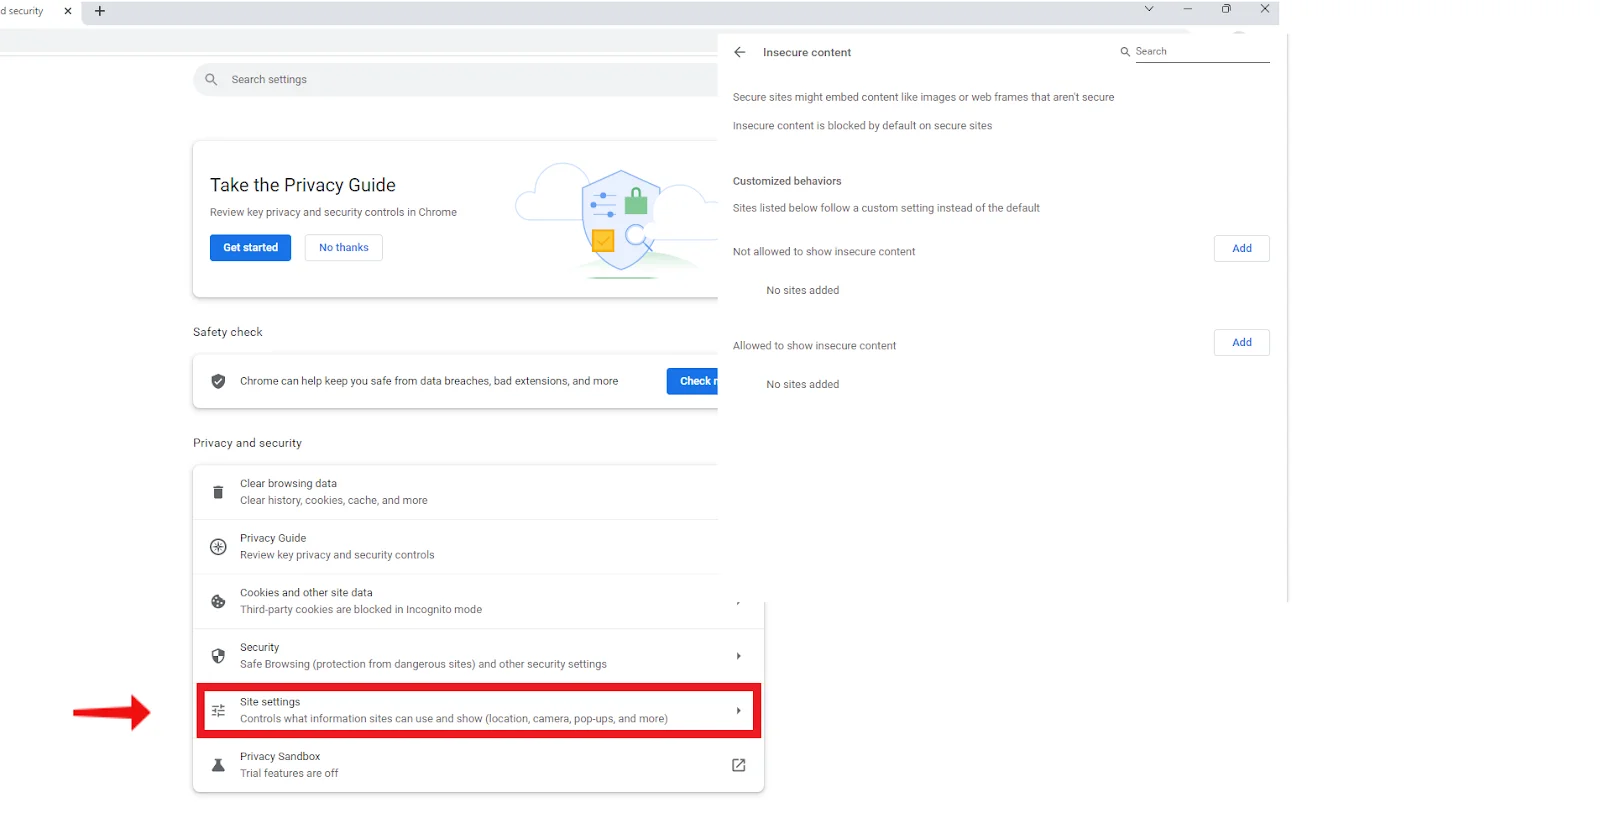
Method 2: Using the Webpage Screenshot Extension
If you frequently need to capture screenshots of entire webpages, including the parts that are not currently visible on your screen, using a Chrome extension can be a handy solution. One popular extension for this purpose is the Webpage Screenshot extension. Here’s how you can use it:
- Install the Extension: Open the Chrome Web Store and search for the “Webpage Screenshot” extension. Click on “Add to Chrome” to install it.
- Activate the Extension: Once the extension is installed, you will see its icon in the toolbar of your Chrome browser. Click on the icon to activate it.
- Set Capture Options: After activating the extension, a small toolbar will appear on your screen. It provides various capture options such as capturing the visible portion, the entire page, or a selected area. Choose the appropriate option for your needs.
- Capture the Screenshot: Once you’ve set the capture options, click on the capture button in the toolbar to take the screenshot. The extension will process the webpage and generate the screenshot accordingly.
- Save or Share the Screenshot: After the screenshot is generated, you will have options to save it as an image file or share it directly to various platforms like email, social media, or cloud storage.
The Webpage Screenshot extension offers additional features like annotating, blurring sensitive information, and adding text to your screenshots. Explore the toolbar options to make the most out of this extension.
By using the Webpage Screenshot extension, you can easily capture screenshots of entire webpages, even those that require scrolling. This method is especially useful for capturing long articles, web pages with dynamic content, or any other webpage where you want to preserve the entire layout and content in a single image.
Method 3: Using the Snipping Tool
If you’re using a school Chromebook that supports Android apps, you can take advantage of the Snipping Tool, a built-in screenshot tool available on Chromebooks with access to the Google Play Store. With the Snipping Tool, you can easily capture screenshots and make annotations. Here’s how to use it:
- Open the Snipping Tool: Open the app drawer on your Chromebook by clicking on the ‘Launcher’ key (usually located in the bottom-left corner of the keyboard). Then, search for and click on the ‘Snipping Tool’ app to open it.
- Select the Capture Area: Once the Snipping Tool is open, you can choose whether to capture the entire screen, a specific window, or a selected area. Use the dropdown menu at the top of the Snipping Tool window to select your desired capture option.
- Capture the Screenshot: After selecting the capture area, click on the capture button (usually a camera icon) to take the screenshot. The Snipping Tool will capture the designated area and display it in the editing interface.
- Annotate and Save: In the Snipping Tool editing interface, you can perform various actions like adding text, highlighting important parts, drawing shapes, and more. Once you’re done making annotations, click on the save button to save the screenshot to your device.
The Snipping Tool offers an intuitive interface and a range of annotation options, making it a practical choice for capturing and editing screenshots on your school Chromebook. However, keep in mind that this method is only available on Chromebooks that support Android apps. If your Chromebook doesn’t have access to the Google Play Store, you can explore alternative methods like using keyboard shortcuts or browser extensions.
Method 4: Using Google Jamboard
Google Jamboard is a collaborative whiteboard tool that can also be used to take screenshots on a Chromebook. It offers a simple and efficient way to capture and annotate content on your screen. Here’s how to use Google Jamboard to capture screenshots on your school Chromebook:
- Open Google Jamboard: Open your Chrome browser and go to the Google Jamboard website (jamboard.google.com) to access the tool. Sign in with your Google account if prompted.
- Create a New Whiteboard: Once you’re in Google Jamboard, click on the ‘+’ icon to create a new whiteboard. This will open a blank canvas where you can capture your screen.
- Take the Screenshot: Switch to the window or application you want to capture. Then, use the keyboard shortcut Ctrl + Shift + 4 to activate the screenshot tool. Your cursor will turn into a crosshair. Click and drag to select the area you want to capture. The selected screenshot will automatically be inserted into your Google Jamboard whiteboard.
- Annotate the Screenshot: Google Jamboard offers various tools for annotating your screenshot. You can draw, add text, insert shapes, and more. Use these tools to highlight important areas, add notes, or make any necessary annotations.
- Save and Share: After annotating the screenshot, you can save it as an image file by right-clicking on the image and selecting “Save image as”. You can also share the screenshot directly from Google Jamboard by clicking on the “Share” button and choosing the desired sharing method.
Google Jamboard provides a user-friendly interface for capturing and annotating screenshots on your school Chromebook. It allows you to not only capture your screen but also collaborate, brainstorm, and share your ideas with others. Whether you’re highlighting key points in a presentation or working on a group project, Google Jamboard is a versatile tool that can enhance your screenshot-taking experience.
Conclusion
Taking screenshots on your school Chromebook is a valuable skill that can greatly enhance your productivity and aid in various tasks. Throughout this article, we have explored different methods to capture screenshots on your Chromebook, including keyboard shortcuts, the Webpage Screenshot extension, the Snipping Tool, and Google Jamboard.
Using keyboard shortcuts provides a quick and efficient way to capture screenshots, whether it’s the entire screen, a specific window, or a selected area. The Webpage Screenshot extension offers additional capabilities, allowing you to capture entire webpages and easily annotate screenshots. The Snipping Tool provides built-in functionality for Chromebooks that support Android apps, making it a convenient option for capturing and editing screenshots. Finally, Google Jamboard offers a collaborative whiteboard experience, allowing you to capture and annotate screenshots while fostering collaboration with others.
When choosing the right method for capturing screenshots on your school Chromebook, consider your specific needs, preferences, and the features each method offers. Experiment with different methods and find the one that works best for you.
With the ability to capture screenshots, you can easily save and share important information, document errors or issues, collaborate with classmates, and enhance your presentations or projects. Mastering the art of taking screenshots on your school Chromebook will undoubtedly make your digital experience more efficient and enjoyable.
So go ahead and start capturing those important moments on your Chromebook screen with confidence!