Introduction
Chromebooks have become increasingly popular for their affordable price, sleek design, and easy-to-use interface. Whether you’re a student, a professional, or simply someone who enjoys browsing the web, knowing how to take a screenshot on your Chromebook can come in handy in a variety of situations.
Capturing screenshots allows you to save and share important information, document online purchases, troubleshoot technical issues, or simply capture a memorable moment. In this article, we will explore different methods to help you take screenshots on your Chromebook.
Chromebooks offer various built-in options and third-party extensions that make taking screenshots quick and effortless. No matter which method you choose, capturing a screenshot on your Chromebook is a breeze, and you don’t need any advanced technical skills to do so.
In the following sections, we will guide you through four different methods to take a screenshot on your Chromebook. Whether you prefer using keyboard shortcuts, accessing the Chromebook’s menu options, utilizing a stylus, or a third-party extension, we’ve got you covered. So, let’s dive in and explore each method in detail.
Method 1: Using Keyboard Shortcuts
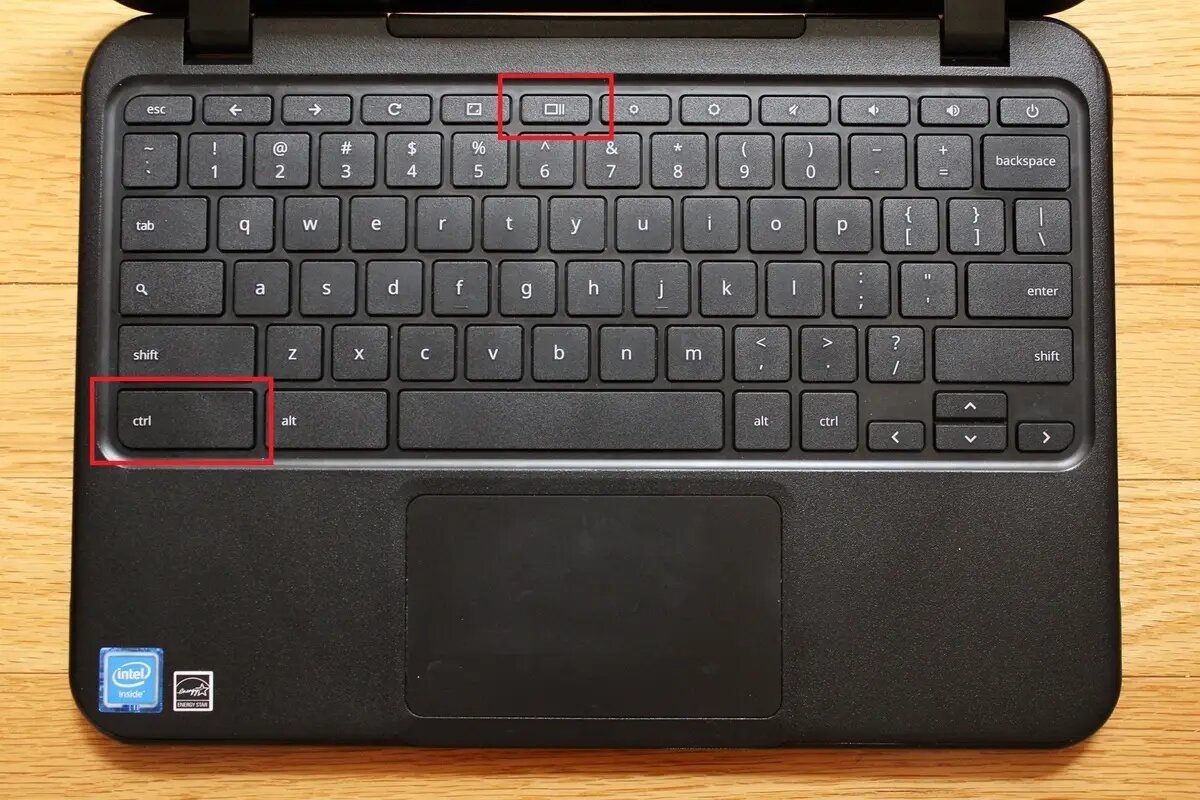
Taking a screenshot on your Chromebook using keyboard shortcuts is one of the quickest and easiest methods. Chrome OS provides several handy keyboard shortcuts that allow you to capture different types of screenshots. Here’s how you can do it:
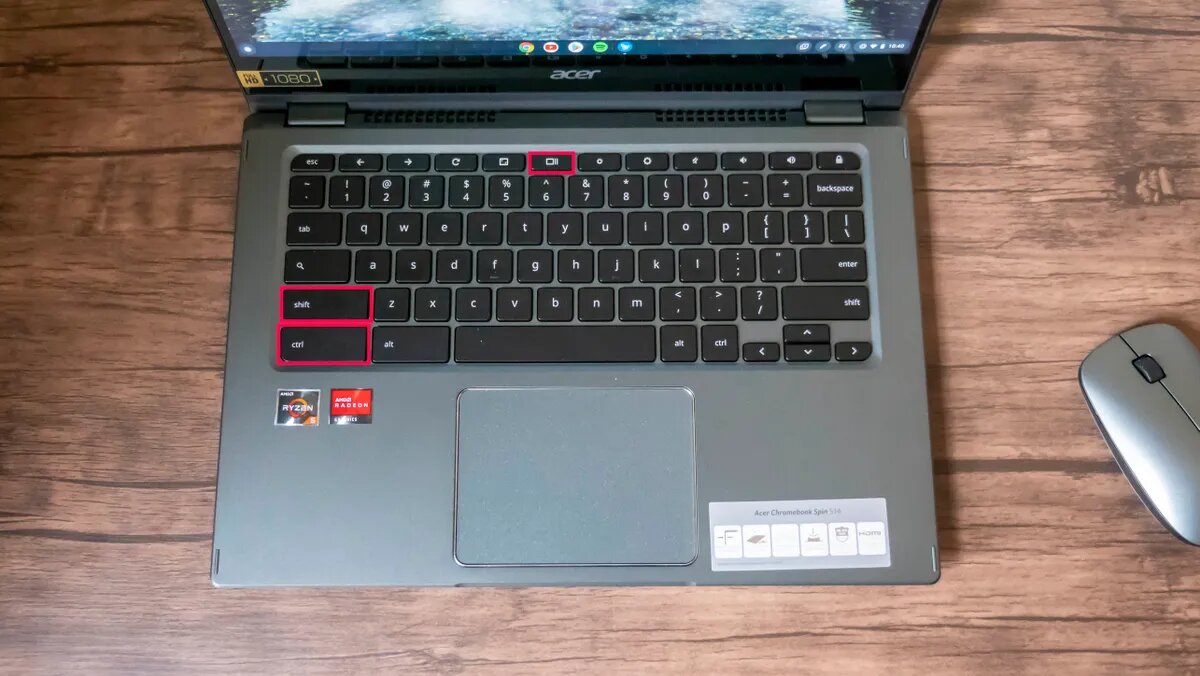
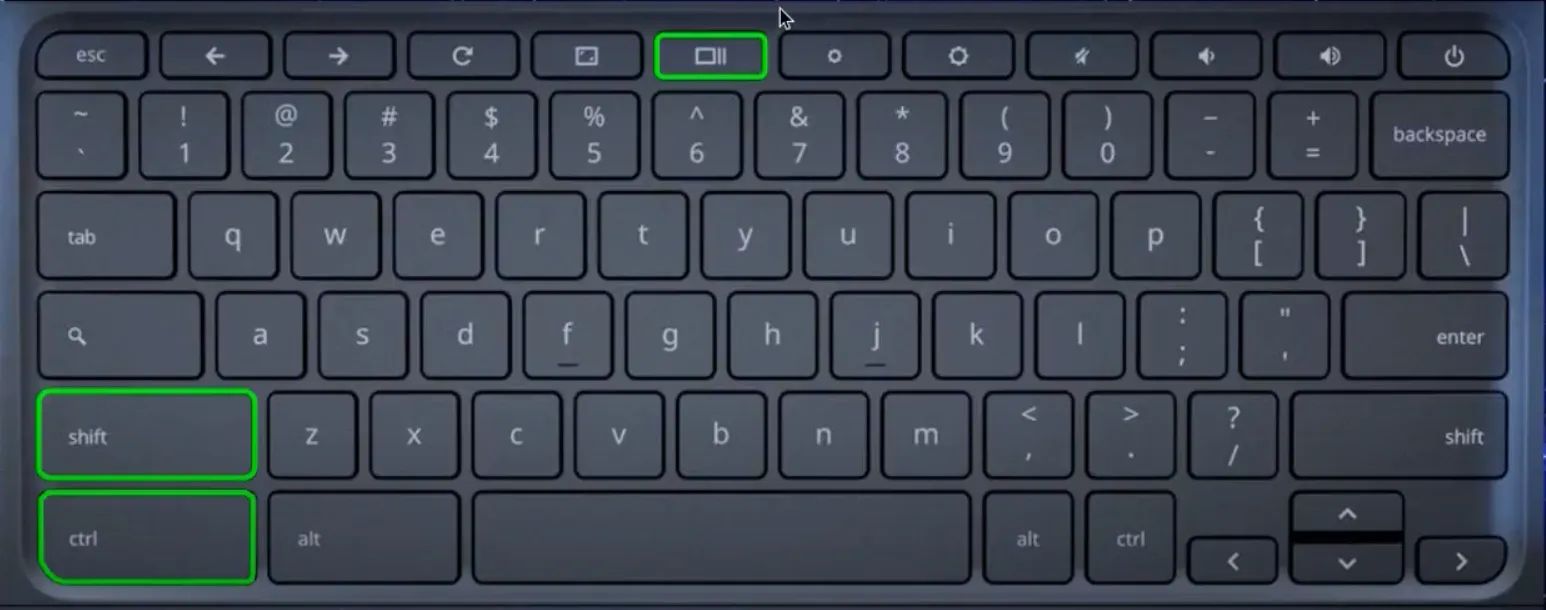
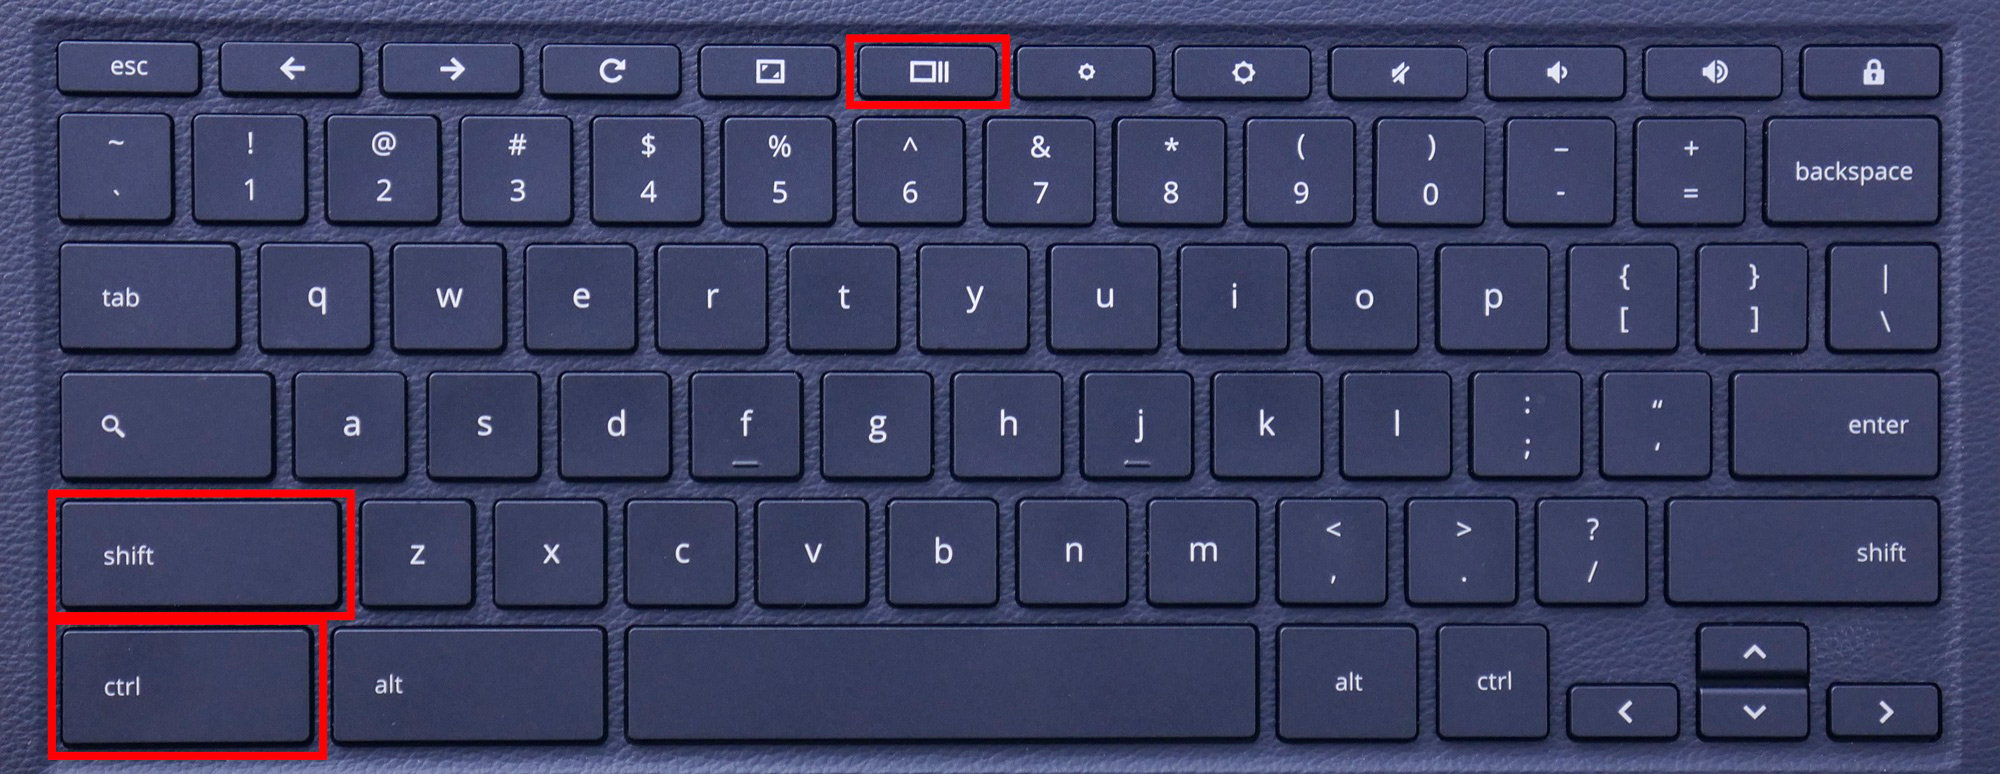
- Full-Screen Screenshot: To capture a screenshot of the entire screen, press the “Ctrl” and “F5” keys simultaneously. The screen will briefly dim, indicating that the screenshot has been taken. You can access the screenshot by opening the “Files” app and navigating to the “Downloads” folder. Alternatively, you can press the “Ctrl” and “M” keys to open the file manager directly.
- Partial-Screen Screenshot: If you only want to capture a specific portion of the screen, press the “Ctrl”, “Shift”, and “F5” keys together. Your cursor will turn into a crosshair. Click and drag the crosshair to select the desired area. Once you release the mouse button, the screenshot will be saved. Again, you can access it through the “Files” app or by using the file manager shortcut.
- Window Screenshot: To capture a screenshot of a specific window, make sure the window you want to capture is active. Then, press the “Ctrl”, “Shift”, and “F5” keys simultaneously. Your cursor will change to a crosshair. Now, click on the window you want to capture, and the screenshot will be saved. You can find it in the “Downloads” folder or through the file manager.
Using these keyboard shortcuts, you can easily capture screenshots on your Chromebook without the need for any additional software. It’s a convenient and efficient way to document information, save images, or keep a record of important details.
Now that you’re familiar with the keyboard shortcuts for taking screenshots on your Chromebook, let’s move on to the next method, which involves utilizing the Chromebook’s menu options to capture screenshots.
Method 2: Using the Chromebook’s Menu
If you prefer a more visual approach to taking screenshots on your Chromebook, using the built-in menu options is a great alternative. Chrome OS provides a menu that allows you to capture screenshots with just a few clicks. Here’s how you can do it:
- Full-Screen Screenshot: Start by locating the clock in the bottom-right corner of your Chromebook’s screen. Click on it, and you’ll see a menu with various options. Look for the “Screenshot” icon, which looks like a square with a small camera inside. Click on the “Screenshot” icon, and a full-screen screenshot will be captured instantly. You can access the screenshot by opening the “Files” app and navigating to the “Downloads” folder.
- Partial-Screen Screenshot: To capture a specific portion of the screen, follow the same steps as above. Once you click on the “Screenshot” icon, your cursor will turn into a crosshair. Click and drag the crosshair to select the desired area. When you release the mouse button, the partial-screen screenshot will be saved, and you can find it in the “Downloads” folder or through the file manager.
Using the Chromebook’s menu options provides a visual and intuitive way to take screenshots. It’s especially helpful if you’re more comfortable using mouse clicks instead of keyboard shortcuts. The menu is easily accessible and allows you to capture both full-screen and partial-screen screenshots effortlessly.
In the next section, we will explore an alternative method for taking screenshots on your Chromebook using the device’s stylus. If you have a Chromebook with touchscreen support and a stylus, this method may be particularly useful to you.
Method 3: Using Chromebook’s Stylus
If you own a Chromebook with touchscreen support and a stylus, taking screenshots becomes even more convenient. Utilizing the stylus allows for precise and easy capture of screenshots on your Chromebook. Here’s how to do it:
- Full-Screen Screenshot: Start by pressing the stylus against the screen, and hold it for a couple of seconds. A menu will appear with various options. Select the “Capture screenshot” option from the menu, and a full-screen screenshot will be captured instantly. You can access the screenshot through the “Files” app or by using the file manager.
- Partial-Screen Screenshot: To capture a specific portion of the screen, press the stylus against the screen and hold it. While holding the stylus, drag it to select the desired area. Once you release the stylus, the partial-screen screenshot will be saved automatically. Retrieve the screenshot from the “Downloads” folder or by using the file manager.
Using the Chromebook’s stylus simplifies the process of taking screenshots, especially if you have a touchscreen device. The precise control that the stylus provides allows for accurate selection of the desired screen area. It’s a convenient method for capturing important information or sharing specific content without needing to rely on keyboard shortcuts or menu options.
In the next section, we will explore an alternative method using third-party extensions. These extensions offer additional features and customization options for taking and managing screenshots on your Chromebook.
Method 4: Using a Third-Party Extension
If you’re looking for more advanced features and customization options for taking screenshots on your Chromebook, using a third-party extension can be a great solution. There are several extensions available in the Chrome Web Store that enhance the screenshot capturing capabilities of your Chromebook. Here’s how you can use a third-party extension to take screenshots:
- Search and Install Extension: Open the Chrome Web Store and search for a screenshot extension that suits your needs. Look for popular extensions such as “Lightshot” or “Awesome Screenshot” and click on the “Add to Chrome” button to install the extension.
- Follow Extension Instructions: Once the extension is installed, follow the instructions provided to activate and configure it. Most extensions will add an icon to your Chromebook’s toolbar, which you can click on to access the extension’s features.
- Use Extension Features: Depending on the extension you installed, you can access features like capturing full-screen or partial-screen screenshots, annotating screenshots with text or drawings, blurring sensitive information, and saving screenshots to various locations or cloud storage services.
Using a third-party extension offers additional flexibility and customization options for taking screenshots on your Chromebook. These extensions often come with advanced editing tools and the ability to easily share screenshots with others. Explore different extensions in the Chrome Web Store to find one that fits your preferences and requirements.
Now that you’ve learned four different methods for taking screenshots on your Chromebook, you can confidently capture and save important information, share memorable moments, troubleshoot issues, and more.
Conclusion
Taking screenshots on your Chromebook is a simple and useful skill that allows you to capture and save important information, troubleshoot technical issues, and share memorable moments with others. Throughout this article, we explored four different methods for taking screenshots on your Chromebook: using keyboard shortcuts, utilizing the Chromebook’s menu options, utilizing a stylus, and using third-party extensions.
Using keyboard shortcuts provides a quick and efficient way to capture screenshots, whether you need a full-screen, partial-screen, or window screenshot. The Chromebook’s menu options offer a visual and intuitive approach, especially for those who prefer using mouse clicks. If you have a touchscreen Chromebook with a stylus, capturing screenshots becomes even more convenient and precise. Lastly, third-party extensions provide additional features and customization options to enhance your screenshot capturing experience.
With these methods at your disposal, you can choose the one that best suits your preferences and needs. Whether you are a student, professional, or casual user, knowing how to take screenshots on your Chromebook can greatly enhance your productivity and online experience.
So, the next time you need to capture a screenshot on your Chromebook, whether it’s to save an important piece of information or share a funny meme with your friends, you’ll have the knowledge and tools to do so. Enjoy exploring the different methods and discovering the one that works best for you!