Introduction
Have you ever taken beautiful photos on your iPhone and wished to transfer them to your desktop for safekeeping, editing, or sharing? Well, you’re in luck! In this article, we will guide you through the step-by-step process of downloading photos from your iPhone to your desktop.
In today’s digital age, our smartphones have become our primary cameras, capturing precious memories with just a few clicks. While the storage capacity of iPhones has significantly improved over the years, it’s always a good idea to back up your photos to your desktop to free up space and ensure their preservation.
By transferring your photos from your iPhone to your desktop, you’ll have easy access to them at any time, without relying solely on your phone. Whether you want to create a backup, organize your photo library, or edit them using professional editing software, downloading your iPhone photos to your desktop is a simple and efficient solution.
Now, let’s dive into the step-by-step process and explore the various methods you can use to download photos from your iPhone to your desktop.
Step 1: Connect your iPhone to your desktop
The first step in downloading photos from your iPhone to your desktop is to establish a connection between the two devices. To do this, you will need a Lightning cable (for newer iPhone models) or a 30-pin connector (for older iPhone models) that is compatible with your desktop.
Here’s a simple guide to help you connect your iPhone to your desktop:
- Locate the USB port on your desktop. It is usually found on the back of the CPU if you’re using a PC, or on the side or back of the monitor if you’re using an iMac or an all-in-one computer.
- Take one end of the Lightning cable or 30-pin connector and insert it into the USB port on your desktop.
- Take the other end of the cable and plug it into the charging port on your iPhone.
- Your iPhone should now be connected to your desktop.
Once the connection is established, your desktop may prompt you with a message asking whether you trust this computer. Tap “Trust” on your iPhone to proceed.
It’s worth noting that some newer desktop models come with built-in wireless connectivity options, such as AirDrop or iCloud, which allow you to transfer photos without a physical cable. If your desktop supports these technologies, you can explore those options as well.
Now that your iPhone is connected to your desktop, we can move on to the next step: opening the Photos app on your iPhone.
Step 2: Open the Photos app on your iPhone
After connecting your iPhone to your desktop, the next step is to open the Photos app on your iPhone. This is where you will have access to all the photos and videos stored on your device.
To open the Photos app on your iPhone, follow these simple steps:
- Locate the Photos app on your iPhone’s home screen. It is represented by a multicolored flower icon and is usually found in the bottom row of apps.
- Tap on the Photos app icon to launch it.
Once the app is open, you will see various tabs at the bottom of the screen, including Photos, For You, Albums, and more. These tabs allow you to navigate through your photo library, view your memories, and access different albums and categories.
The Photos tab will display all the photos and videos on your iPhone in chronological order, starting with the most recent ones. You can scroll through your library to find the specific photos you want to download to your desktop.
If you have organized your photos into specific albums or categories, you can navigate to the Albums tab to access them. This can be helpful if you want to download a specific set of photos that are already grouped together.
Now that you have opened the Photos app on your iPhone, it’s time to move on to the next step: selecting the photos you want to download.
Step 3: Select the photos you want to download
Once you have opened the Photos app on your iPhone, it’s time to select the specific photos that you want to download to your desktop. This step allows you to choose the photos that are most important to you, whether it’s a single photo, a group of photos, or an entire album.
Here’s how you can select the photos you want to download:
- Navigate to the Photos tab or the Albums tab in the Photos app, depending on where your desired photos are located.
- Scroll through your photo library to find the specific photos you want to download. You can tap on individual photos to select them, or if you want to select multiple photos at once, you can use the “Select” button located at the top-right corner of the screen.
- Once you tap on the “Select” button, you can now tap on each photo to add them to your selection. You will notice a blue checkmark appearing on the selected photos.
- If you want to select an entire album, you can tap on the album and then tap on the “Select” button to choose all the photos within that album.
- Double-check your selection to ensure you have chosen all the desired photos. You can deselect any photos by tapping on them again.
This selection process gives you the flexibility to download individual photos, a group of photos, or even a complete album, depending on your preferences. Once you have made your selection, you are ready to move on to the next step: downloading the photos using the Photos app for Windows or Mac, or using the File Explorer for Windows or Finder for Mac.
Step 4: Download photos using the Photos app for Windows or Mac
If you’re using a Windows computer or a Mac, the Photos app provides a convenient way to download photos from your iPhone to your desktop. The Photos app is a built-in application that allows you to manage and organize your photos on both operating systems.
Here’s how you can download photos using the Photos app:
- Connect your iPhone to your Windows computer or Mac using the appropriate USB cable.
- On your computer, open the Photos app. On a Windows computer, you can find it in the Start menu or by searching for “Photos.” On a Mac, the Photos app is usually located in the Applications folder.
- In the Photos app, you should see your iPhone listed under the “Devices” or “Import” section. Click on your iPhone to access its contents.
- You will be presented with the option to import all new photos or select specific photos to import. Choose the selection that best suits your needs.
- Once you’ve made your selection, click on the “Import” or “Import Selected” button to begin the transfer process.
- The Photos app will then start downloading the selected photos from your iPhone to your desktop. You can track the progress of the transfer in the app.
- After the transfer is complete, you will find the downloaded photos in the designated folder or library within the Photos app on your computer.
It’s important to note that the Photos app provides a quick and straightforward way to download photos. However, the exact steps may vary slightly depending on the version of Windows or Mac that you’re using. Make sure to follow any on-screen prompts or instructions provided by the Photos app during the process.
With the photos successfully downloaded to your desktop using the Photos app, you can now move on to the next step: saving the downloaded photos to your desktop.
Step 5: Download photos using the File Explorer for Windows or Finder for Mac
If you prefer using the native file management systems of Windows or Mac, you can download photos from your iPhone to your desktop using the File Explorer on Windows or the Finder on Mac. These file explorers provide a simple and direct method of transferring files between devices.
Follow the steps below to download photos using the File Explorer (Windows) or Finder (Mac):
- Connect your iPhone to your computer using the appropriate USB cable.
- On your Windows computer, open the File Explorer. You can do this by clicking on the folder icon in the taskbar or by pressing the Windows key + E.
- On a Mac, open the Finder by clicking on the smiley face icon in the Dock or by pressing Command + Space, then typing “Finder” and hitting Enter.
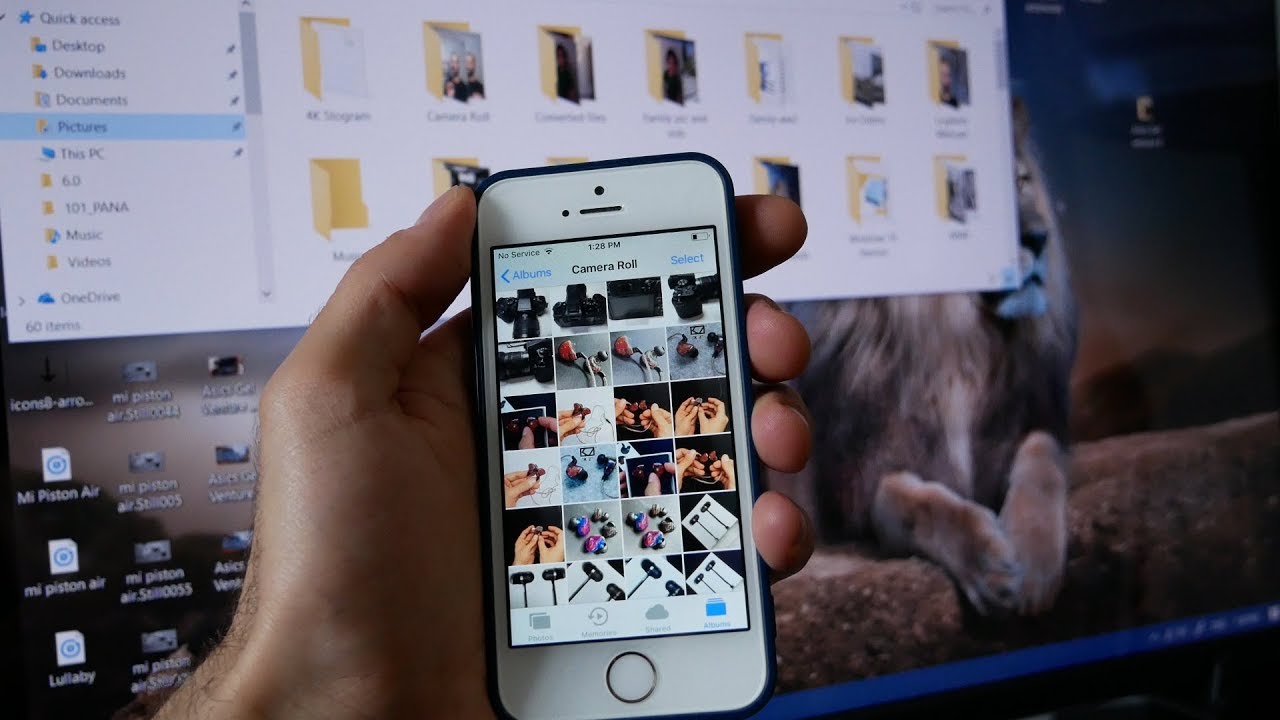
- In the File Explorer or Finder, you should see your iPhone listed under the “Devices” section or in the sidebar. Click on your iPhone to access its contents.
- Navigate to the “DCIM” folder or any other folder where your photos are stored on your iPhone.
- Locate the photos you want to download and select them by either clicking and dragging a selection box around the photos or holding down the Ctrl (Windows) or Command (Mac) key while clicking on individual photos.
- Once you’ve selected the desired photos, right-click on them and choose the “Copy” or “Cut” option.
- Navigate to the folder on your desktop where you want to save the downloaded photos.
- Right-click in the folder and select the “Paste” option to transfer the photos from your iPhone to your desktop.
The photos will now be downloaded and saved to the designated folder on your desktop. You can access them through the File Explorer (Windows) or Finder (Mac) at any time.
It’s important to ensure that you have enough disk space on your desktop to accommodate the downloaded photos. If necessary, free up space by deleting any unwanted files or folders from your desktop.
With the photos successfully downloaded using the File Explorer or Finder, you can now proceed to the final step: saving the downloaded photos to your desktop.
Step 6: Save the downloaded photos to your desktop
Now that you have successfully downloaded the photos from your iPhone to your desktop, the final step is to save them to a specific location on your desktop for easy access and organization.
Follow these steps to save the downloaded photos to your desktop:
- Locate the folder or destination on your desktop where you want to save the downloaded photos. It can be a pre-existing folder or a new folder that you create specifically for these photos.
- Open the folder or navigate to the destination on your desktop.
- Select the downloaded photos that you wish to save by either clicking and dragging a selection box around the photos or holding down the Ctrl (Windows) or Command (Mac) key while clicking on individual photos.
- Once you have selected the desired photos, right-click on them and choose the “Copy” option.
- Go back to the folder or destination on your desktop and right-click inside it. Then, select the “Paste” option to save the copied photos into the folder.
- The copied photos will now be saved to the designated folder on your desktop. You can access and organize them according to your preferences.
By saving the downloaded photos to your desktop, you ensure that they are easily accessible whenever you need them without having to rely solely on your iPhone. You can also utilize the organizational features of your desktop, such as creating subfolders or categorizing the photos by date, event, or subject, to keep your photo collection well-organized.
Remember to regularly back up your photos from your desktop to an external storage device or cloud storage service to protect them from any potential data loss or device issues.
With the photos now saved to your desktop, you have completed the process of downloading and saving photos from your iPhone. You can now enjoy your memories, edit the photos, or share them with others as you desire.
Conclusion
Transferring photos from your iPhone to your desktop is a practical way to free up storage space, organize your photo library, and have convenient access to your photos on a larger screen. In this article, we have explored the step-by-step process of downloading photos from your iPhone to your desktop.
We began by connecting your iPhone to your desktop using a Lightning cable or a 30-pin connector. Then, we opened the Photos app on your iPhone and learned how to select the specific photos you want to download. Next, we explored two methods for downloading photos to your desktop: using the Photos app for Windows or Mac, and using the File Explorer for Windows or Finder for Mac.
Lastly, we discussed the importance of saving the downloaded photos to a specific location on your desktop for easy access and organization. By following these steps, you can efficiently transfer your precious photos from your iPhone to your desktop and enjoy them at your convenience.
Remember to regularly back up your photos to avoid any potential data loss and to make room for new memories on your iPhone. Additionally, don’t forget to explore other backup options, such as cloud storage or external hard drives, to ensure the safety and longevity of your photo collection.
Now that you have learned how to download photos from your iPhone to your desktop, you can confidently manage your photo library, unleash your creativity through photo editing, and easily share your memories with others. Capture, transfer, and cherish the valuable moments captured by your iPhone, knowing that they are safe and accessible on your desktop.