Introduction
Hey there! Are you a video creator looking to add some catchy tunes to your Premiere Pro projects? Well, you’re in luck! Finding the perfect music for your videos can enhance the overall impact and make your content stand out. In this article, we’ll guide you through the process of downloading music and incorporating it seamlessly into your Premiere Pro projects.
Music plays a vital role in setting the mood, creating emotion, and enhancing the storytelling aspect of your videos. It can engage your audience, leaving a lasting impression. Whether you’re working on a professional production or a personal project, having access to a wide range of music can transform your videos, taking them from average to outstanding.
But where do you find suitable music for your projects? How do you download it and precisely integrate it into your Premiere Pro timeline? Don’t worry, we’ve got you covered! We’ll take you step-by-step through the process, exploring different sources for music, selecting the right file, downloading it, importing it into Premiere Pro, and fine-tuning the audio settings to achieve the perfect blend with your video footage.
Before we dive into the nitty-gritty of downloading and adding music to your projects, it’s essential to know that copyright laws protect most music compositions. It’s crucial to respect the intellectual property rights of content creators. Fortunately, there are several platforms that offer royalty-free music, allowing you to download and use their tracks legally for your videos without any copyright issues.
Now that you’re excited to elevate your video projects with some fantastic music, let’s begin the journey of downloading and adding music to Premiere Pro. From searching for the perfect track to fine-tuning the audio settings, we’ll explore every step of the process so that you can create captivating videos that resonate with your audience. So, buckle up and let’s get started!
Step 1: Find a Music Source
The first step in adding music to your Premiere Pro project is finding a reliable source for music tracks. There are numerous platforms available that offer a wide selection of music, ranging from free to paid options. Let’s explore some of the popular music sources:
- Royalty-Free Music Libraries: Websites like Epidemic Sound, Artlist, and PremiumBeat provide a vast collection of royalty-free music tracks specifically curated for video projects. These platforms offer high-quality music that you can download and use without any legal restrictions.
- Creative Commons: Platforms like SoundCloud and Jamendo provide music that is licensed under Creative Commons. This means that you can use the music for free, as long as you give proper attribution to the artist.
- YouTube Audio Library: YouTube has its own extensive library of free music tracks that you can access directly from the YouTube Studio. These tracks are cleared for use in YouTube videos and can also be used in other projects outside of the platform.
- Paid Music Libraries: If you’re looking for premium and exclusive music tracks, paid libraries like AudioJungle and Pond5 offer a vast selection of high-quality music that you can purchase and use in your projects. These platforms often provide a broader range of options and allow for more customization.
When choosing a music source, consider factors like the style of music you’re looking for, the budget you have, and the specific licensing requirements for your project. Make sure to read the terms and conditions of each platform to ensure that you comply with their usage guidelines.
Once you have identified your preferred music source, it’s time to explore their collection and select the perfect track that suits your video project. Take your time to browse through different genres, moods, and tempos to find the music that complements the tone and style of your video.
With a wide array of music sources available, you’ll undoubtedly find the right track that adds that extra punch to your Premiere Pro project. So, let’s move on to the next step and learn how to choose the perfect music file.
Step 2: Choose a Suitable Music File
Now that you have explored different music sources, it’s time to choose a suitable music file for your Premiere Pro project. Selecting the right track is crucial as it sets the tone, enhances the mood, and complements the visuals of your video.
Consider the following factors when choosing a suitable music file:
- Genre and Style: Think about the genre and style of your video project. Is it a high-energy action sequence, a heartfelt emotional moment, or a playful comedy? Choose a music file that matches the overall vibe and captures the essence of your video.
- Tempo and Rhythm: Pay attention to the tempo and rhythm of the music track. Does it align with the pace of your video? A fast-paced video might require an upbeat and energetic track, while a slow-motion sequence might benefit from a more mellow and atmospheric tune.
- Duration: Consider the length of the music track. Does it fit the duration of your video? You don’t want the music to abruptly end or drag on past the video’s completion. Look for a track that has a similar duration or can be easily trimmed to fit seamlessly.
- Emotional Connection: Think about the emotions you want to evoke in your audience. Does the music track evoke the desired emotions, whether it’s excitement, nostalgia, or serenity? Choose a track that resonates with your video’s message and engages viewers on an emotional level.
It’s essential to listen to the music file before making a final decision. Most music platforms provide a playback option, allowing you to preview the track and ensure it aligns with your vision. Take your time to listen to different options and make notes on the ones that stand out.
Remember, it’s worth putting in the effort to find the perfect music file for your Premiere Pro project. A well-chosen track can significantly elevate the quality of your video and leave a lasting impact on your audience.
Now that you’ve chosen a suitable music file, it’s time to move on to the next step: downloading the music and preparing it for integration into your Premiere Pro project. Let’s dive in!
Step 3: Download the Music File
Now that you have selected the perfect music file for your Premiere Pro project, it’s time to download it and prepare it for integration into your video. The process will vary slightly depending on the music source you are using, but here are some general steps to follow:
- Click the Download Button: Locate the download button associated with the music track you have chosen. It could be labeled as “Download,” “Save,” or have a downward arrow symbol. Click on it to initiate the download process.
- Select the Format: Some music sources offer different file formats to choose from. Select a format that is compatible with Premiere Pro. The most common formats include MP3 and WAV. If in doubt, check Premiere Pro’s documentation or consult the music source’s support section for recommended formats.
- Choose the Quality: If the music source allows for different quality options, consider choosing the highest quality available. This ensures a crisp and high-fidelity audio experience in your videos.
- Select a Download Location: Choose a designated folder on your computer where you want to save the downloaded music file. This will make it easier to locate and import into Premiere Pro later.
- Wait for the Download to Complete: Depending on the file size and your internet connection, the download process may take a few seconds to several minutes. Be patient and allow the file to download completely before proceeding.
Once the download is complete, navigate to the folder where you saved the music file. Make sure to double-check that the file has been downloaded correctly and is not corrupted. You can do this by playing the downloaded file with a media player to ensure it sounds as expected without any glitches or issues.
With the music file successfully downloaded and validated, you’re now ready to import it into your Premiere Pro project. In the next step, we’ll explore how to seamlessly integrate the music into your project timeline. Let’s move on!
Step 4: Import the Music File to Premiere Pro
Now that you have downloaded the music file, it’s time to import it into your Premiere Pro project. Follow these steps to seamlessly integrate the music file:
- Launch Premiere Pro: Open Premiere Pro on your computer and create a new project or open an existing one where you want to add the music.
- Create a New Audio Track: In the timeline panel, right-click on an empty space and select “Create a New Audio Track.” This will create a new track specifically for your music file.
- Click the Import Media button: In the top-left corner of the Premiere Pro interface, click on the “Media Browser” or “Import Media” button. This will open the media browser window.
- Select the Music File: In the media browser window, navigate to the folder where you saved the downloaded music file. Select the file and click “Import” to add it to your Premiere Pro project.
- Drag the Music File to the Audio Track: Locate the music file in the Project panel and drag it onto the newly created audio track in the timeline. Ensure that the music file is aligned with the section of your video where you want the music to start playing.
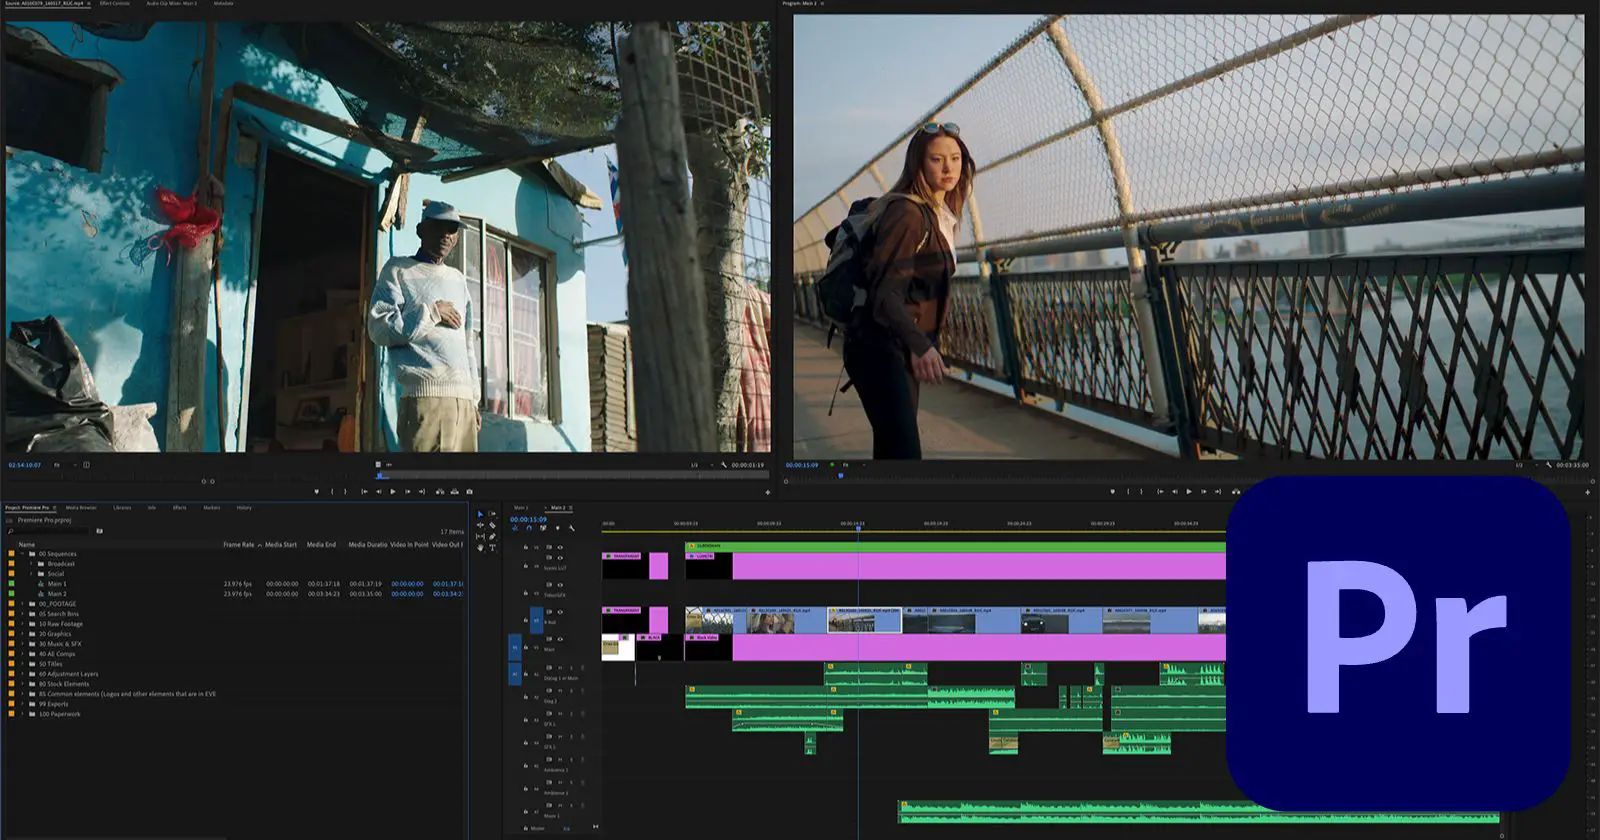
After following these steps, you will see the music file represented as a waveform in the audio track on the timeline. The waveform visualizes the audio, allowing you to make precise adjustments and edits later on.
If you want to add multiple music files to your project, simply repeat the above steps for each file, creating additional audio tracks to accommodate them.
Once the music file is imported and placed on the timeline, you can further refine its placement and duration by trimming, resizing, and adding fades using the various tools available in Premiere Pro. This allows you to synchronize the music perfectly with your video and create a seamless audio-visual experience.
Now that the music file is successfully imported into your Premiere Pro project, let’s move on to the next step and learn how to add the music to the project timeline. Keep on reading!
Step 5: Add the Music to the Project Timeline
With the music file imported into your Premiere Pro project, it’s time to add it to the project timeline. Here’s how you can do it:
- Select the Music Clip: Locate the music clip on the timeline – it’s represented by a waveform. Click on the clip to select it.
- Drag and Adjust the Clip: Once selected, you can drag the music clip to the desired starting point on the timeline. Adjust the duration of the clip by dragging its endpoints inward or outward, depending on the segment of the music you want to use in your video.
- Align the Music with the Video: To synchronize the music with your video, align the beginning of the music clip with the corresponding visuals or the desired point in your video where you want the music to start playing.
- Trim or Extend the Clip: If necessary, use the trimming handles on the sides of the clip to further refine its duration. This allows you to seamlessly match the music with the flow and pacing of your video.
- Adjust the Volume: To balance the audio levels, adjust the volume of the music clip. You can do this by selecting the clip and using the audio mixer or the volume control in the Effects Control panel. Experiment with different volume settings to find the right balance between the music and other audio elements in your video.
- Apply Transitions: If you want to create a more polished and smooth transition between adjacent clips, you can apply audio transitions like fades in or out. This helps avoid abrupt audio changes, providing a more seamless listening experience.
- Preview and Fine-Tune: Play the video in the timeline to preview the audio and make any necessary adjustments. As you review it, listen carefully to ensure that the music fits well with the visuals and enhances the overall storytelling of your video.
Adding the music to the project timeline allows you to synchronize it with your video, creating a cohesive and engaging audio-visual experience. By adjusting the duration, volume, and applying transitions, you can achieve the desired impact and mood for your video.
Now that you have successfully added the music to your project timeline, let’s move on to the next step and explore how to adjust the music settings to ensure optimal audio quality. Keep reading!
Step 6: Adjust the Music Settings
After adding the music to your project timeline in Premiere Pro, it’s time to fine-tune the music settings to ensure optimal audio quality. Here are some essential adjustments you can make:
- Equalization (EQ): An EQ allows you to adjust the frequency balance of the music, enhancing specific elements or removing unwanted frequencies. Use the built-in EQ effects in Premiere Pro to fine-tune the music’s tonal quality and make it blend seamlessly with your video’s audio.
- Pan and Balance: If your music track has stereo channels, you can adjust the pan and balance to control the spatial placement of the sound in the stereo field. This allows you to achieve a balanced audio mix and create a sense of width and depth in your video’s sound.
- Effects and Audio Filters: Premiere Pro offers a range of audio effects and filters that you can apply to the music clip. Experiment with effects like reverb, delay, or distortion to add creative touches or enhance the music’s characteristics. Additionally, you can use audio filters like noise reduction or compression to clean up the audio and improve its overall quality.
- Keyframing: If you want to manipulate the volume or any other audio effect over time, you can use keyframes. Keyframing allows you to create smooth transitions and precise control over the music’s characteristics within your video. For example, you can gradually fade in the music at the beginning or fade it out at the end of the video.
- Audio Mixing: If your video includes dialogue or other audio elements, it’s crucial to ensure a proper balance between the music and the rest of the audio. Use the audio mixer in Premiere Pro to adjust the levels of different audio tracks, ensuring that the music doesn’t overpower other important sounds in your video.
- Syncing to Video Edits: If you have made any cuts, trims, or edits to your video footage after adding the music, double-check that the music is still in sync with the visuals. Occasionally, you may need to make minor adjustments to maintain synchronization throughout the video.
By making these adjustments, you can customize the music to fit your specific video project and create a more immersive and impactful audio experience for your viewers.
Now that you’ve fine-tuned the music settings, it’s time to move on to the final step: exporting your video with the music included. Let’s explore how to do this in the next step!
Step 7: Export the Final Video with Music
After adjusting the music settings to your liking, it’s time to export your final video with the integrated music in Premiere Pro. Here’s how you can do it:
- Review the Timeline: Before exporting, make sure to review the entire timeline and double-check that the music is playing in sync with the visuals, and the volume levels are balanced with other audio elements.
- Select the Export Settings: Go to the File menu and click on Export or use the keyboard shortcut Ctrl+M (Windows) or Command+M (Mac) to open the Export Settings window.
- Select a Format: Choose the desired format for your exported video. Popular options include MP4, MOV, and AVI. Consider the destination platform or device where you’ll be sharing the video to ensure compatibility.
- Adjust Video Settings: In the Export Settings window, you can adjust various video settings such as resolution, frame rate, and bitrate. Choose the settings that best suit your video’s needs and quality requirements.
- Configure Audio Settings: Pay attention to the audio settings in the Export Settings window. Ensure that the audio is enabled and set to export with the same settings as the source material to maintain the highest audio quality.
- Check Export Location: Choose the folder on your computer where you want to save the exported video. Make sure you have enough storage space available.
- Start the Export: After confirming all the settings, click on the Export button to start the exporting process. Premiere Pro will begin rendering the video, incorporating the music and all other applied effects.
- Monitor the Export Progress: While the video is exporting, you can track the progress in the Export window. Larger files and higher-quality settings may take longer to render, so be patient during this process.
- Preview the Exported Video: Once the export is completed, locate the exported video file in the designated folder. Play the video to ensure that the music is correctly included and maintains its desired volume and quality.
With the final video exported, you can now share it with the world, whether it’s on social media, a website, or any other platform. The integrated music will add a professional touch and enhance the overall impact of your video.
Congratulations! You have successfully completed the process of downloading music and seamlessly incorporating it into your Premiere Pro project. The integration of music can truly elevate your video content and captivate your audience.
Now it’s your turn to put this knowledge into practice and create amazing videos enriched with the perfect music tracks. Happy editing!
Conclusion
Adding music to your Premiere Pro projects can significantly enhance their impact and make them more engaging for your audience. By following the steps outlined in this guide, you can seamlessly integrate music into your videos, creating a captivating audio-visual experience.
Throughout this process, we explored the crucial steps of finding a reliable music source, choosing a suitable music file, downloading it, importing it into Premiere Pro, and adjusting the music settings to achieve optimal audio quality. We also discussed the importance of respecting copyright laws and choosing royalty-free music to avoid any legal issues.
Remember to consider the genre, tempo, and emotional connection when selecting music, and ensure that it aligns with the visuals and enhances the overall message of your video. Pay attention to volume levels, apply transitions if needed, and make precise adjustments using keyframes and audio effects.
Once you have fine-tuned the music settings, you can export your final video, ensuring that the music is embedded and synchronized with the visuals. Be sure to preview the exported video to confirm that everything is working as intended.
By incorporating music into your Premiere Pro projects, you can elevate the quality, storytelling, and overall appeal of your videos. So, take the knowledge you’ve gained from this guide and let your creativity shine as you create impactful videos that leave a lasting impression on your audience.
Now it’s time to immerse yourself in the world of video editing, experiment with different music tracks, and create stunning videos that resonate with your viewers. Enjoy the process and happy editing!


