Introduction
Are you a Spotify user who wants to download music from Spotify and transfer it to iTunes? You’re in luck! In this guide, we will walk you through a step-by-step process to help you download music from Spotify to iTunes effortlessly. So, let’s dive right in and get started!
Spotify is a popular online music streaming platform that offers millions of songs from various genres. While Spotify allows its users to stream music online, it does not provide an option to download songs directly to your device. This limitation can be frustrating, especially if you want to have offline access to your favorite tracks or transfer them to iTunes for further convenience.
Luckily, there are workarounds and third-party tools that enable users to download songs from Spotify and convert them into compatible formats like MP3. By following the steps outlined in this guide, you’ll be able to seamlessly download your favorite tracks from Spotify and add them to your iTunes library.
Before we get started, it’s important to note that some of the steps in this guide require a Spotify Premium subscription. The premium subscription offers additional features, such as offline listening and higher audio quality, that are essential for downloading music from Spotify. If you don’t have a Spotify Premium account, you can sign up for one by visiting the official Spotify website. Once you have your account ready, let’s move on to the next section where we’ll guide you through the process of downloading and installing the Spotify app.
Step 1: Sign up for a Spotify Premium account
To download music from Spotify and transfer it to iTunes, you need to have a Spotify Premium account. The premium subscription offers additional features such as offline listening, which is crucial for being able to download songs for offline use. Here’s how you can sign up for a Spotify Premium account:
1. Visit the official Spotify website: Open your web browser and go to www.spotify.com.
2. Click on “Premium” in the top-right corner: On the Spotify homepage, you’ll see a “Premium” option in the top-right corner of the screen. Click on it to proceed.
3. Choose your plan: Spotify offers different plans for individuals, families, and students. Select the plan that suits your needs by clicking on the corresponding “Get Premium” button.
4. Create or log in to your account: If you already have a Spotify account, simply log in using your credentials. If not, click on “Sign Up” and follow the instructions to create a new account. You can sign up using your email address or by linking your Facebook account.
5. Enter payment details: In order to subscribe to Spotify Premium, you’ll need to provide payment information. Spotify accepts various payment methods, including credit and debit cards, PayPal, and mobile billing.
6. Complete the subscription process: Follow the prompts to complete the subscription process. Once you’ve successfully subscribed, you’ll have access to all the premium features, including the ability to download music from Spotify.
Having a Spotify Premium account not only allows you to download music for offline listening but also provides a higher quality audio experience compared to the free version of Spotify. With your Premium account ready, you’re now ready to move on to the next step, which is to download and install the Spotify app on your device.
Step 2: Download and install the Spotify app
To download music from Spotify and transfer it to iTunes, you need to have the Spotify app installed on your device. The Spotify app allows you to access the vast library of songs and playlists available on the platform. Here’s how you can download and install the Spotify app:
1. Visit the official Spotify website: Open your web browser and go to www.spotify.com.
2. Click on “Download” or “Get Spotify”: On the Spotify homepage, you’ll find a button that says “Download” or “Get Spotify.” Click on this button to begin the download process.
3. Choose your device: After clicking on the download button, you’ll be redirected to a page where you can choose the device on which you want to install Spotify. Spotify is available for various platforms, including Windows, Mac, iOS, and Android. Select the appropriate option for your device.
4. Download and install the app: Once you’ve selected your device, the Spotify app download will start automatically. Once the download is complete, open the installer file and follow the on-screen instructions to install the app on your device.
5. Sign in to your Spotify account: After the installation is complete, open the Spotify app and sign in using your Spotify account credentials. If you don’t have an account, you can create one during the sign-up process within the app.
Now that you have successfully downloaded and installed the Spotify app on your device, you can proceed to the next step, which is logging in to your Spotify account. Logging in is essential to access the full functionality of Spotify, including the ability to download and save music for offline listening. So, let’s move on to Step 3 and learn how to log in to your Spotify account.
Step 3: Open Spotify and log in to your account
Now that you have installed the Spotify app on your device, it’s time to open it and log in to your Spotify account. Logging in will give you access to all the features of Spotify, including the ability to download and transfer music to iTunes. Here’s how you can log in to your Spotify account:
1. Open the Spotify app: Locate the Spotify app on your device and tap on it to launch it. The app icon usually features a green circle with three curved lines inside.
2. Sign in or create a new account: If you already have a Spotify account, click on the “Log In” button and enter your Spotify username and password. If you don’t have an account yet, click on the “Sign Up” button and follow the prompts to create a new account.
3. Link your Spotify account to other platforms (optional): Spotify offers the option to link your account to other platforms, such as Facebook or Apple Music. This allows you to easily transfer your music preferences and playlists between different platforms. If you wish to link your account, follow the on-screen instructions to do so.
4. Explore the Spotify app: Once you’re logged in, take some time to familiarize yourself with the Spotify app. Browse through the extensive music library, explore different genres and playlists, and discover new music that suits your taste.
By logging in to your Spotify account, you gain full access to all its features, including the ability to search for and play songs, create playlists, follow your favorite artists, and, most importantly, download music for offline listening. In the next step, we will guide you on how to find the songs or playlists you want to download from Spotify, so you can enjoy them even when you’re offline. So, let’s move on to Step 4 and start exploring the vast collection of music available on Spotify.
Step 4: Find the songs or playlists you want to download
Now that you’re logged in to your Spotify account, it’s time to find the songs or playlists that you want to download and transfer to iTunes. Spotify offers a vast collection of music spanning various genres, so you’re sure to find something that suits your taste. Here’s how you can find the songs or playlists you want to download:
1. Search for specific songs or artists: If you have a particular song or artist in mind, you can use the search bar at the top of the Spotify app to find them. Simply type in the name of the song or artist and press Enter. Spotify will display relevant search results, and you can select the desired song from the list.
2. Explore curated playlists: Spotify offers a wide range of curated playlists based on different moods, genres, and themes. These playlists are created by Spotify’s expert editorial team and are a great way to discover new music. To access these playlists, click on the “Browse” tab in the bottom menu of the app and navigate through the different categories.
3. Follow your favorite artists and their playlists: If you have favorite artists whose music you enjoy, you can follow them on Spotify to stay updated with their latest releases. When you follow an artist, their songs and playlists will appear in your Spotify library. To follow an artist, simply search for their name and click on the “Follow” button on their profile.
4. Create your own playlists: Another way to curate your own collection of songs is by creating playlists. You can create playlists for different moods, occasions, or genres. To create a playlist, click on the “Your Library” tab in the bottom menu of the app, then select “Create playlist” and give your playlist a name. You can then start adding songs to your playlist by searching for them and clicking the “+” button.
Once you have found the songs or playlists you want to download, you’re one step closer to transferring them to iTunes. In the next step, we will guide you on how to enable the “Offline Mode” feature in Spotify, which is essential for downloading music for offline use. So, let’s move on to Step 5 and make sure you can enjoy your favorite songs even without an internet connection.
Step 5: Enable the “Offline Mode” feature
To download music from Spotify and transfer it to iTunes, you need to enable the “Offline Mode” feature. Enabling this feature allows you to download songs and playlists for offline listening, ensuring that you can enjoy your favorite tracks even when you don’t have an internet connection. Here’s how you can enable the “Offline Mode” feature in Spotify:
1. Open the Spotify app: Ensure that you are logged in to your Spotify account and have the app open on your device.
2. Navigate to the settings menu: Tap on the “Home” tab at the bottom of the app to go to the home screen. Then, tap on the gear icon in the top-right corner to access the settings menu.
3. Enable “Offline Mode”: In the settings menu, you’ll find an option labeled “Offline Mode” or “Download.” Toggle the switch to enable the offline mode feature.
4. Choose your storage option: After enabling offline mode, you may be prompted to choose where you want your downloads to be stored. Select the appropriate option based on your device’s storage capacity and personal preference.
5. Select songs or playlists to download: Once offline mode is enabled, you can start downloading songs or playlists for offline listening. To download a specific song, navigate to the song and tap the download button (usually a downward arrow). To download an entire playlist, open the playlist and tap the download button at the top of the screen.
6. Monitor download progress: You can check the download progress of your songs or playlists by going to the “Your Library” tab in the bottom menu of the app and selecting the “Downloads” option. This will show you the status of your downloads and how much space they occupy on your device.
By enabling the “Offline Mode” feature in Spotify, you can ensure that your favorite songs are available for offline listening, allowing you to enjoy them without an internet connection. In the next step, we will guide you on how to create a new playlist in Spotify, which will be used to organize the songs or playlists you want to transfer to iTunes. So, let’s move on to Step 6 and start creating your personal playlist in Spotify.
Step 6: Create a new playlist in Spotify
To organize the songs or playlists you want to transfer to iTunes, it’s a good idea to create a new playlist in Spotify. By creating a playlist, you can easily manage and access the specific tracks you want to download and transfer. Here’s how you can create a new playlist in Spotify:
1. Open the Spotify app: Make sure you are logged in to your Spotify account and have the app open on your device.
2. Go to the “Your Library” tab: At the bottom of the Spotify app, you’ll find a tab labeled “Your Library.” Tap on it to access your personal library.
3. Tap “Create playlist”: In your library, you’ll see a button that says “Create playlist.” Tap on it to start creating your new playlist.
4. Name and customize your playlist: Give your playlist a catchy and descriptive name. You can also add a playlist cover image by tapping on the icon beside the playlist name. Customize your playlist to your liking.
5. Add songs or playlists to your new playlist: To add songs or playlists to your newly created playlist, you have a few options. You can search for specific songs or artists and tap the three dots next to the song or playlist to select “Add to playlist.” You can also browse through your library or playlists and use the same method to add songs or playlists to your new playlist.
6. Rearrange and edit your playlist: Once you’ve added songs or playlists to your new playlist, you can rearrange them by tapping and holding on a song and dragging it to the desired position. You can also edit the playlist by tapping the three dots next to the playlist name and selecting “Edit playlist.” This allows you to add or remove songs, change the order, and make other modifications as needed.
By creating a new playlist in Spotify, you can keep all the songs or playlists you want to transfer to iTunes organized and easily accessible. In the next step, we will guide you on how to add the songs or playlists to your new playlist. Let’s move on to Step 7 and start building your collection of songs in Spotify.
Step 7: Add the songs or playlists to your new playlist
Now that you have created a new playlist in Spotify, it’s time to add the songs or playlists that you want to transfer to iTunes. By adding them to your new playlist, you can easily manage and organize the tracks you want to download. Here’s how you can add songs or playlists to your new playlist in Spotify:
1. Open the Spotify app: Ensure that you are logged in to your Spotify account and have the app open on your device.
2. Go to your new playlist: Tap on the “Your Library” tab at the bottom of the Spotify app to access your personal library. Then, locate and tap on the playlist you created in the previous step.
3. Add individual songs: To add individual songs, you can search for them by artist, album, or song title using the search bar at the top of the app. Once you find the desired song, tap the three dots next to it and select “Add to playlist.” Choose your new playlist from the list to add the song.
4. Add entire playlists: If you want to add an entire playlist to your new playlist, you can search for the playlist using the search bar or navigate to the “Browse” tab and explore curated playlists. Once you find the playlist you want to add, tap on the three dots next to it and select “Add to playlist.” Choose your new playlist from the list to add the entire playlist.
5. Rearrange and remove songs: After adding songs or playlists to your new playlist, you can rearrange them by tapping and holding on a song and dragging it to the desired position. If you want to remove a song from the playlist, tap on the three dots next to the song and select “Remove from playlist.”
6. Continue adding songs or playlists: Repeat steps 3 to 5 to add more songs or playlists to your new playlist. You can add as many songs or playlists as you want to create the perfect collection for transferring to iTunes.
By adding the songs or playlists to your new playlist in Spotify, you are one step closer to transferring them to iTunes. In the next step, we will guide you on how to convert your Spotify playlist to MP3 format, which is compatible with iTunes. Let’s move on to Step 8 and start preparing your music for transfer.
Step 8: Convert your Spotify playlist to MP3 format
To transfer your Spotify playlist to iTunes, you will need to convert the songs in your playlist to MP3 format. MP3 is a widely accepted audio format that is compatible with iTunes and various other media players. Here’s how you can convert your Spotify playlist to MP3 format:
1. Choose a Spotify to MP3 converter: There are several third-party software options available that allow you to convert your Spotify playlist to MP3 format. You can search online for different Spotify to MP3 converters and choose the one that suits your needs. Some popular options are Sidify, DRmare, and Audacity.
2. Download and install the converter: Once you have chosen a Spotify to MP3 converter, download and install it on your computer following the provided instructions.
3. Open the converter software: Launch the converter software that you have installed on your computer.
4. Import your Spotify playlist: In the converter software, you will find an option to import your Spotify playlist. Click on this option and select your desired playlist from Spotify.
5. Choose MP3 as the output format: In the converter software settings, select MP3 as the desired output format for your converted Spotify playlist. Adjust any other necessary settings, such as the audio quality or bitrate, according to your preferences.
6. Start the conversion process: Once you have selected the settings, start the conversion process by clicking on the “Convert” or “Start” button in the converter software. The software will then convert each song in your Spotify playlist to MP3 format.
7. Wait for the conversion to complete: The conversion process may take some time, depending on the number of songs in your playlist and the speed of your computer. Wait for the software to finish converting all the songs.
8. Locate the converted MP3 files: After the conversion is complete, the converted MP3 files will be saved in a designated folder on your computer. Make note of this folder location so that you can easily access the converted files later.
By converting your Spotify playlist to MP3 format, you now have the songs in a format that is compatible with iTunes. In the next step, we will guide you on how to import the converted Spotify songs into iTunes, so you can start enjoying your music. Let’s move on to Step 9 and complete the transfer process.
Step 9: Import the converted Spotify songs into iTunes
Now that you have converted your Spotify playlist to MP3 format, it’s time to import the converted songs into iTunes. By doing so, you can easily access and manage your Spotify music within the iTunes library. Here’s how you can import the converted Spotify songs into iTunes:
1. Open iTunes: Launch the iTunes application on your computer. If you don’t have iTunes installed, you can download and install it from the official Apple website.
2. Navigate to the music library: In iTunes, click on the “Music” tab located at the top of the screen to access your music library.
3. Import the converted songs: There are a few ways to import the converted songs into iTunes:
– Method 1: Drag and drop the converted MP3 files directly into the iTunes window. Simply locate the folder where the converted MP3 files are saved, select the desired songs, and drag them into the iTunes window. iTunes will automatically add the songs to your library.
– Method 2: Click on “File” in the iTunes menu, then select “Add File to Library” or “Add Folder to Library.” In the file browser window that appears, navigate to the folder where the converted MP3 files are saved, select the files or folder, and click “Open.” iTunes will import the selected songs into your library.
4. Wait for iTunes to import the songs: Once you have selected the converted MP3 files and added them to iTunes, the software will start importing them. The time it takes to import the songs will depend on the number and size of the files.
5. Check your iTunes library: After the import process is complete, you can go to the “Music” tab in iTunes and check your library to ensure that the converted Spotify songs have been successfully added.
Congratulations! You have successfully imported your converted Spotify songs into iTunes. Now you can access and enjoy your favorite tracks within the iTunes library. In the next and final step, we will guide you on how to access your downloaded songs in iTunes and start listening to your music collection. Let’s move on to Step 10 and complete the process.
Step 10: Access your downloaded songs in iTunes and enjoy!
Now that you have successfully imported your converted Spotify songs into iTunes, it’s time to access and enjoy your music collection. Here’s how you can access your downloaded songs in iTunes:
1. Open iTunes: Launch the iTunes application on your computer if it’s not already open.
2. Navigate to your music library: Click on the “Music” tab located at the top of the iTunes window to access your music library.
3. Locate your downloaded songs: In the music library, you will find your downloaded Spotify songs organized by artist, album, and song title. You can browse through your library to find the specific songs you want to listen to or use the search function to quickly locate a particular track.
4. Create playlists in iTunes: To further organize your downloaded songs, you can create playlists within iTunes. Simply click on the “File” menu and select “New” followed by “Playlist.” Give your playlist a name and start adding songs to it by dragging and dropping or using the “Add File to Library” option.
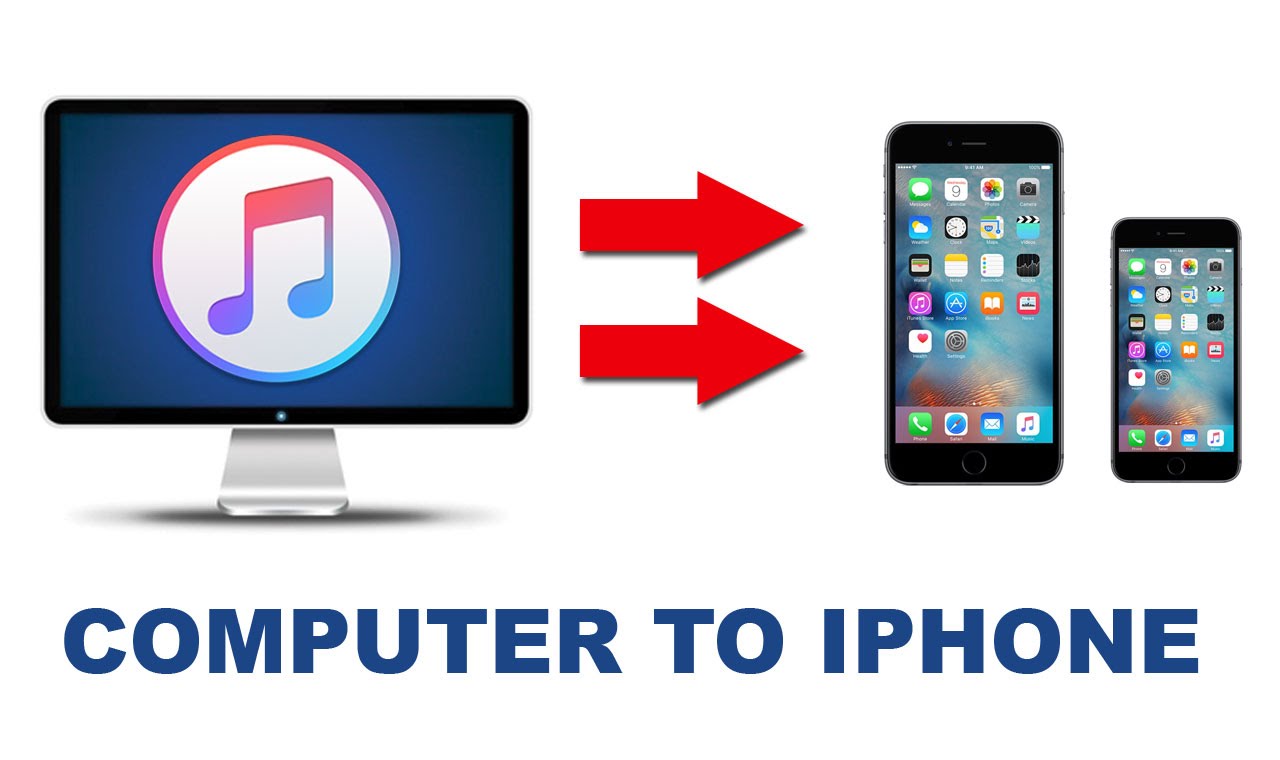
5. Transfer to Apple devices: If you want to enjoy your downloaded songs on your Apple devices, such as iPhone, iPad, or iPod, you can sync your iTunes library with your device using a USB cable or Wi-Fi. Connect your device to your computer, select it in the iTunes sidebar, and click on the “Sync” button to transfer your downloaded songs to your device.
6. Customize your listening experience: iTunes offers various tools and features to enhance your music listening experience. You can create smart playlists, customize equalizer settings, and adjust the playback options to suit your preferences.
Now that you have access to your downloaded Spotify songs in iTunes, you can enjoy your music collection to the fullest. Whether you want to listen to your favorite tracks while working, relaxing, or on the go, iTunes provides a user-friendly platform to organize, play, and sync your music across different devices.
Remember to keep your iTunes library updated by regularly syncing your downloaded songs and playlists with your devices to ensure that you have the most recent music additions at your fingertips.
Enjoy the seamless experience of having your favorite Spotify songs integrated into your iTunes library and indulge in the pleasure of listening to your personalized music collection anytime, anywhere.