Introduction
With the rise of music streaming platforms like Spotify, it has become easier than ever to access a wide range of songs and playlists on the go. However, if you want to enjoy your favorite tunes offline or transfer them to a different device, you might wonder how to download music from Spotify.
In this guide, we will show you how to download music from Spotify to a thumb drive, allowing you to take your favorite songs with you wherever you go. Whether you want to listen to music in your car without using data or share your favorite tracks with a friend, downloading music from Spotify to a thumb drive is a convenient option.
Before we dive into the step-by-step process, it’s important to note that downloading music from Spotify is only available for premium subscribers. Therefore, make sure you have an active Spotify Premium subscription before proceeding with the following steps.
Now, let’s get started with downloading music from Spotify to a thumb drive!
Step 1: Check your Spotify subscription
Before you begin downloading music from Spotify, it’s vital to confirm that you have an active Spotify Premium subscription. This is because downloading content for offline listening is only available to premium subscribers. If you’re not already a premium member, you can easily upgrade your account by visiting the Spotify website and selecting the premium plan that suits your needs.
Spotify Premium offers numerous benefits beyond downloading music, including ad-free listening, higher audio quality, and the ability to skip unlimited tracks. Additionally, premium subscribers have access to exclusive content and personalized recommendations based on their music preferences.
To check your Spotify subscription, follow these steps:
- Open the Spotify app on your computer or mobile device.
- Log in to your account if prompted.
- Click on your profile icon in the top-right corner of the screen.
- In the dropdown menu, select “Account.”
- On the Account overview page, verify that it shows Spotify Premium as your subscription type.
If your subscription status displays as Spotify Premium, you’re ready to proceed to the next step. However, if it shows Spotify Free or another subscription level, you’ll need to upgrade to Spotify Premium to access the download feature.
By ensuring you have an active Spotify Premium subscription, you’ll have the necessary access to download music from Spotify and enjoy your favorite tracks offline.
Step 2: Install the latest version of Spotify desktop app
In order to download music from Spotify to a thumb drive, you’ll need to have the latest version of the Spotify desktop app installed on your computer. The Spotify desktop app provides you with the necessary tools and settings to manage your music library and download songs for offline use.
Here’s how you can install the latest version of the Spotify desktop app:
- Visit the Spotify website (www.spotify.com).
- Click on the “Download” button located at the top-right corner of the page.
- Once the download is complete, open the installer file.
- Follow the on-screen instructions to install the Spotify desktop app.
- After the installation process is finished, launch the Spotify app on your computer.
- Log in to your Spotify account using your username and password.
It’s important to keep the Spotify desktop app updated to ensure that you have access to the latest features, improvements, and bug fixes. Spotify frequently releases updates to enhance the user experience and provide a seamless music streaming experience.
By installing and updating the Spotify desktop app, you’ll be ready to proceed with the next steps and start downloading your favorite music from Spotify.
Step 3: Create a new playlist for downloaded music
Now that you have the Spotify desktop app installed and ready to use, it’s time to create a new playlist specifically for the downloaded music that you want to transfer to your thumb drive. Creating a dedicated playlist will help keep your downloaded songs organized and easily accessible.
Follow these steps to create a new playlist in the Spotify desktop app:
- Launch the Spotify app on your computer.
- In the left sidebar, click on the “New Playlist” button located at the bottom-left corner of the screen.
- Give your playlist a name that is descriptive and easy to remember.
- Add a brief description or any other details you wish to include (optional).
- Click on the “Create” button to finalize the playlist creation.
Once you’ve created the playlist, it will appear in the left sidebar of the Spotify desktop app. You can now proceed to add songs to your newly created playlist, which we’ll cover in the next step.
Remember, the playlist you create is specifically for the music you plan to download and transfer to your thumb drive. This will help you keep track of the downloaded songs and easily access them whenever you want to listen offline.
Step 4: Add songs to your newly created playlist
Now that you have created a playlist for your downloaded music, it’s time to start adding songs to it. Spotify offers a vast library of songs, allowing you to discover and select your favorite tracks to include in your playlist.
Here’s how you can add songs to your newly created playlist:
- Search for the songs you want to add to your playlist by typing the song name, artist, or album in the search bar located at the top of the Spotify app.
- Once you find a song you want to add, hover over it and click on the three-dot menu icon that appears.
- In the dropdown menu, select “Add to playlist” and choose the name of the playlist you created for your downloaded music.
- Repeat the process for each song you want to add to your playlist.
You can also add entire albums or playlists to your newly created playlist by following similar steps. This allows you to have a diverse selection of music in your downloaded playlist.
It’s important to note that you can add up to 10,000 songs to a single playlist in Spotify. Therefore, feel free to add as many songs as you like to your playlist, ensuring that you have enough variety and options to enjoy your downloaded music.
Once you have added your desired songs to the playlist, you’re ready to proceed to the next step and enable the download option for your playlist.
Step 5: Enable the download option for your playlist
In order to download the songs from your playlist to your thumb drive, you need to enable the download option for the entire playlist. This will allow Spotify to save the songs locally on your device for offline listening.
Here’s how you can enable the download option for your playlist:
- Navigate to the playlist you created for your downloaded music in the Spotify desktop app.
- Click on the playlist to open it.
- Look for the “Download” toggle switch located at the top of the playlist.
- Toggle the switch to enable the download option for the playlist. It will turn green to indicate that the playlist is set for offline access.
Enabling the download option for your playlist will initiate the download process for all the songs in the playlist. The progress and status of the downloads can be viewed in the “Downloads” section of the Spotify desktop app.
It’s worth noting that the download time may vary depending on your internet connection speed and the number of songs in your playlist. Make sure you have a stable internet connection and sufficient storage space on your device to download the songs.
Once the download is complete, the songs in your playlist will be available for offline listening within the Spotify app. Now, it’s time to transfer them to your thumb drive for portable enjoyment.
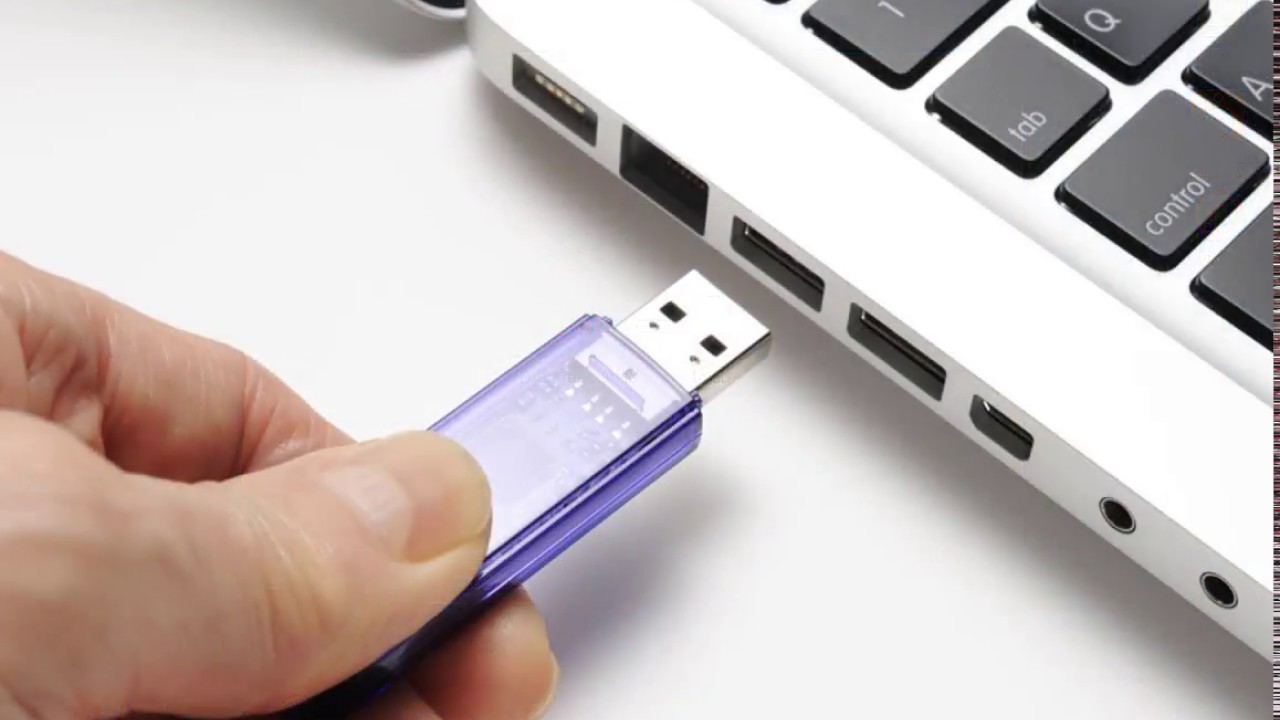
Step 6: Connect your thumb drive to your computer
To transfer the downloaded music from Spotify to a thumb drive, you’ll need to connect the thumb drive to your computer. The thumb drive serves as the external storage device where you will copy the music files.
Follow these steps to connect your thumb drive to your computer:
- Locate an available USB port on your computer.
- Take your thumb drive and insert it into the USB port.
- Ensure that the thumb drive is properly inserted and securely connected.
- Your computer should recognize the thumb drive and assign it a drive letter, such as “E:” or “F:”, which you will use to access it.
Once your thumb drive is connected to your computer, it will appear as a removable storage device in your file explorer or desktop. Be sure to handle the thumb drive with care and avoid removing it while the transfer process is in progress to prevent data corruption.
Now that your thumb drive is connected, you’re ready to proceed to the next step and start downloading your playlist to the thumb drive.
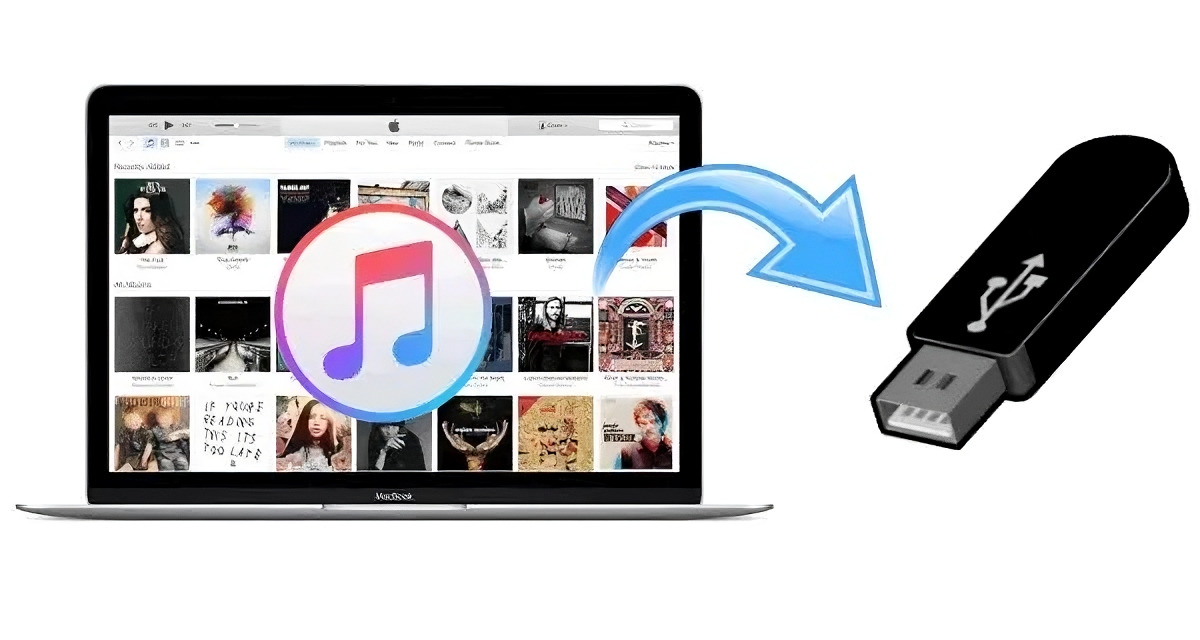
Step 7: Download your playlist to the thumb drive
With your thumb drive connected to your computer, you can now proceed to download the music from your playlist and transfer it to the thumb drive. Spotify allows you to specify the location where you want the downloaded music to be saved, and in this case, we will choose the connected thumb drive.
Follow these steps to download your playlist to the thumb drive:
- Open the Spotify desktop app on your computer.
- Click on the “Your Library” tab located in the left sidebar.
- Under the “Playlists” section, locate and click on the playlist you want to download.
- In the playlist view, click on the three-dot menu icon located at the top-right corner of the screen.
- In the dropdown menu, select “Download” to initiate the download process.
- Choose the thumb drive as the location to save the downloaded music. You can do this by selecting the thumb drive drive letter from the options available.
- Click on the “Download” or “Start download” button to begin transferring the music to the thumb drive.
The time it takes to download the playlist to the thumb drive depends on the number of songs in the playlist and the speed of your computer and thumb drive. Please be patient and avoid disconnecting the thumb drive during the transfer.
Once the download is complete, you will have successfully transferred your playlist’s music to the thumb drive. You can now safely remove the thumb drive from your computer and enjoy your downloaded music on any device with a USB port.
Step 8: Safely remove the thumb drive from your computer
After successfully downloading your playlist to the thumb drive, it is important to follow the proper procedure to safely remove the thumb drive from your computer. This ensures that the data is properly written and there is no risk of data corruption or loss.
Here’s how you can safely remove the thumb drive from your computer:
- Make sure all file transfer activities between your computer and the thumb drive are completed.
- Close any applications or windows that are accessing files on the thumb drive.
- In the taskbar or system tray of your computer, locate the “Safely Remove Hardware” icon.
- Click on the “Safely Remove Hardware” icon to open the menu.
- Identify the thumb drive from the list of removable devices in the menu.
- Click on the thumb drive’s name to select it for safe removal.
- Wait for your computer to notify you that it is safe to remove the thumb drive.
- Gently remove the thumb drive from the USB port.
It is important to note that removing the thumb drive while files are being transferred or accessed may result in data loss or corruption. Therefore, always make sure to follow the appropriate steps to safely remove the thumb drive from your computer.
Now that you have safely removed the thumb drive, you can take it with you and enjoy your favorite downloaded music on any device with a USB port.
Conclusion
Congratulations! You have successfully learned how to download music from Spotify to a thumb drive. By following the step-by-step guide, you can now enjoy your favorite songs and playlists offline, and take them with you wherever you go.
We started by checking your Spotify subscription to ensure that you have a premium account, which is necessary for downloading music. Then, we walked through installing the latest version of the Spotify desktop app, creating a new playlist for your downloaded music, and adding songs to the playlist.
Next, you enabled the download option for your playlist, allowing Spotify to save the songs locally on your device for offline access. After connecting your thumb drive to your computer, you downloaded your playlist and transferred the music files to the thumb drive. Lastly, you followed the proper procedure to safely remove the thumb drive from your computer.
Now, you can enjoy your downloaded music on any device with a USB port and have the flexibility to listen to your favorite tracks without relying on an internet connection. Whether you’re on a road trip, working out at the gym, or simply relaxing at home, your downloaded music from Spotify will always be at your fingertips.
Remember, the steps outlined in this guide are specific to downloading music from Spotify and transferring it to a thumb drive. Feel free to explore other options and features offered by Spotify to enhance your music listening experience.
So, grab your thumb drive, fire up your Spotify app, and start downloading your favorite tunes today!

![How To Download Music Safe and Fast [GUIDE]](https://robots.net/wp-content/uploads/2022/04/how-to-download-music-featured-300x175.jpg)