Introduction
Welcome to the world of Apple Music, where you can access millions of songs, albums, and playlists at your fingertips. Listening to music has never been more convenient, with the ability to stream your favorite tracks on your devices. However, there may be times when you want to download your Apple Music library for offline listening, such as during a long flight or when you’re in an area with limited internet connectivity.
In this guide, we will walk you through the process of downloading all of your Apple Music at once, ensuring that you have access to your favorite tunes anytime, anywhere. Whether you’re using an iPhone, iPad, or Mac, we’ve got you covered.
Before we dive into the steps, it’s important to note that downloading your Apple Music requires an active subscription to Apple Music. If you haven’t signed up for Apple Music yet, you can do so by visiting the App Store or the Music app on your device. Once you’re all set with a subscription, let’s get started!
Keep in mind that downloading your entire Apple Music library at once may take some time, depending on the size of your library and the speed of your internet connection. It’s recommended to have a stable Wi-Fi connection and sufficient storage space on your device to accommodate the downloaded music.
Now, let’s move on to the step-by-step process for downloading all of your Apple Music at once!
Step 1: Open Apple Music
The first step in downloading all of your Apple Music is to open the Apple Music app on your device. Apple Music is available on iPhone, iPad, and Mac, so make sure you have the app installed and logged in with your Apple ID.
On iPhone or iPad, you can find the Apple Music app on your home screen. Simply tap on the app icon to open it. If you can’t find it, you can use the search function by swiping down on your home screen and typing “Apple Music” in the search bar.
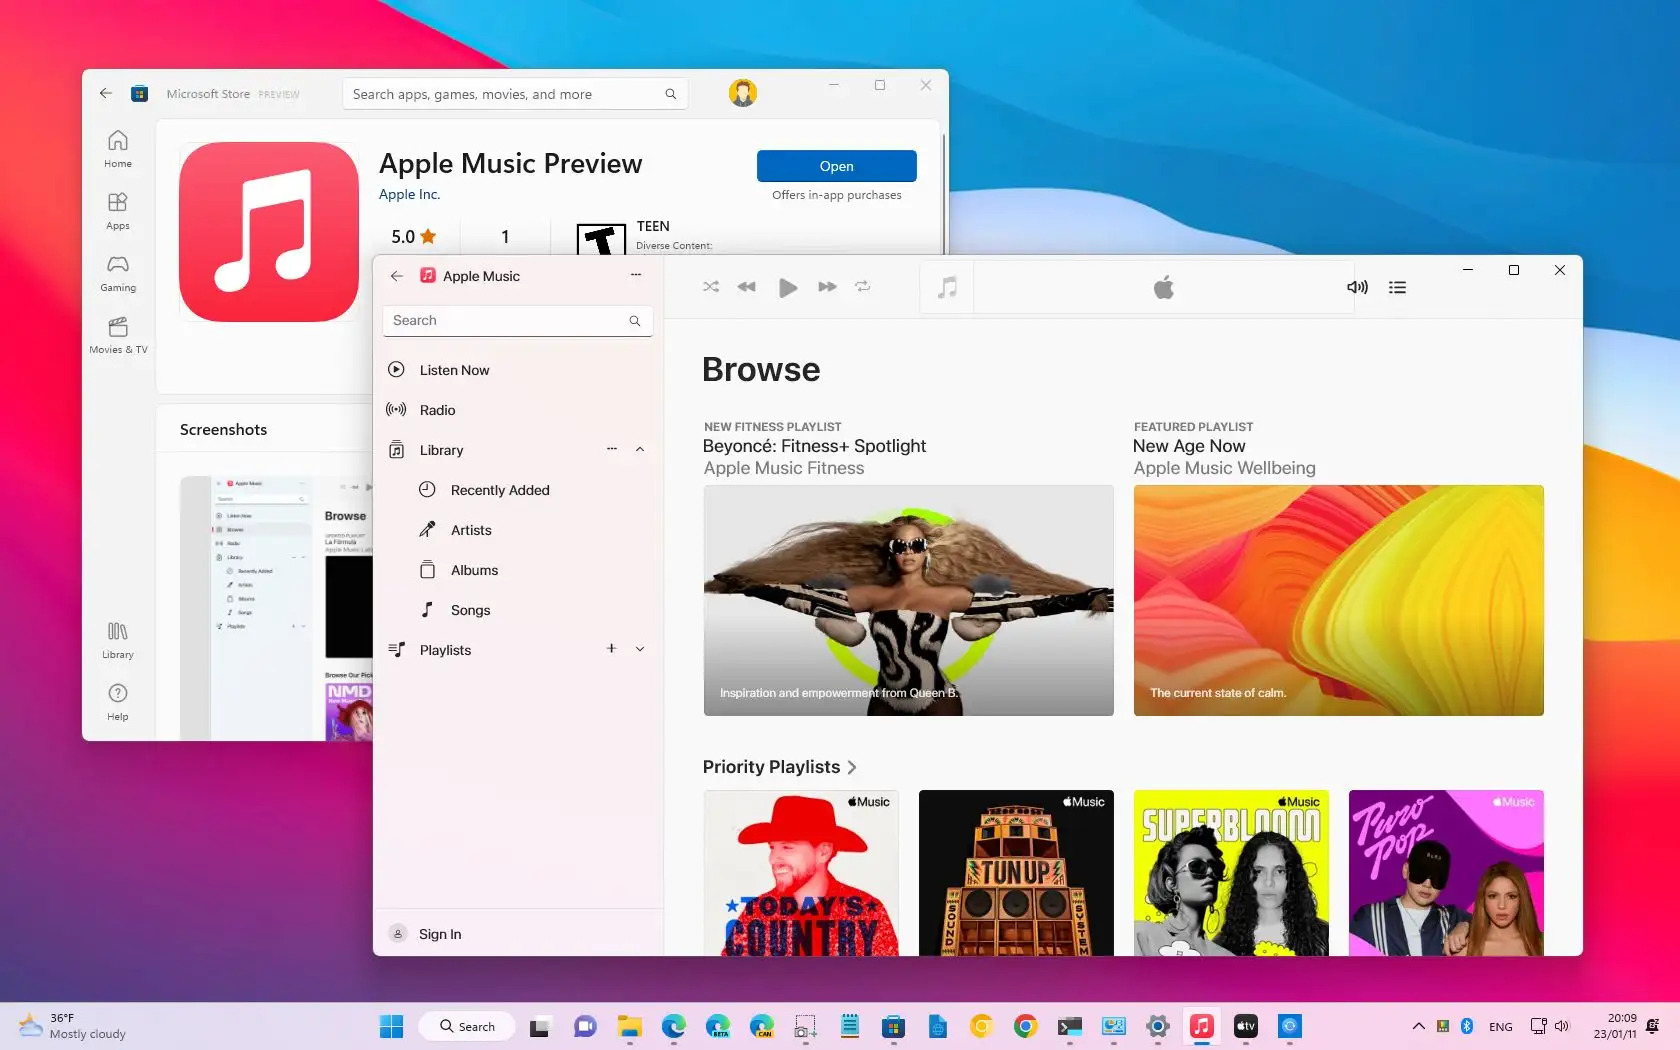
On Mac, you can access Apple Music by clicking on the Music app in your Dock or by searching for it in Spotlight (the magnifying glass icon on the top right corner of your screen).
Once you’ve opened Apple Music, you will be greeted with the For You tab, which offers personalized recommendations based on your music preferences. This tab also provides access to curated playlists and new releases.
To proceed with downloading your Apple Music library, we’ll need to navigate to the Library tab. Tap on the Library icon at the bottom of the screen on iPhone or iPad, or click on the Library option in the top left corner of the screen on Mac. This will take you to your personal music library, where all your saved songs, albums, and playlists are stored.
Now that you’ve successfully opened Apple Music and accessed your library, let’s move on to the next step to continue the process of downloading all of your Apple Music at once.
Step 2: Navigate to Your Library
Once you have opened the Apple Music app, the next step is to navigate to your music library. This is where all your saved songs, albums, and playlists are stored.
On iPhone or iPad, you can find the Library tab at the bottom of the screen. Tap on it, and you will be taken to your personal music library.
On Mac, the Library option is located in the top left corner of the screen. Click on it, and you will be directed to your music library.
Once you are in your library, you will see various categories such as Songs, Albums, Artists, and Playlists. These categories make it easy to organize and access your music collection.
To proceed with downloading your Apple Music library, we need to select the appropriate category. For example, if you want to download all of your favorite songs, click on the “Songs” category. If you prefer to download entire albums, click on the “Albums” category.
At this point, you have successfully navigated to your music library and chosen the desired category. In the upcoming section, we will explain how to select specific songs or albums for download and customize your download settings.
Step 3: Select Songs or Albums
Now that you have reached your music library, it’s time to select the songs or albums that you want to download. This step allows you to customize your download and save only the music that you prefer.
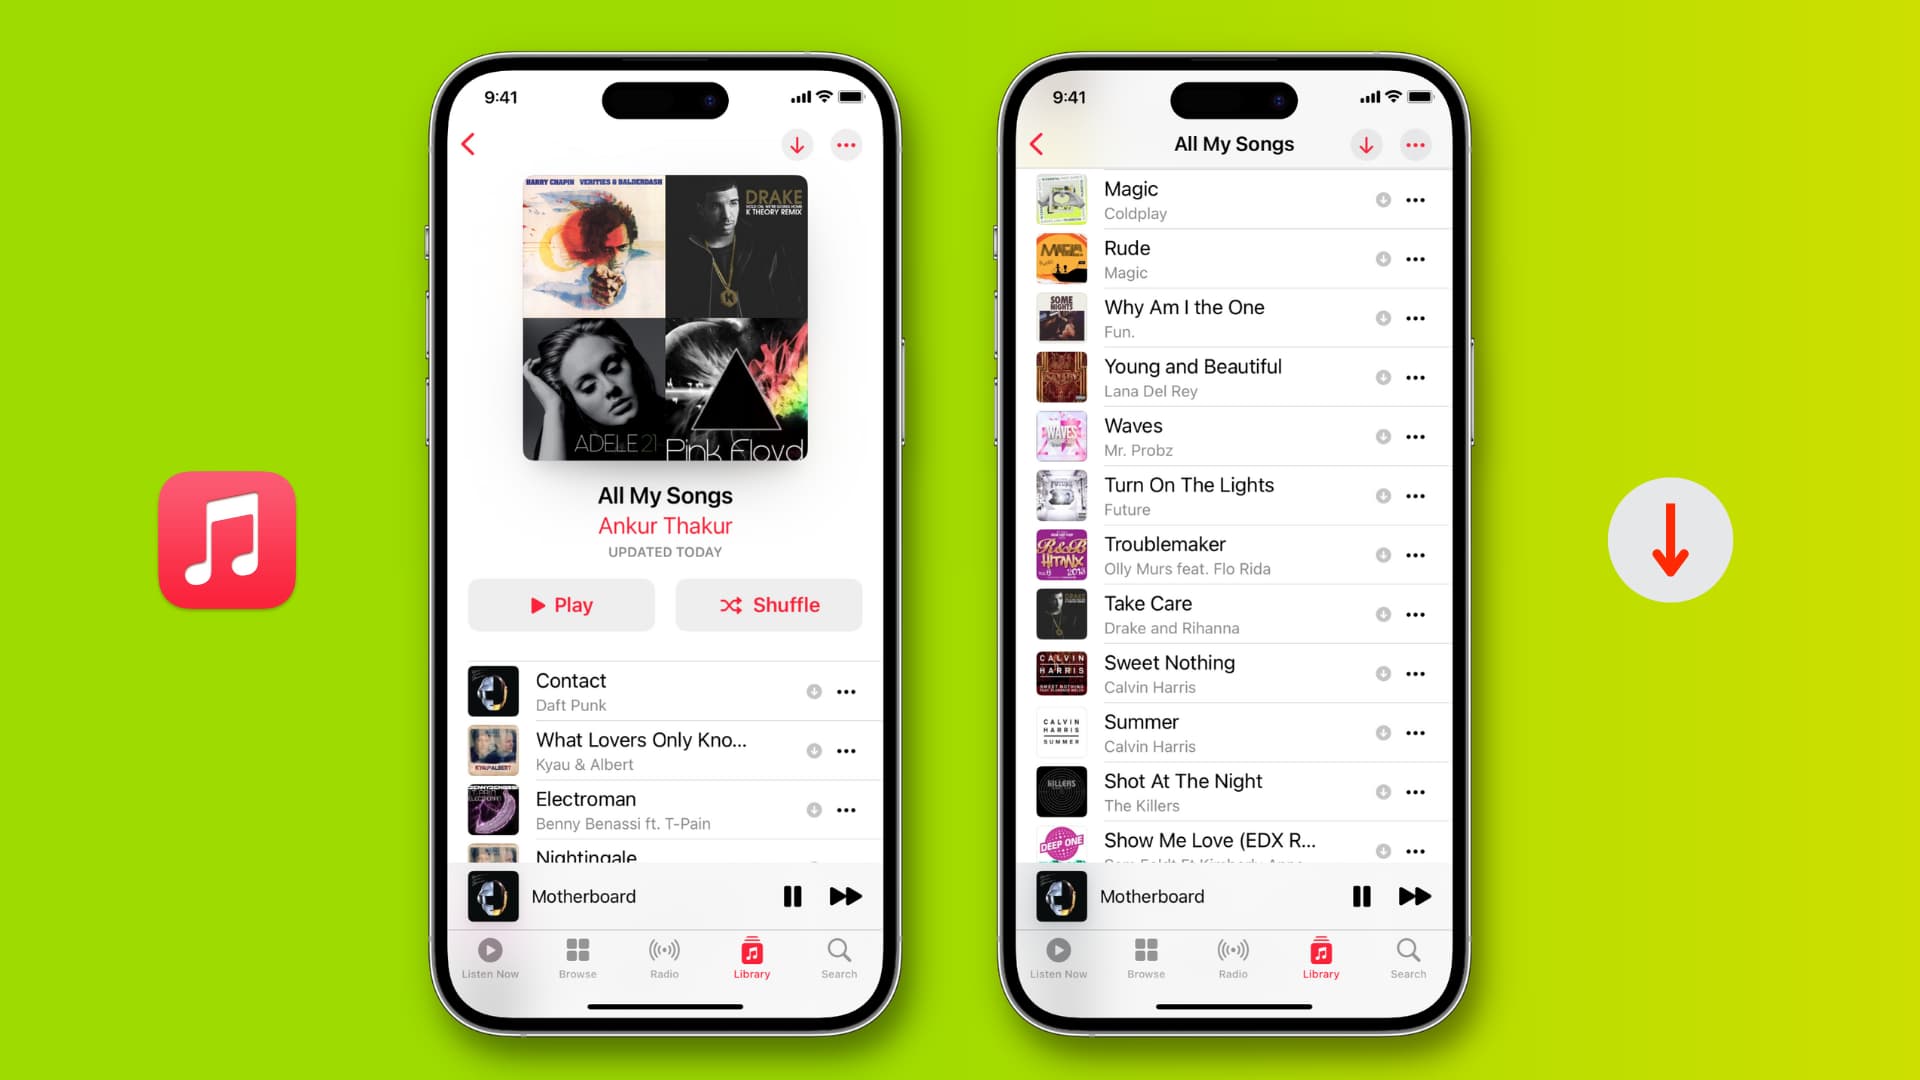
In your music library, you will see a list of all the songs, albums, and playlists that you have saved. You can scroll through the list to browse or use the search bar at the top of the screen to find specific songs or albums.
To select individual songs, simply tap on the ellipsis (…) next to the song title. This will bring up a menu of options, including the option to download the song. Tap on the download button to initiate the download process. The button will change to a cloud icon with a downward arrow to indicate that the song is downloading.
If you prefer to download entire albums, find the album cover in your library and tap on it. This will take you to the album page, where you can see all the songs included in the album. Similar to selecting individual songs, you can tap on the ellipsis (…) next to the song titles and choose the download option.
To select multiple songs or albums at once, you can use the “Edit” button, which is typically located in the top right corner of the screen. This will allow you to select multiple items by checking the corresponding checkboxes next to each song or album. Once you have selected the desired music, look for the download button to initiate the download process.
Remember, you have full control over which songs or albums you want to download. This customization feature ensures that you have enough storage space and only save the music that you truly enjoy.
Now that you have learned how to select songs or albums for download, let’s move on to the next step to customize your download settings.
Step 4: Choose Your Download Settings
After selecting the songs or albums you want to download, it’s time to customize your download settings. These settings allow you to control the quality of the downloaded music and manage your storage usage.
To access the download settings, navigate to the settings menu within the Apple Music app. On iPhone or iPad, you can find the settings by tapping on the profile icon in the top left corner of the screen and selecting “Settings.” On Mac, click on the Music menu in the top left corner of the screen and choose “Preferences.”
Within the settings menu, look for the “Download” or “Downloads” option. This is where you can adjust your download settings according to your preferences.
One of the most important settings to consider is the audio quality of your downloaded songs. Apple Music offers three options: High quality, Standard quality, and Most compatible. High-quality downloads deliver the best audio experience but require more storage space. Standard quality strikes a balance between audio quality and storage usage. Most compatible downloads are optimized for lower-quality playback and take up less space.
Additionally, you may have the option to choose whether to download music only when connected to Wi-Fi or also when using your cellular data. Enabling the Wi-Fi-only option can help prevent unnecessary data usage and ensure a faster and more stable download experience.
Take some time to review and adjust these settings based on your preferences and available storage space on your device. Once you have customized your download settings, you are ready to proceed to the next and final step.
Step 5: Download Your Music
Now that you have selected your desired songs or albums and customized your download settings, it’s time to start downloading your music from Apple Music. This step will initiate the download process and save your selected music directly to your device’s storage.
To begin the download, simply tap on the download button next to each song or album. The button will typically be represented by a cloud icon with a downward arrow. When you tap on it, the download will start, and the icon will change to a progress indicator, showing the download status.
For larger albums or longer playlists, the download process may take some time. It’s best to have a stable internet connection, particularly if you are downloading a large amount of music. You can track the progress of each download by checking the progress indicators or the download status in your music library.
During the download process, it’s important to keep the Apple Music app open and ensure that your device has sufficient storage space. If your storage becomes full during the download, the process may stop, and you may need to free up space or prioritize which songs or albums to download first.
Once the download is complete, you will see a notification or indication that the songs or albums are ready for offline listening. At this point, you can disconnect from the internet and enjoy your downloaded music wherever you go.
Remember that downloaded music is stored locally on your device and will not require an internet connection to play. You can access your downloaded music by simply opening the Apple Music app and navigating to your library or the respective category (songs, albums, or playlists).
Congratulations! You have successfully downloaded your selected music from Apple Music. Now, let’s move on to the final step to ensure that all of your downloaded music is properly stored and accessible.
Step 6: Check the Downloaded Music
After downloading your music from Apple Music, it’s essential to verify that all your selected songs and albums have been successfully saved and are accessible for offline listening. This final step ensures that you can enjoy your music without any interruptions, even when you don’t have an internet connection.
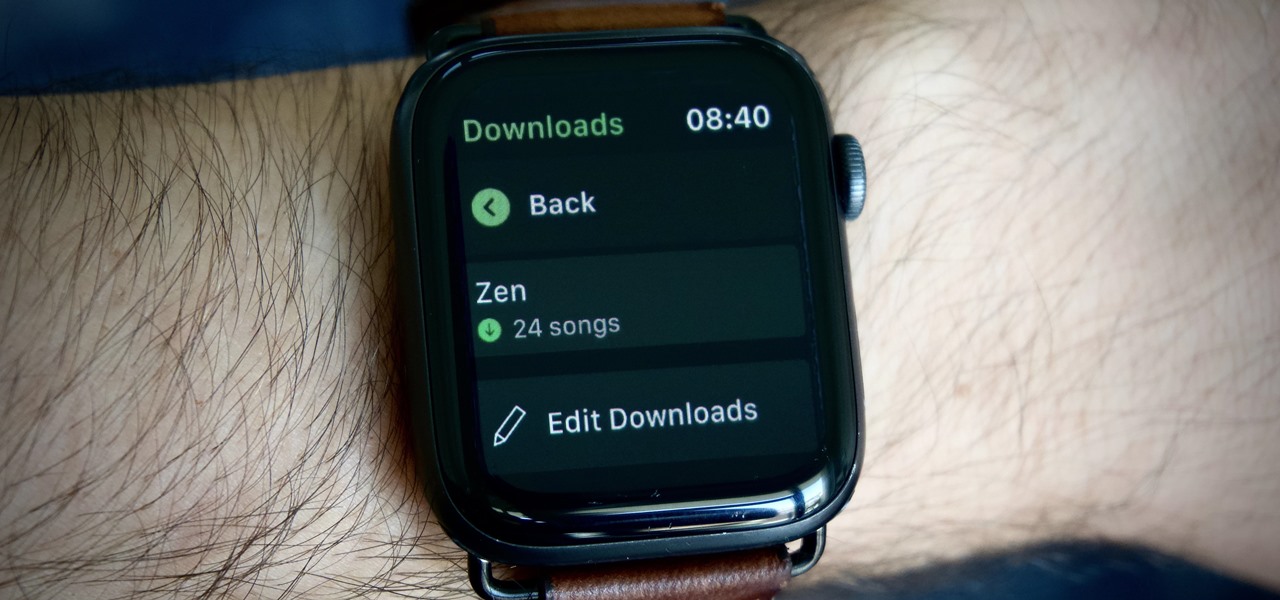
To check the downloaded music, open the Apple Music app on your device and navigate to your music library. Depending on your preference, you can select the Songs, Albums, or Playlists category to view the downloaded content.
If you have downloaded individual songs, scroll through the list and look for the cloud icon with a downward arrow next to each song. This icon indicates that the song has been successfully downloaded and is available for offline listening.
In the case of downloaded albums, locate the album cover and tap on it to access the album page. Ensure that all the songs listed in the album have the cloud icon next to them, indicating that they have been downloaded.
If you encounter any songs or albums without the cloud icon or if you notice any issues with the downloaded music, you may need to re-download them. To do this, simply tap on the cloud icon or the download button next to the affected songs or albums, and the download process will start again.
It’s also important to periodically check your downloaded music to ensure that it remains available on your device. Sometimes, due to storage limitations or changes in your Apple Music subscription, downloaded music may become unavailable. Checking your downloaded music regularly can help you identify and resolve any potential issues promptly.
By following these steps and checking your downloaded music, you can be confident that you will always have access to your favorite songs and albums, regardless of your internet connectivity.
Congratulations! You have successfully completed the process of downloading all of your Apple Music and ensuring that it is readily available for offline listening. Now, you can enjoy your favorite tunes anytime, anywhere.