Introduction
Welcome to the world of Wii gaming! If you’re looking to expand your gaming library without splurging on physical copies or spending a fortune buying games from the Wii Shop Channel, you’ve come to the right place. With just an SD card, you can easily download and store Wii games to enjoy at your convenience.
Downloading Wii games onto an SD card allows you to take advantage of the Homebrew Channel, a software application that unlocks the potential of your Wii console. It grants you access to a wide range of homebrew software, including the USB Loader GX, which enables you to load and play downloaded Wii games directly from the SD card.
This step-by-step guide will walk you through the process of downloading Wii games onto your SD card, from setting up your Wii console to playing your favorite titles. So grab your SD card and let’s get started!
Note: Modifying your Wii console may void its warranty and could potentially cause damage. Please proceed at your own risk and only follow this guide if you’re comfortable with the process.
Step 1: Prepare your Wii console
Before you can start downloading Wii games onto your SD card, it’s important to ensure that your Wii console is ready for the process. Follow these steps to prepare your Wii console:
- Check your Wii console version: The first thing you need to do is verify that your Wii console is running on version 4.3. You can check this by going to the Wii System Menu and selecting the Wii Settings option. Scroll to the right and select the “Wii System Update” option to confirm your console’s version. If you’re not on version 4.3, you’ll need to update your Wii console before proceeding. Ensure you have a stable internet connection to perform the update.
- Format your SD card: To ensure compatibility and optimal performance, it’s recommended to format your SD card as FAT32. Connect your SD card to your computer using a card reader and open the file explorer. Locate the SD card, right-click on it, and select the “Format” option. Choose FAT32 as the file system and click “Start” to begin the formatting process. Be aware that formatting will erase all data on the SD card, so make sure to back up any important files beforehand.
- Create a folder on the SD card: After formatting, create a new folder on the root of your SD card and name it “apps” (without the quotes). This folder will be used to store the necessary software for downloading Wii games onto the SD card.
- Prepare the Wii Homebrew Channel: To install the Homebrew Channel, you’ll need an SD card with at least 2GB of storage space. Download the Homebrew Channel installer from the official website and extract the contents to your computer. Copy the extracted files to the “apps” folder on your SD card.
Once you’ve completed these steps, you’re ready to move on to the next phase of the process: obtaining the Homebrew Channel. Stay tuned for step 2, where we’ll guide you through the installation process of the Homebrew Channel.
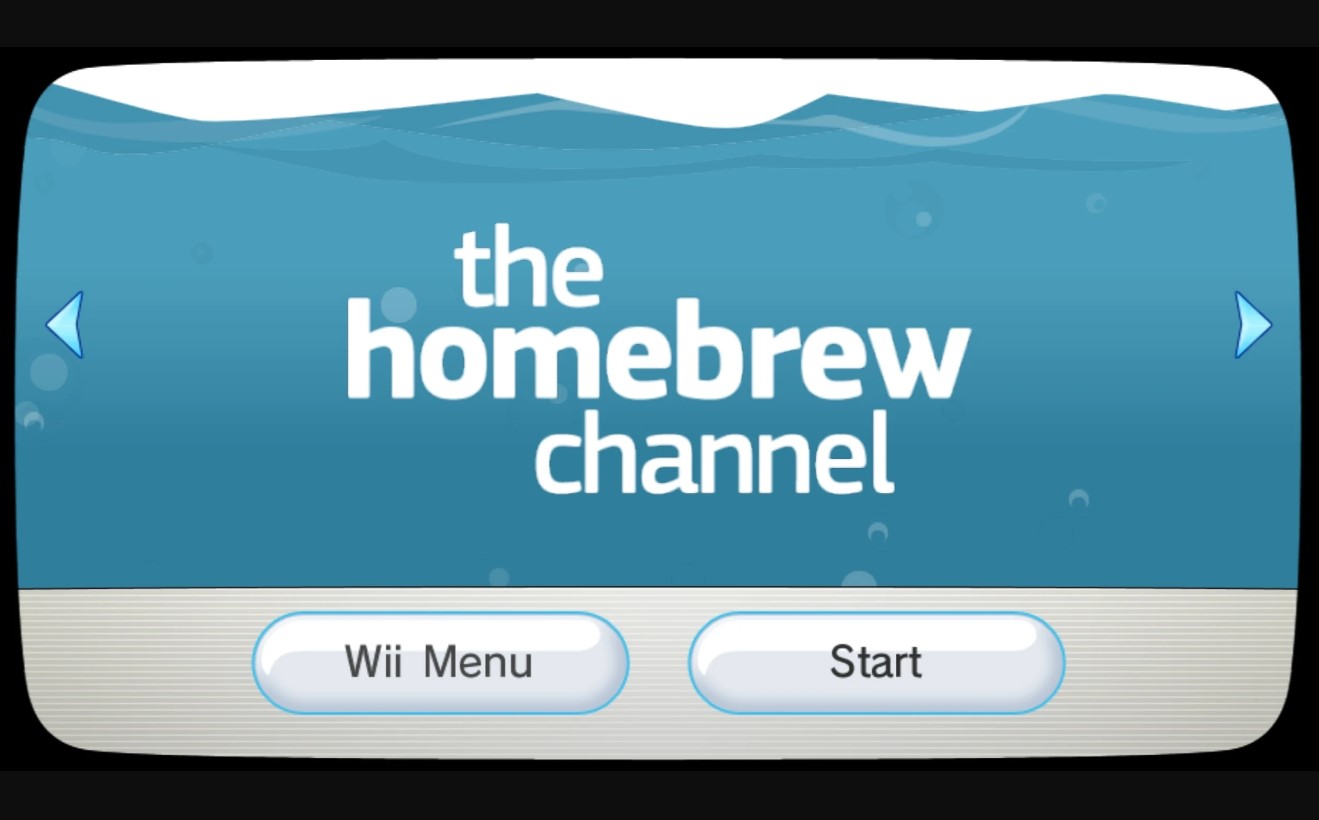
Step 2: Get the Homebrew Channel
The Homebrew Channel is an essential piece of software that allows you to unlock the full potential of your Wii console. It acts as a portal for various homebrew applications, including the USB Loader GX, which we’ll use to load and play downloaded Wii games from the SD card. Follow these steps to install the Homebrew Channel:
- Prepare your SD card: Insert the SD card into your computer’s card reader and create a new folder at the root of the SD card. Name this folder “apps” (without the quotes). This is where we’ll place the files necessary for installing the Homebrew Channel.
- Download the Homebrew Channel: Visit the official Homebrew Channel website and download the latest version of the Channel. Save the downloaded file to your computer, then extract the contents of the ZIP file.
- Copy files to the SD card: Open the extracted folder and locate the file called “boot.elf.” Copy this file to the “apps” folder on your SD card.
- Eject the SD card: Safely remove the SD card from your computer and insert it into your Wii console’s SD card slot.
- Access the Homebrew Channel: Turn on your Wii console and navigate to the Wii System Menu. Select the “Wii” button on the bottom left of the screen, then click on “Data Management” and choose “Channels.” From there, select “SD Card” and you should see the Homebrew Channel listed. Click on it to open the Homebrew Channel on your Wii console.
- Install the Homebrew Channel: Follow the on-screen instructions to complete the installation process. Once the installation is complete, you can exit the Homebrew Channel and return to the Wii System Menu.
Congratulations! You have successfully installed the Homebrew Channel on your Wii console. Now you’re ready to move on to the next step: installing the USB Loader GX, which will allow you to download and play Wii games directly from your SD card.
Step 3: Install the USB Loader GX
Once you have the Homebrew Channel installed on your Wii console, it’s time to set up the USB Loader GX. This application will enable you to load and play downloaded Wii games directly from your SD card. Follow these steps to install the USB Loader GX:
- Prepare your SD card: Insert the SD card into your computer’s card reader and create a new folder at the root of the SD card. Name this folder “apps” (without the quotes) if it doesn’t already exist. This is where we’ll place the USB Loader GX files.
- Download USB Loader GX: Visit the official USB Loader GX website and download the latest version of the application. Save the downloaded file to your computer.
- Extract the files: Open the downloaded ZIP file and extract the contents to a new folder on your computer. You should have a folder named “USBLoaderGX” containing various files and folders.
- Copy files to the SD card: Copy the entire “USBLoaderGX” folder from your computer to the “apps” folder on your SD card. Ensure that the folder structure remains intact, with all files and folders preserved.
- Eject the SD card: Safely remove the SD card from your computer and insert it into the SD card slot on your Wii console.
- Access the Homebrew Channel: Turn on your Wii console and navigate to the Wii System Menu. Select the Homebrew Channel and press the A button to open it.
- Launch the USB Loader GX: In the Homebrew Channel, locate the USB Loader GX application and click on it to launch it. The USB Loader GX interface should now appear on your screen.
- Configure USB Loader GX: Use the on-screen instructions to configure the USB Loader GX settings according to your preference. You can customize various options such as display settings, game cover art, and control settings.
Once you’ve completed these steps, the USB Loader GX is successfully installed on your Wii console. You’re one step closer to downloading and playing Wii games directly from your SD card. In the next step, we’ll guide you through the process of downloading Wii games.
Step 4: Downloading Wii games
Now that you have the USB Loader GX installed on your Wii console, it’s time to start downloading Wii games. Keep in mind that downloading copyrighted games without proper authorization is illegal. Only download games that you own or have permission to access. Follow these steps to download Wii games:
- Find a reliable source: Look for reputable websites that offer Wii game downloads. You can search for popular Wii game download sites or explore online forums and communities dedicated to homebrew gaming.
- Search for Wii games: Use the search function on the website to browse through the catalog of available Wii games. You can search by title, genre, or popularity to find the games you’re interested in.
- Choose and download: Once you’ve selected a game, click on the download link or button. The game file will typically be in ISO or WBFS format.
- Save the downloaded game: Choose a location on your computer to save the downloaded Wii game file. It’s recommended to create a dedicated folder to store your downloaded games for easy access.
- Verify the game: After the download is complete, it’s a good practice to verify the integrity of the game file using a tool like HashCheck or a similar checksum utility. This ensures that the game file hasn’t been corrupted during the download process.
- Keep your antivirus updated: It’s essential to have a reliable antivirus program installed on your computer and keep it updated to scan the downloaded files for any potential threats.
Remember to always download games from trusted sources to protect yourself from viruses or malware. Additionally, only download games that you own or have legal access to. Piracy is illegal and can result in legal consequences.
Once you’ve downloaded your desired Wii games, you’re ready to move on to the next step: preparing your SD card to store and play the downloaded games. Stay tuned!
Step 5: Preparing the SD card
Now that you have downloaded your desired Wii games, it’s time to prepare your SD card to store and play these games on your Wii console. Follow these steps to get your SD card ready:
- Insert the SD card: Ensure that your Wii console is turned off. Insert the SD card into the SD card slot located on the front or side of your Wii console.
- Power on the console: Turn on your Wii console and wait for it to boot up.
- Access the Homebrew Channel: Navigate to the Wii System Menu and select the Homebrew Channel. Press the A button to open it.
- Launch the USB Loader GX: Locate and select the USB Loader GX application in the Homebrew Channel. The USB Loader GX interface will appear on your screen.
- Select the SD card: Once in the USB Loader GX interface, use the Wiimote to navigate and select the “Settings” option. In the settings menu, choose “Loader Settings” and then “Game Folder Settings.” Select “SD” as the game folder option to designate the SD card as the storage location for your Wii games.
- Configure game settings: Customize various game settings within the USB Loader GX interface to ensure an optimal gaming experience. Adjust display settings, control settings, and other preferences according to your liking.
- Save settings: After configuring the necessary settings, make sure to save the changes by selecting the “Save” or “Apply” option within the USB Loader GX interface.
By following these steps and properly preparing your SD card, you’re now ready to transfer the downloaded Wii games onto the SD card. In the next step, we will guide you through the process of transferring the Wii games to the SD card. Get ready for an exciting gaming experience on your Wii console!
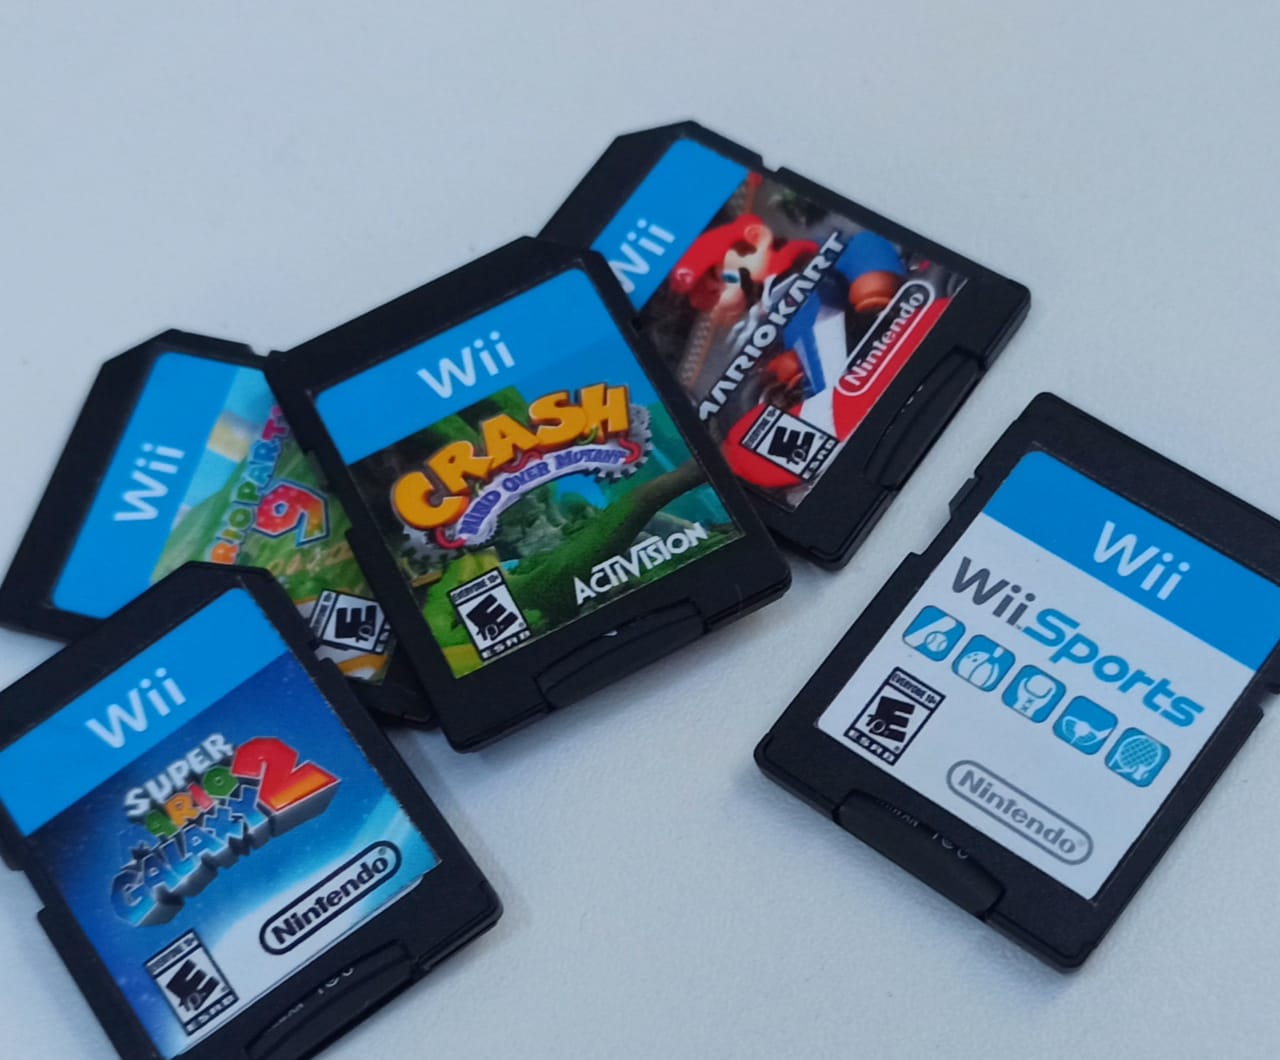
Step 6: Transferring Wii games to the SD card
Now that your SD card is prepared, it’s time to transfer the downloaded Wii games onto the SD card. Follow these steps to transfer the games:
- Connect the SD card: Insert the SD card into your computer’s card reader or connect your Wii console to your computer using an SD card adapter.
- Access the SD card: Once connected, open the File Explorer (Windows) or Finder (Mac) on your computer. Locate the SD card; it should appear as a removable storage device.
- Create a folder: Create a new folder on the SD card and give it a name that will help you identify it as the location for storing Wii game files.
- Copy Wii game files: Locate the downloaded Wii game files on your computer. Select the game files and copy them to the folder you created on the SD card.
- Ensure proper file organization: It’s important to maintain a proper file structure on the SD card to ensure the games are recognized by the USB Loader GX. The game files should be in ISO, WBFS, or another compatible format, and they should be placed directly in the folder on the SD card, without any additional subfolders.
- Eject the SD card: Safely remove the SD card from your computer or disconnect the SD card adapter from your Wii console.
- Insert the SD card: Insert the SD card back into the SD card slot on your Wii console.
With the Wii games successfully transferred to the SD card, you’re now ready to insert the card into your Wii console and start playing the games. In the next step, we’ll guide you through the process of inserting the SD card and playing Wii games from it.
Step 7: Inserting the SD card into the Wii console
Now that you have transferred the Wii games to your SD card, it’s time to insert the SD card into your Wii console. Follow these steps to insert the SD card:
- Power off the Wii console: Ensure that your Wii console is turned off before proceeding.
- Locate the SD card slot: On the front or side of your Wii console, you’ll find a small flap or cover. Flip open this flap to reveal the SD card slot.
- Insert the SD card: Take your SD card and gently slide it into the SD card slot, with the label facing the same direction as the front of the Wii console. Push the card in until it clicks into place or until you feel it is securely inserted.
- Close the flap or cover: After inserting the SD card, close the flap or cover that was opened to access the SD card slot. Ensure that it is securely closed.
- Power on the Wii console: Turn on your Wii console and wait for it to fully boot up.
- Access the Homebrew Channel: Navigate to the Wii System Menu and select the Homebrew Channel. Press the A button to open it.
- Launch the USB Loader GX: In the Homebrew Channel, locate and select the USB Loader GX application. The USB Loader GX interface should now appear on your screen.
With the SD card successfully inserted into your Wii console, you’re now ready to start playing Wii games directly from the SD card. In the next step, we’ll guide you through the process of playing Wii games using the USB Loader GX. Get ready for an amazing gaming experience!
Step 8: Playing Wii games from the SD card
With the SD card inserted and the USB Loader GX interface open on your Wii console, it’s time to start playing Wii games directly from the SD card. Follow these steps to play Wii games:
- Select a game: Use the Wiimote or GameCube controller to navigate and browse through the list of games displayed in the USB Loader GX interface. Use the up and down arrows to highlight a game and press the A button to select it.
- Load the game: Once a game is selected, the USB Loader GX will load the game from the SD card. This process may take a few seconds depending on the size of the game.
- Enjoy the game: Once the game has loaded, you can now start playing it! Use the controller to navigate through the game menus and enjoy the immersive gaming experience.
- Additional options: Within the USB Loader GX interface, you’ll also find options for adjusting various game settings. You can customize settings such as controller configurations, display options, and more to suit your preferences.
- Return to the USB Loader GX: To go back to the USB Loader GX interface while playing a game, press the Home button on the controller. From there, you can select a different game or explore other features of the USB Loader GX.
- Exiting the game: To exit a game and return to the USB Loader GX interface, press the Home button again and select “Return to Loader.”
- Power off the Wii console: When you’re done playing Wii games, make sure to properly power off your Wii console.
By following these steps, you can easily play Wii games directly from the SD card using the USB Loader GX. Enjoy the convenience and flexibility of having your game library accessible and ready to play at any time. Have fun gaming!
Conclusion
Congratulations! You have successfully learned how to download Wii games onto your SD card and play them directly on your Wii console. By following the step-by-step guide, you have unlocked a world of possibilities for expanding your gaming library.
Through the Homebrew Channel and the USB Loader GX, you now have access to a wide range of Wii games that you can download and store on your SD card. The ability to play these games directly from the SD card provides convenience and flexibility, eliminating the need for physical copies or purchasing games from the Wii Shop Channel.
Remember to download Wii games from trusted sources and only download games that you have legal access to. Piracy is illegal and can result in serious consequences. Respect the work of game developers and support them by purchasing games you enjoy.
Always keep your Wii console updated and periodically update related software for optimal performance and compatibility. Additionally, ensure that your SD card is formatted correctly and properly organized to avoid any issues when loading games.
Now that you have the knowledge and skills to download and play Wii games from your SD card, it’s time to explore new gaming experiences and enjoy countless hours of entertainment. Let your gaming adventures begin!