Introduction
Welcome to the world of typography! Fonts play a significant role in enhancing the visual appeal and readability of any text, be it on a webpage, document, or graphic design. As a MacBook user, you have the advantage of accessing a wide range of fonts to enhance your creative projects.
In this article, we will walk you through the process of finding, downloading, installing, and using fonts on your MacBook. Whether you are a designer, writer, or simply someone who enjoys experimenting with different fonts, this guide will help you navigate the exciting world of typography on your Mac.
Having the ability to download new fonts opens up a whole new realm of possibilities for customizing your projects. From elegant and professional fonts for business presentations to fun and whimsical fonts for personal projects, the options are endless.
Before we dive into the details, it’s important to note that the process of downloading and installing fonts on a Macbook may differ slightly depending on the operating system version you are using. However, the general steps remain the same.
So, whether you are using the latest macOS or an older version, rest assured that you will find all the necessary information in this article to enable you to download, install, and use your desired fonts with confidence.
Now, let’s get started with the exciting world of fonts on your MacBook and explore the process of finding and downloading fonts to elevate your design projects.
Finding and Downloading Fonts
Before you can start using different fonts on your MacBook, you need to find and download them. Fortunately, there are several reliable sources where you can discover a vast collection of fonts to suit every style and project.
One of the most popular sources for downloading fonts is Google Fonts. This platform offers a wide selection of free and open-source fonts that you can use for both personal and commercial projects. Simply visit the Google Fonts website, browse through the available options, and click on the “Download” button for the fonts you wish to use.
Another popular website for finding and downloading fonts is DaFont. With a massive library of unique and creative fonts, DaFont allows you to search for fonts based on various categories such as script, handwritten, display, and more. Once you find a font you like, click on the “Download” button next to the font name to save it to your computer.
For premium fonts, websites like Adobe Fonts and Font Squirrel offer a wide range of high-quality paid fonts. These fonts often come with additional features and advanced customization options.
Once you’ve found a font you want to use, simply follow these steps to download it on your MacBook:
- Click on the download button for the font you wish to download.
- A zip file containing the font files will be downloaded to your computer.
- Locate the downloaded zip file and double-click on it to extract the font files.
- Once the zip file is extracted, you will see the font files in .ttf or .otf format.
- Double-click on the font file to open it in Font Book, the default font management application on Mac.
- Click the “Install Font” button in the Font Book window to install the font on your MacBook.
- The font is now installed and ready to use in various applications.
It’s important to note that while downloading fonts, ensure that you are sourcing them from reputable websites to avoid any potential security risks.
Now that you’ve successfully downloaded your desired fonts, it’s time to move on to the next step: installing these fonts on your MacBook.
Installing Fonts on the Macbook
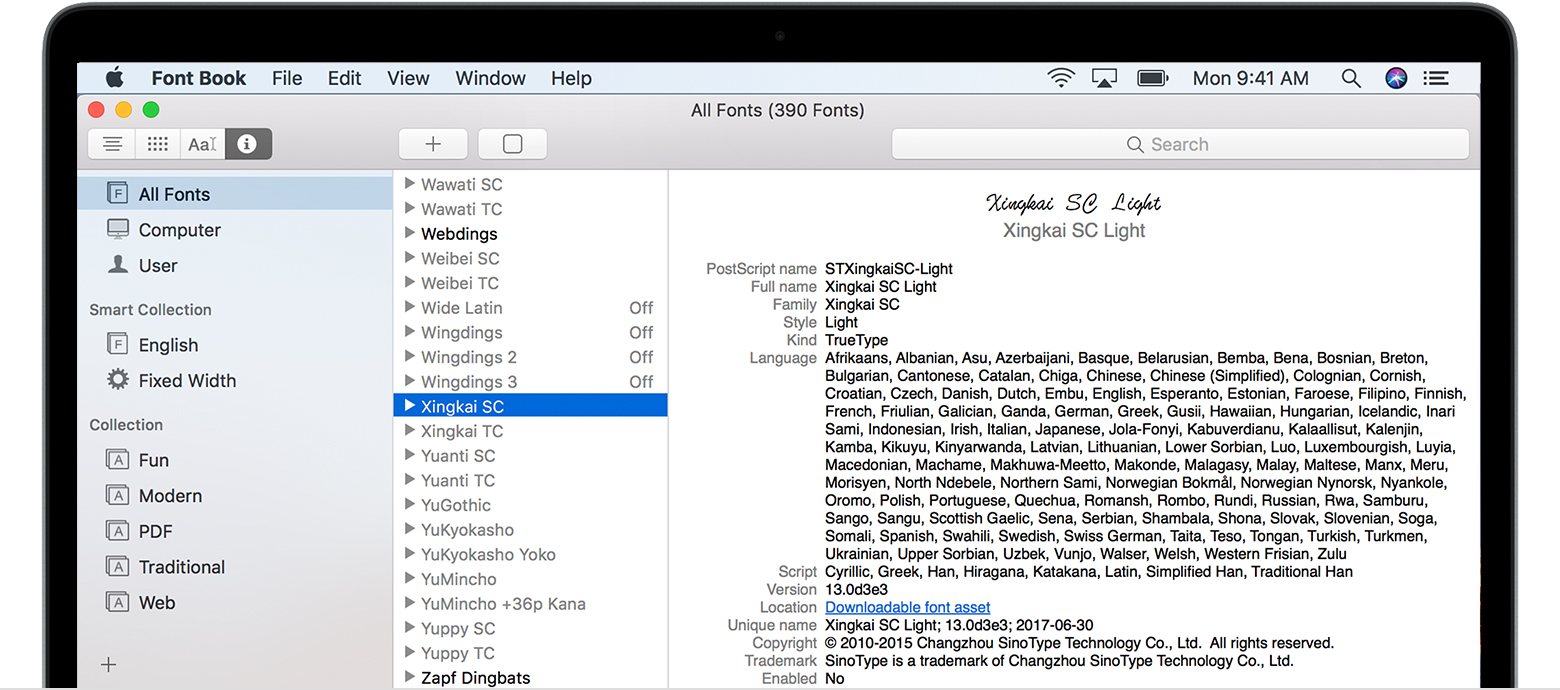
Once you have downloaded the font files onto your MacBook, the next step is to install them. Installing fonts on your Mac is a straightforward process and can be done using the default font management application called Font Book.
Follow these steps to install fonts on your MacBook:
- Locate the downloaded font files on your computer.
- Double-click on the font file to open it in Font Book.
- The Font Book window will open, displaying an overview of the font.
- Click on the “Install Font” button in the Font Book window.
- Font Book will install the font and display a confirmation message.
- The font is now successfully installed on your MacBook.
Alternatively, you can also install fonts by dragging and dropping the font files into the Font Book window. Font Book will automatically install the fonts for you.
After installing the fonts, they will be available for use in various applications on your Mac, such as Pages, Keynote, Photoshop, Illustrator, and more. You can access the installed fonts within the font selection menus of these applications.
It is worth mentioning that you can also choose to activate or deactivate specific fonts in Font Book. This can help you organize and declutter your font library, especially if you have a large collection of fonts installed.
To deactivate a font, simply locate the font in Font Book, select it, and click on the “Disable” button. The font will no longer be available for use in applications. If you decide to use the font again, you can easily reactivate it by clicking on the “Enable” button.
Now that you have successfully installed the fonts, you are ready to start using them in various applications on your MacBook.
Using Installed Fonts in Applications
With the fonts successfully installed on your MacBook, it’s time to put them to use in your favorite applications and unleash your creativity. Whether you’re working on a document, designing a graphic, or creating a presentation, here’s how you can use the installed fonts in various applications:
Pages
If you’re using Pages, Apple’s word processing application, incorporating your installed fonts into your documents is a breeze. Simply open Pages and select the text you want to modify. Then, go to the Format menu and choose the Fonts option. A dropdown menu will appear, showcasing all the installed fonts on your MacBook. Select your desired font, and the selected text will instantly update with the new font style.
Keynote
Keynote, Apple’s presentation software, allows you to add a professional touch to your slides by using your installed fonts. To do this, open Keynote and select the text you want to customize on a slide. Next, click on the Format tab at the top of the screen and navigate to the Text tab. From there, you can choose your desired font from the Fonts dropdown menu, giving your presentation a unique and visually appealing look.
Photoshop and Illustrator
If you’re into graphic design and using Adobe’s Photoshop or Illustrator, incorporating your installed fonts is essential. After opening your desired application, create a new document or open an existing one. Then, select the text tool from the toolbar and click on the canvas to start typing. At the top of the screen, you’ll find a font selection dropdown menu. Click on it, and all your installed fonts will appear for you to choose from. Select your desired font, and your text will be instantly updated with the chosen style.
Note that in Photoshop, you can also access the font selection dropdown menu by clicking on the Character panel on the right side of the interface.
Other Applications
The process of using installed fonts will be similar in most other applications on your MacBook. Look for font selection options in the formatting or text editing menus of the application you’re using. From there, you can choose your desired font and apply it to the selected text.
Now that you know how to use your installed fonts in various applications, let’s move on to the next section, where we’ll explore how to organize and manage your font collection on your MacBook.
Organizing and Managing Fonts
As you continue to explore and download different fonts for your MacBook, it’s important to keep your font collection organized and easily accessible. Here are some tips for organizing and managing your fonts:
Font Book
Font Book, the default font management application on your MacBook, provides various organizational features to help you manage your fonts effectively. You can create font collections, which act as folders to group related fonts together. For example, you can create collections for serif fonts, script fonts, or specific projects. To create a font collection, simply go to the File menu in Font Book, select “New Collection,” and give it a suitable name. Then, drag and drop the relevant fonts into the collection.
Additionally, Font Book allows you to enable or disable specific fonts, as mentioned earlier. This feature comes in handy when you want to declutter your font library or temporarily hide certain fonts from the font selection menus in your applications.
Font Management Software
If you have an extensive font collection or require more advanced font management capabilities, you may consider using third-party font management software. These applications offer features like font activation and deactivation, advanced categorization and tagging, and even font preview customization.
Some popular font management software options for Mac include FontExplorer X, Suitcase Fusion, and Typeface. These tools provide more robust organization and management features, making it easier to find and use your installed fonts.
Regularly Review and Remove Unused Fonts
To maintain a streamlined font library, periodically review your installed fonts and remove any that you no longer use. This will help declutter your font selection menus and make it easier to find the fonts you actually need. Remember that unused fonts take up disk space, so eliminating them can also free up storage on your MacBook.
When reviewing your font collection, consider factors like functionality, visual appeal, and personal preference. If you find fonts that no longer serve your needs or no longer align with your design aesthetic, it’s time to bid them farewell and create space for new and inspiring fonts.
By implementing these organizational and management practices, you can ensure a seamless workflow and enhance your creative process with easy access to the right fonts.
Now that you’ve learned how to organize and manage your font collection, let’s conclude the article with a recap of the essential points covered.
Conclusion
Using different fonts on your MacBook can significantly enhance the visual appeal and creative possibilities of your projects. By following the steps outlined in this article, you can easily find, download, install, and use fonts in various applications on your Mac.
Remember to explore reputable sources like Google Fonts, DaFont, and Adobe Fonts to discover a wide range of fonts that suit your style and project requirements. Downloading fonts is a straightforward process, and once you have the font files, installing them using Font Book is a breeze.
Take advantage of the flexibility and customization options that fonts provide in applications like Pages, Keynote, Photoshop, and Illustrator. Adding a personal touch to your documents, presentations, and graphic designs can make a significant impact on the overall visual impact.
As your font collection grows, ensure you keep it organized using features available in Font Book or opt for third-party font management software to enhance your organization and management capabilities. Periodically review and remove unused fonts to streamline and declutter your library.
The world of typography is vast, with countless fonts to explore. Embrace your creativity and experiment with different fonts to create captivating visuals and convey your intended message effectively.
Now that you’re equipped with the knowledge to download, install, use, and manage fonts on your MacBook, it’s time to let your imagination run wild and take your projects to new heights with the power of typography.


