Introduction
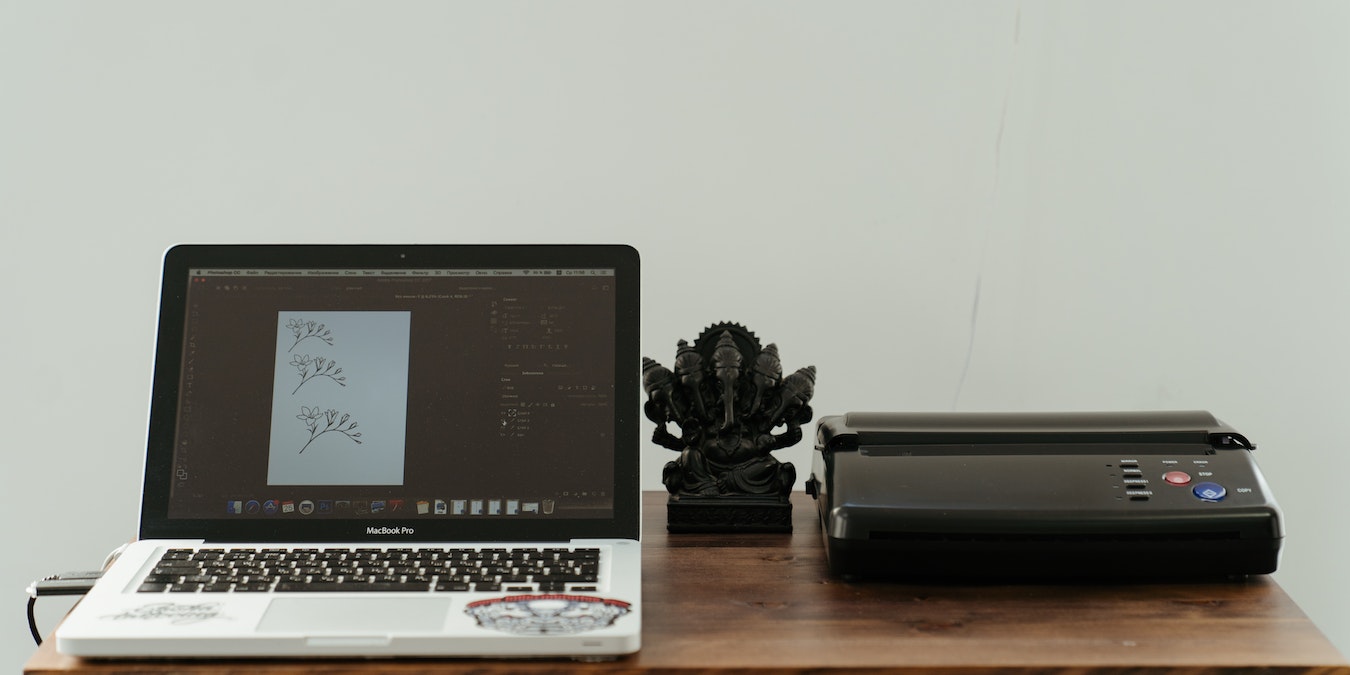
Printing documents has become an essential task in our day-to-day lives. Whether you need to print out important reports, school assignments, or creative projects, having a reliable printer is crucial. If you own a MacBook Pro, you’re in luck, as it offers seamless compatibility with various printers for all your printing needs.
In this article, we will guide you through the process of printing on your MacBook Pro. From connecting the printer to troubleshooting common printing issues, we’ve got you covered. So, let’s dive in and learn how to print efficiently and effortlessly on your MacBook Pro.
Before we begin, it’s important to note that the instructions provided here are tailored specifically for MacBooks running the latest macOS. If you are using an older version of macOS or a different MacBook model, some steps might vary slightly.
Now, let’s get started and explore the world of printing on your MacBook Pro!
Connecting the Printer
Before you can start printing on your MacBook Pro, you need to establish a connection between your laptop and the printer. Here’s how you can do it:
- Check the availability of compatible ports: If your printer uses USB, check if your MacBook Pro has USB-A or USB-C ports. Ensure that you have the necessary cables or adapters to connect the printer to your laptop.
- Power on the printer: Make sure your printer is turned on and properly connected to a power source.
- Connect the printer to your MacBook Pro: Using the appropriate cable or adapter, connect the printer to your MacBook Pro’s available port. If your printer supports wireless connectivity, you can skip the cable connection.
Once the physical connection is established, your MacBook Pro will automatically detect the printer and prompt you with further setup instructions. If you’re using a wireless printer, follow the on-screen instructions to connect it to your Wi-Fi network.
After the printer is connected, you’re ready to move on to the next step: checking printer compatibility.
Checking Printer Compatibility
Before printing on your MacBook Pro, it’s essential to ensure that your printer is compatible with macOS. Here are a few steps you can follow to check printer compatibility:
- Visit the manufacturer’s website: Go to the official website of the printer manufacturer and navigate to their support or product page. Look for information about macOS compatibility for your specific printer model.
- Check system requirements: Verify that your MacBook Pro meets the minimum system requirements specified by the printer manufacturer. This includes the macOS version, available memory, and processor requirements.
- Search for driver support: Check if the printer manufacturer offers official drivers or software for macOS. The presence of dedicated macOS drivers ensures smoother integration and improved functionality.
If you are unable to find compatibility information on the manufacturer’s website, you can also consult online forums or community boards where other MacBook users discuss their experiences with different printer models. This can give you insights into the printing capabilities and compatibility of specific printers with macOS.
Remember, compatibility is crucial to ensure that your printer works seamlessly with your MacBook Pro. Investing a little time in checking compatibility can save you from potential frustrations down the line.
Once you’ve confirmed that your printer is compatible with macOS, you can proceed to install the necessary software for your printer.
Installing Printer Software
After connecting your printer to your MacBook Pro and verifying compatibility, the next step is to install the printer software. Installing the necessary drivers and software is crucial for your printer to work correctly with macOS. Here’s how you can install the printer software:
- Check for automatic installation: In many cases, macOS automatically detects the connected printer and installs the necessary software. If this happens, you will receive a notification prompting you to add the printer. Follow the on-screen instructions to complete the installation.
- Download drivers from the manufacturer’s website: If automatic installation doesn’t occur, or if you prefer to manually install the software, visit the printer manufacturer’s website. Look for the driver or software downloads section and locate the appropriate software for your printer model.
- Download and install the software: Download the latest version of the printer software for macOS. Once downloaded, locate the installer file and double-click on it to initiate the installation process. Follow the on-screen instructions to complete the installation.
During the installation, you may be prompted to choose additional settings or customize the software according to your preferences. Make sure to carefully read and select the options that suit your requirements.
Once the software is installed, your printer will be ready to use with your MacBook Pro. However, before you start printing, it’s a good idea to set up default print preferences to optimize your printing experience.
Setting Up Default Print Preferences
Setting up default print preferences allows you to streamline your printing process and ensure that your documents are printed according to your desired specifications. Here’s how you can set up default print preferences on your MacBook Pro:
- Open the “System Preferences” on your MacBook Pro. You can do this by clicking on the Apple menu in the top-left corner of the screen and selecting “System Preferences” from the drop-down menu.
- In the System Preferences window, locate and click on the “Printers & Scanners” icon. This will open the Printers & Scanners settings menu.
- Select your printer from the list on the left-hand side of the menu. If you have multiple printers connected, choose the one you want to set preferences for.
- Click on the “Options & Supplies” button located beneath the printer list. This will open additional settings for your selected printer.
- In the Options & Supplies window, navigate to the “Driver” tab. Here, you will find various settings related to your printer’s default preferences.
- Customize the default settings to your preference. This may include options such as paper size, print quality, double-sided printing, and more. Make sure to save the changes.
By setting up your default print preferences, you can save time and avoid manually adjusting settings each time you print a document. However, do keep in mind that specific applications may have their own print settings that override the default preferences. In such cases, you will need to adjust the settings within the application itself.
Now that you have set up your default print preferences, it’s time to select a document to print on your MacBook Pro.
Selecting a Document to Print
Once you have your printer connected, software installed, and default print preferences set up, it’s time to select a document that you want to print on your MacBook Pro. The process for selecting a document may vary slightly depending on the application you are using, but the general steps are as follows:
- Open the document you want to print in the appropriate application. This could be a word processing document, a spreadsheet, a PDF, an image file, or any other compatible file format.
- Click on the “File” menu in the application’s menu bar located at the top of the screen.
- From the drop-down menu, select the “Print” option. Alternatively, you may find a printer icon or a “Print” button within the application’s toolbar.
- The print dialogue box will appear, displaying various print settings and options.
- Review the print settings to ensure they match your desired preferences, such as paper size, orientation, number of copies, and print range.
- Make any necessary adjustments to the print settings according to your requirements.
- Once you are satisfied with the settings, click on the “Print” button to send the document to your printer.
Depending on the size of the document and the settings you’ve chosen, the printing process may take a few moments. Keep in mind that you can monitor the print progress from either the printer’s display (if available) or the print queue on your MacBook Pro.
Now that you know how to select a document to print, let’s move on and explore how to adjust print settings to further customize your printing experience.
Adjusting Print Settings
When printing a document on your MacBook Pro, you have the option to adjust various print settings to meet your specific needs. Whether you want to change the paper type, print in color or black and white, or adjust the print quality, here’s how you can adjust print settings:
- Open the document you want to print in the application of your choice and follow the steps mentioned earlier to access the print dialogue box.
- Within the print dialogue box, you’ll find several options and settings that you can modify to adjust the print settings.
- Common print settings include the paper size, orientation (portrait or landscape), number of copies, and print range (such as printing specific pages or a range of pages).
- In addition to these basic settings, you may have access to advanced settings such as print quality, color options, paper type, and more. These settings can vary depending on the printer model and the application you are using to print.
- Take the time to review and adjust the print settings according to your preferences. You may need to expand certain sections or click on additional options to access specific settings.
- Once you’ve made all the necessary adjustments, click on the “Print” button to initiate the printing process.
By adjusting the print settings, you can optimize your printing output and ensure that the document is printed exactly as you need it. The flexibility to customize the print settings allows you to conserve resources, enhance the visual quality, and tailor the printing experience to suit your individual requirements.
Before you hit the print button, it’s advisable to preview the print to catch any potential errors or formatting issues. Let’s explore how you can preview the print before it goes to the printer.
Previewing the Print
Previewing the print allows you to see how the document will look before sending it to the printer. This step is particularly useful in ensuring that there are no errors or formatting issues that may affect the print quality. Follow these steps to preview the print on your MacBook Pro:
- Open the document in the application you are using to print.
- Access the print dialogue box by clicking on the “File” menu and selecting the “Print” option, or by using the appropriate toolbar button.
- Within the print dialogue box, look for a button or option that says “Preview” or “Print Preview.” Click on this option.
- A preview window will appear, showing you how the document will appear when printed. You can scroll through the pages, zoom in or out, and navigate to different sections of the document.
- Take your time to carefully review the document in the preview window. Pay attention to any formatting issues, missing text or images, or any other anomalies that may affect the print quality.
- If you notice any problems, go back to the application and make the necessary adjustments to the document or print settings.
- Once you are satisfied with the preview and confident that the document is ready to be printed, close the preview window and click on the “Print” button in the print dialogue box to initiate the printing process.
Previewing the print allows you to catch any potential issues before they waste paper and resources. It gives you the opportunity to make any last-minute adjustments and ensures that the final printout meets your expectations.
Now that you’ve previewed the print and are ready to proceed, let’s move on to the final step: actually printing the document from your MacBook Pro.
Printing the Document
Printing the document from your MacBook Pro is the final step in the printing process. After previewing the print and ensuring that everything looks good, follow these steps to print the document:
- Make sure your printer is turned on and connected to your MacBook Pro.
- Open the document you want to print in the application of your choice.
- Access the print dialogue box by clicking on the “File” menu and selecting the “Print” option, or by using the appropriate toolbar button.
- Review the print settings one last time to ensure they match your desired preferences.
- Click on the “Print” button within the print dialogue box to start the printing process.
- Depending on the size of the document, the printer model, and the print settings, it may take a few moments for the printing process to complete. You can monitor the print progress either through the printer’s display panel (if available) or the print queue on your MacBook Pro.
- Once the document has finished printing, retrieve the printed output from the printer’s output tray.
It’s important to note that if you encounter any issues during the printing process, such as paper jams or poor print quality, refer to the troubleshooting section of your printer’s manual or consult the manufacturer’s support resources for assistance.
Now that you have successfully printed your document, it’s time to wrap up this guide. However, before we conclude, let’s briefly explore a few common printing issues and how to troubleshoot them.
Troubleshooting Common Printing Issues
Printing can sometimes be accompanied by various issues that may disrupt the printing process or result in undesired output. Here are a few common printing issues you may encounter and some troubleshooting steps to resolve them:
- Paper Jams: If you experience a paper jam, first turn off the printer and carefully remove the jammed paper. Check for any torn pieces of paper or obstructions. Once cleared, reload the paper properly and try printing again.
- Poor Print Quality: If your prints appear faded, streaked, or blurry, check the print settings to ensure the appropriate print quality is selected. Additionally, make sure you are using the correct type and size of paper for the document. If the issue persists, consider cleaning the printer heads or replacing the ink or toner cartridges.
- Printer Offline: If your printer is listed as “Offline” in the Printers & Scanners settings, try restarting both your MacBook Pro and the printer. Verify the printer’s connectivity and ensure it is properly connected to your laptop. You may also need to reinstall the printer drivers.
- Print Spooler Errors: If you encounter print spooler errors or a delay in the printing process, restart the print spooler service on your MacBook Pro. To do this, open the “Terminal” application and enter the command “sudo launchctl stop org.cups.cupsd” to stop the print spooler, then enter “sudo launchctl start org.cups.cupsd” to restart it.
- Missing Fonts or Formatting: If your printed document is missing certain fonts or shows incorrect formatting, ensure that the fonts used in the document are installed on your MacBook Pro. You may also need to check the print settings to ensure they are set to preserve the document’s original formatting.
If you encounter any other specific printing issues, it’s recommended to consult the printer’s user manual or visit the manufacturer’s support website for further troubleshooting guidance. They may have specific instructions tailored to your printer model or any known issues and solutions.
Now that you’re armed with troubleshooting knowledge, you’re ready to tackle any printing issues that may arise. Remember to refer back to this guide or seek assistance whenever needed.
Conclusion
Printing on your MacBook Pro can be a seamless and efficient process once you understand the necessary steps. From connecting your printer to troubleshooting common issues, we have covered the essential aspects of printing on your MacBook Pro.
We began by explaining the importance of connecting your printer to your MacBook Pro and checking its compatibility with macOS. Then, we walked you through the process of installing the necessary printer software and setting up default print preferences to enhance your printing experience.
We also provided guidance on selecting a document to print, adjusting print settings, and previewing the print to ensure desired output. Finally, we discussed troubleshooting common printing issues that you may encounter along the way.
Remember, while these instructions are tailored for macOS and MacBook Pro, the foundational concepts apply to printing on other platforms as well. Always refer to your specific printer’s manual and consult the manufacturer’s support resources for detailed troubleshooting or model-specific instructions.
With the knowledge gained from this guide, you are well-equipped to print documents efficiently and proficiently on your MacBook Pro. Whether you need to print important documents for work, school assignments, or personal projects, you can maximize the capabilities of your printer and enjoy hassle-free printing.
So, go ahead and embark on your printing journey with confidence, knowing that you have the know-how to make the most of your MacBook Pro’s printing capabilities!