Introduction
Welcome to this guide on how to download DocuSign documents. DocuSign is a widely-used electronic signature platform that allows you to send, sign, and manage documents digitally. It provides a convenient and secure way to handle important documents without the need for printing, scanning, or mailing.
Downloading your DocuSign documents is a simple process that allows you to access and store your files locally on your device. Whether you need to save a copy for your records or share it with others, downloading the documents is essential. In this guide, we will take you through the step-by-step process of downloading your DocuSign documents.
Before we delve into the steps, it’s important to note that you will need an active DocuSign account to perform the following actions. If you don’t already have an account, you can sign up for one on the DocuSign website.
Now that we have the prerequisites out of the way, let’s get started with the guide on how to download DocuSign documents.
Step 1: Log in to your DocuSign account
The first step to downloading your DocuSign documents is to log in to your DocuSign account. Follow these guidelines to access your account:
- Open your preferred web browser and go to the DocuSign website (www.docusign.com).
- Click on the “Log in” button located in the top-right corner of the homepage.
- Enter your email address and password associated with your DocuSign account.
- Click on the “Log in” or “Sign in” button to proceed.
If you have successfully entered the correct login credentials, you will be redirected to your DocuSign account’s dashboard.
It’s worth noting that if you have enabled two-factor authentication for your account, you may need to provide additional verification, such as a code sent to your mobile device or email, to complete the login process. This adds an extra layer of security to your account.
Make sure you have a stable internet connection and a supported web browser to ensure a smooth login experience. Commonly used browsers, such as Google Chrome, Mozilla Firefox, and Microsoft Edge, are generally compatible with DocuSign.
Once you have successfully logged in to your DocuSign account, you’re ready to proceed to the next step: accessing your documents.
Step 2: Access your Documents
After logging in to your DocuSign account, the next step is to access the documents that you want to download. Follow these steps to locate your documents:
- From your DocuSign account dashboard, navigate to the “Documents” tab. This tab is typically located at the top of the page or in the main navigation menu.
- Once you’re on the Documents page, you will find a list of all the documents associated with your account.
- Depending on your account settings and the number of documents you have, you may need to apply filters, such as document status, date range, or document name, to quickly locate the specific document(s) you want to download.
- Once you have found the desired document, click on its name or thumbnail to open it.
When you open a document, you will be able to view its contents, including any signatures, fields, or annotations that may be present. This allows you to review the document before downloading it.
If you’re having trouble finding a specific document, you can use the search bar located at the top of the Documents page. Simply enter keywords related to the document, such as the document sender’s name, recipient’s name, or document title, and click the search button.
Additionally, DocuSign provides advanced search options that allow you to refine your search criteria based on various parameters, such as the document sender, recipient, date range, or document tags. Familiarize yourself with these search features to make it easier to access and download your desired documents.
Now that you have successfully accessed your documents, it’s time to move on to the next step: selecting the document you want to download.
Step 3: Select the Document to Download
Once you have accessed your documents in your DocuSign account, the next step is to select the specific document that you want to download. Follow these steps to choose the document:
- Review the list of documents displayed on the screen and identify the one you wish to download.
- Click on the document’s name or thumbnail to open it in the DocuSign viewer.
- Within the document viewer, you will have the option to navigate through the pages and review the document’s contents.
- If you have multiple documents open, ensure that you have selected the correct one for download.
Take your time to verify the document’s content and ensure it is the one you intend to download. This is particularly important if you have several documents within your account or if you’re working on multiple projects simultaneously.
During the document selection process, pay attention to any document-specific details or instructions that may be provided, such as signing deadlines, special instructions, or any specific actions required from you. This will help you stay organized and ensure you download and handle the correct document.
By following these steps, you’ll be able to select the specific document you want to download. With the document now chosen, we can move on to the next step: downloading the document.
Step 4: Download the Document
Now that you have selected the document you wish to download from your DocuSign account, it’s time to proceed with the download. Follow these steps to download the document:
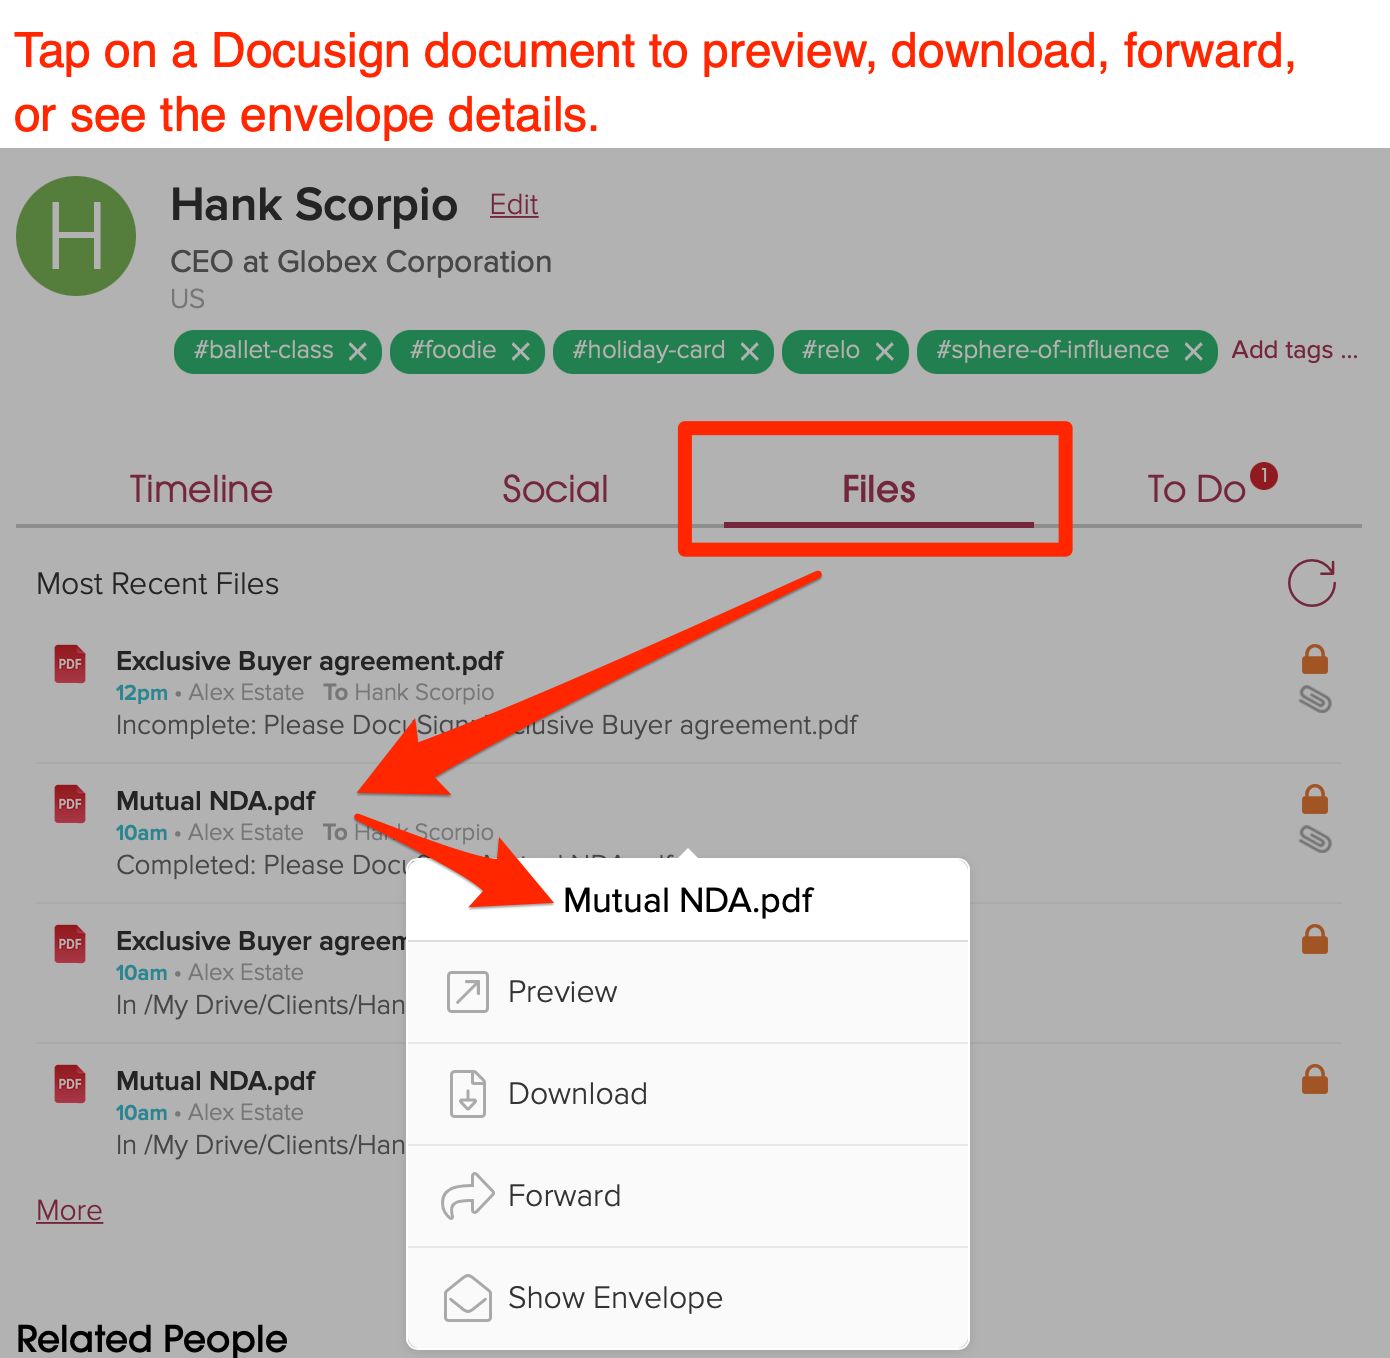
- In the DocuSign viewer, locate the download button or option. This button is typically represented by an icon that resembles a downward arrow or a cloud with an arrow pointing down.
- Click on the download button to initiate the downloading process. This may prompt a dialog box or menu to appear, allowing you to choose the format or file type in which you want to download the document.
- Depending on your preferences or requirements, select the desired file format for the download. Common download options include PDF, Word, Excel, or other compatible formats.
- After selecting the file format, choose a destination folder or location on your computer where you want to save the downloaded document.
- Once you have chosen the destination, click the “Download” or “Save” button to begin the download process.
- Wait for the download to complete. This may take a few moments, depending on the size of the document and the speed of your internet connection.
Once the download is complete, you will have a local copy of the document saved on your computer or device. At this point, you can access and view the downloaded document using the appropriate software or application for the file format you selected.
Ensure that you save the document in a secure and easily accessible location on your computer for future reference or sharing purposes.
Congratulations! You have successfully downloaded the document from your DocuSign account. Now, you can proceed to the final step: saving the document locally.
Step 5: Saving the Document Locally
After successfully downloading the document from your DocuSign account, the final step is to save the document locally on your device. Follow these steps to save the document:
- Navigate to the destination folder or location where you saved the downloaded document.
- Once you have located the document, you can rename the file if desired. Right-click on the file and select the “Rename” option, then enter the new desired name for the document.
- Choose a suitable file location on your device to save the document. If necessary, create a new folder or directory to keep your downloaded DocuSign documents organized.
- With the document renamed and the desired file location selected, click “Save” to finalize the process.
By saving the document locally on your device, you ensure that you have a copy readily available for future access, reference, or sharing purposes. Having the document saved on your device allows you to work offline and access it without requiring an internet connection or logging into your DocuSign account.
It is good practice to regularly back up your downloaded DocuSign documents to an external storage device or cloud storage service to prevent any potential loss of data. This provides an added layer of security and peace of mind knowing that your documents are safely stored and protected.
Congratulations! You have successfully saved the downloaded DocuSign document locally on your device. You can now access, review, and manage the document as needed without relying on your DocuSign account.
Conclusion
Downloading your DocuSign documents is a straightforward process that allows you to access and save your important files locally on your device. By following the steps outlined in this guide, you can effortlessly download and save your documents for future reference, sharing, or offline access.
Remember, before you can download your DocuSign documents, you need to log in to your DocuSign account using your login credentials. Once logged in, you can access your documents from the “Documents” tab and select the specific document you wish to download.
After selecting the document, you can initiate the download process by clicking on the download button and choosing the desired file format. Make sure to select a suitable location to save the downloaded document on your device. Finally, save the document locally, and you’re all set!
By having a local copy of your DocuSign documents, you can conveniently work offline, access files without an internet connection, and keep a backup of your important documents on your device.
Thank you for following this step-by-step guide on how to download DocuSign documents. We hope it has been informative and helpful in enabling you to effectively manage and store your digital documents.