Introduction
Welcome to this comprehensive guide on how to download and install apps to an SD card on the Galaxy S5. The Galaxy S5, a popular Android smartphone, offers the convenience of expandable storage through the use of an SD card. By utilizing the SD card, you can significantly increase the available storage space and free up internal storage for other data.
Downloading apps to the SD card can be particularly useful for users who frequently download and use a large number of apps or have limited internal storage space on their device. By storing apps on the SD card, you can avoid running out of storage and experiencing a sluggish performance.
While some devices automatically install apps to the SD card, the Galaxy S5 requires manual configuration to enable this feature. Fortunately, the process is relatively straightforward and can be done in a few simple steps.
In this guide, we will walk you through the necessary steps to check if your device supports SD card installation, prepare your SD card, set your SD card as the default storage location, download apps to the SD card, and move installed apps to the SD card. Additionally, we will provide troubleshooting tips to help you overcome any challenges you may encounter along the way.
Whether you’re a new Galaxy S5 owner looking to optimize storage or a seasoned user wanting to better manage your apps, this guide has got you covered. So, let’s dive in and learn how to download and install apps to the SD card on your Galaxy S5!
Why Download Apps to SD Card?
There are several compelling reasons why you might want to download and install apps directly to your SD card on the Galaxy S5. Let’s explore some of the key benefits:
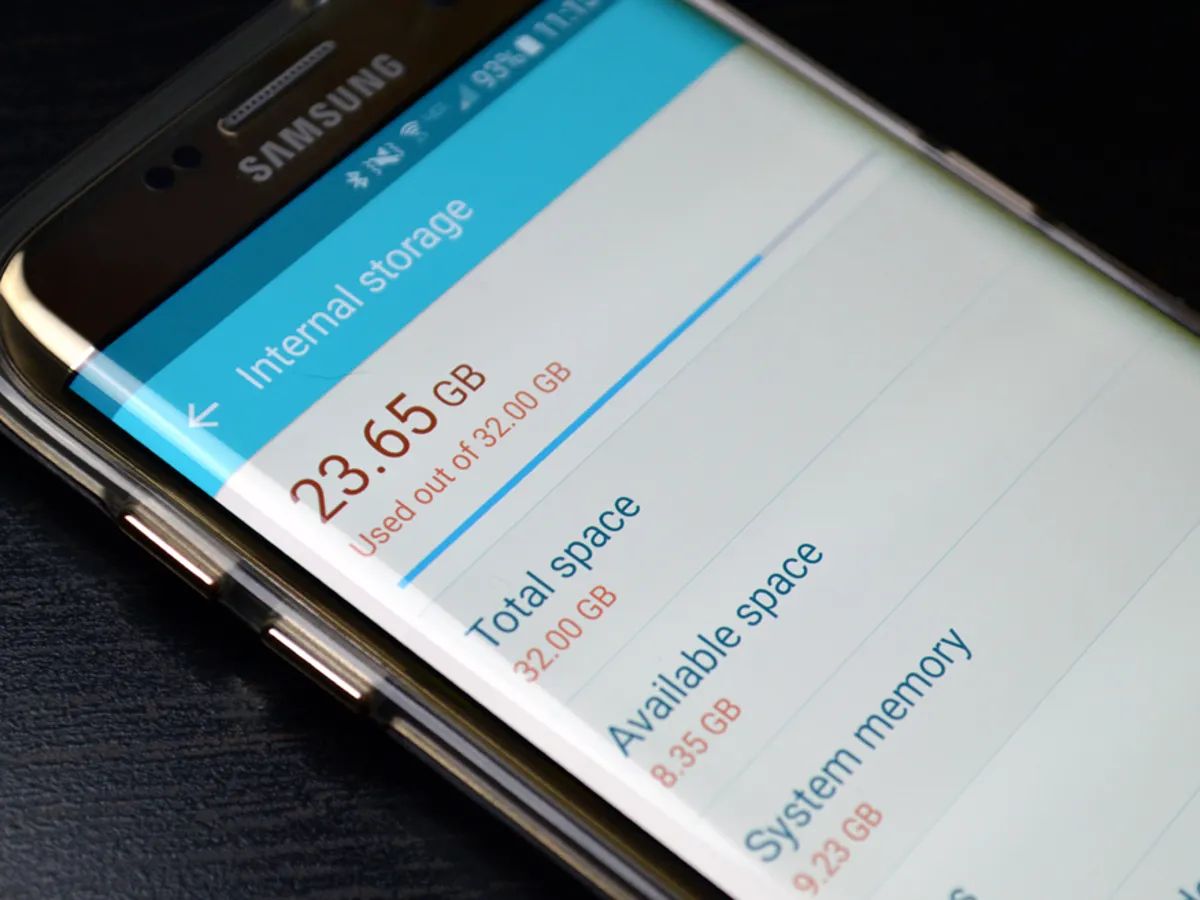
- Increased Storage Space: One primary advantage of utilizing the SD card for app installations is the ability to significantly expand your device’s storage capacity. By transferring apps to the SD card, you can free up precious internal storage, allowing you to download more apps, capture more photos and videos, and store additional files and documents without running out of space.
- Improved Performance: As you install more apps and accumulate data on your device, the internal storage can become overcrowded, resulting in sluggish performance. By moving apps to the SD card, you can alleviate the burden on your device’s internal storage and enjoy a smoother and more responsive user experience.
- Easier App Management: With apps stored on the SD card, you have greater flexibility in managing your applications. You can easily uninstall or update apps without worrying about precious internal storage space. Additionally, if you switch devices or perform a factory reset, the apps saved on the SD card can be transferred to the new device, ensuring a seamless transition.
- Customization Options: Some users prefer organizing their apps in specific folders or locations on their SD card. By downloading apps directly to the SD card, you have more control over how your apps are stored and arranged, giving you a personalized organizational system that suits your preferences.
- Compatibility with Different Models: The ability to download apps to the SD card is especially valuable if you plan to upgrade to a new Galaxy device in the future. Many newer models continue to support expandable storage through SD cards, so you can easily transfer your apps and data to the new device without losing any valuable information or having to start from scratch.
By understanding the advantages of downloading apps to the SD card, you can make the most of your Galaxy S5’s storage capabilities and enjoy a seamless and efficient user experience. Now that we’ve explored the benefits, let’s move on to the step-by-step process of downloading apps to your SD card.
Step 1: Check if Your Device Supports SD Card Installation
Before proceeding with the installation of apps to your SD card, it’s important to ensure that your Galaxy S5 supports this feature. While most models do support SD card installations, there may be variations among different carriers or regional editions. Here’s how you can check if your device supports SD card installation:
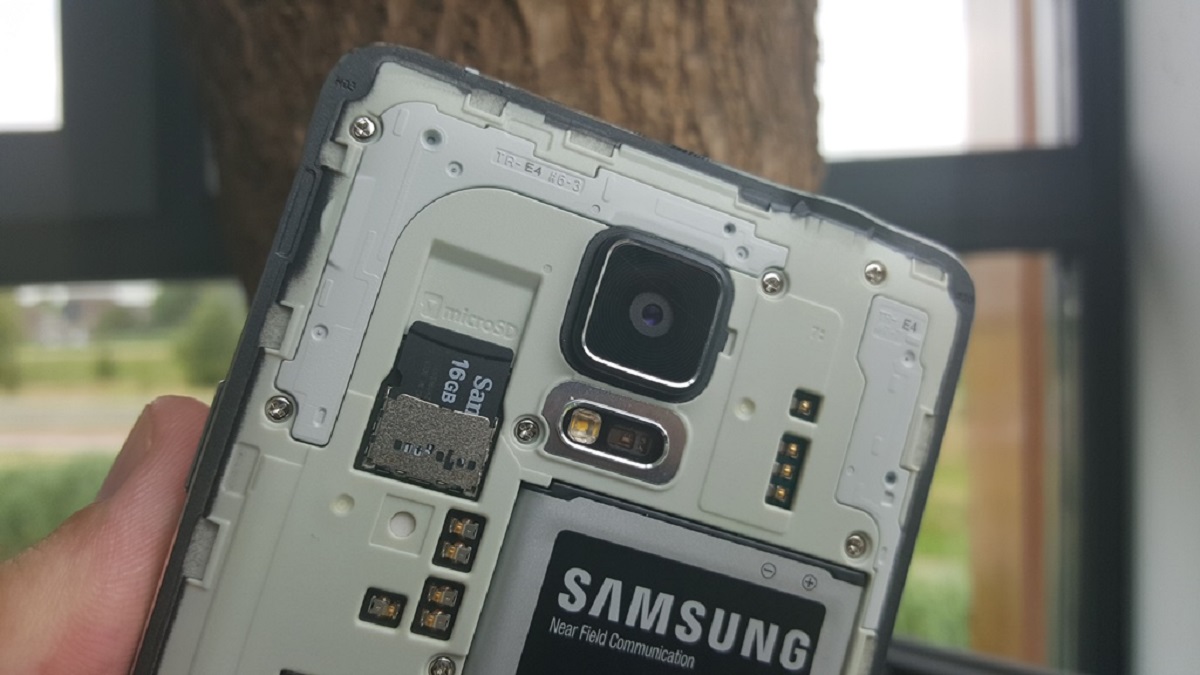
- Power on your Galaxy S5 and locate the SD card slot. On the Galaxy S5, the SD card slot is typically found behind the back cover, near the battery.
- Gently remove the back cover of your device by applying pressure on the designated area and sliding it off.
- Once the back cover is removed, you should see the battery and the SD card slot.
- Using your fingernail or a small tool, carefully remove the SD card tray from the slot.
- Look for any existing SD card in the tray. If there is no card present, it indicates that your device does not currently have an SD card installed. In this case, you can proceed to purchase a compatible SD card to expand your storage capacity.
- If there is an SD card present in the tray, you can proceed to the next step to verify that your device is configured to install apps on the SD card.
If your Galaxy S5 does not have an SD card slot or the option to install apps on the SD card is not available, it means that your device does not support this feature. In such cases, you may need to consider alternative methods of managing app storage, such as uninstalling unused apps or transferring data to cloud storage solutions.
Now that you’ve determined whether your device supports SD card installation, you can move on to the next step of preparing your SD card for app installations.
Step 2: Prepare Your SD Card
After confirming that your Galaxy S5 supports SD card installation, the next step is to prepare your SD card for app installations. Here’s what you need to do:
- Make sure your SD card is compatible with your Galaxy S5. The Galaxy S5 typically supports microSD cards up to a certain capacity, such as 128GB or 256GB. Check the user manual or the manufacturer’s specifications to ensure compatibility.
- If you already have an SD card inserted into your device, ensure that it is formatted correctly. Formatting the SD card will erase all existing data, so be sure to back up any important files or data before proceeding.
- To format the SD card, go to “Settings” on your Galaxy S5.
- Scroll down and tap on “Storage & USB.”
- Under the “Portable Storage” section, you should see your SD card listed. Tap on it.
- Tap on the three-dot menu icon in the top-right corner and select “Format as portable.”
- Follow the prompts to confirm the formatting process. This may take a few moments.
- Once the formatting is complete, your SD card will be ready to use for app installations.
- If you do not have an SD card inserted into your device, you will need to purchase one. Ensure that you choose a reliable and reputable brand to ensure compatibility and performance.
- Insert the SD card into the SD card slot on your Galaxy S5, making sure it is securely inserted into the tray.
- Replace the back cover of your device by aligning it with the edges and pressing it gently until it snaps into place.
By preparing your SD card correctly, you can ensure that it is ready to store and install apps on your Galaxy S5. Once your SD card is prepared, you can proceed to the next step of setting your SD card as the default storage location for app installations.
Step 3: Set Your SD Card as the Default Storage Location
Now that you have prepared your SD card, the next step is to set it as the default storage location for app installations on your Galaxy S5. By doing so, any apps you download or install will automatically be stored on the SD card. Here’s how you can set your SD card as the default storage location:
- On your Galaxy S5, go to “Settings”.
- Scroll down and tap on “Apps.”
- Tap on the three-dot menu icon in the top-right corner and select “Settings.”
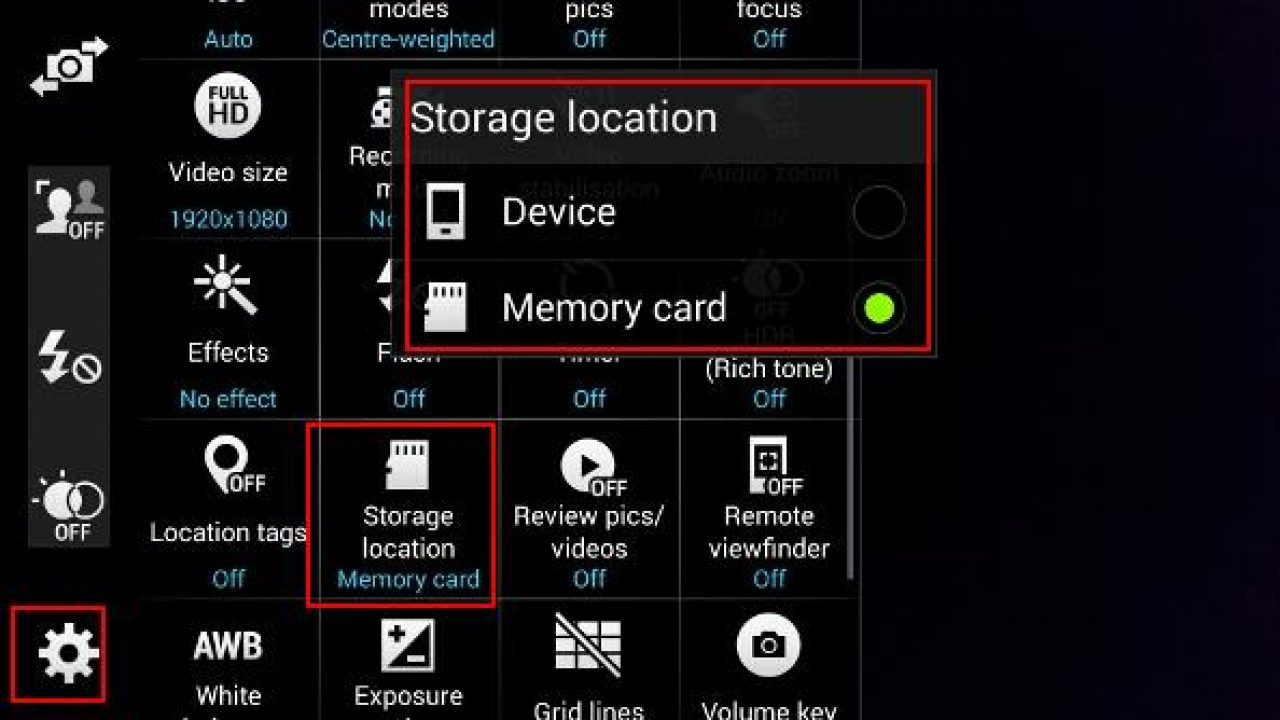
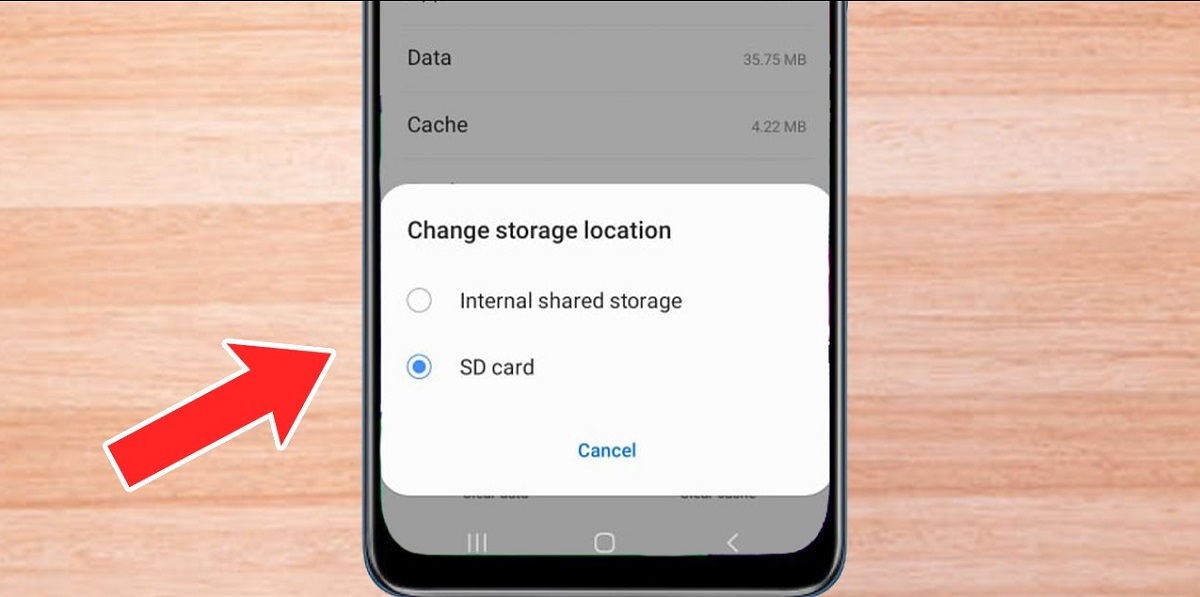
- Look for an option called “Default storage location” or “Install location.”
- Select the “SD card” option. This will ensure that any new apps you download or install will be stored on the SD card by default.
- If you do not see an option to set the default storage location, it may be because your device’s operating system does not support this feature. In such cases, you can still manually move installed apps to the SD card in the next step.
Once you have set your SD card as the default storage location, any new apps you download or install will be automatically stored on the card. This helps to optimize your device’s internal storage and ensures that you have more space for other data.
It’s important to note that some apps may not be eligible to be moved to the SD card due to system restrictions or app-specific settings. In such cases, you may need to manually move the installed apps to the SD card in the next step.
Now that you have configured your device to use the SD card as the default storage location, let’s move on to the next step of downloading and installing apps directly to your SD card.
Step 4: Download Apps to SD Card
Now that you have set your SD card as the default storage location, you can proceed to download and install apps directly onto your SD card. Here’s how:
- Open the Google Play Store on your Galaxy S5.
- Search for the app you want to download and install. You can either browse through the categories or use the search bar at the top to find specific apps.
- Once you have found the app you want, tap on it to open its page.
- On the app’s page, you will see an “Install” button. Tap on it to start the download and installation process.
- During the installation process, you may be prompted to grant certain permissions to the app. Read through the permissions and tap “Accept” to proceed.
- By default, the app will be downloaded and installed onto your SD card. You can monitor the progress in the notification bar at the top.
- Once the installation is complete, you can find the app on your app drawer or home screen, ready to be used.
- Repeat the same process for any other apps you want to download and install onto your SD card.
It’s important to note that not all apps or games can be downloaded and installed directly onto the SD card. Some apps have restrictions or limitations that prevent them from being moved to external storage. In such cases, the apps will be automatically installed on your device’s internal storage, even if you have set the SD card as the default storage location.
If you encounter any apps that are not eligible to be installed on the SD card, you can still manually move them to the SD card in the next step.
With this step, you have successfully downloaded and installed apps onto your SD card. Now let’s move on to the next step of moving already installed apps to the SD card.
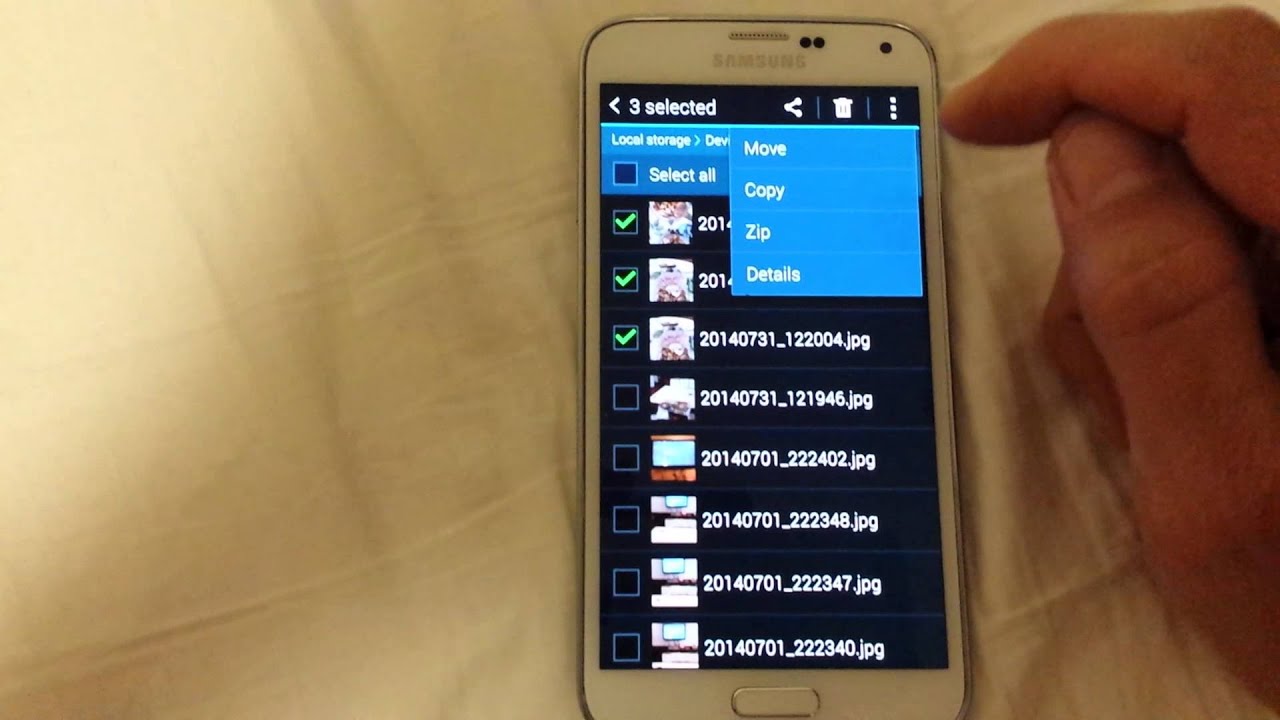
Step 5: Move Installed Apps to SD Card
If you have apps already installed on your Galaxy S5’s internal storage, you can easily move them to the SD card to free up space and optimize storage. Here’s how to move installed apps to the SD card:
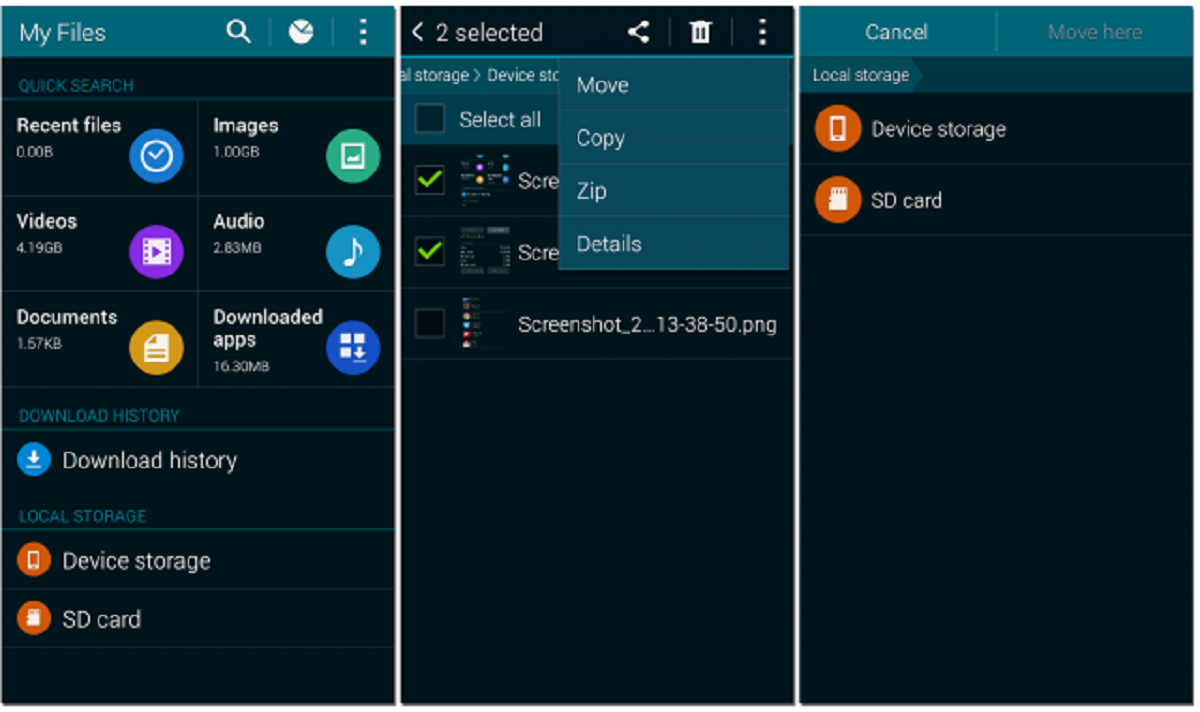
- Open the Settings app on your Galaxy S5.
- Scroll down and tap on “Apps”.
- Find the app that you want to move to the SD card and tap on it.
- On the app’s info page, you will see an option called “Storage”. Tap on it.
- You will now see two options: “Change” and “Clear data”. Tap on “Change”.
- A pop-up window will appear, asking you to confirm if you want to move the app to the SD card. Tap on “Move” to proceed.
- The app will now be moved to the SD card. The process may take a few moments, depending on the size of the app and the speed of your SD card.
- Repeat the same process for any other apps that you want to move to the SD card.
It’s important to note that not all apps can be moved to the SD card. Some apps, particularly system apps or certain apps with specific restrictions, are not eligible to be moved. In such cases, the “Change” option will be grayed out, indicating that the app cannot be moved to the SD card.
By moving installed apps to the SD card, you can free up internal storage space, ensuring a smoother and more efficient performance for your Galaxy S5.
Now that you’ve learned how to move apps to the SD card, let’s move on to the next and final step, which includes some troubleshooting tips to help you overcome any challenges you may encounter.
Step 6: Troubleshooting Tips
While downloading and installing apps to the SD card on your Galaxy S5 is generally a straightforward process, you may encounter some challenges along the way. Here are some troubleshooting tips to help you overcome common difficulties:
- App Compatibility: Not all apps can be moved to the SD card. If you encounter an app that cannot be moved, check if there is an updated version available that supports SD card installation.
- Insufficient SD Card Space: If your SD card is running out of space, you may not be able to download or install new apps. Consider deleting unnecessary files or moving less frequently used apps back to the device’s internal storage.
- App Performance: While moving apps to the SD card can free up internal storage, it may impact app performance, particularly for apps with high resource usage. If you notice any lag or issues with specific apps, consider moving them back to the device’s internal storage.
- App Updates: When apps are updated, they may be moved back to the device’s internal storage. Keep an eye on app updates and check their storage location to ensure they remain on the SD card if desired.
- SD Card Errors: If you encounter any errors or issues with your SD card, such as corruption or mounting problems, try formatting the card and reinserting it into your device. Alternatively, you may want to try using a different SD card to see if the issue persists.
- App Permissions: Some apps may require specific permissions that are not available when installed on the SD card. If you experience issues with app functionality or features, try moving the app back to the device’s internal storage and checking if the problem persists.
If you continue to experience difficulties or have specific questions related to your Galaxy S5’s app storage, it may be helpful to refer to the device’s user manual or reach out to the manufacturer’s support team for further assistance.
With these troubleshooting tips in mind, you should be able to overcome most common challenges encountered when downloading, installing, and managing apps on the SD card of your Galaxy S5.
Congratulations! You have successfully learned how to download, install, and manage apps on the SD card of your Galaxy S5. By utilizing this feature, you can optimize your device’s storage, improve performance, and enhance your overall user experience.
Conclusion
In this comprehensive guide, we’ve walked you through the steps to download and install apps directly to the SD card on your Galaxy S5. By utilizing the SD card as a storage option, you can significantly increase your device’s storage capacity, optimize performance, and have greater control over app management. Here’s a quick recap of the steps covered:
- Check if your device supports SD card installation.
- Prepare your SD card by ensuring compatibility and formatting it correctly.
- Set your SD card as the default storage location for app installations.
- Download and install apps directly to your SD card.
- Move already installed apps to the SD card to free up internal storage space.
- Troubleshoot any challenges you may encounter along the way.
By following these steps, you can make the most of your Galaxy S5’s expandable storage feature and enjoy a seamless and efficient user experience. Remember that not all apps can be moved to the SD card, and certain factors such as app compatibility and SD card space limitations may come into play. It’s essential to monitor your device’s storage and make necessary adjustments as needed.
If you have any questions or need further assistance, consult the user manual of your Galaxy S5 or reach out to the manufacturer’s support team for guidance. They can provide additional information specific to your device and offer solutions to any issues you may encounter.
With your newfound knowledge of downloading and installing apps to the SD card on your Galaxy S5, you can now enjoy the benefits of expanded storage space, improved performance, and easier app management. Make the most of your device’s capabilities and enjoy the convenience of having your favorite apps readily available while freeing up internal storage for other important data.