Introduction
The Samsung Galaxy S5 is a powerful and feature-packed smartphone that offers a wide variety of applications and functionality. However, with continuous usage, your device’s storage can quickly fill up, leading to reduced performance and limited space for new apps, photos, and files. Clearing space on your Samsung Galaxy S5 is essential to optimize its performance and ensure that you have sufficient storage for your needs.
In this article, we will explore various methods to clear space on your Samsung Galaxy S5. We will discuss steps such as clearing app cache, deleting unnecessary apps, moving apps to the SD card, clearing the downloads folder, removing unused files and folders, transferring data to your computer or cloud storage, clearing cached data, disabling bloatware, removing unused widgets and live wallpapers, clearing browser cache and history, clearing call logs and messages, deleting old photos and videos, uninstalling unused updates, closing unused apps, and even performing a factory reset if necessary.
By following these techniques, you can reclaim valuable storage space on your Samsung Galaxy S5, improve its performance, and have the flexibility to download new apps, capture more photos, and store essential files without any limitations. Let’s explore these methods in detail to help you clear space on your Samsung Galaxy S5.
Clearing App Cache
One of the first steps you can take to clear space on your Samsung Galaxy S5 is to clear the cache of individual apps. When you use an app, it stores temporary data in its cache to improve performance. However, over time, this cache can accumulate, taking up valuable storage space. Clearing app cache not only frees up space but can also resolve app-related issues and improve overall performance.
To clear the app cache on your Samsung Galaxy S5, follow these steps:
- Open the Settings app on your device.
- Scroll down and tap on the “Apps” or “Applications” option.
- Here, you will see a list of all the apps installed on your device. Tap on the app you want to clear the cache for.
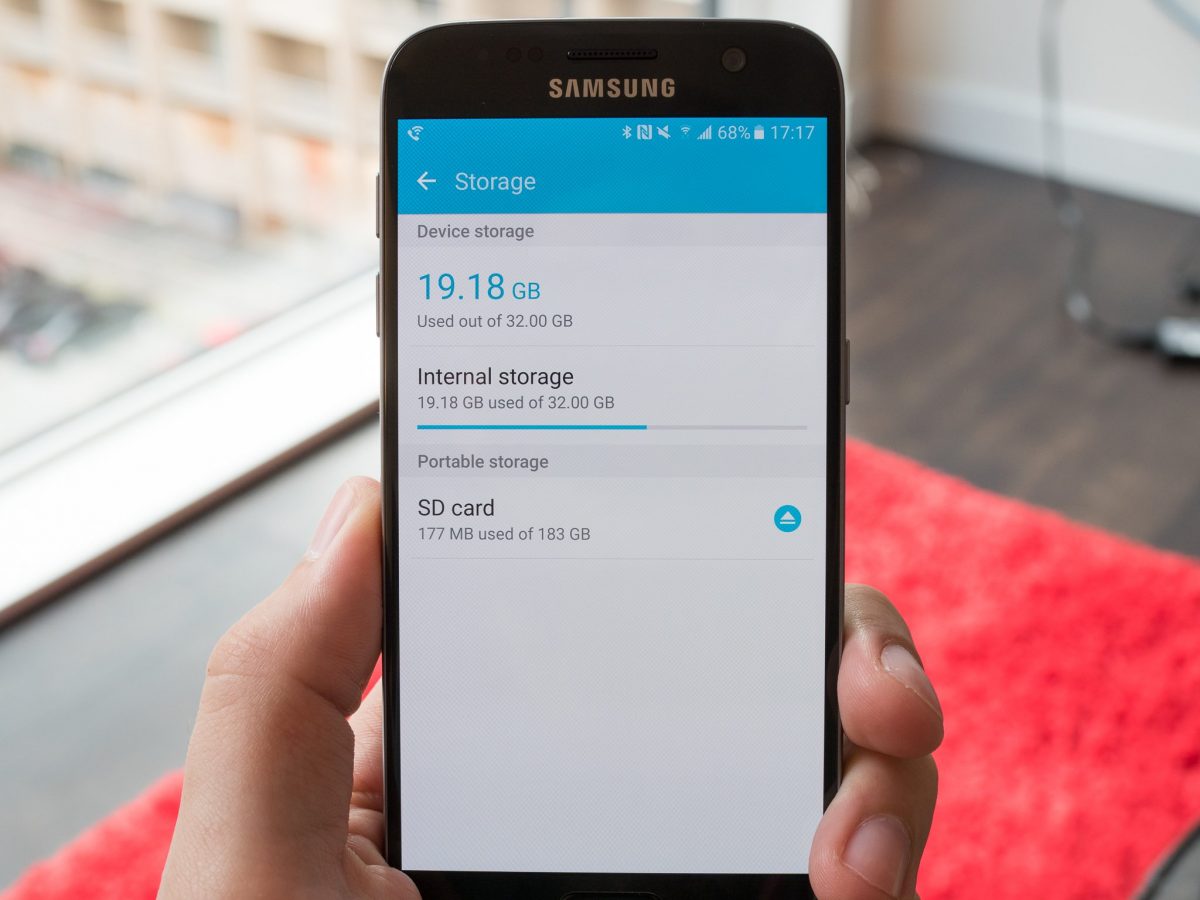
- On the app’s info page, tap on the “Storage” option.
- You will now see the option to “Clear Cache.” Tap on it to clear the cache for the selected app.
Repeat these steps for each app you want to clear the cache for. You can also choose to clear the cache for all apps by tapping on the “Cached Data” option in the “Storage” menu. However, be cautious when clearing the cache for system apps or apps that you are not familiar with, as it may affect the app’s functionality or data.
Clearing app cache is a simple and effective way to free up space on your Samsung Galaxy S5. It is recommended to periodically clear the cache for frequently used apps or apps that take up a significant amount of storage. By doing so, you can optimize the performance of your device and ensure a smooth user experience.
Deleting Unnecessary Apps
One of the easiest ways to clear space on your Samsung Galaxy S5 is by deleting unnecessary apps. Over time, we tend to accumulate numerous apps on our smartphones that we no longer use or need. These unused apps not only take up valuable storage but can also impact the device’s performance. By identifying and removing these unnecessary apps, you can free up significant storage space and improve the overall functionality of your Samsung Galaxy S5.
To delete unnecessary apps from your Samsung Galaxy S5, follow these steps:
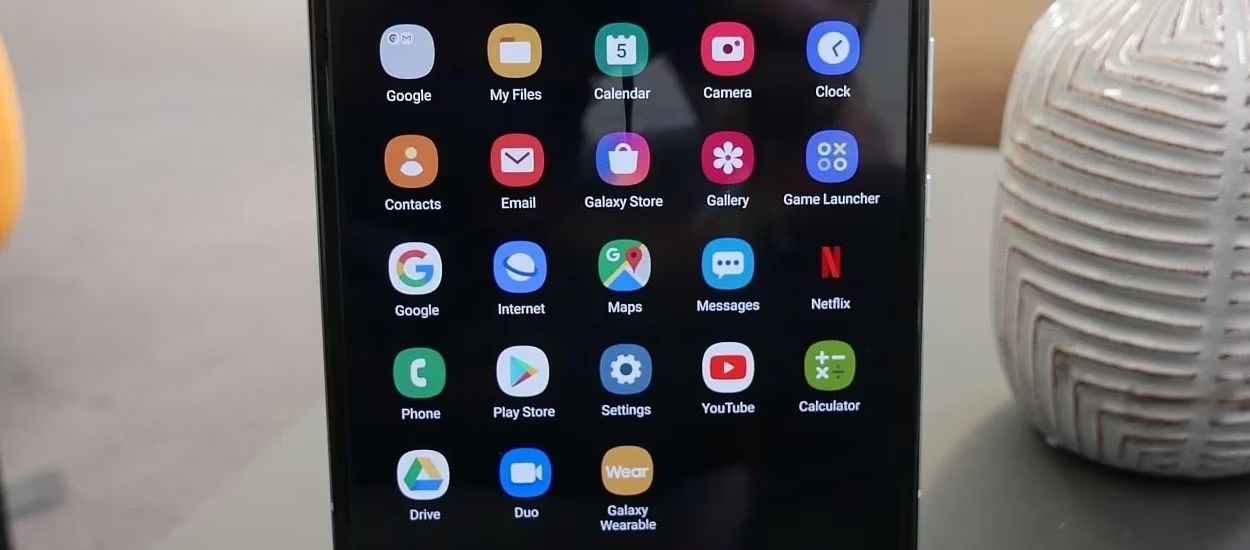
- From the home screen, navigate to the app drawer.
- Locate the app you want to delete.
- Press and hold on the app icon until a menu appears.
- Select the “Uninstall” or “Remove” option from the menu.
- Confirm the deletion by tapping “OK” or “Uninstall” in the pop-up dialog box.
Repeat these steps for all the unnecessary apps you want to delete from your device. It’s essential to be cautious when uninstalling apps, as some pre-installed apps may be necessary for the proper functioning of your Samsung Galaxy S5. If you are unsure about an app, it’s advisable to research its purpose or seek assistance from reliable sources before removing it.
Additionally, you can also consider disabling built-in system apps that you don’t use. Although you cannot fully delete these apps, disabling them can free up storage space and prevent them from running in the background. To disable built-in apps, go to the “Apps” section in the device settings, locate the app, and select the “Disable” option.
By deleting unnecessary apps and disabling unused system apps, you can reclaim significant storage space on your Samsung Galaxy S5 and enjoy a clutter-free and optimized device experience.
Moving Apps to SD Card
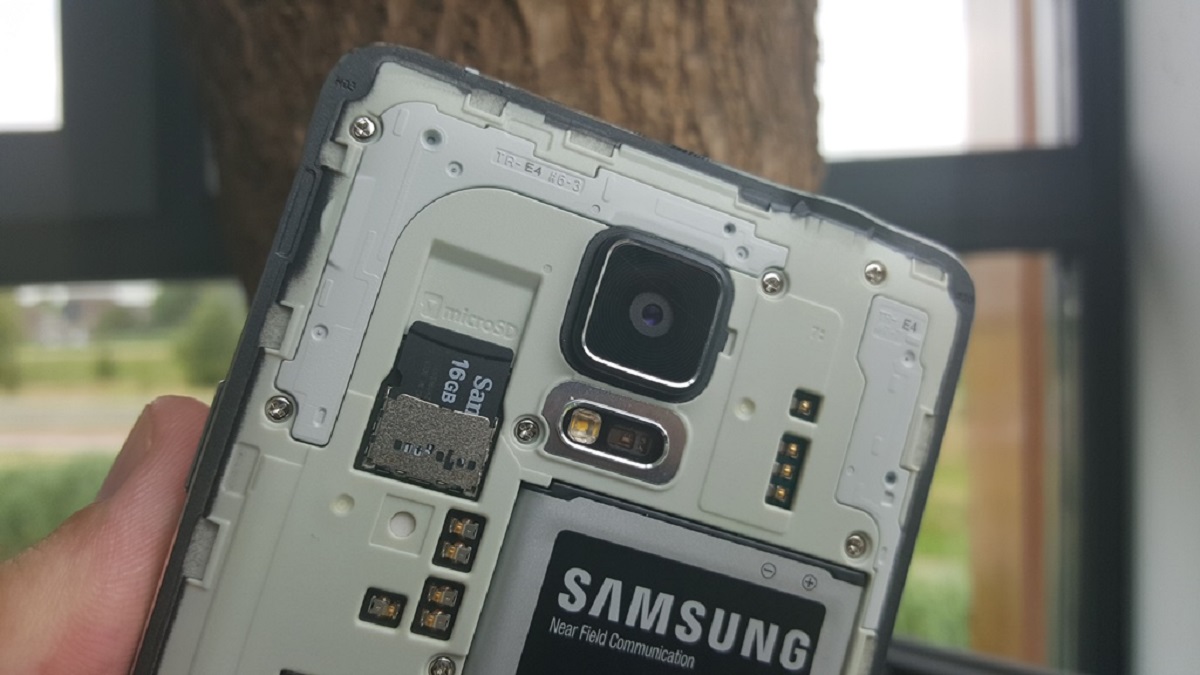
The Samsung Galaxy S5 allows you to expand its storage capacity by using an external SD card. By moving apps from the device’s internal storage to the SD card, you can free up space and ensure smoother device performance. However, not all apps can be moved to the SD card, as certain apps require specific permissions or functionality that can only be supported by the device’s internal storage. Nevertheless, moving compatible apps to the SD card can still provide significant space savings.
To move apps to the SD card on your Samsung Galaxy S5, follow these steps:
- Open the Settings app on your device.
- Scroll down and tap on the “Apps” or “Applications” option.
- Select the app you want to move to the SD card.
- On the app’s info page, tap on the “Storage” option.
- Look for the “Change” or “Move to SD card” option and tap on it (if available).
- Wait for the app to be moved to the SD card. This may take a few moments, depending on the size of the app.
Please note that the process may vary slightly depending on your device’s software version and interface. If you do not see the option to move an app to the SD card, it may not be supported for that specific app.
It’s important to keep in mind that some apps will still occupy a portion of the device’s internal storage, even after being moved to the SD card. This is because certain app data, such as cache or necessary files, must reside in the internal storage. Nonetheless, moving apps to the SD card can still provide significant space savings for your Samsung Galaxy S5.
Remember to periodically check and manage the apps stored on your SD card, as some may require updates or may no longer be in use. By regularly organizing and managing your apps, you can optimize the storage efficiency of your Samsung Galaxy S5 and ensure that you have ample space for the apps and data you need.
Clearing Downloads Folder
The Downloads folder on your Samsung Galaxy S5 is where all the files you download from the internet are stored. Over time, this folder can accumulate a significant amount of files, including documents, images, videos, and more. Clearing the Downloads folder is a simple and effective method to reclaim storage space on your device and ensure that you only keep the files you need.
To clear the Downloads folder on your Samsung Galaxy S5, follow these steps:
- Open the “My Files” app on your device (sometimes labeled as “File Manager”).
- Navigate to the “Downloads” folder. Typically, this can be found in the “Internal storage” or “SD card” section, depending on where your downloads are saved.
- Once inside the Downloads folder, you will see a list of downloaded files. Tap and hold on a file to select it.
- After selecting the first file, you can continue selecting more files that you want to delete by tapping on them.
- Once you have selected all the files you want to delete, tap on the trash bin or delete icon to remove them.
- Confirm the deletion by tapping “OK” or “Delete” in the pop-up dialog box.
Repeat these steps for all the files you want to remove from the Downloads folder. It’s recommended to review the files before deleting them to ensure you don’t accidentally delete any important documents or media.
Additionally, you can set your device to automatically clear the Downloads folder after a certain period. To enable this feature, open the “Settings” app, select “Storage,” and find the option to automatically clear the Downloads folder. By doing so, you can ensure that unnecessary files are regularly removed from your device, freeing up valuable storage space without any manual effort.
Clearing the Downloads folder should be done regularly to prevent the accumulation of unnecessary files and optimize the storage capacity of your Samsung Galaxy S5. By keeping the Downloads folder organized and free of unneeded files, you can ensure that you have enough space for new downloads and improve the overall performance of your device.
Removing Unused Files and Folders
Over time, our Samsung Galaxy S5 can become cluttered with unused files and folders, taking up valuable storage space. These files can include old documents, images, videos, music, and more. Removing these unused files and folders not only frees up storage space but also helps in organizing your device. By keeping only the files you need and removing unnecessary ones, you can optimize both your device’s performance and storage capacity.
To remove unused files and folders from your Samsung Galaxy S5, follow these steps:
- Open the “My Files” app on your device (sometimes labeled as “File Manager”).
- Navigate to the location where the files or folders are stored. This can be your internal storage or external SD card.
- Browse through the files and folders and identify the ones you no longer need or use.
- Once you have identified the files or folders, tap and hold on a file or folder to select it.
- Continue selecting more files or folders by tapping on them.
- After selecting all the files or folders you want to remove, tap on the delete icon or trash bin to delete them.
- Confirm the deletion by tapping “OK” or “Delete” in the pop-up dialog box.
Exercise caution when deleting files or folders, as once deleted, they cannot be recovered unless you have a backup. It is recommended to review the files and folders thoroughly to ensure you do not accidentally delete any important data.
Deleting unused files and folders is not only about freeing up storage space but also about organizing your device. Consider creating separate folders for different types of files or organizing them logically to make it easier to find what you need in the future. By maintaining a clean and organized file structure, you can efficiently manage your Samsung Galaxy S5’s storage space and improve your overall device experience.
Transferring Data to Computer or Cloud
Transferring data from your Samsung Galaxy S5 to a computer or cloud storage is an excellent way to clear space on your device while ensuring that your important files and data are safely backed up. By offloading files such as photos, videos, documents, and music to an external storage solution, you can free up significant storage space and have access to your data from multiple devices. There are several methods you can use to transfer data from your Samsung Galaxy S5 to a computer or cloud storage platform.
One method is to connect your Samsung Galaxy S5 to your computer using a USB cable. After connecting, you can access your device’s storage from your computer and transfer files manually. Simply open your file explorer on your computer, locate your device under the “Devices” or “My Computer” section, and browse through the folders to locate the files you want to transfer. From there, you can copy and paste the files to your computer’s storage or an external hard drive. Alternatively, you can also use specialized software like Samsung Smart Switch to transfer files between your device and computer wirelessly.
Another method is to utilize cloud storage platforms such as Google Drive, Dropbox, or Microsoft OneDrive. These platforms allow you to upload your files to the cloud and access them from any device with an internet connection. Simply install the respective app on your Samsung Galaxy S5, sign in to your account, and upload the files you want to transfer. Once uploaded, you can access these files from your computer or any other device with the corresponding app installed. Additionally, cloud storage platforms often provide automatic backup features, further safeguarding your data.
When transferring data to a computer or cloud storage, it’s important to be selective and transfer only the files you need. Review your files and delete any duplicates or unnecessary documents to optimize the storage space. Additionally, consider organizing your files into folders or categories for easier management and access.
By transferring data from your Samsung Galaxy S5 to a computer or cloud storage platform, you can free up storage space on your device while ensuring the safety and accessibility of your important files. Regularly transferring and managing your data is a proactive approach to maintain an organized and optimized device experience.
Clearing Cached Data
Cached data is temporary data stored by apps and websites on your Samsung Galaxy S5 to help them load faster in the future. While cached data can improve performance, it can also accumulate over time and take up valuable storage space. Clearing cached data not only frees up storage but can also resolve issues related to app performance and data corruption. It is a simple and effective way to optimize your device’s performance.
To clear cached data on your Samsung Galaxy S5, follow these steps:
- Open the Settings app on your device.
- Scroll down and tap on the “Device Care” or “Storage” option.
- In the Device Care or Storage menu, tap on the “Storage” or “Clean Now” option.
- Your device will start analyzing the storage and suggest areas to clean. Tap on the “Cached Data” option.
- A pop-up message will appear asking you to confirm the deletion of cached data. Tap on “OK” to proceed.
- Your device will then clear the cached data, which may take a few moments.
Additionally, some apps also provide an option within their settings to clear cached data. You can go to the app settings, search for the “Storage” or “Cache” option, and choose to clear the cache for that specific app. This can be useful if you want to target specific apps that consume a significant amount of storage space.
Clearing the cached data regularly is recommended to maintain optimal performance on your Samsung Galaxy S5. However, keep in mind that clearing cached data will remove temporary files and may require apps or websites to reload their content, which might cause a slight delay the next time you use them.
By periodically clearing cached data, you can not only reclaim precious storage space on your Samsung Galaxy S5 but also ensure that your apps and websites are functioning efficiently.
Disabling Bloatware
Bloatware refers to pre-installed apps on your Samsung Galaxy S5 that are often unnecessary and occupy valuable storage space. These apps are typically included by manufacturers or carriers and may not be relevant or useful to all users. Disabling bloatware allows you to remove these unwanted apps from your device, freeing up storage space and potentially improving overall performance.
To disable bloatware on your Samsung Galaxy S5, follow these steps:
- Open the Settings app on your device.
- Scroll down and tap on the “Apps” or “Applications” option.
- Here, you will see a list of all the apps installed on your device.
- Scroll through the list and identify the bloatware apps that you want to disable.
- Tap on the app you wish to disable.
- On the app’s info page, you will find the option to “Disable” the app.
- Tap on the “Disable” button and confirm your choice if prompted.
By disabling bloatware, you are essentially preventing these apps from running in the background and taking up unnecessary system resources. While the disabled apps will still exist on your device, they will no longer be able to use storage or drain battery power.
It’s important to note that not all pre-installed apps can be disabled, as some may be essential for your device’s normal functioning. Be cautious when disabling apps and ensure that you understand their purpose before proceeding.
Disabling bloatware can have several benefits aside from freeing up storage space. It can help streamline your device’s interface by removing unwanted app icons and enhance overall performance by reducing background processes. Additionally, disabling bloatware can improve battery life, as these apps no longer consume system resources.
Remember to periodically review your device’s apps and disable any bloatware that you have identified. By doing so, you can optimize the storage and performance of your Samsung Galaxy S5, ensuring that it runs smoothly and efficiently without unnecessary clutter.
Removing Unused Widgets and Live Wallpapers
Widgets and live wallpapers on your Samsung Galaxy S5 can enhance the visual appeal and functionality of your device’s home screen. However, having too many unused widgets or live wallpapers can not only clutter the home screen but also consume valuable system resources and battery power. Removing unused widgets and live wallpapers is a simple and effective way to free up space, optimize performance, and create a more streamlined user experience.
To remove unused widgets and live wallpapers from your Samsung Galaxy S5, follow these steps:
- Press and hold on an empty area of your home screen.
- A menu or options bar will appear at the bottom of the screen.
- Tap on the “Widgets” or “Wallpapers” option.
- Browse through the available widgets or live wallpapers and locate the ones that you no longer use or want to remove.
- Press and hold on the widget or live wallpaper you wish to remove.
- Drag the widget or live wallpaper to the “Remove” or “Trash” icon that appears on the screen.
- Release your finger to remove the widget or live wallpaper from your home screen.
Repeat these steps for all the unused widgets and live wallpapers you want to remove. By removing these unused items, you can not only declutter your home screen but also reduce the load on your device’s resources, resulting in improved performance and a smoother user experience.
Additionally, it’s a good practice to regularly reassess the widgets you have on your home screen and consider if they are still necessary. Removing unnecessary widgets can help streamline your home screen and create a more organized and efficient layout.
If you have specific widgets or live wallpapers that you frequently use, consider keeping them and removing the rest to further optimize your device. Remember that you can always add widgets or live wallpapers back later if needed.
By removing unused widgets and live wallpapers, you can declutter your Samsung Galaxy S5’s home screen, reduce resource consumption, improve battery life, and enjoy a cleaner and more efficient device experience.
Clearing Browser Cache and History
When browsing the internet on your Samsung Galaxy S5, your web browser stores temporary data, including website images, cookies, and browsing history. While this data is useful for faster loading of websites and easier navigation, it can accumulate over time and occupy a significant amount of storage space. Clearing your browser cache and history is a simple and effective way to free up space, maintain privacy, and ensure optimal browsing performance.
To clear the browser cache and history on your Samsung Galaxy S5, follow these steps based on the default Samsung Internet browser:
- Open the Samsung Internet browser app on your device.
- Tap on the three-dot menu icon in the top-right corner of the screen.
- From the drop-down menu, select “Settings.”
- Scroll down and tap on the “Privacy” or “Privacy and security” option.
- Within the privacy settings, select “Delete browsing data.”
- You will see a list of options for clearing data. Choose the items you want to delete, such as cache, browsing history, cookies, and saved passwords.
- Tap on the “Delete” or “Clear data” button to remove the selected items.
The steps may vary slightly depending on the version of the Samsung Internet browser you are using. However, the general process of clearing cache and history should be similar.
It’s important to note that clearing browser cache and history will log you out of websites and remove any saved login information. If you want to retain specific login information or browsing data, it’s advisable to take note of it or use a password manager before clearing the cache and history.
Regularly clearing your browser cache and history can provide several benefits. It helps free up storage space, ensures your browsing activity remains private, and can improve the performance of your Samsung Galaxy S5’s web browser. Additionally, clearing browser cache and history can prevent potential issues with website loading and browsing.
By taking a few moments to clear your browser cache and history, you can maintain a clean and optimized browsing experience on your Samsung Galaxy S5.
Clearing Call Logs and Messages
Over time, call logs and messaging history on your Samsung Galaxy S5 can accumulate, occupying storage space and potentially compromising your privacy. Clearing call logs and messages not only helps optimize storage but also allows you to maintain a clean and organized communication history. By selectively clearing these logs and messages, you can free up space and ensure a more efficient and private messaging experience.
To clear call logs on your Samsung Galaxy S5, follow these steps:
- Open the Phone app on your device.
- Tap on the “Recents” or “Call Log” tab at the bottom of the screen.
- You will see a list of recent incoming, outgoing, and missed calls.
- Tap and hold on a call log entry to select it.
- To select additional entries, tap on each one individually.
- Once you have selected all the call logs you want to remove, tap on the delete icon or trash bin.
- Confirm the deletion by tapping “OK” or “Delete” in the pop-up dialog box.
To clear messages on your Samsung Galaxy S5, follow these steps:
- Open the Messaging app on your device.
- Tap on the “Messages” or “Conversations” tab.
- You will see a list of conversations or message threads.
- Tap and hold on a conversation to select it.
- Tap on additional conversations to select multiple threads.
- Once you have selected all the conversations you want to remove, tap on the delete icon or trash bin.
- Confirm the deletion by tapping “OK” or “Delete” in the pop-up dialog box.
By selectively clearing call logs and messages, you can maintain a more organized and clutter-free communication history on your Samsung Galaxy S5. It’s important to review these logs and messages carefully before deletion to ensure that you don’t accidentally remove any important information or conversations.
Regularly clearing call logs and messages not only helps optimize storage space but also protects your privacy by minimizing the amount of personal data stored on your device. Moreover, it can help improve the overall performance of your messaging and call-related features.
Exercise caution when clearing call logs and messages, and make sure to back up any important information before proceeding. By periodically clearing call logs and messages, you can maintain a cleaner and more organized communication experience on your Samsung Galaxy S5.
Deleting Old Photos and Videos
One of the most effective ways to free up storage space on your Samsung Galaxy S5 is by deleting old photos and videos that are no longer needed. As these media files tend to take up a significant amount of storage, removing unnecessary ones can provide immediate storage savings and improve overall device performance. Deleting old photos and videos not only optimizes your device’s storage capacity but also allows you to organize and manage your media collection more efficiently.
To delete old photos and videos from your Samsung Galaxy S5, follow these steps:
- Open the Gallery app on your device.
- Navigate to the album or folder containing the photos or videos you want to delete.
- Tap and hold on a photo or video to select it.
- Select any additional photos or videos you want to delete.
- Once you have selected all the media files you wish to remove, look for the delete icon, trash bin, or the option to “Delete” or “Remove.”
- Tap on the appropriate option to delete the selected photos and videos.
- Confirm the deletion by tapping “OK” or “Delete” in the pop-up dialog box.
Before you delete any photos or videos, it’s important to review them carefully to ensure that you don’t accidentally remove any precious memories or important files. Consider backing up your media files to a computer or cloud storage before deleting them from your device, so you have a secure copy.
Deleting old photos and videos not only saves storage space but also helps you organize and declutter your media library. Consider sorting your media files into different albums or folders based on themes, dates, or events, making it easier to find specific photos or videos in the future.
By regularly deleting old and unnecessary photos and videos, you can optimize the storage capacity of your Samsung Galaxy S5, ensure efficient device performance, and maintain a well-organized collection of media files.
Uninstalling Unused Updates
Uninstalling unused updates on your Samsung Galaxy S5 is a simple yet effective way to clear up storage space and improve the performance of your device. As apps receive regular updates, older versions of these updates can accumulate on your device, taking up valuable storage space. By removing unused updates, you can reclaim storage and ensure that only the latest and necessary versions of apps are installed on your Samsung Galaxy S5.
To uninstall unused updates on your Samsung Galaxy S5, follow these steps:
- Open the Settings app on your device.
- Scroll down and tap on the “Apps” or “Applications” option.
- Here, you will see a list of all the apps installed on your device.
- Look for the app that you want to uninstall the update for.
- Tap on the app and select the “Uninstall updates” or “Uninstall latest update” option (the wording may vary depending on your device).
- A confirmation message will appear, informing you about the potential impact of uninstalling the update. Tap “OK” to proceed.
- The selected app will revert to the original version that was installed when you first received your device.
Repeat these steps for each app you want to uninstall the unused updates for. It’s important to note that uninstalling updates will not remove the app itself, but only revert it to a previous version. If you encounter any issues with the app after uninstalling the update, you can always reinstall the latest version from the app store.
Uninstalling unused updates not only frees up storage space but also ensures that you have the most up-to-date versions of the apps that you use. By removing unnecessary updates, you can streamline your device’s app installations and improve overall performance.
It’s advisable to periodically review your device’s apps and uninstall unused updates to maximize storage space and keep your Samsung Galaxy S5 running smoothly. By doing so, you can optimize the performance of your device and ensure that you have the latest and most relevant app versions installed.
Closing Unused Apps
Having multiple apps running in the background on your Samsung Galaxy S5 can not only consume system resources but also use up valuable memory and drain your battery. Closing unused apps is a quick and effective way to free up system resources, optimize device performance, and extend battery life. By regularly closing unused apps, you can ensure that your Samsung Galaxy S5 runs smoothly and efficiently.
To close unused apps on your Samsung Galaxy S5, follow these steps:
- Tap the square or recent apps button located at the bottom of your device’s screen.
- You will see a list of recently used apps in a card stack or carousel view.
- Swipe left or right to navigate through the apps.
- To close an app, swipe it up or off the screen. Alternatively, you can tap the “X” or close button located at the top or side of the app card.
- Repeat this process to close any additional unused apps.
It’s important to note that closing unused apps does not uninstall or remove them from your device; it simply stops them from running in the background. When you open the app again, it will resume from where you left off.
Closing unused apps has several benefits. It frees up memory, allowing your device to run more smoothly and respond faster. It also conserves battery life by preventing unnecessary apps from consuming power in the background. Additionally, closing unused apps reduces the clutter in your recent apps view, making it easier to navigate and switch between active applications.
To further optimize your device’s performance and battery life, consider disabling automatic background app refreshing. To do this, go to the Settings app, select “Apps” or “Applications,” tap on the app you want to manage, and disable the “Background data” or “Allow background activity” option.
By regularly closing unused apps and managing app settings, you can maximize the performance, battery life, and efficiency of your Samsung Galaxy S5. It’s a simple habit that can greatly enhance your overall user experience.
Restarting the Device
Restarting your Samsung Galaxy S5 is a simple yet effective solution to resolve various issues and improve overall device performance. By restarting your device, you can clear temporary files, refresh system processes, and free up memory, resulting in a smoother and more responsive user experience. Additionally, restarting the device can help resolve minor software glitches and restore optimal functionality.
To restart your Samsung Galaxy S5, follow these steps:
- Press and hold the power button located on the side or top of your device.
- An options menu will appear on the screen.
- Tap on the “Restart” or “Reboot” option.
- Wait for your device to shut down and restart.
It’s important to note that restarting your device does not delete any personal data or settings. It simply closes all running apps and processes, refreshes system resources, and starts your device with a clean slate.
Restarting your Samsung Galaxy S5 can help in various situations. If you notice slow performance, unresponsive apps, or general system glitches, a restart can often resolve these issues. It can also help fix network connectivity problems, improve battery life, and clear any temporary files or caches that may be affecting device performance.
Restarting your device is a good practice to incorporate into your routine maintenance. It’s recommended to restart your Samsung Galaxy S5 periodically, especially if you have been using it for an extended period or notice a decrease in performance. Restarting your device can help ensure that you are starting with a fresh and optimized system.
In situations where a restart does not resolve the issue or you are experiencing more significant problems, you may want to consider performing a factory reset. However, it’s important to note that a factory reset will erase all data and settings on your device, so be sure to back up any important information before proceeding.
By restarting your Samsung Galaxy S5 regularly, you can maintain optimal performance, clear temporary files, and potentially resolve minor software issues. It’s a simple and effective solution to refresh your device and ensure a smooth and enjoyable user experience.
Factory Reset
A factory reset is a drastic step to take on your Samsung Galaxy S5, as it completely wipes all data and settings from your device, returning it to its original factory state. While a factory reset should be approached with caution, it can be a necessary measure to resolve more complex software issues, eliminate persistent problems, or prepare the device for new ownership. However, it’s important to note that performing a factory reset will delete all personal data, including apps, contacts, settings, and media files, so it’s crucial to back up your data before proceeding.
To perform a factory reset on your Samsung Galaxy S5, follow these steps:
- Open the Settings app on your device.
- Scroll down and tap on the “Backup and Reset” or “General Management” option.
- Select “Factory Data Reset” or “Reset” to begin the process.
- Read the information on the screen to understand the consequences of the factory reset.
- If required, enter your PIN or passcode to authenticate the reset.
- Confirm your decision by tapping on “Reset” or “Erase Everything.”
- Wait for the device to complete the factory reset process. This may take a few minutes.
After the factory reset is complete, your Samsung Galaxy S5 will be in its original state as when you first purchased it. You will need to go through the initial setup process, including signing in to your Google account and reconfiguring your device settings.
Performing a factory reset is a last resort option when troubleshooting or if you are selling or giving away your Samsung Galaxy S5. It can help resolve persistent software issues, remove malware or viruses, and ensure that your personal data is completely erased before handing over the device.
Before performing a factory reset, it is strongly recommended to back up your important data such as contacts, photos, videos, and documents to an external storage device or a cloud service. This will allow you to restore your data once the reset is complete.
Remember, a factory reset is irreversible, and all data will be permanently deleted. It should only be considered after exhausting other troubleshooting methods and ensuring all critical data is backed up. If you are uncertain or need assistance, it’s advisable to contact Samsung support or consult with a professional technician.
By performing a factory reset on your Samsung Galaxy S5, you can start fresh and potentially resolve persistent software issues. However, it is a drastic measure that should be taken with caution and only after careful consideration of the implications.