Introduction
Welcome to the world of Samsung Galaxy S5, a smartphone that offers a plethora of features and functionalities to enhance your mobile experience. Among its many capabilities, the Galaxy S5 comes with the option to expand its storage space using an SD card. Whether you want to store more photos, videos, or music, the SD card can be a convenient and practical solution.
In this article, we will guide you through the process of locating and using the SD card on your Galaxy S5. We’ll explain how to remove the back cover of your phone, insert and remove the SD card, and troubleshoot any issues that may arise.
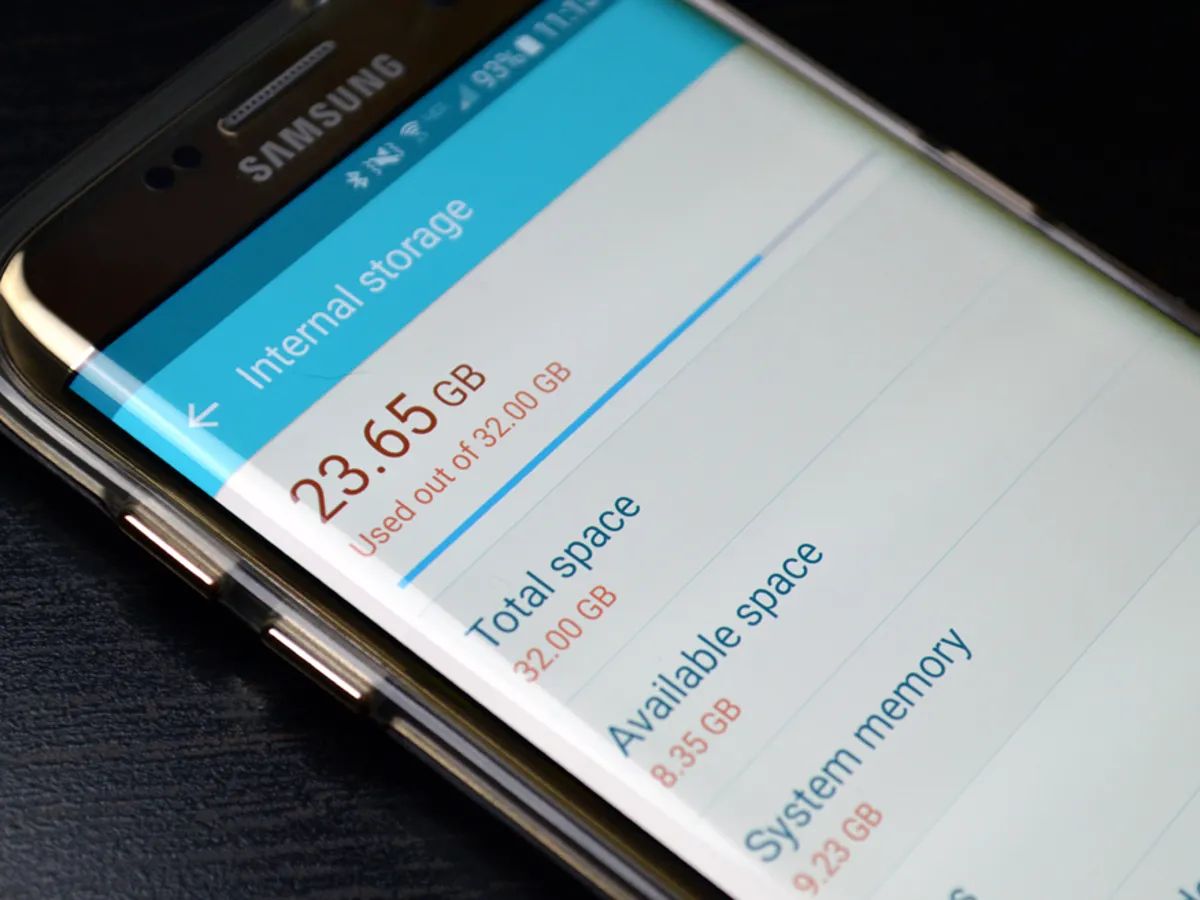
Before we delve into the details, it’s important to note that the Galaxy S5 supports microSD cards up to 128GB in size. You’ll need to purchase a microSD card separately, as it does not come bundled with the phone.
Now, let’s get started and explore the world of expanded storage on your Galaxy S5!
Removing the back cover
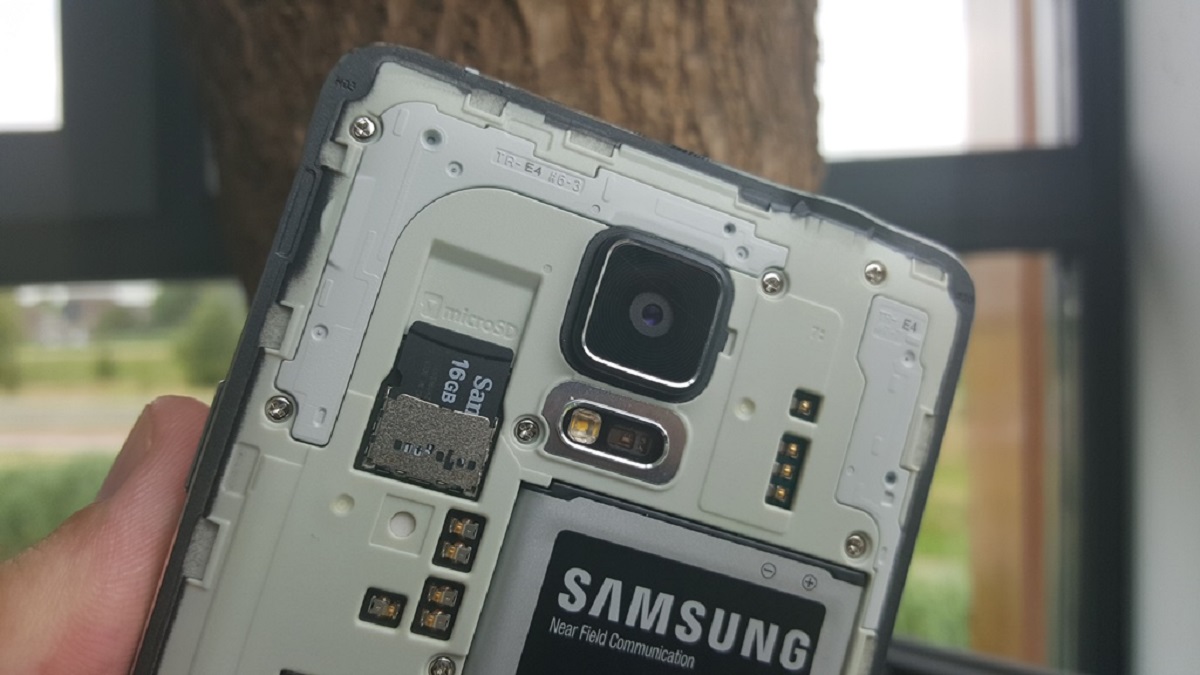
To access the SD card slot on your Galaxy S5, you’ll first need to remove the back cover of the phone. Follow these simple steps to safely remove the back cover:
- Power off your Galaxy S5: Before removing the back cover, ensure that your phone is powered off completely. This will prevent any potential damage or data loss.
- Locate the notch: On the back of your phone, you will find a small notch near the top edge of the device. This is where you will begin removing the back cover.
- Insert your fingernail or a pry tool: Insert your fingernail or a pry tool into the notch and gently lift upward. Apply steady pressure until you feel the back cover start to come loose.
- Work your way around the edges: Once you’ve lifted the back cover slightly, carefully work your way around the edges of the phone. Gently pry and lift the back cover until it is fully detached from the device.
It’s important to note that the back cover is made of a durable plastic material, but it can still be susceptible to damage if excessive force is applied. Take care when removing the back cover to avoid any cracks or breaks.
With the back cover now removed, you have access to the internal components of your Galaxy S5, including the SD card slot. In the next section, we’ll guide you through the process of inserting and removing the SD card.
Inserting and removing the SD card
Now that you have successfully removed the back cover of your Galaxy S5, you can proceed with inserting or removing the SD card. Follow these steps to ensure a smooth and hassle-free process:
- Locate the SD card slot: On the internal side of the back cover, you will find a rectangular slot towards the top-right corner. This is where the SD card will be inserted.
- Prepare the SD card: If you have a new SD card that has not been used before, ensure that it is properly formatted for use with your Galaxy S5. If you are reusing an existing SD card, you can skip this step.
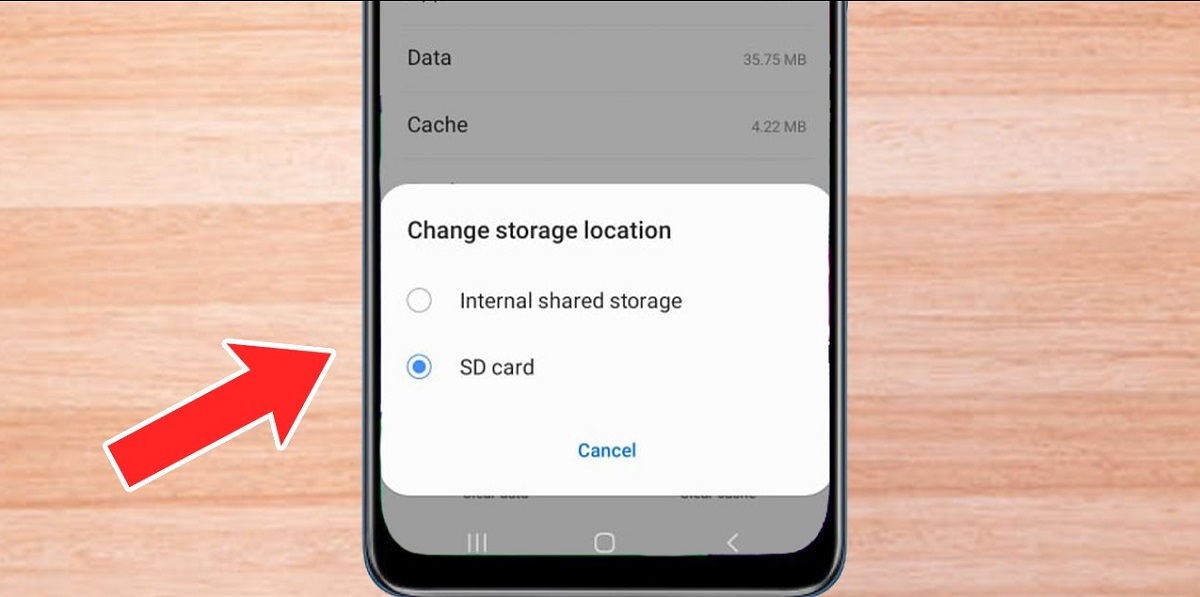
- Insert the SD card: Hold your SD card with the gold contacts facing downwards and the notched edge aligned with the slot on the back cover. Gently place the SD card into the slot, taking care not to force it in or bend the card.
- Secure the SD card: Once the SD card is inserted, press it gently to ensure it is properly seated in the slot. It should fit snugly without any gaps or wobbling.
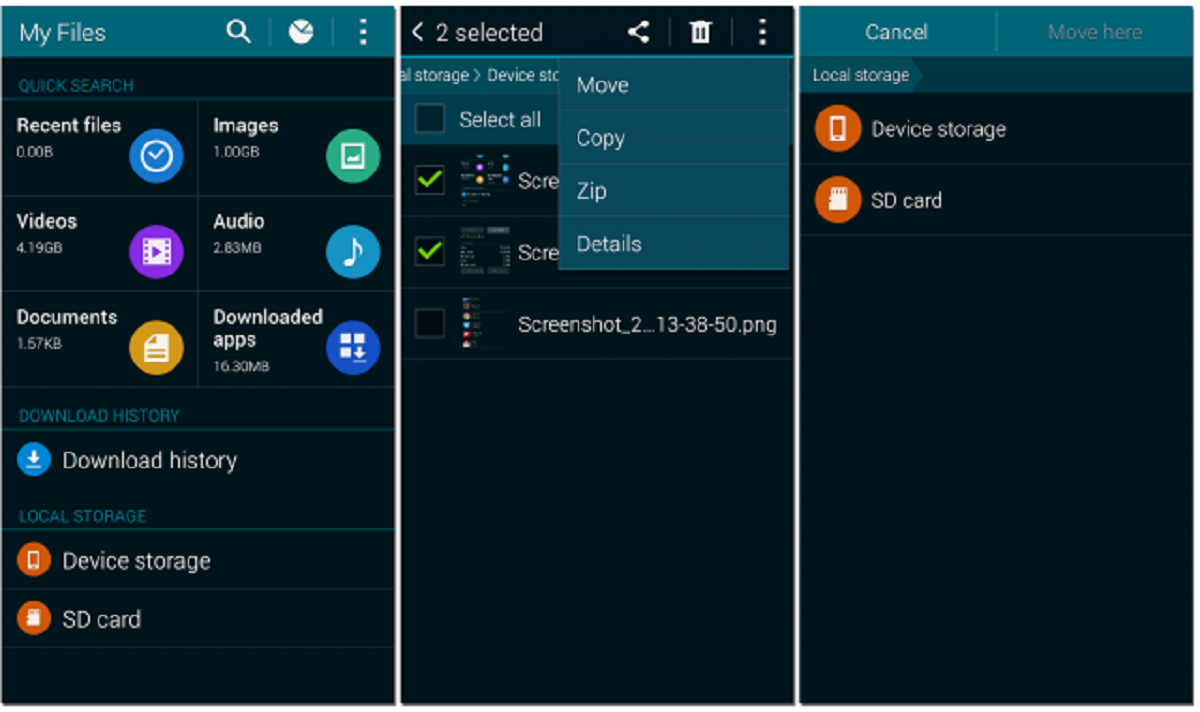
- Removing the SD card: To remove the SD card, gently push it inwards until it clicks. This will release the latch and allow you to withdraw the card. Carefully pull out the SD card using your fingers or a pair of tweezers if necessary.
Remember, it’s important not to remove the SD card while your Galaxy S5 is actively accessing or writing data to it. Doing so may result in data corruption and potential loss of files. Always ensure that your phone is powered off or that there is no ongoing activity before removing the SD card.
Now that you know how to insert and remove the SD card from your Galaxy S5, let’s move on to the next section where we will help you locate the SD card slot on your phone.
Locating the SD card slot
Locating the SD card slot on your Galaxy S5 is essential for easy access and management of your SD card. Follow the steps below to find the SD card slot on your device:
- With the back cover of your Galaxy S5 removed, you’ll notice a rectangular slot towards the top-right corner of the phone’s internal side. This is where the SD card slot is located.
- The SD card slot is labeled with “MicroSD” or “SD Card” markings, indicating its purpose and function.
- Once you have located the SD card slot, you can now insert or remove the SD card as needed, following the steps outlined in the previous section.
It’s important to handle the SD card slot with care, as it is a delicate component of your Galaxy S5. Avoid inserting any foreign objects into the slot to prevent damage or misalignment.
Having properly located the SD card slot and familiarized yourself with its appearance, you can now confidently insert and remove your SD card whenever necessary. The SD card slot allows you to expand the storage capacity of your Galaxy S5 and customize it according to your needs.
In the next section, we’ll address some common troubleshooting issues that you may encounter when using an SD card with your Galaxy S5.
Troubleshooting issues with the SD card
While using an SD card with your Galaxy S5 can provide additional storage and convenience, you may encounter some common issues along the way. Here are a few troubleshooting tips to help you overcome SD card-related problems:
1. SD card not detected: If your Galaxy S5 does not recognize the SD card, start by removing and reinserting the card to ensure it is properly seated in the slot. If the issue persists, try using a different SD card to determine if the problem lies with the card itself. Additionally, ensure that the SD card is formatted correctly and compatible with your device.
2. Slow transfer speeds: If you are experiencing slow transfer speeds when copying files to or from your SD card, consider using a higher-speed SD card that meets the recommended specifications for your Galaxy S5. Additionally, ensure that your device’s software is up to date, as performance improvements and bug fixes may address slow transfer speed issues.
3. Data corruption or errors: If you notice data corruption or encounter errors when accessing files on your SD card, try removing and reinserting the card to refresh the connection. You can also attempt to repair the SD card using your device’s built-in storage management tools or a computer equipped with compatible SD card reader software.
4. Incompatibility issues: Some SD cards may not be fully compatible with the Galaxy S5, leading to compatibility issues or reduced functionality. Before purchasing an SD card, ensure that it is listed as compatible with your device. It’s also worth checking for any firmware updates for your Galaxy S5 that may address compatibility concerns.
5. Physical damage or wear: If your SD card is physically damaged or worn, it may cause issues with your Galaxy S5. Inspect the card for visible signs of damage or wear, such as cracked or bent edges. If you suspect physical damage, consider replacing the SD card with a new one to resolve any associated problems.
By following these troubleshooting steps, you can resolve many common SD card-related issues with your Galaxy S5. However, if the problem persists or if you encounter more complex issues, it is advisable to seek assistance from a technical expert or consult Samsung’s support resources.
Now that we have addressed some troubleshooting tips, let’s explore ways to maximize the storage space on your SD card in the next section.
Tips for maximizing SD card storage space
With the ability to expand the storage capacity of your Galaxy S5 using an SD card, it’s important to optimize and make the most out of the available space. Here are some tips to help you maximize the storage space on your SD card:
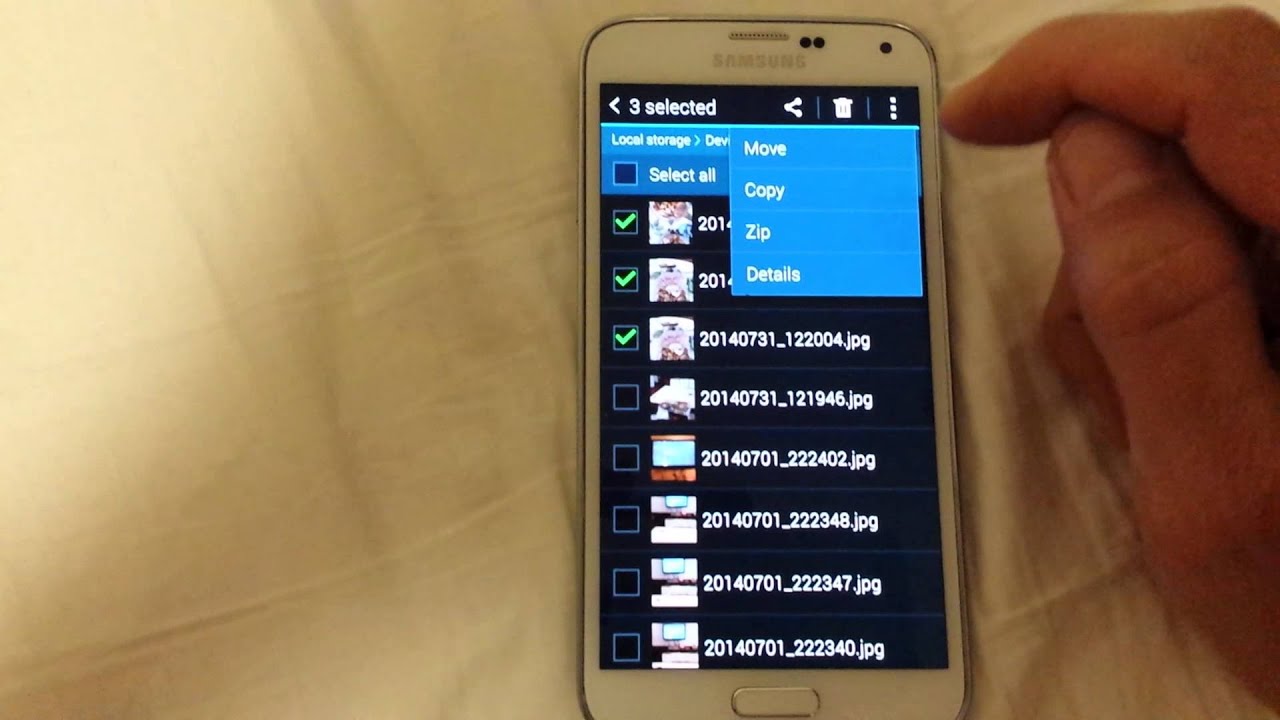
1. Organize files: Keep your files organized in a logical folder structure. Create separate folders for photos, videos, music, and other types of files to easily locate and manage them on your SD card.
2. Delete unnecessary files: Regularly review and delete any unnecessary files or duplicates from your SD card. This will free up valuable space and prevent clutter. Be cautious when deleting files and ensure that you have backups, if needed.
3. Utilize compression: Consider compressing large files, such as videos or documents, to save space on your SD card. Utilize compression software or apps that can reduce file size without significant loss of quality.
4. Move apps to internal storage: While the SD card can be used for storing media files, it is recommended to keep your apps on the internal storage of your Galaxy S5. Moving apps to the SD card may cause slower performance or compatibility issues.
5. Use cloud storage: Make use of cloud storage services to offload files and free up space on your SD card. Services like Google Drive, Dropbox, or Microsoft OneDrive allow you to store files online and access them from your device when needed.
6. Transfer media files: If you have a large collection of media files, such as photos, videos, or music, consider transferring them to a computer or an external hard drive. This will help you free up space on your SD card without losing access to your files.
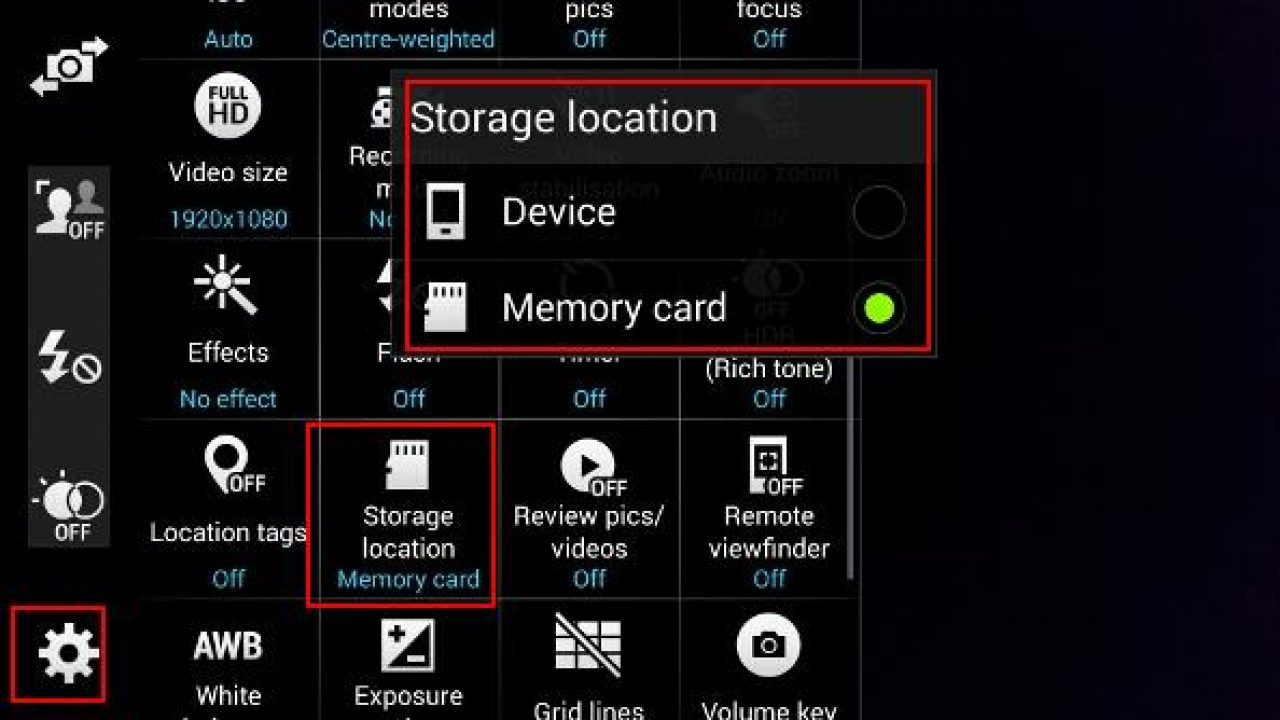
7. Adjust camera settings: Modify your camera settings to control the resolution and quality of photos and videos. Lower resolution or quality settings can help reduce file sizes and save space on your SD card.
By following these tips, you can optimize the storage space on your SD card and ensure that you have ample room for your important files and media. Regularly reviewing and managing your SD card’s content will help you stay organized and make the most out of your device’s expanded storage capabilities.
Now that we have explored ways to maximize storage space, let’s conclude our journey of understanding the SD card usage on the Galaxy S5.
Conclusion
In conclusion, the Galaxy S5 offers the convenience and flexibility of expanding its storage space through the use of an SD card. By following the step-by-step instructions provided in this article, you can easily remove the back cover, locate the SD card slot, and insert or remove the SD card as needed.
We also discussed troubleshooting tips for common SD card-related issues, such as detection problems, slow transfer speeds, data corruption, and incompatibility. It’s important to handle the SD card with care and ensure that it is properly seated in the slot to avoid any complications.
To make the most out of your SD card storage space, we provided valuable tips on organizing files, deleting unnecessary data, utilizing compression, and taking advantage of cloud storage services. By following these best practices, you can ensure that your Galaxy S5 remains optimized for efficient storage usage.
Remember to regularly review and manage your SD card’s content to keep it organized and make room for new files and media. Whether it’s capturing precious memories through photos and videos or enjoying your favorite music on the go, the SD card expands the possibilities of what you can do with your Galaxy S5.
We hope that this guide has been helpful in navigating the world of SD cards on the Galaxy S5 and maximizing your mobile storage experience. Should you encounter any further questions or concerns, consult Samsung’s support resources or reach out to a technical expert for assistance.
Now, go ahead and enjoy the extended storage capacity that your Galaxy S5 offers, unlocking new possibilities for your digital life!