Introduction
Welcome to this guide on how to download apps on Windows! Whether you’re a seasoned Windows user or a newbie to the operating system, this article will walk you through the steps to access the Windows Store and download incredible apps that can enhance your productivity, entertainment, and overall user experience.
The Windows Store is Microsoft’s official marketplace for apps, offering a wide range of applications for various purposes, including productivity tools, games, multimedia content, and more. With just a few clicks, you can find and download apps directly to your Windows device.
Downloading apps from the Windows Store is a convenient and reliable way to enhance the functionality and enjoyment of your Windows device. Whether you’re looking for a new photo editing app, a popular social media platform, or a game to keep you entertained during your free time, the Windows Store has you covered.
In this guide, we’ll walk you through the process of accessing the Windows Store, browsing and searching for apps, downloading and installing them, managing and updating your apps, and troubleshooting any issues that may arise during the download process. By the end of this article, you’ll be equipped with all the knowledge you need to make the most of the Windows Store and download apps that suit your needs.
So, without further ado, let’s dive into the exciting world of app downloading on Windows and explore all the amazing possibilities the Windows Store has to offer!
Step 1: Understanding the Windows Store
Before we jump into downloading apps, let’s take a moment to understand what the Windows Store is all about. The Windows Store is Microsoft’s official digital distribution platform for Windows applications. It is integrated into the Windows operating system, making it easy to access and explore.
The Windows Store offers a vast collection of apps that are specifically designed and optimized for Windows devices. These apps are developed by various software creators, including Microsoft and third-party developers, ensuring a wide range of choices for users.
One of the advantages of the Windows Store is its ability to provide a curated and trustworthy app ecosystem. Every app available in the Windows Store undergoes a stringent review process to ensure quality, security, and compatibility with Windows devices. This means you can confidently browse and download apps without worrying about malware or compatibility issues.
The Windows Store offers different categories of apps to cater to various user needs. From productivity and communication apps to entertainment and gaming, there’s something for everyone. You can also find free apps, as well as paid apps that offer advanced features or premium content.
Furthermore, the Windows Store provides user reviews and ratings for each app, allowing you to make informed decisions before downloading. These reviews give you insights into the app’s functionality, performance, and user experience, helping you choose the best apps for your needs.
It’s worth noting that while the Windows Store is primarily focused on apps, it also offers other types of content, such as movies, music, and books. This diversity adds to the overall entertainment value and convenience of the platform.
Now that you have a better understanding of what the Windows Store is and what it has to offer, it’s time to learn how to access it. In the next step, we’ll explore the different methods of accessing the Windows Store on your Windows device.
Step 2: Accessing the Windows Store
Accessing the Windows Store is a straightforward process. There are multiple ways to access the Windows Store on your Windows device, allowing you to choose the method that works best for you.
Here are a few common methods to access the Windows Store:
- Start Menu: The most common way to access the Windows Store is through the Start menu. Simply click on the Start button, usually located at the bottom-left corner of your screen, and look for the Microsoft Store icon. Click on it to open the Windows Store.
- Taskbar: If you have pinned the Microsoft Store icon to your taskbar, you can simply click on it to launch the Windows Store.
- Cortana search: Another easy way to access the Windows Store is by using the Cortana search feature. Click on the Cortana search box, usually located next to the Start button, and type in “Microsoft Store” or “Windows Store.” Cortana will display the Microsoft Store app as one of the search results, which you can then click to open.
- Shortcut keys: If you prefer using keyboard shortcuts, you can press the Windows key + S to open the search bar, then type in “Microsoft Store” or “Windows Store.” Press Enter to open the Windows Store.
- Microsoft Store website: If you’re using a web browser, you can also access the Windows Store through the Microsoft Store website. Simply go to www.microsoft.com/store, and you’ll be able to browse and download apps directly from your browser.
No matter which method you choose, each will lead you to the Windows Store interface, where you can explore the vast collection of apps and content available.
Now that you know how to access the Windows Store, it’s time to move on to the next step: browsing and searching for apps. In the following section, we’ll guide you through finding the apps that best suit your needs.
Step 3: Browsing and Searching for Apps
Once you’ve accessed the Windows Store, it’s time to start exploring the vast library of apps that are available to download. In this step, we’ll guide you through the process of browsing and searching for apps that interest you.
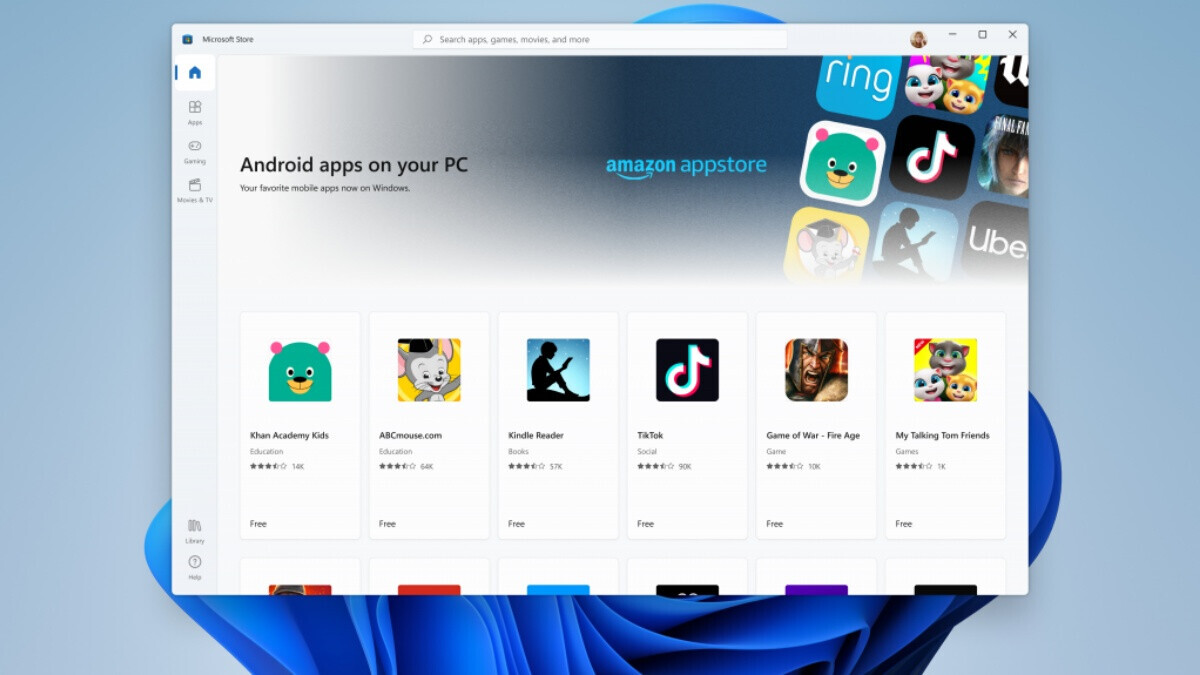
When you first open the Windows Store, you’ll be greeted with a homepage that showcases featured apps, new releases, and popular picks. You can browse through these sections to discover new and exciting apps. Additionally, the homepage may highlight special promotions or app collections based on different themes, such as productivity, gaming, or creativity.
To further refine your search, the Windows Store provides various categories and subcategories. You can click on these categories from the navigation menu to explore apps related to specific topics, such as education, entertainment, travel, and more. This categorization helps you find apps that align with your interests or specific needs.
If you already have a specific app in mind, or if you’re looking for something particular, you can take advantage of the search function in the Windows Store. Simply enter your keywords or the name of the app in the search bar, and the Store will display relevant results based on your query. From the search results, you can browse through different apps and click on their listings to learn more about them.
When browsing or searching for apps, it’s essential to read the app descriptions, check the user reviews, and see the ratings. The app description provides information about the app’s features, compatibility, and requirements, helping you determine if it meets your needs. User reviews and ratings offer valuable insights from other users’ experiences, helping you make informed decisions before downloading an app.
Once you find an app that you want to download, you’ll be able to see if it’s free or if there is a cost associated with it. For paid apps, the Windows Store provides a clear indication of the price. You can also check if the app offers any in-app purchases or additional features that may require a payment.
Now that you’re familiar with browsing and searching for apps in the Windows Store, it’s time to move on to the next step: downloading and installing the apps. In the following section, we’ll guide you through this process and get you ready to enjoy your new apps.
Step 4: Downloading and Installing Apps
Once you’ve found an app that you want to download from the Windows Store, the process of downloading and installing it is quick and straightforward. In this step, we’ll guide you through the process of acquiring and installing your desired apps.
To download an app, simply click on its listing in the Windows Store. This will take you to the app’s details page, where you can find more information about the app, including screenshots, app size, and reviews.
On the app’s details page, you’ll see a button labeled “Get” or “Install.” Clicking on this button will initiate the download and installation process. The button label may differ based on whether the app is free or requires payment.
If the app is free, clicking “Get” will instantly begin downloading and installing the app on your Windows device. The progress of the download will be indicated by a progress bar or a downloading animation. Once the download is complete, the app will be installed automatically, and you can access it from your device’s app list or Start menu.
If the app is paid, clicking “Install” will prompt you to complete the purchase process. The Windows Store offers different payment options, including credit cards, PayPal, and gift cards. Follow the instructions on the screen to complete the payment and initiate the download and installation process. Once the app is installed, it will be ready to use.
While the app is downloading and installing, it’s important to ensure a stable internet connection to avoid any interruption in the process. You can monitor the download progress by checking the progress bar or the downloading animation in the Windows Store.
Once the app is successfully installed, you can launch it from your device’s app list, Start menu, or desktop shortcut, depending on how it is designed to be accessed. Enjoy exploring and using your newly downloaded app!
It’s worth mentioning that some apps may require additional permissions or settings to function properly. The Windows Store will notify you if any additional steps or settings are necessary to ensure the app’s optimal performance. Be sure to review and follow these instructions to get the most out of your downloaded apps.
Now that you know how to download and install apps from the Windows Store, it’s time to move on to the next step: managing and updating your apps. In the next section, we’ll guide you through the process of managing your downloaded apps and keeping them up to date.
Step 5: Managing and Updating Apps
Once you’ve downloaded and installed apps from the Windows Store, it’s important to know how to manage and update them to ensure optimal performance and security. In this step, we’ll guide you through the process of managing and updating your apps on Windows.
To manage your installed apps, you can access the “My Library” section in the Windows Store. This section keeps track of all the apps you’ve downloaded and allows you to view and manage them easily. To access the “My Library” section, click on the three-dot menu icon in the top-right corner of the Windows Store and select “My Library” from the drop-down menu.
In the “My Library” section, you’ll see a list of all your installed apps. You can sort them by various criteria, such as name, category, or installation date, to find a specific app quickly. From here, you have several options to manage your apps:
- Open an app: Simply click on an app’s listing to open and launch it.
- Uninstall an app: If you no longer need or want an app, you can uninstall it by clicking on the “Uninstall” button next to its listing. This will remove the app from your device and free up storage space.
- Reinstall an app: Should you uninstall an app but later decide to reinstall it, you can easily do so from the “My Library” section. Find the app in your library, click on its listing, and select the “Install” button.
Updating your apps is an essential part of app management, as updates often contain bug fixes, feature enhancements, and security patches. To ensure that your apps are up to date, the Windows Store provides automatic updates by default.
When updates are available for your installed apps, the Windows Store will notify you with a small number badge on the Start menu icon and a notification in the Windows Store itself. You can click on the notification or visit the “Downloads and updates” section in the Windows Store to view and install the updates.
Within the “Downloads and updates” section, you’ll see a list of all the available updates for your apps. You can choose to install them all at once by clicking the “Update all” button or individually select the apps you want to update. The Windows Store will then download and install the updates automatically.
It’s important to allow the updates to complete, as interrupting the process could lead to incomplete installations or potential issues with the apps. While updates are being installed, you can track their progress using the progress bar or the downloading animation in the Windows Store.
By managing and updating your apps regularly, you can ensure that you have the latest features, improvements, and security enhancements available.
Now that you know how to manage and update your apps, let’s move on to the next step: uninstalling apps. In the following section, we’ll guide you through the process of removing apps from your Windows device.
Step 6: Uninstalling Apps
Uninstalling apps that you no longer need or want is an important step in managing your Windows device efficiently. In this step, we’ll guide you through the process of uninstalling apps from your Windows device.
There are several methods you can use to uninstall apps, depending on your preference and the version of Windows you are using:
- Method 1: From the Start menu: Open the Start menu, and locate the app you want to uninstall. Right-click on its icon, and a context menu will appear. From the menu, select “Uninstall” or “Uninstall app.” Follow the on-screen prompts to confirm the uninstallation.
- Method 2: Using the Windows Settings: Open the Windows Settings by pressing the Windows key + I on your keyboard or clicking on the gear icon in the Start menu. In the Settings window, select “Apps” or “Apps & features” from the options. A list of installed apps will appear. Find the app you want to uninstall, click on it, and select “Uninstall.” Follow the prompts to complete the uninstallation process.
- Method 3: Using the Control Panel: Open the Control Panel by typing “Control Panel” in the Cortana search bar and selecting the appropriate search result. In the Control Panel window, click on “Programs” or “Programs and Features.” A list of installed programs and apps will appear. Find the app you want to uninstall, right-click on it, and select “Uninstall.” Follow the prompts to uninstall the app.
Regardless of the method you choose, you may encounter a confirmation prompt before the uninstallation process begins. This prompt ensures that you don’t accidentally uninstall an app. Confirm your choice to proceed with the uninstallation.
After confirming the uninstallation, Windows will remove the app from your device. Depending on the app’s size, this process may take a few moments. Once the uninstallation is complete, the app will be removed from your device, freeing up storage space.
It’s important to note that uninstalling an app will remove all its associated files and settings from your device. If you decide to reinstall the app at a later time, you will have to go through the downloading and installation process again.
By regularly uninstalling apps that you no longer use, you can help optimize the performance and storage space of your Windows device.
Now that you know how to uninstall apps from your Windows device, let’s move on to the final step: troubleshooting app download issues. In the next section, we’ll provide some tips to help you overcome common obstacles during the app download process.
Step 7: Troubleshooting App Download Issues
Sometimes, you may encounter issues when trying to download apps from the Windows Store. In this step, we’ll provide you with some troubleshooting tips to help you overcome common obstacles during the app download process.
If you’re experiencing problems with app downloads, here are a few steps you can take to troubleshoot the issue:
- Check your internet connection: Ensure that you have a stable internet connection. Unstable or slow internet connections can affect the download process. Try restarting your modem or router, or connect to a different network if possible.
- Clear the Windows Store cache: Sometimes, clearing the Windows Store cache can resolve download issues. Open the “Run” dialog by pressing the Windows key + R on your keyboard, then type “wsreset.exe” and hit Enter. This will clear the Windows Store cache, and you can then attempt to download the app again.
- Check your storage space: Insufficient storage space on your device can prevent app downloads. Check your available storage space and free up space if necessary by removing unnecessary files or uninstalling apps that you no longer need.
- Disable security software: In some cases, security software like antivirus or firewall programs can interfere with app downloads. Temporarily disable such software, and try downloading the app again. Remember to re-enable your security software once the download is complete.
- Restart your device: Sometimes, a simple restart can resolve temporary glitches or conflicts that may be preventing app downloads. Try restarting your Windows device and then attempt to download the app once again.
- Check for Windows updates: Outdated Windows software can sometimes cause issues with app downloads. Make sure your system is up to date by checking for and installing any available Windows updates. To do this, go to the Windows Settings, select “Update & Security,” and check for updates.
- Contact Windows support: If none of the above steps resolve your app download issues, you may want to reach out to Windows support for further assistance. They can provide you with specific troubleshooting steps based on your unique situation.
By following these troubleshooting steps, you increase the chances of successfully resolving app download issues and enjoying a smooth experience in the Windows Store.
Congratulations! You now have the knowledge and tools to access, download, manage, update, and uninstall apps on your Windows device. With the wide variety of apps available in the Windows Store, you can personalize your Windows experience, boost productivity, and have fun with entertainment options.
Remember to explore and discover new apps that cater to your interests and needs. Whether you’re seeking productivity tools, entertainment apps, or creative software, the Windows Store has something for everyone.
Conclusion
Downloading apps from the Windows Store is a straightforward and convenient way to enhance your Windows device. With a wide range of apps available, you can find tools to boost your productivity, games to entertain you, and various other applications to meet your needs.
In this guide, we covered the steps to access the Windows Store, browse and search for apps, download and install them, manage and update your apps, and finally, uninstall apps. By following these steps, you can make the most of the Windows Store and optimize your Windows device’s functionality.
Remember to explore different categories and utilize search functionalities to find apps that align with your interests and requirements. Read app descriptions, user reviews, and ratings to ensure you choose apps that deliver the best user experience.
Regularly managing and updating your apps is essential to benefit from bug fixes, improved features, and enhanced security. Additionally, uninstalling apps that you no longer use helps free up storage space and optimize the performance of your Windows device.
If you encounter any issues during the app download process, we provided troubleshooting tips to help you overcome common obstacles. However, if you need further assistance, don’t hesitate to reach out to Windows support for personalized guidance.
Now that you have a solid understanding of how to navigate the Windows Store and download apps, it’s time to explore the vast library of apps available. Discover new ways to be productive, entertained, and creative with the incredible selection of apps waiting for you in the Windows Store.
Enjoy your journey of app exploration and have fun customizing your Windows experience!