Introduction
Welcome to our guide on how to download a GitHub repository. GitHub is a popular platform for hosting and collaborating on software development projects. It offers a wealth of open-source repositories, allowing developers to access and contribute to various projects. Whether you are a beginner or an experienced developer, downloading a GitHub repository is essential for accessing the source code and files.
Downloading a GitHub repository is a straightforward process that can be done using different methods. In this guide, we will walk you through the steps to download a GitHub repository, including using the download button, extracting the downloaded file, and utilizing Git commands to clone the repository.
Downloading a GitHub repository grants you access to the source code, allowing you to study it, make modifications, or even contribute to the project. This can be especially beneficial if you want to explore new programming languages, learn from code written by experienced developers, or collaborate with other developers on specific projects.
Whether you are looking to download a repository for personal use or to contribute to open-source projects, this guide will provide you with the necessary step-by-step instructions to download a GitHub repository and get started with your coding journey.
Step 1: Choose the Repository
Before you can download a GitHub repository, you first need to choose which repository you want to download. GitHub hosts millions of repositories, covering a wide range of programming languages and topics.
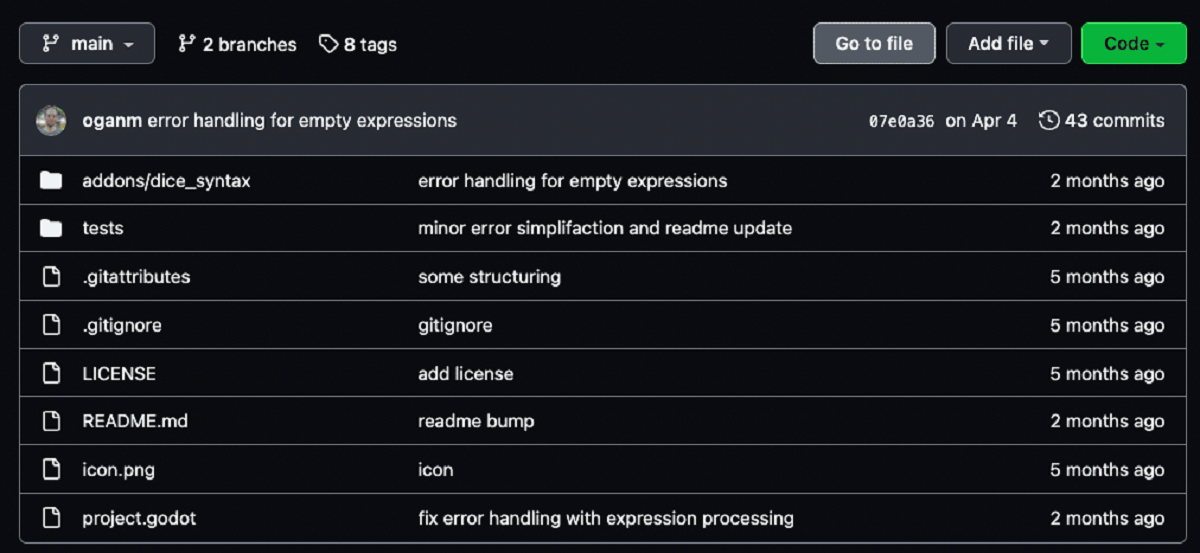
To choose a repository, start by visiting the GitHub website and navigating to the repositories section. You can use the search bar at the top of the page to search for specific repositories or explore different categories and topics using the filters available.
When choosing a repository, consider your interests, programming language preferences, and the purpose of downloading the repository. Are you looking to learn a new language, contribute to a project, or simply explore existing code? Narrow down your options and select a repository that aligns with your goals and interests.
Additionally, it’s important to review the repository’s README file. The README file provides important information about the repository, including its purpose, functionality, and any specific instructions or requirements. Reading the README file can help you understand the repository better and determine if it meets your needs.
Furthermore, pay attention to the repository’s activity level and community engagement. Active repositories with regular updates and a thriving community of contributors may indicate a well-maintained and supported project.
Once you have chosen the repository you want to download, proceed to the next step to learn how to find the download button.
Step 2: Find the Download Button
After choosing the GitHub repository you want to download, the next step is to find the download button. GitHub provides an easy way to download repositories as compressed files, either in ZIP or TAR format.
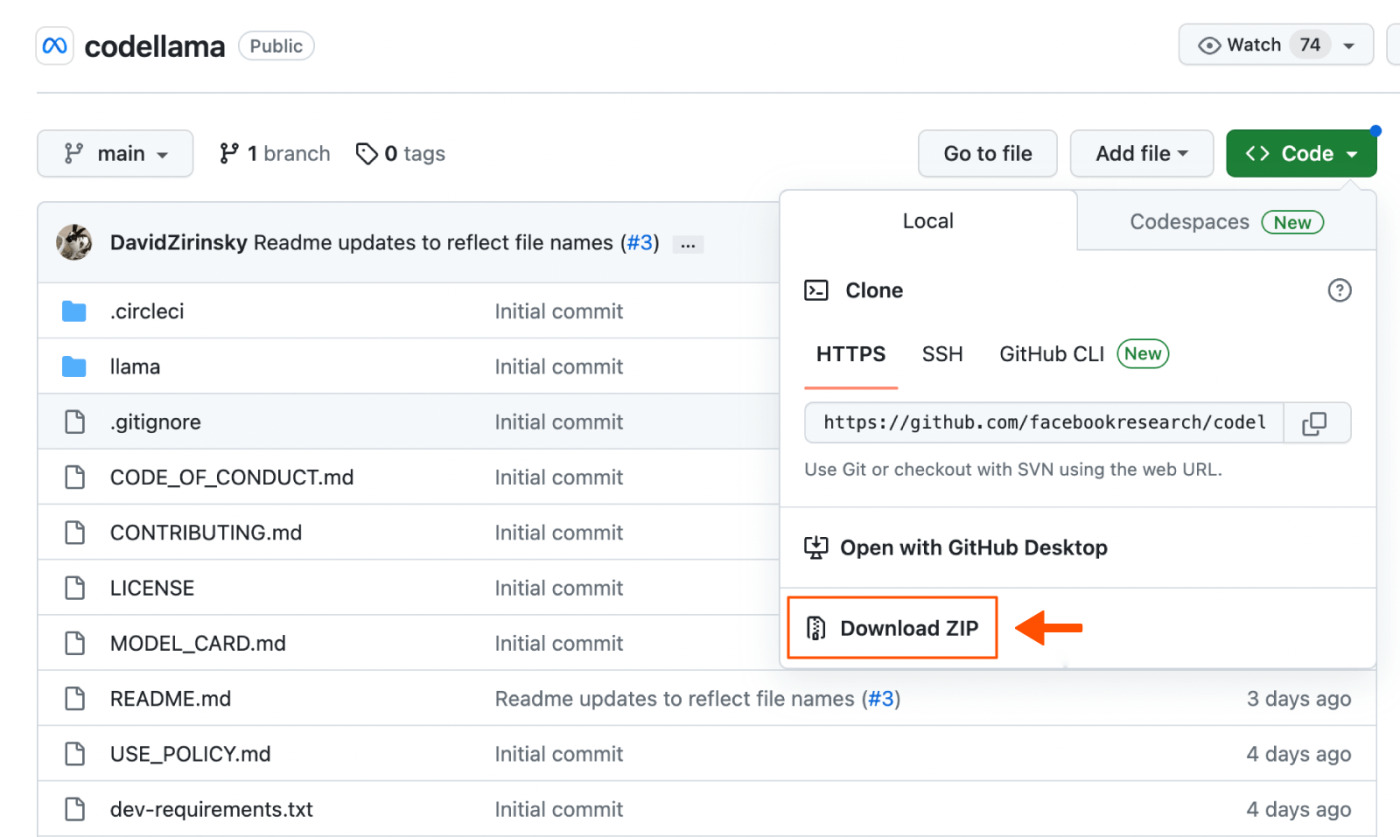
To find the download button, navigate to the main page of the repository on GitHub. Look for a green button labeled “Code” or “Download” near the top-right corner of the page. Clicking on this button will reveal a drop-down menu with download options.
In the drop-down menu, you will see options to download the repository as a ZIP file or a TAR file. ZIP files are more commonly used and compatible with most operating systems. TAR files, on the other hand, are often preferred by users of Unix-based systems.
Click on the desired download format, and GitHub will begin creating the compressed file. Depending on the size of the repository, this process may take a few seconds or longer.
Please note that some repositories may not have the download option available. This could be due to the owner disabling the download feature or the repository being marked as private. In such cases, you will need to explore alternative ways to access the repository, such as cloning it using Git commands, which we will cover later in this guide.
Once the download is complete, proceed to the next step to learn how to extract the downloaded file.
Step 3: Download the Repository as a Zip File
Once you have found the download button and selected the desired format, it’s time to download the repository as a ZIP file. This allows you to have a local copy of the repository’s code and files on your computer.
After clicking on the download button and selecting the ZIP format, the GitHub platform will generate and initiate the download of the ZIP file. Depending on the size of the repository and your internet connection speed, the download may take a few moments to complete.
Once the download is finished, locate the downloaded ZIP file on your computer. By default, the file is usually saved in your computer’s “Downloads” folder or the designated folder for downloaded files.
To access the files within the ZIP archive, you will need to extract them. Right-click on the ZIP file and select the “Extract” or “Extract All” option from the context menu that appears. Choose a folder or location on your computer where you want to extract the files.
After the extraction process is complete, you will have a folder containing the entire repository’s code and files. You can now explore the contents and access the code using a code editor, or incorporate it into your development environment.
It’s important to note that the extracted files do not retain the version control history associated with the repository. If you want to preserve the version history and be able to contribute to the project, consider using Git to clone the repository, as we will explain in the next step.
Now that you have successfully downloaded and extracted the repository, it’s time to move on to the next step: using the Git command to clone the repository.
Step 4: Extract the Zip File
After downloading the GitHub repository as a ZIP file, the next step is to extract its contents. Extracting the ZIP file allows you to access the repository’s code and files on your local machine.
Locate the downloaded ZIP file on your computer. Typically, it can be found in your computer’s “Downloads” folder or the default folder for downloaded files. Right-click on the ZIP file and select the “Extract” or “Extract All” option from the context menu.
A dialog box will appear, asking you to choose a destination folder for the extracted files. Select a folder on your computer where you want to save the extracted repository. It is recommended to choose a location that is easily accessible and organized.
Click the “Extract” or “OK” button, and the extraction process will begin. Depending on the size of the ZIP file and your computer’s performance, the extraction may take a few moments.
Once the extraction is complete, you will have a new folder containing the repository’s code and files. The extracted folder will have the same name as the repository and will contain all the necessary files to work with.
You can now access the repository’s code using a code editor or explore the contents of the folder on your local machine. The extracted files can be modified, studied, or used in your development projects.
It’s important to note that when you extract the ZIP file, the version control history associated with the repository is not retained. If you want to preserve the full version history and be able to contribute to the project, it’s recommended to use Git and clone the repository, as we will demonstrate in the next step.
Now that you have successfully extracted the ZIP file, let’s move on to the next step: using the Git command to clone the repository.
Step 5: Use the Git Command to Clone the Repository
Cloning a GitHub repository using Git allows you to create a local copy of the repository that includes the complete version history. This enables you to not only access the code and files but also contribute to the project and keep your local copy up to date.
To clone a repository, you will need to have Git installed on your computer. If you don’t have Git installed, you can download and install it from the official Git website.
Once Git is installed, open a command prompt or terminal on your computer. Navigate to the directory where you want to clone the repository. You can use the “cd” command to navigate through folders in the command prompt or terminal.
Now, go to the GitHub repository page and click on the green “Code” button near the top-right corner of the page. This will reveal a dropdown menu with different options for cloning the repository.
Click on the “HTTPS” option to reveal the URL that you can use to clone the repository. Copy the URL to the clipboard.
Back in the command prompt or terminal, use the “git clone” command followed by the repository’s URL. For example:
git clone https://github.com/username/repository.git
Replace “username” with the actual username of the repository owner and “repository” with the repository’s name. Press Enter to execute the command.
Git will initiate the cloning process and create a local copy of the repository on your computer. Depending on the size of the repository and your internet connection speed, this process may take a few moments or longer.
Once the cloning is complete, you will have a new folder on your computer containing all the files and the complete version history of the repository. You can now access, modify, and contribute to the code using a text editor or an integrated development environment (IDE).
Make sure to regularly update your local repository by pulling the latest changes from the remote repository. This ensures that you have the most recent code and are working on the latest version of the project.
You have successfully cloned the repository using Git. Feel free to explore, make changes, and collaborate with the project’s community.
Conclusion
Downloading a GitHub repository allows you to access and study the source code and files of various projects hosted on the platform. Whether you are a beginner programmer or an experienced developer, downloading repositories can provide valuable learning opportunities and enable you to contribute to open-source projects.
In this guide, we covered the step-by-step process of downloading a GitHub repository. We began by explaining the importance of choosing the right repository that aligns with your goals and interests. We then explored how to find and download the repository as a ZIP file or a TAR file. Extracting the ZIP file was also covered, allowing you to access the local copy of the repository’s code and files on your computer.
Furthermore, we discussed the use of Git commands to clone a repository, which allows you to have a local copy that includes the complete version history. Cloning a repository with Git is especially beneficial if you plan to contribute to the project or keep your local copy up to date with the latest changes.
Remember to regularly update your local repository by pulling the latest changes from the remote repository to ensure that you are working on the most recent version of the project.
By following the steps outlined in this guide, you can confidently download GitHub repositories and start exploring, contributing, and enhancing your programming skills. Now, go ahead and delve into the vast world of GitHub repositories!


