Introduction
Welcome to the world of open-source development! Github is a popular platform for hosting and sharing repositories, and downloading folders from Github is an essential skill for anyone involved in coding or collaborating on projects. Whether you’re a seasoned developer or a newcomer to the coding community, this guide will walk you through the step-by-step process of downloading a folder from Github.
Downloading a folder from Github allows you to access and utilize the files and resources contained within it. This can be particularly helpful when you want to explore the code of a project, contribute to an open-source repository, or simply have a local copy of the folder for offline use.
In this guide, we will cover the necessary steps to download a folder from Github, regardless of whether you are using a web browser or a terminal. So, no matter your level of technical expertise, you’ll be able to follow along and successfully download the folder you need.
Before we dive into the specifics, it’s important to note that Github provides different ways to download a repository or a folder within it. You can choose to download the folder as a zip file or clone the repository to your local machine using Git. Both options have their advantages and it’s up to you to decide which method suits your needs best.
Now that you have an overview of what we’ll be covering, let’s begin our journey to download a folder from Github. Just follow the step-by-step instructions in the upcoming sections and you’ll be downloading folders like a pro in no time!
Step 1: Open Github
The first step in downloading a folder from Github is to open the Github website in your preferred web browser. Simply launch the browser of your choice and enter “https://github.com” in the address bar. Hit Enter, and you’ll be redirected to the Github homepage.
If you already have a Github account, you can sign in by clicking on the “Sign in” button at the top-right corner of the page. Enter your credentials and click “Sign in” to access your Github account. If you don’t have an account yet, you can create one by clicking on the “Sign up” button and following the registration process.
Once you are signed in, you’ll have access to all the features and functionalities that Github offers. Take a moment to familiarize yourself with the layout and interface of the website. The main navigation bar at the top of the page provides quick access to your repositories, notifications, and other important sections.
Additionally, you can explore different repositories by browsing through the trending repositories, searching for a specific project, or following links shared by others. The Github search bar, located at the top-left corner of the page, allows you to search for repositories, organizations, users, and other Github content.
Now that you are on the Github website and familiar with its interface, you are ready to move on to the next step: navigating to the desired folder where the file you want to download is located.
Step 2: Navigate to the Desired Folder
Once you are on the Github homepage and signed in to your account, it’s time to locate the folder that you want to download. Whether you’re searching for a specific project or exploring a repository, Github provides several ways to navigate to the desired folder.
If you have a direct link to the repository that contains the folder, simply copy the URL and paste it into the address bar of your web browser. Hit Enter, and you will be taken directly to the repository page.
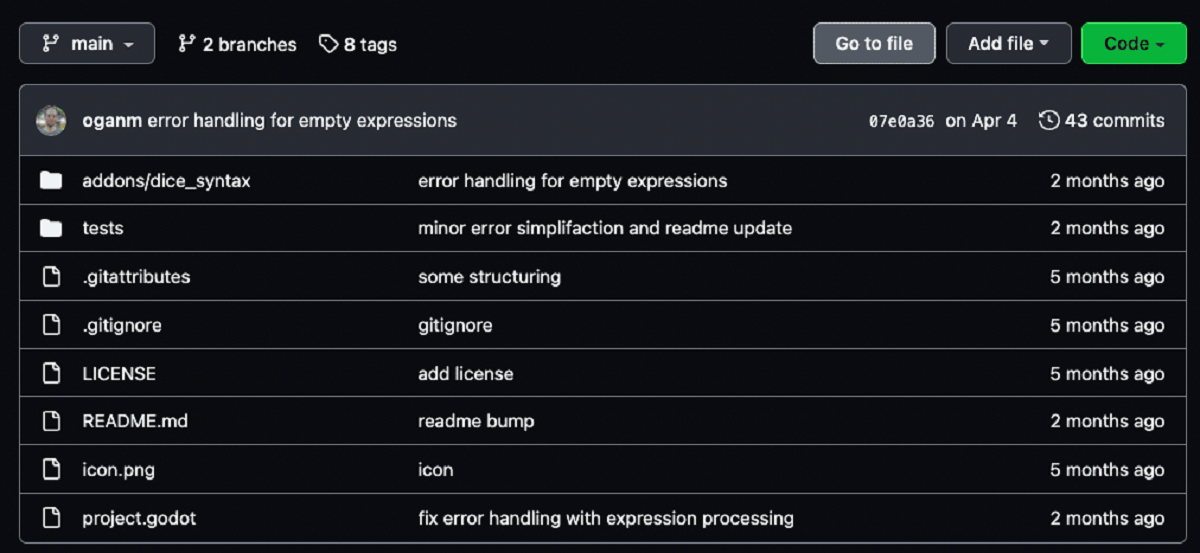
On the repository page, you will see a list of files and folders that make up the project. Look for the folder you want to download and click on its name to access its contents.
If you don’t have a direct link, you can use the search bar on the Github homepage to find the repository that contains the folder. Enter the name of the repository or relevant keywords related to the project in the search bar and hit Enter.
Once you find the repository in the search results, click on its name to open the repository page. From there, you can navigate through the folders and subfolders until you find the specific folder you want to download.
Another way to locate a folder is by browsing the repositories you are following or exploring the trending repositories. You can access these options from the main navigation bar at the top of the Github homepage.
If you are collaborating with others on a project, you can also find the folder through their Github profiles. Navigate to their profile by searching for their username in the Github search bar, clicking on their username in a commit or pull request, or through a shared link to their profile.
Once you have successfully located the desired folder, you are ready to proceed to the next step: clicking on the “Download” button.
Step 3: Click on the “Download” Button
Now that you have navigated to the desired folder in the Github repository, it’s time to download it. Github provides a convenient “Download” button that allows you to easily obtain a copy of the folder.
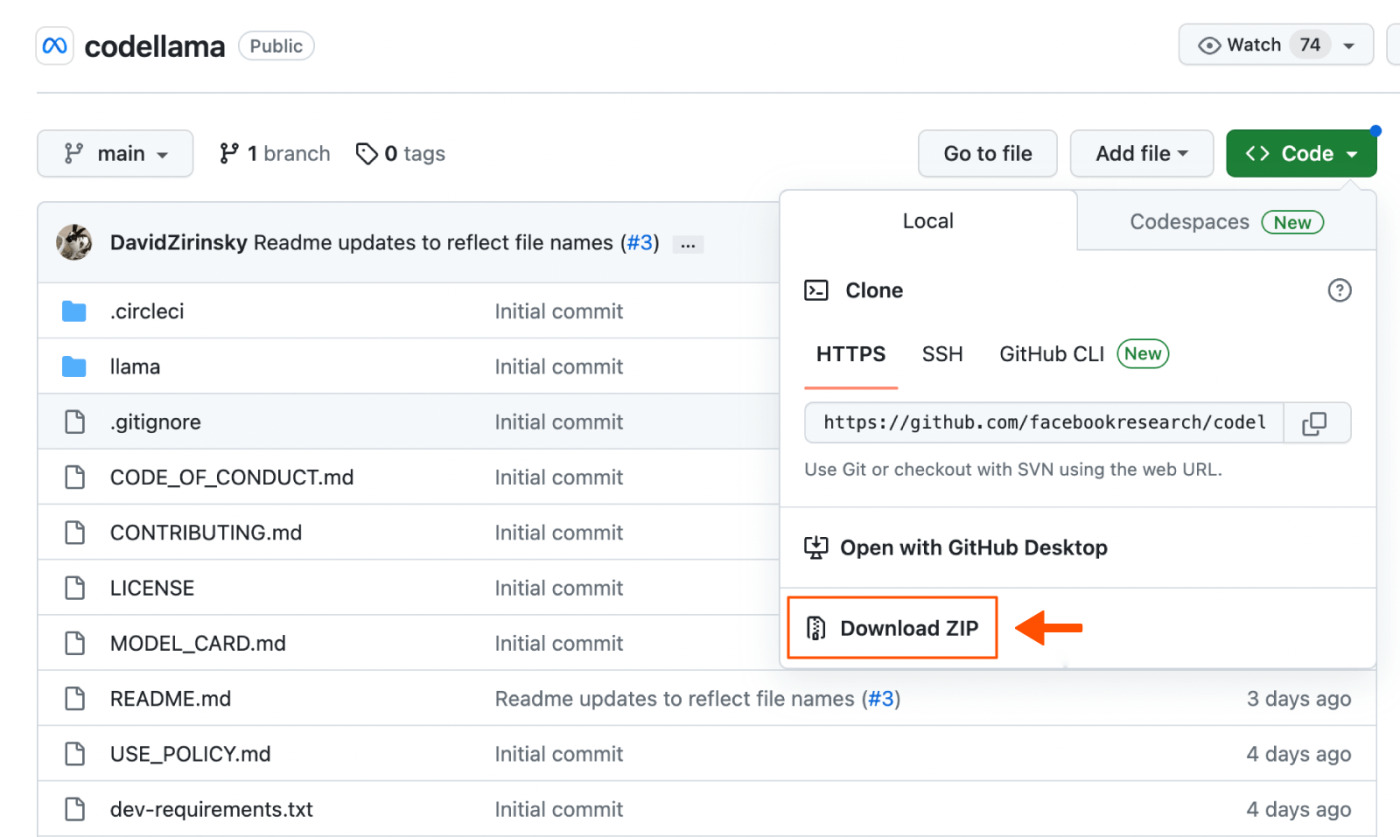
Look for the “Download” button located near the top-right corner of the folder page. This button is usually represented by a green color and an icon resembling an arrow pointing downwards.
Click on the “Download” button, and a dropdown menu will appear with different options for downloading the folder. The available options may include downloading the folder as a zip file or cloning the repository to your local machine using Git.
If you prefer to download the folder as a zip file, select the “Download ZIP” option from the dropdown menu. This will initiate the download process, and the folder will be saved to your computer as a compressed zip file.
On the other hand, if you want to clone the repository to your local machine using Git, select the “Clone” option from the dropdown menu. This will provide you with the repository’s URL, which you can use with Git commands to clone the repository and obtain a complete local copy of the folder and its revision history.
Depending on your requirements, choose the appropriate download option from the dropdown menu and click on it to start the download process.
Keep in mind that the time it takes to download the folder will depend on its size and your internet connection speed. Larger folders may take longer to download, so be patient while the download is in progress.
Once the download is complete, you can move on to the next step and save the downloaded folder to your computer.
Step 4: Choose the Download Option
After clicking on the “Download” button, you will be presented with different download options for the folder. It’s important to choose the download option that best suits your needs and preferences.
The most common download option is to download the folder as a zip file. This option bundles all the files and subfolders within the selected folder into a single compressed file. Downloading the folder as a zip file is ideal if you only need the contents of the folder and don’t require access to the complete revision history or the ability to make changes to the repository.
To select the zip file download option, simply click on the “Download ZIP” link or button from the dropdown menu. This action will initiate the downloading process, and the zip file will be saved to your computer’s default download location.
Alternatively, you may choose to clone the entire repository to your local machine using Git. This option gives you full access to the folder, including its revision history and the ability to contribute changes back to the repository. Cloning the repository requires Git to be installed on your computer.
If you decide to clone the repository, click on the “Clone” option from the dropdown menu. This will display the repository’s URL, which you can use with Git commands to clone the repository and create a local copy on your computer.
Choose the download option that best aligns with your needs and click on it. The chosen download option will begin the process of saving the folder to your computer.
Remember to keep track of the location where you save the downloaded folder, as you will need to access it later for further use or reference.
With the download option selected and the downloading process initiated, you are one step closer to having the desired folder saved on your computer.
Step 5: Save the Folder to Your Computer
Once the downloading process is complete, it’s time to save the downloaded folder to your computer. The location where the folder is saved will depend on your browser’s settings and your personal preferences.
If you downloaded the folder as a zip file, most browsers will automatically save it to the default download location on your computer. To access the downloaded zip file, you can usually find it in a folder called “Downloads” or a similar directory.
Locate the downloaded zip file and extract its contents. Right-click on the file and select “Extract” or “Extract All” from the context menu. Choose a destination folder where you want to save the extracted contents of the folder, and the extraction process will begin.
If you chose the option to clone the repository using Git, the repository will be saved to a local directory on your computer. Choose a suitable location for the repository and provide the necessary information when using Git commands to clone the repository.
Make sure to choose a location that is easily accessible and organized for future reference. You can create a new folder specifically for storing downloaded folders from Github or save it in a folder that aligns with your existing file structure.
Once the folder or repository is saved to your desired location, you can access it using any file explorer or coding editor of your choice. The files and resources within the folder are now ready for you to view, edit, or utilize in your coding projects.
Remember to review any licensing or copyright information associated with the downloaded folder, especially if you plan to use it for commercial or public projects. Ensure compliance with any applicable rules or regulations to avoid any legal issues.
Congratulations! You have successfully downloaded the desired folder from Github and saved it to your computer. Now you can start exploring the files, making changes if needed, and utilizing the resources in your coding endeavors.
Conclusion
Downloading a folder from Github is a crucial skill for developers, coders, and anyone involved in the open-source community. It allows you to access and utilize the resources within a repository, contribute to projects, or have a local copy for offline use.
In this guide, we have walked through the step-by-step process of downloading a folder from Github. We started by opening Github and navigating to the desired folder. Then, we clicked on the “Download” button and chose the appropriate download option, whether it was downloading the folder as a zip file or cloning the repository using Git.
Finally, we saved the downloaded folder to our computer, ensuring that it is easily accessible for future use. It’s important to remember the location where you saved the folder and to stay compliant with any licensing or copyright requirements associated with the downloaded content.
Now that you have mastered the process of downloading folders from Github, you can confidently explore and contribute to various repositories. Make the most of the resources available on Github to enhance your coding skills and collaborate with others in the open-source community.
Keep in mind that Github is a continuously evolving platform, and updates or changes to its interface may occur over time. If you come across any discrepancies or differences in the instructions provided, make sure to refer to the official documentation or reach out to the Github support community for assistance.
Happy coding and exploring the vast world of open-source development!