Introduction
Welcome to this tutorial on how to download a notebook from GitHub. GitHub is a popular platform for hosting and sharing code repositories, including Jupyter notebooks. Jupyter notebooks are widely used for data analysis, machine learning, and other scientific computing tasks. If you come across a notebook on GitHub that you want to download and use, this guide will walk you through the steps to do so.
Downloading a notebook from GitHub is a straightforward process that requires just a few clicks. By following the steps outlined in this tutorial, you’ll be able to download a notebook and save it to your local machine. Once downloaded, you can open the notebook in Jupyter or any other compatible environment to explore the code, run the cells, and analyze the data.
Whether you’re a data scientist, a student, or a programming enthusiast, GitHub provides a vast collection of public repositories that you can explore and learn from. Being able to download notebooks from GitHub allows you to access valuable resources, learn from others’ code, and contribute to the open-source community.
This tutorial assumes that you have basic familiarity with GitHub and know how to navigate through repositories. So, let’s get started and learn how to download a notebook from GitHub.
Step 1: Go to the GitHub Repository
The first step to download a notebook from GitHub is to go to the repository where the notebook is located. To do this, open your web browser and navigate to the GitHub website at github.com. If you don’t have an account, you may need to sign up for one, which is free and only takes a few moments.
Once you’re logged in to your GitHub account, you can either search for the specific repository or navigate through your existing repositories or those of others. If you know the name of the repository, you can use the search bar at the top of the GitHub page to find it. Alternatively, you can browse through your own repositories by clicking on your profile picture in the top-right corner and selecting “Your repositories” from the drop-down menu.
Once you’ve located the repository containing the notebook you want to download, click on its name to open it. This will take you to the repository page, where you can find all the files and information related to that repository.
It’s important to note that if the repository is private and you don’t have access to it, you won’t be able to download the notebook. In this case, you’ll need to request access from the owner of the repository or find another publicly available repository to download the notebook.
Now that you’re on the repository page, you’re ready to proceed to the next step.
Step 2: Locate the Notebook File
After navigating to the GitHub repository page, the next step is to locate the notebook file within the repository. GitHub allows you to organize files and folders within a repository, so it’s essential to identify the specific file you want to download.
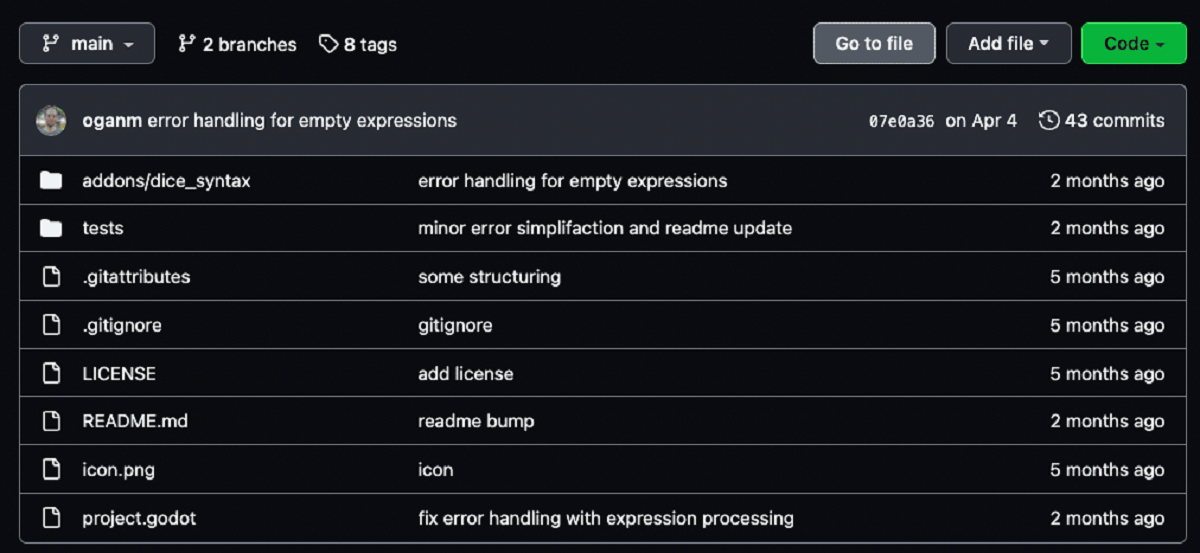
On the repository page, you’ll see a list of files and directories contained within the repository. Look for the file with the extension “.ipynb” as this indicates a Jupyter notebook file. If there are multiple notebook files, ensure you select the correct one that you want to download.
If the file is located in a subdirectory, you may need to navigate through the directory structure by clicking on the relevant folders until you find the notebook file. GitHub provides a breadcrumb navigation bar at the top of the page to help you track your location within the repository.
Take note of the file name and its location within the repository. This information will be useful in the next step when you download the notebook.
It’s worth mentioning that in addition to Jupyter notebooks, GitHub also supports other file formats, such as plain text files, Python scripts, and more. Therefore, ensure that you specifically locate the notebook file with the “.ipynb” extension.
Once you’ve identified the notebook file, you’re ready to proceed to the next step of downloading it.
Step 3: Click on the Notebook File
Now that you have located the notebook file within the GitHub repository, the next step is to click on the file to access its contents and prepare for downloading.
On the repository page, you should see the name of the notebook file listed. The file name typically ends with the “.ipynb” extension. Click on the file name to open the notebook file.
When you click on the notebook file, GitHub will automatically render the contents of the notebook, making it easier to preview the code and any markdown cells included in the notebook. You can scroll through the notebook and review its contents to ensure it meets your requirements.
This step is crucial as it allows you to examine the notebook’s code, explore any visualizations, and understand the purpose and functionality of the notebook before downloading it. It also helps in case the repository contains multiple notebook files, ensuring that you have selected the correct one.
If the notebook file is large or contains many cells, it may take a few moments for GitHub to render the notebook fully. Be patient while the rendering process completes, and avoid closing the page or navigating away during this time.
After the notebook file has been rendered and you have reviewed its contents, you’re ready to proceed to the next step: downloading the notebook.
Step 4: Download the Notebook
Now that you have accessed the notebook file on GitHub and verified its contents, it’s time to download the notebook to your local machine. GitHub provides a simple and straightforward way to download files from repositories, including Jupyter notebooks.
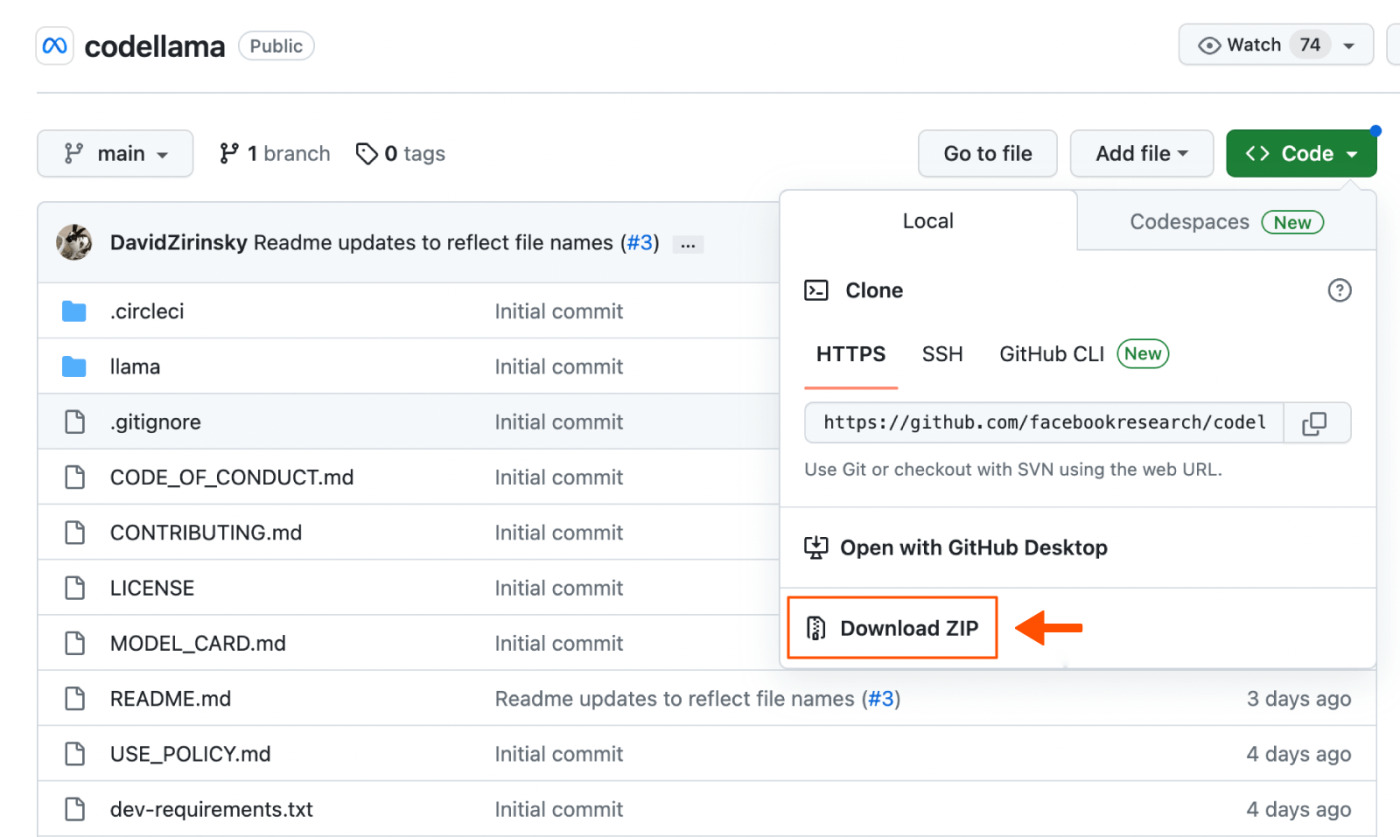
To download the notebook, look for the options available at the top-right corner of the file preview. You will find a button labeled “Download,” “Raw,” or with a down-arrow icon indicating the download action.
Click on the download button to initiate the download process. Depending on your browser settings, the notebook file may be automatically saved to your default downloads folder or you may be prompted to choose a destination folder to save the file.
Once the download is complete, you will have a local copy of the notebook file on your computer. This allows you to access the notebook offline, make changes, and experiment with the code and data within the notebook.
Ensure that you choose a location on your local machine where you can easily locate the downloaded notebook file later. Consider creating a dedicated folder or directory for storing downloaded notebooks to keep your files organized.
Congratulations! You have successfully downloaded the notebook file from GitHub. The file is now ready for further exploration and analysis in your preferred Jupyter notebook environment.
Proceed to the final step to learn how to save the notebook to your desired location.
Step 5: Save the Notebook to your Desired Location
After you have downloaded the notebook file from GitHub, the final step is to save it to your desired location on your computer. By saving the notebook file to a specific directory, you can easily access it whenever needed and keep your files organized.
Locate the downloaded notebook file on your computer. Depending on your browser and its settings, the file may be saved in your default downloads folder or the folder you specified during the download process.
If the downloaded notebook file is in a compressed format, such as a .zip file, you’ll need to extract it before you can use it. Right-click on the file and select “Extract” or similar options to unzip the file and access the notebook within.
Once the notebook file is visible and accessible, choose the desired location on your computer where you want to save it. This could be a specific folder, a project directory, or any other location that suits your workflow and organization preferences.
Create or navigate to the chosen location on your computer and then drag and drop or copy and paste the notebook file from its current location to the desired location. Alternatively, you can use the “Save As” feature in your Jupyter notebook environment to specify the desired location while saving the notebook.
It’s beneficial to save the notebook file in a location that is easy to remember and access. Consider using a descriptive name for the file that reflects its content or purpose. This makes it easier to identify and locate the notebook in the future.
With the notebook now saved in your desired location, you have successfully completed the process of downloading and saving a notebook from GitHub. You can now open the notebook in your Jupyter notebook environment and start exploring the code, running cells, and analyzing the data contained within.
Enjoy working with your newly downloaded notebook! Happy coding!
Conclusion
Downloading a notebook from GitHub is a simple and convenient process that allows you to access and utilize valuable resources for data analysis, machine learning, and other scientific computing tasks. By following the steps outlined in this tutorial, you can easily download a notebook and save it to your local machine.
We started by introducing GitHub as a popular platform for hosting and sharing code repositories. We then walked through the step-by-step process, starting from navigating to the GitHub repository, locating the notebook file, clicking on the file to access its contents, downloading the notebook, and finally saving it to a desired location on your computer.
GitHub provides an extensive collection of public repositories, making it a valuable resource for various domains and programming languages. By being able to download notebooks from GitHub, you can explore others’ code, learn from their examples, and contribute to the open-source community.
Remember to review the notebook’s contents and ensure it meets your requirements before downloading it. Always verify that the file you’re downloading is indeed the correct notebook file you intended to download.
Once you have downloaded the notebook, you can open it in your preferred Jupyter notebook environment and start working with the code and data. The notebook file is now stored locally on your computer, allowing you to access it offline and make any necessary modifications according to your needs.
Whether you’re a data scientist, a student, or a programming enthusiast, downloading notebooks from GitHub can greatly enhance your learning and productivity. Take advantage of the wealth of knowledge and resources available in the open-source community.
Now that you’re equipped with the knowledge of how to download a notebook from GitHub, go ahead and explore the vast world of notebooks hosted on GitHub. Happy downloading and coding!