Introduction
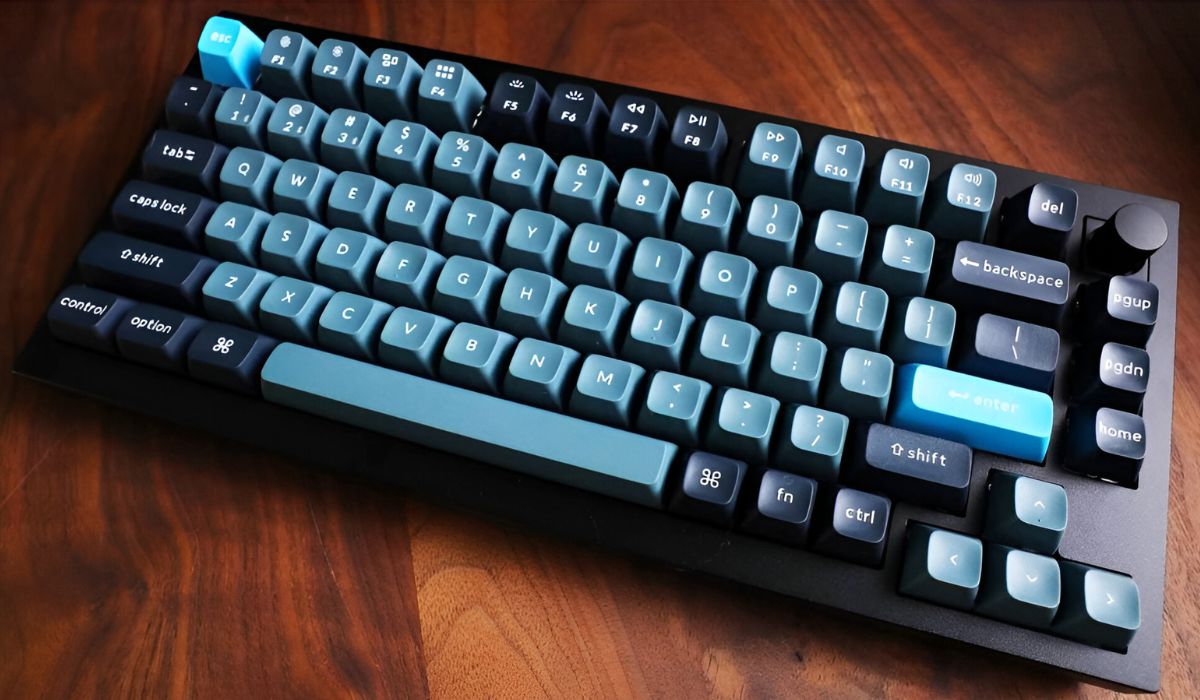
So, you've got yourself a shiny new mechanical keyboard, and you're eager to customize it with some eye-catching keycaps. Whether you're looking to enhance your typing experience or add a personal touch to your keyboard, swapping out keycaps is a fantastic way to make your keyboard truly your own.
In this guide, I'll walk you through the process of putting a keycap on a mechanical keyboard. It's a simple and satisfying task that can instantly transform the look and feel of your keyboard. With just a few basic tools and a little know-how, you'll be well on your way to customizing your keyboard to suit your style and preferences.
I'll cover everything from gathering the necessary tools to aligning and pressing down the keycap correctly. By the end of this guide, you'll have the confidence and skills to effortlessly swap out keycaps on your mechanical keyboard, allowing you to express your personality and elevate your typing experience. So, let's dive in and get started!
Step 1: Gather Your Tools
Before you begin the process of putting a keycap on your mechanical keyboard, it’s essential to gather the necessary tools. Having the right tools at your disposal will ensure a smooth and successful keycap installation. Here’s what you’ll need:
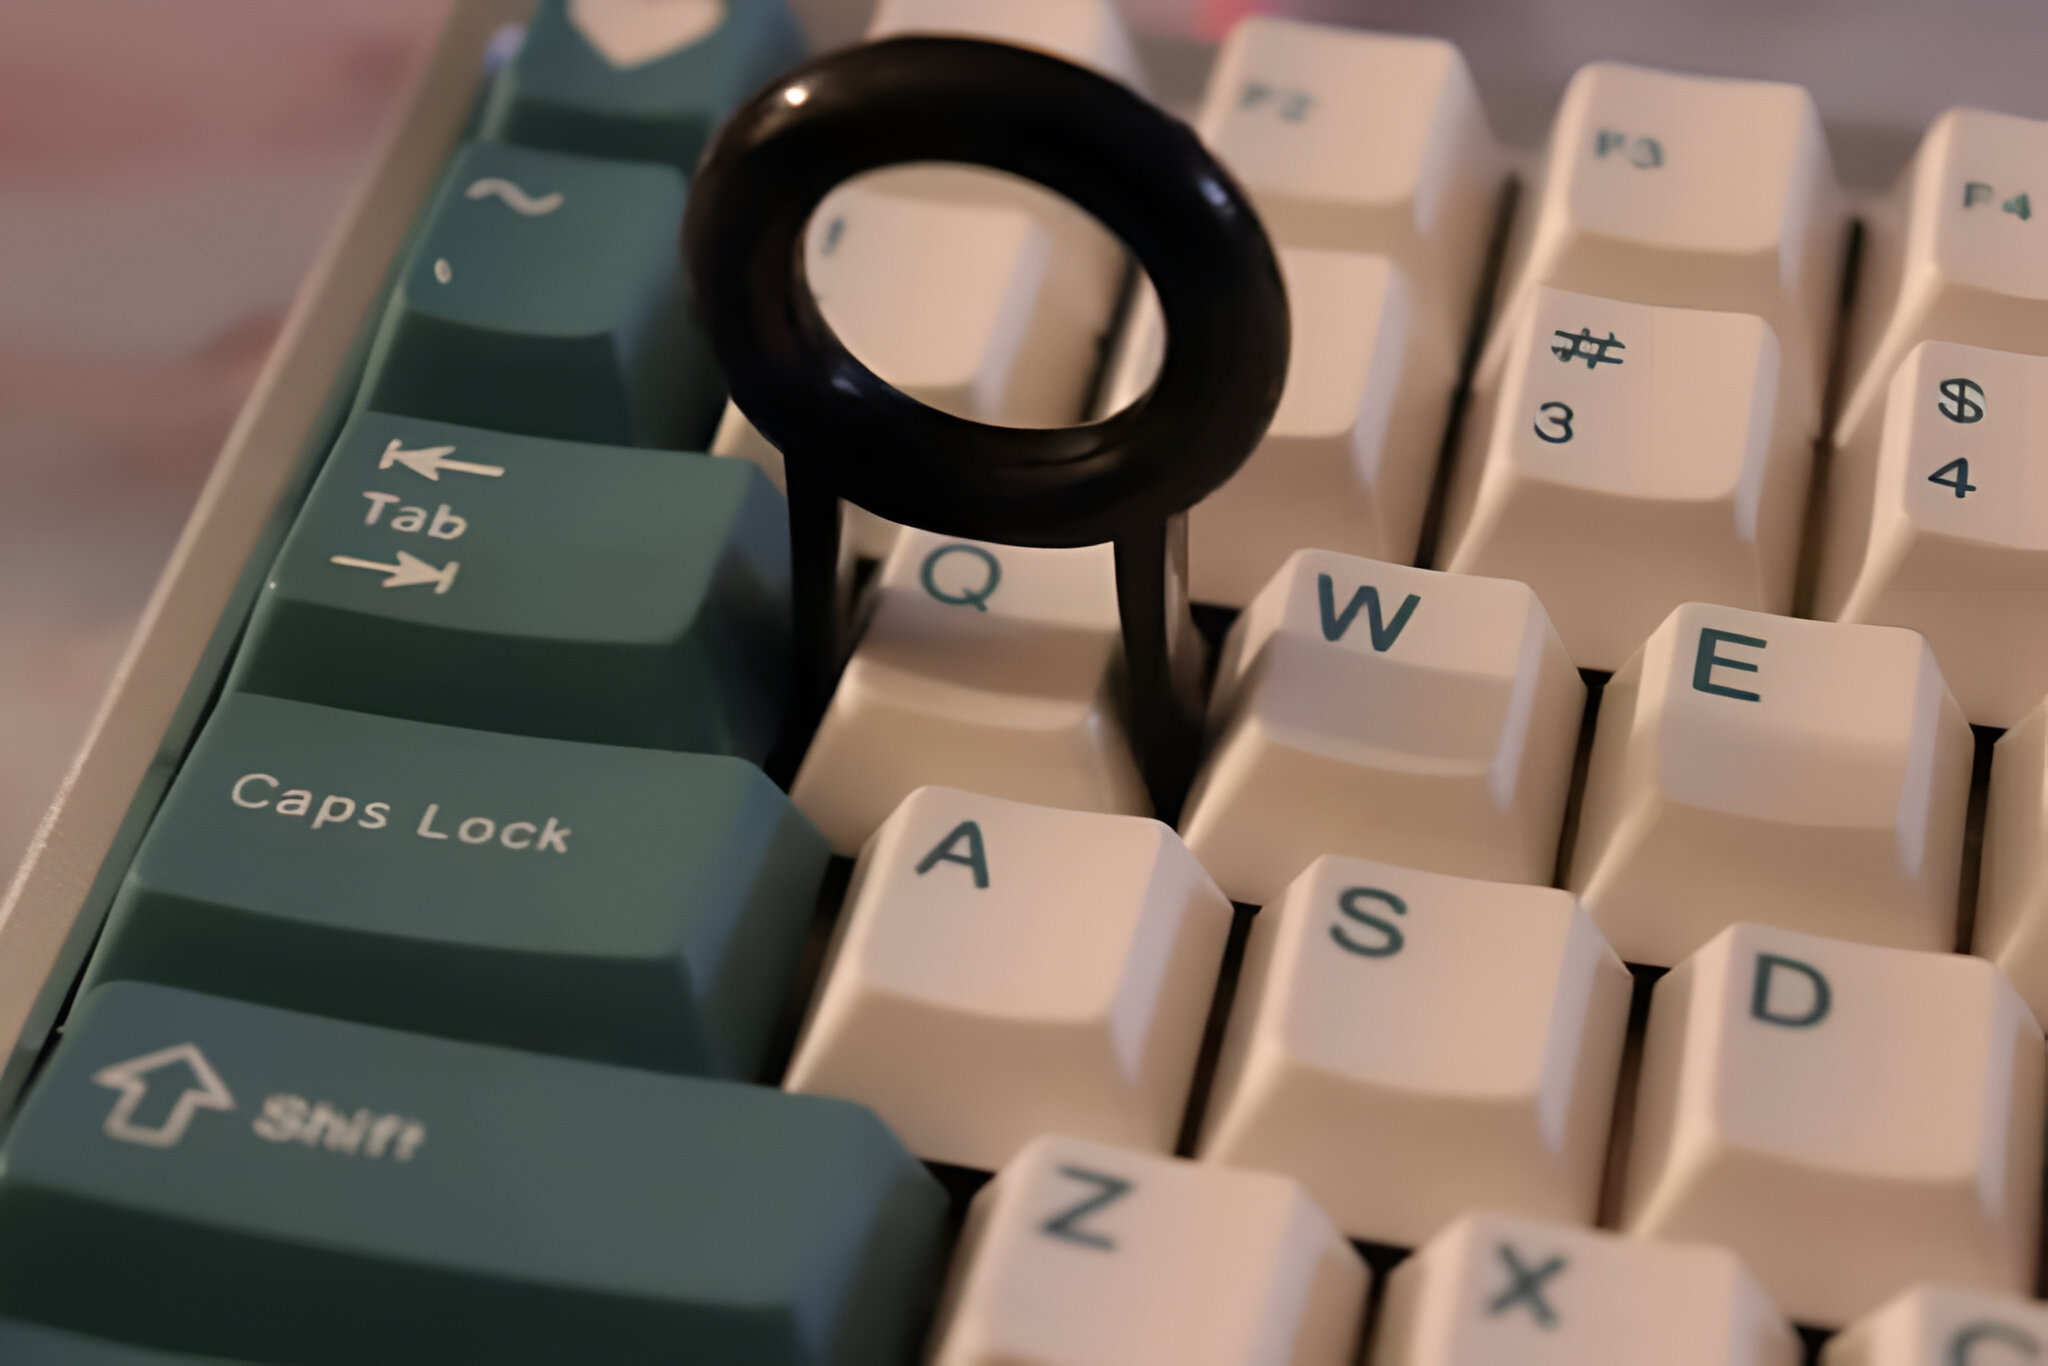
- Keycap Puller: A keycap puller is a small tool designed to safely and easily remove keycaps from a keyboard. It typically features wire loops that hook under the keycap for effortless removal.
- New Keycap: Of course, you’ll need the keycap you want to install. Whether it’s a custom artisan keycap or a replacement for a worn-out key, make sure you have the new keycap ready for installation.
- Clean Cloth: It’s always a good idea to have a clean cloth on hand to wipe down the keyboard and keycap, ensuring a pristine surface for the new keycap.
- Paper Towel or Compressed Air: To clean any debris or dust from the switch and surrounding area, a paper towel or a can of compressed air can be handy.
By having these tools at the ready, you’ll be well-prepared to proceed with confidence as you embark on the keycap installation process. With the tools in hand, you’re ready to move on to the next step: aligning the keycap for installation.
Step 2: Align the Keycap
Once you have gathered the necessary tools, it’s time to align the new keycap for installation on your mechanical keyboard. Proper alignment ensures that the keycap sits securely and uniformly on the switch, allowing for smooth and consistent keystrokes. Follow these steps to align the keycap effectively:
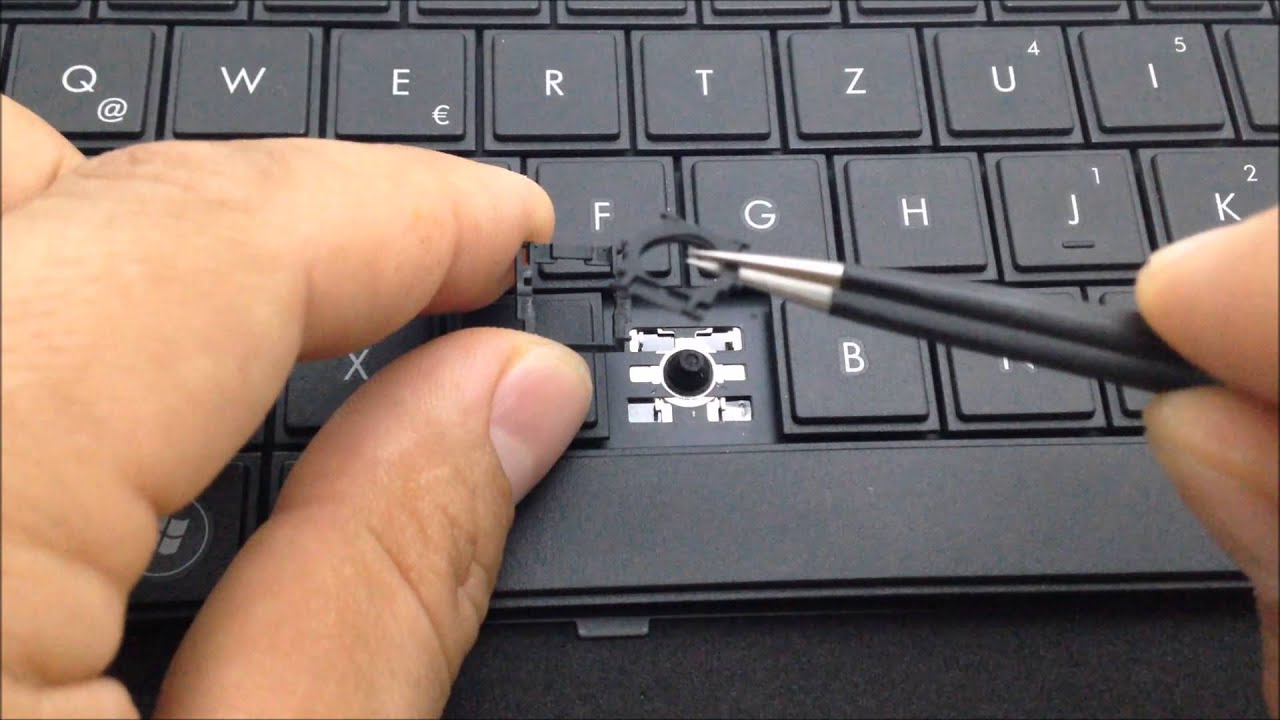
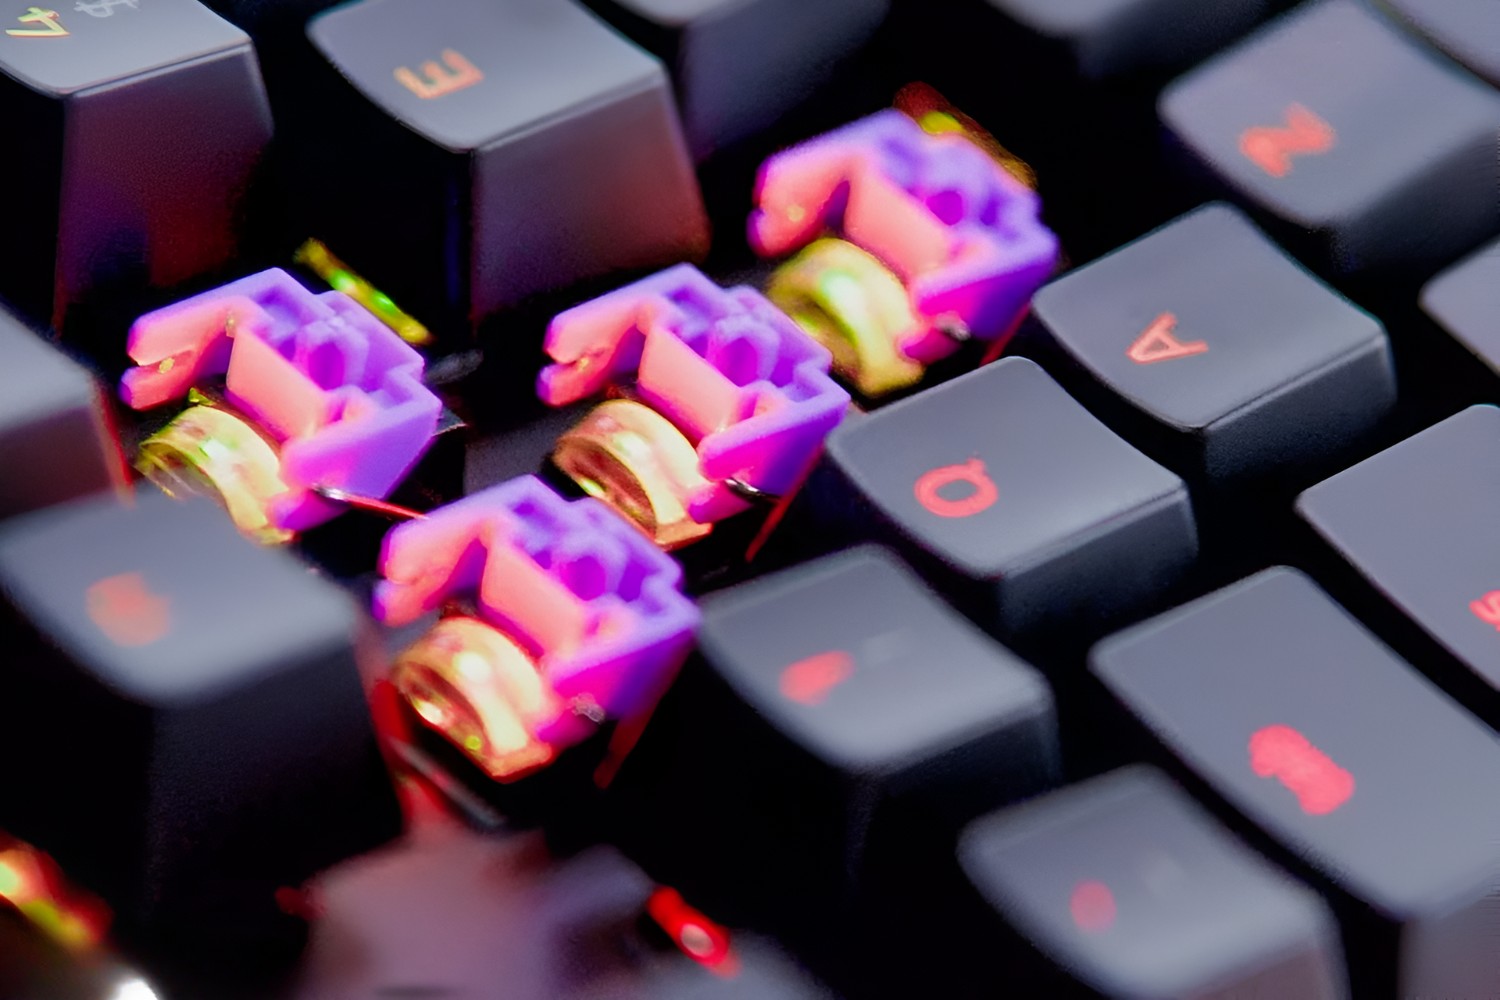
- Identify the Correct Position: Take a close look at the switch and locate the position where the keycap will sit. Most keycaps have a cross-shaped stem that aligns with the switch stem, ensuring the keycap fits perfectly in place.
- Position the Keycap: Gently place the new keycap over the switch stem, ensuring that the stem and the keycap align correctly. Take your time to position it accurately, as a well-aligned keycap will sit flush and provide a satisfying typing experience.
- Apply Even Pressure: Once the keycap is positioned correctly, apply even pressure to the top of the keycap. This will allow the stem to slide into the keycap, securing it in place on the switch.
By following these steps, you’ll ensure that the keycap is aligned accurately and sits securely on the switch, setting the stage for the next crucial step: pressing down firmly to complete the installation.
Step 3: Press Down Firmly
With the keycap aligned over the switch, the next step is to press down firmly to secure the keycap in place. This step is essential for ensuring that the keycap sits snugly on the switch and functions seamlessly during typing. Follow these guidelines to press down the keycap firmly:
- Use Your Fingertips: Position your fingertips over the top of the keycap, ensuring that your fingers are centered and exerting even pressure. This will help distribute the force evenly as you press down.
- Apply Controlled Pressure: Gently but firmly press down on the keycap, using controlled pressure to seat it onto the switch. Avoid applying excessive force, as this can potentially damage the switch or the keycap.
- Ensure a Secure Fit: As you press down, listen for a satisfying snap or click, indicating that the keycap has securely attached to the switch. Additionally, visually inspect the keycap to ensure it sits uniformly and flush with the surrounding keycaps.
By following these guidelines, you’ll effectively press down the keycap, ensuring a secure and stable fit on the switch. With the keycap firmly in place, you’re ready to move on to the final step: testing the keycap to confirm its functionality.
Step 4: Test the Keycap
After successfully installing the keycap on your mechanical keyboard, it’s crucial to test its functionality to ensure that it operates as intended. Testing the keycap will allow you to verify that it registers keystrokes accurately and feels comfortable during typing. Follow these steps to test the keycap:
- Type Across the Keyboard: Begin by typing across the keyboard, paying attention to the keycap you’ve just installed. Ensure that the keystrokes register accurately and that the keycap feels stable and responsive during typing.
- Check for Wobbling: Gently wiggle the keycap from side to side to check for any wobbling or instability. A properly installed keycap should sit securely on the switch without excessive movement.
- Assess Comfort and Feel: Pay attention to the comfort and feel of the keycap during typing. Ensure that it complements your typing style and provides a satisfying tactile experience.
By conducting these tests, you’ll be able to confirm that the keycap is functioning as expected and meets your comfort and performance standards. If the keycap passes these tests successfully, you can rest assured that the installation was a success, and your customized mechanical keyboard is now ready for use.
Conclusion
Congratulations! You’ve successfully learned how to put a keycap on a mechanical keyboard. By following the simple steps outlined in this guide, you’ve gained the knowledge and skills to customize your keyboard with new keycaps, adding a personalized touch to your typing experience.
From gathering the necessary tools to aligning, pressing down firmly, and testing the keycap, each step plays a crucial role in ensuring a seamless and satisfying keycap installation process. By taking the time to align the keycap accurately and pressing down firmly, you’ve guaranteed a secure and stable fit on the switch, enhancing both the visual appeal and functionality of your keyboard.
Remember, the process of customizing your mechanical keyboard with unique and stylish keycaps is not only a practical endeavor but also an opportunity for self-expression. Whether you opt for vibrant colors, intricate designs, or specialty keycap sets, your keyboard can now reflect your individuality and personal style.
As you continue to explore the world of mechanical keyboards and keycap customization, don’t hesitate to experiment with different keycap profiles, materials, and designs to find the perfect combination that resonates with you. Embracing the art of keycap customization allows you to infuse your keyboard with personality and elevate your typing experience to new heights.
Now that you’ve mastered the art of putting keycaps on a mechanical keyboard, you’re well-equipped to embark on a journey of keyboard customization and personalization. Whether you’re a seasoned enthusiast or a newcomer to the mechanical keyboard community, the ability to swap keycaps opens up a world of creativity and individuality, allowing you to make your keyboard truly your own.