Introduction
Are you a mechanical keyboard enthusiast looking to personalize your keyboard? Have you ever found it challenging to remove the keys for cleaning or customization? Fear not, as creating your own mechanical keyboard key puller is an excellent solution. This DIY project allows you to craft a simple yet effective tool to effortlessly remove and replace keys on your mechanical keyboard. In this guide, we'll walk you through the step-by-step process of making a key puller using common household items. By following these instructions, you'll soon have a customized tool that simplifies the maintenance and customization of your beloved mechanical keyboard.
Creating your own key puller not only offers a practical solution for keyboard maintenance but also provides a rewarding hands-on experience. You'll gain a deeper understanding of the inner workings of your keyboard and a sense of accomplishment from crafting your own tool. This project is suitable for beginners and seasoned DIY enthusiasts alike, requiring only a few basic materials and minimal effort. So, roll up your sleeves, gather your supplies, and let's dive into the process of making a mechanical keyboard key puller.
Materials Needed
Before embarking on this DIY project, it’s essential to gather the necessary materials. Fortunately, you won’t need to scour specialty stores for rare components; the items required for creating a mechanical keyboard key puller are likely already within your reach. Here’s a list of the materials you’ll need:
- Two paper clips
- Needle-nose pliers
- Electrical tape or heat shrink tubing
- Wire cutter or scissors
- Small wooden dowel or cylindrical handle (optional)
These readily available materials will serve as the building blocks for your custom key puller. The simplicity of the components underscores the accessibility and feasibility of this DIY project. Once you’ve gathered these items, you’ll be well-equipped to proceed with creating your very own mechanical keyboard key puller.
Step 1: Gather Your Supplies
The first step in this DIY endeavor is to gather the necessary supplies for creating your mechanical keyboard key puller. As mentioned earlier, you’ll need two paper clips, needle-nose pliers, electrical tape or heat shrink tubing, a wire cutter or scissors, and a small wooden dowel or cylindrical handle (optional).
Begin by locating two standard-sized paper clips. These will serve as the primary material for constructing the key puller. Next, ensure you have a pair of needle-nose pliers on hand. These will be used to bend and shape the paper clips with precision. Additionally, have electrical tape or heat shrink tubing ready to secure the wires and provide a comfortable grip for the handle.
For cutting and trimming the paper clips, a wire cutter or scissors will be indispensable. This tool will enable you to manipulate the paper clips into the desired shape and size for effectively removing keyboard keys. Finally, if you prefer a more ergonomic handle for your key puller, consider obtaining a small wooden dowel or a cylindrical handle that fits comfortably in your hand.
With these supplies at your disposal, you’re all set to move on to the next step: preparing the wires for your mechanical keyboard key puller.
Step 2: Prepare the Wires
With the necessary supplies assembled, it’s time to prepare the wires for your custom mechanical keyboard key puller. This step involves shaping and configuring the paper clips to form the functional components of the tool. Follow these detailed instructions to ensure the wires are ready for the next stage of the key puller creation process.
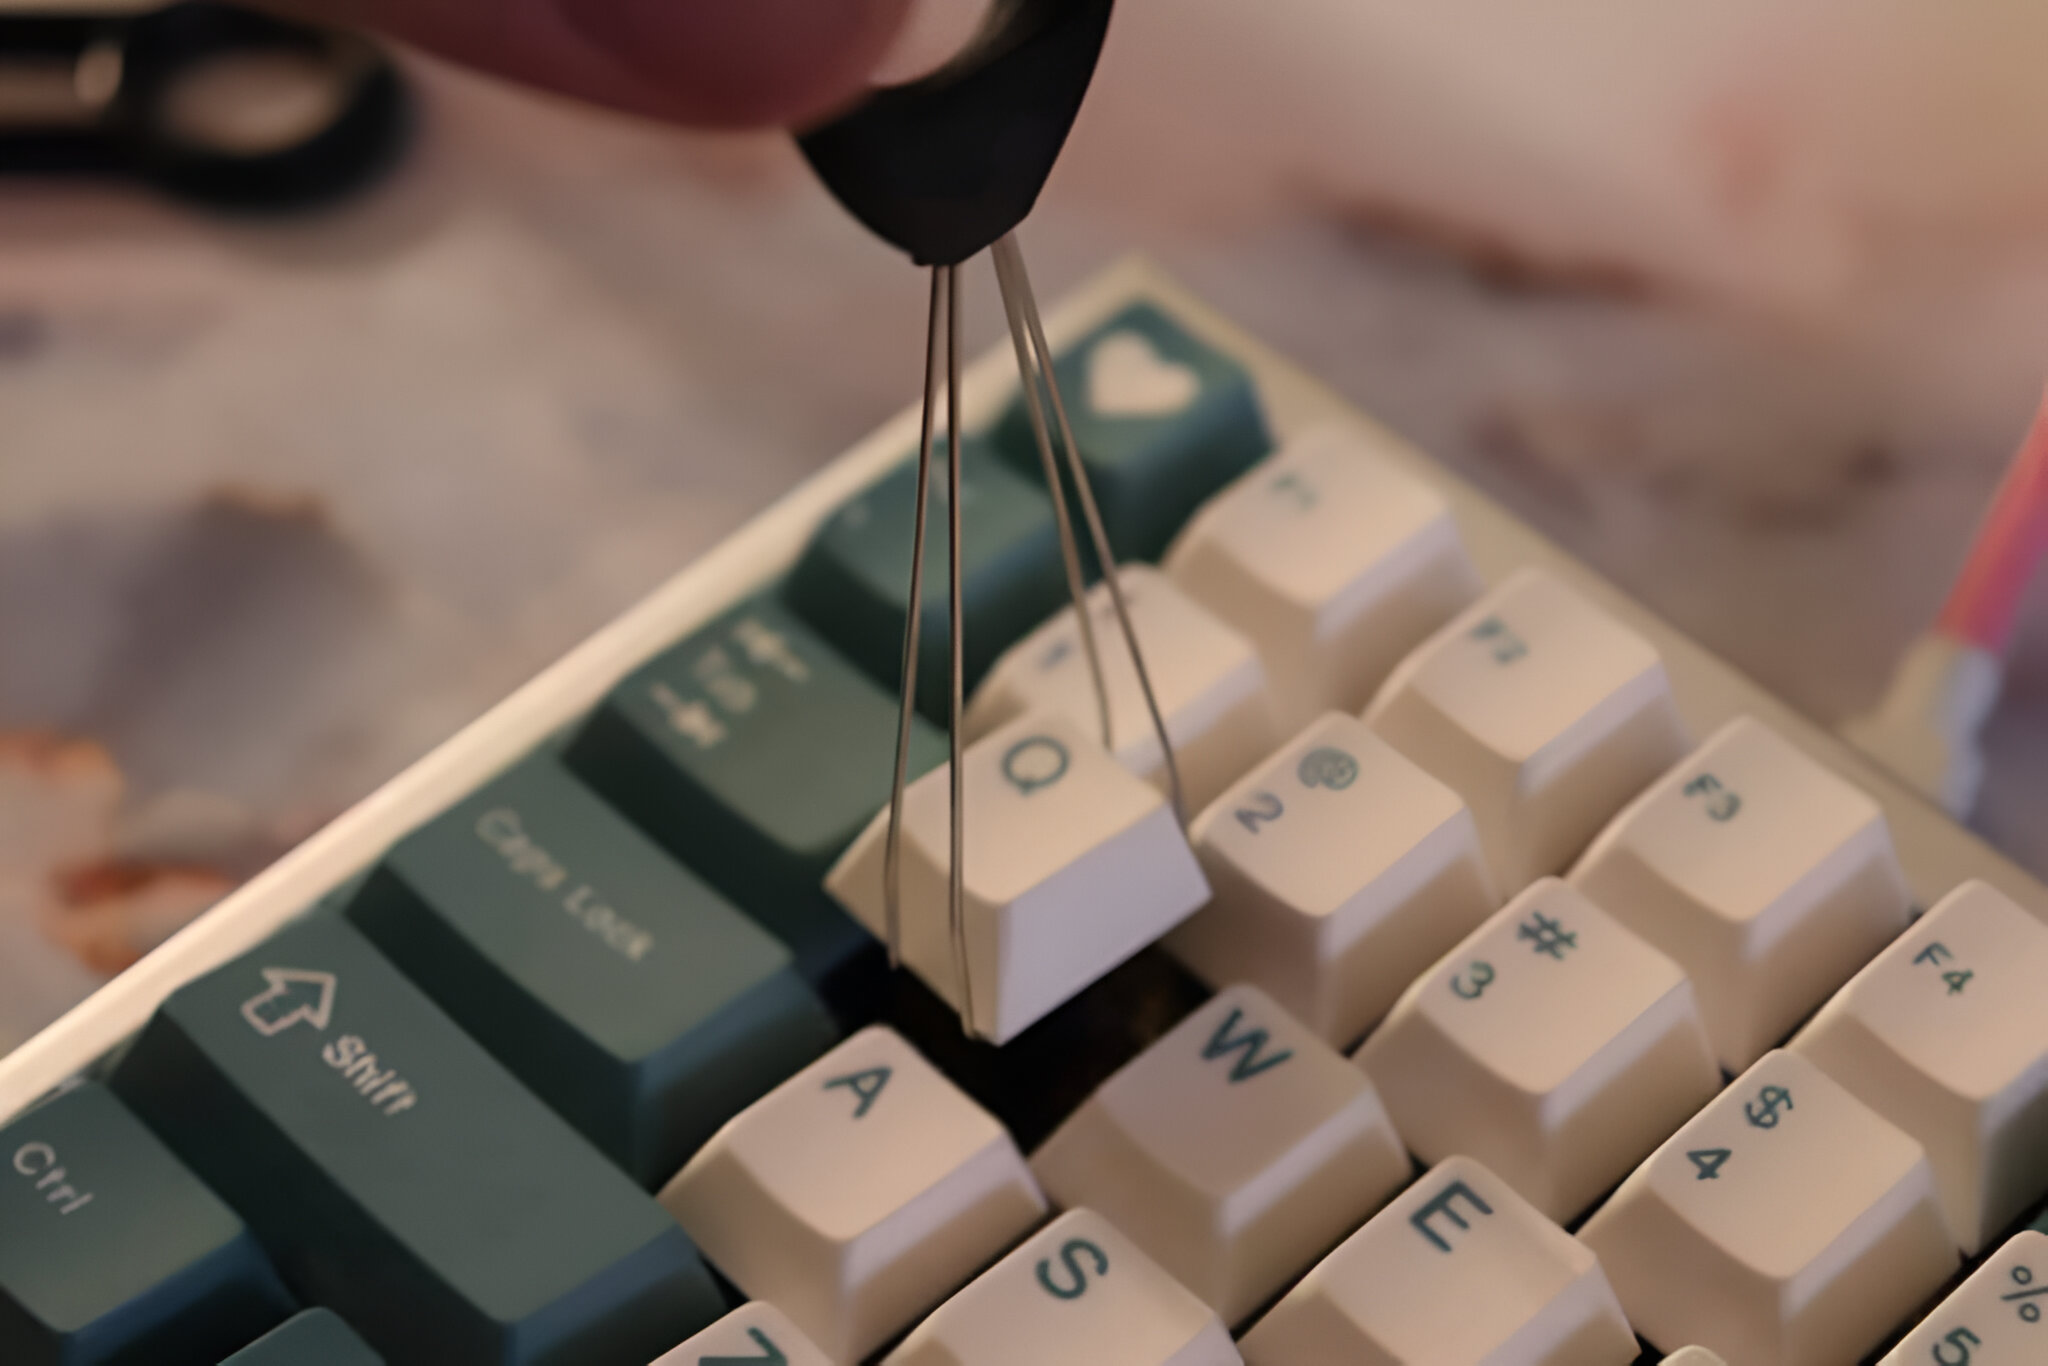
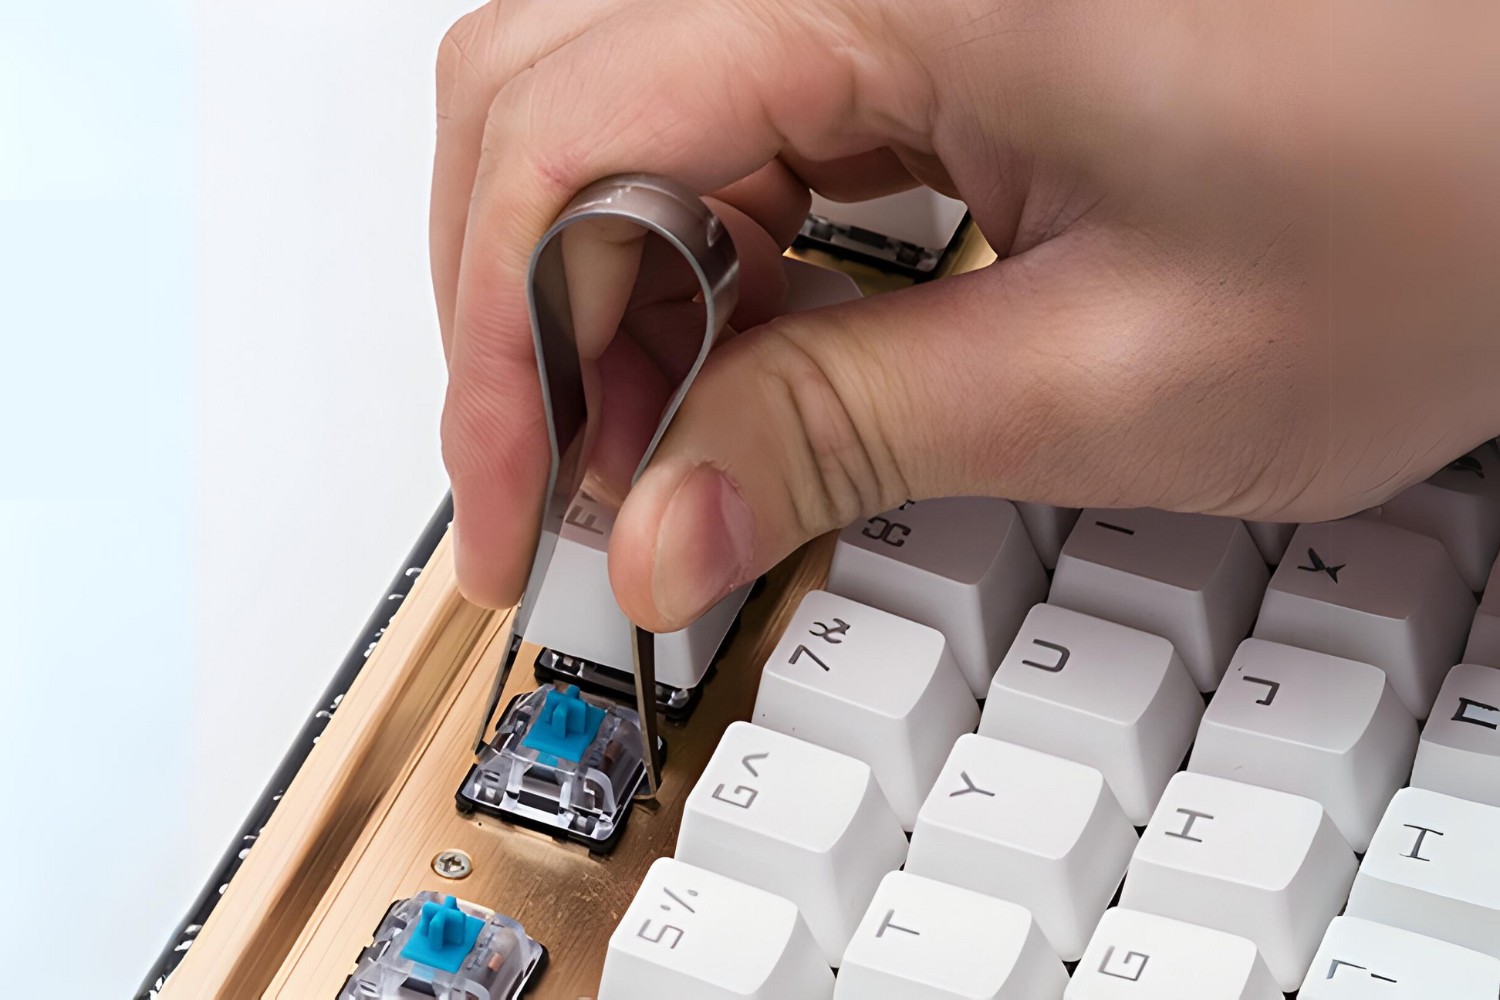
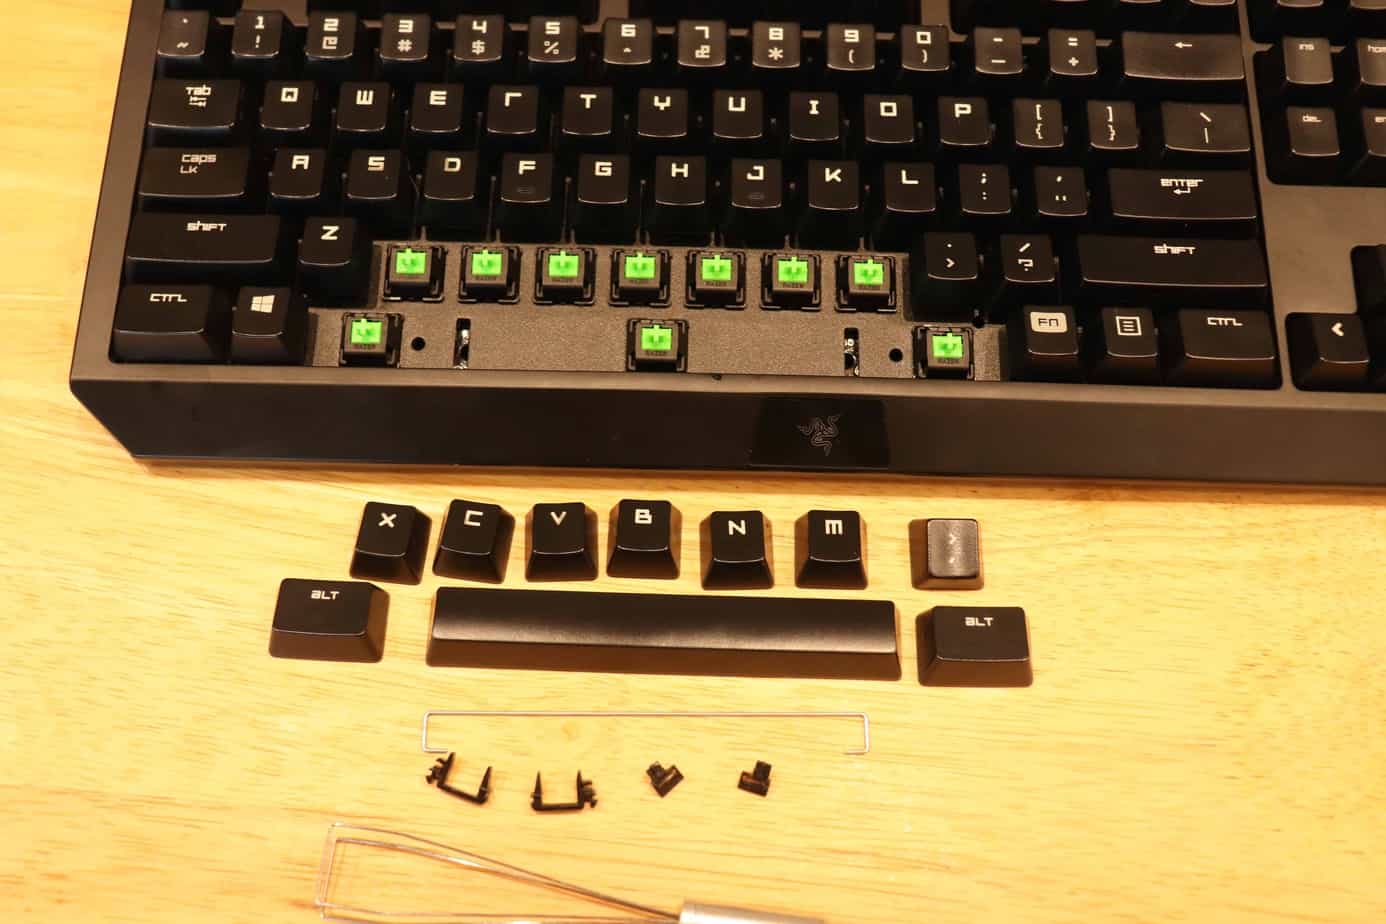
Begin by straightening both paper clips to form long, slender wires. Using the needle-nose pliers, carefully bend one end of each wire to create a small hook. This hook will be used to grasp the edges of the keyboard keys securely. Ensure that the hooks are uniform in size and shape to facilitate consistent performance when using the key puller.
Once the hooks are formed, bend the opposite ends of the wires to create handles or grips. This step is crucial for providing leverage and control when removing the keys from the keyboard. If you have opted to use a small wooden dowel or cylindrical handle, affix the bent ends of the wires to the handle using electrical tape or heat shrink tubing. This will enhance the comfort and usability of the key puller.
After shaping the wires and handles, inspect the components to ensure they are securely fastened and free from sharp edges. Smooth out any rough edges with the needle-nose pliers, and adjust the shape of the hooks if necessary. Once these adjustments are made, your wires are now prepared for the subsequent stage of assembling the mechanical keyboard key puller.
Step 3: Attach the Wires to the Handle
Now that the wires are prepared, the next step in creating your mechanical keyboard key puller is to attach the wires to the handle. If you’ve opted for a small wooden dowel or cylindrical handle, the attachment process will provide a more ergonomic and comfortable grip for using the key puller. Follow these instructions to ensure the wires are securely affixed to the handle.
If you’re using a handle, begin by positioning the bent ends of the wires against the handle in a configuration that allows for a comfortable grip. Once you’ve determined the optimal placement, use electrical tape or heat shrink tubing to firmly secure the wires to the handle. Wrap the tape or tubing tightly around the junction of the wires and the handle, ensuring a snug and stable connection.
As you secure the wires to the handle, pay attention to the alignment and symmetry of the components. The wires should be evenly spaced and firmly attached to the handle, providing a balanced and reliable key puller. If any adjustments are needed, use the needle-nose pliers to fine-tune the positioning and ensure a consistent grip on both wires.
If you’ve chosen not to incorporate a handle and prefer a simpler design, you can proceed with using the key puller without this additional feature. In this case, ensure that the wires are shaped and positioned to provide a secure and comfortable grip for effective use.
Once the wires are securely attached to the handle, your custom mechanical keyboard key puller is nearing completion. The next step involves testing the functionality of the key puller to ensure it performs flawlessly when removing and replacing keys on your mechanical keyboard.
Step 4: Test the Key Puller
After assembling your DIY mechanical keyboard key puller, it’s essential to test its functionality to ensure it effectively serves its purpose. This step involves verifying that the key puller can securely remove and replace keys on your mechanical keyboard without causing any damage. Follow these guidelines to conduct a thorough test of your custom key puller.
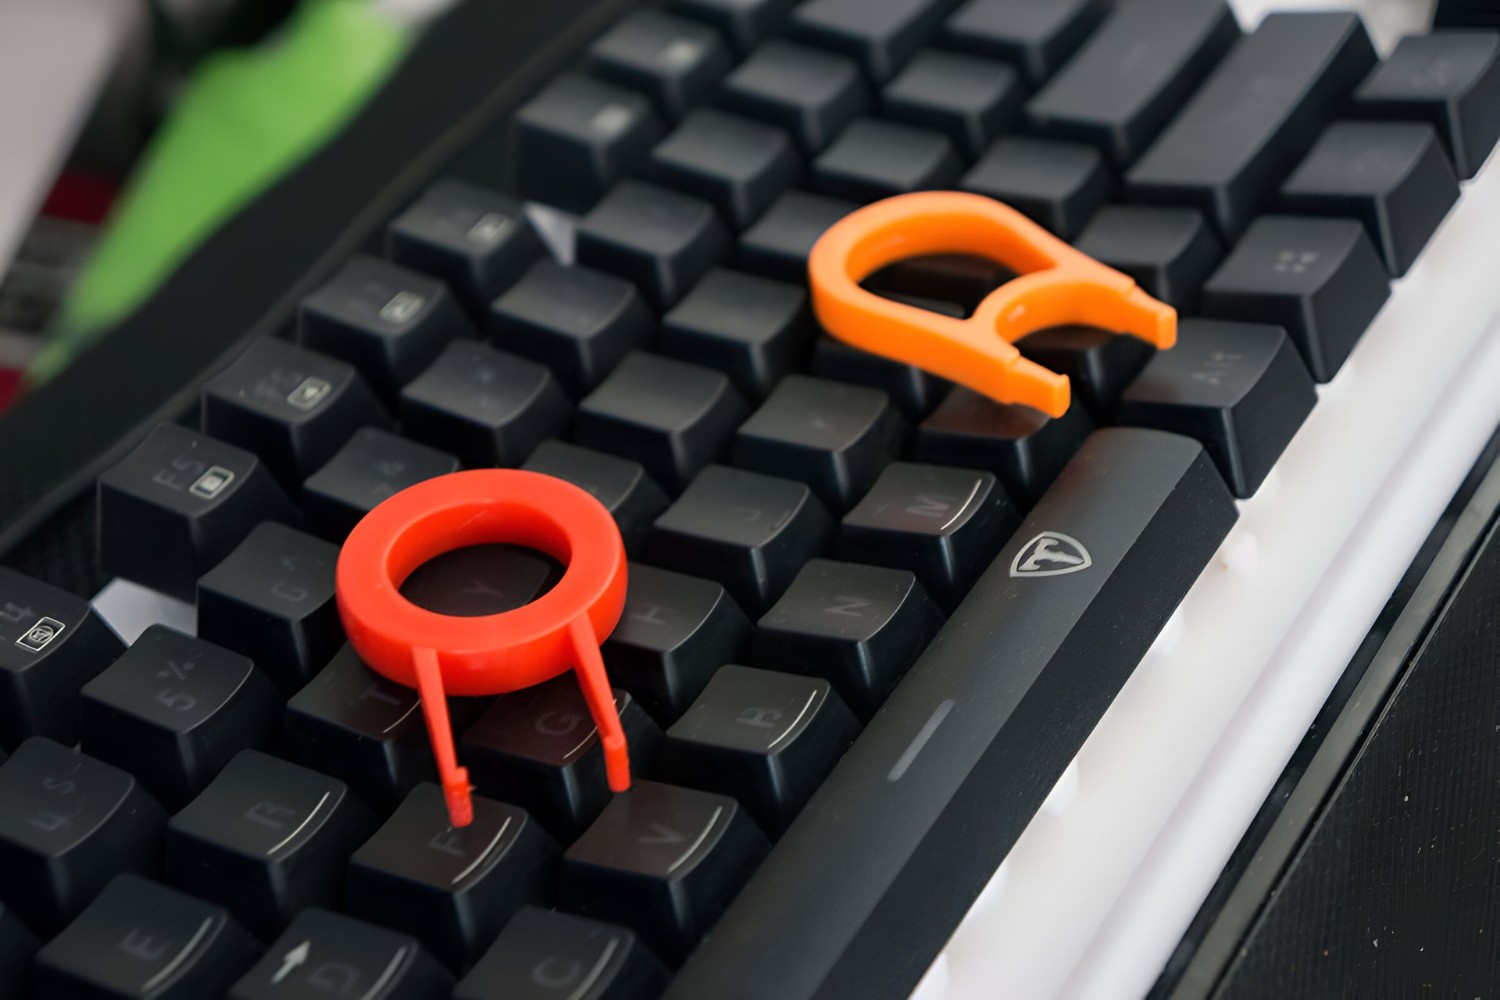
Begin by selecting a key on your mechanical keyboard that you intend to remove. Position the hooked ends of the wires around the edges of the key, ensuring a firm and secure grip. Apply gentle and even pressure to the handles or grips of the key puller, gradually lifting the key from its socket. The key should detach smoothly and without resistance, facilitated by the precision and grip of the key puller’s hooks.
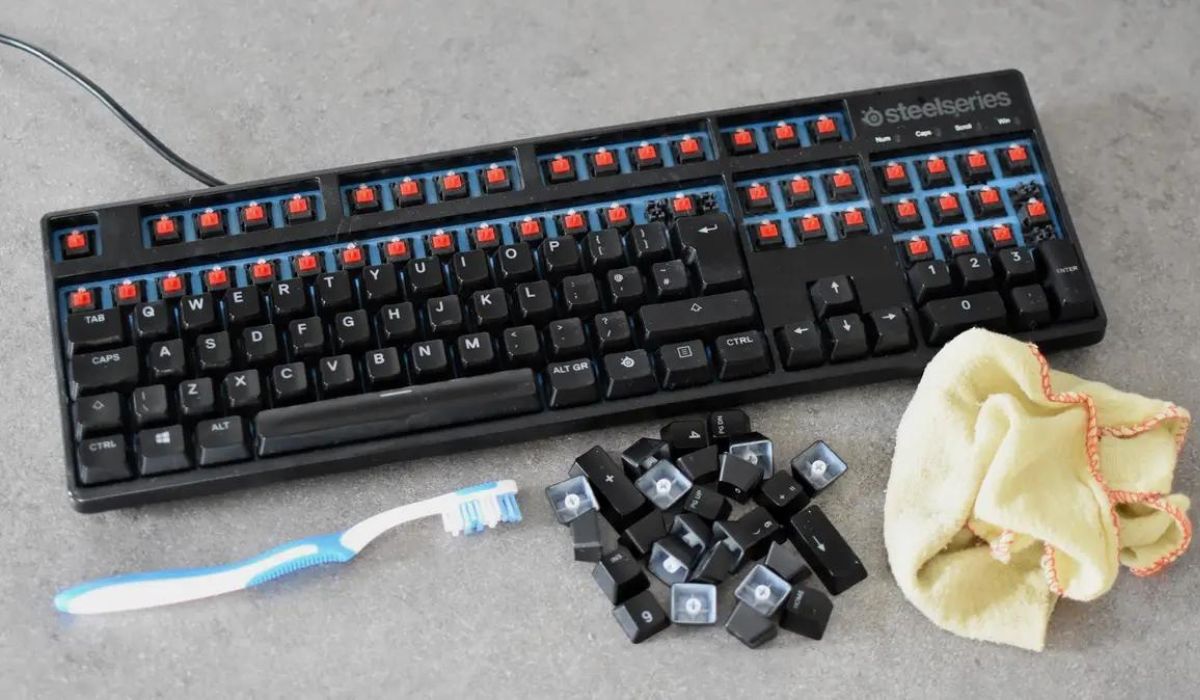
Once the key is removed, examine the effectiveness of the key puller in maintaining the integrity of the key and the keyboard. Ensure that the hooks have not caused any damage to the key or the surrounding keycaps. Additionally, test the key puller on various keys to confirm its consistent performance across different areas of the keyboard.
When replacing the keys, use the key puller to position the key over its socket and gently press down until it securely snaps into place. Verify that the key puller allows for accurate and controlled placement of the keys, ensuring they are reinstalled correctly without any damage or misalignment.
Throughout the testing process, pay close attention to the functionality and ergonomics of the key puller. Assess its ease of use, comfort, and overall effectiveness in removing and replacing keys. If any adjustments are needed, such as refining the shape of the hooks or improving the grip, make the necessary modifications to optimize the performance of your custom key puller.
Upon successful completion of the testing phase, you can confidently rely on your custom mechanical keyboard key puller to simplify the maintenance and customization of your beloved keyboard. With its proven functionality and practical design, your DIY key puller is ready to enhance your mechanical keyboard experience.
Conclusion
Congratulations! By following this guide, you have successfully crafted your own custom mechanical keyboard key puller using simple household materials. This DIY project has empowered you to create a practical and effective tool that simplifies the process of removing and replacing keys on your mechanical keyboard.
Throughout the key puller creation process, you’ve demonstrated resourcefulness and ingenuity by repurposing everyday items to fulfill a specific need. This hands-on experience not only enhances your understanding of the inner workings of your keyboard but also instills a sense of accomplishment from crafting a functional tool with your own hands.
With the key puller now in your possession, you have a reliable and personalized solution for maintaining and customizing your mechanical keyboard. The ergonomic design, precision hooks, and secure grip of the key puller make it an indispensable accessory for keyboard enthusiasts seeking to personalize their typing experience.
As you continue to explore the world of mechanical keyboards and DIY projects, remember the valuable skills and creativity you’ve employed in this endeavor. Whether it’s for cleaning, customizing, or maintaining your keyboard, your custom key puller stands as a testament to your ability to innovate and problem-solve with practical, homemade solutions.
Now, armed with your newly crafted key puller, you can confidently embark on keyboard maintenance tasks and customization projects, knowing that you have a reliable and personalized tool at your disposal. Embrace the satisfaction of a job well done, and enjoy the enhanced versatility and convenience that your DIY mechanical keyboard key puller brings to your keyboard maintenance routine.