Introduction
Introduction
If you own a Gateway laptop, you might have wondered how to determine the status of the mouse pad – whether it's active or disabled. The mouse pad, also known as a touchpad, serves as a convenient alternative to a traditional mouse, allowing users to navigate their laptops with ease. However, there are instances when you may need to check if the mouse pad is turned on or off, especially if you prefer using an external mouse or encounter issues with the touchpad's functionality.
Understanding how to discern the status of the mouse pad on your Gateway laptop is essential for troubleshooting and customizing your device to suit your preferences. Whether you're looking to disable the touchpad to prevent accidental cursor movements while typing or to reactivate it after unintentionally turning it off, knowing the methods to check its status is invaluable.
In this guide, we will explore various approaches to determine the status of the mouse pad on your Gateway laptop. From utilizing keyboard shortcuts to accessing the Device Manager, you'll gain insights into the different methods available to check and manage the status of your laptop's touchpad. Additionally, we'll delve into troubleshooting common touchpad issues, providing you with a comprehensive understanding of how to address potential problems effectively.
Understanding the status of your Gateway laptop's mouse pad empowers you to make informed decisions about its usage, ensuring a seamless and personalized computing experience. Let's delve into the methods for checking the mouse pad status and troubleshooting any associated issues, allowing you to harness the full potential of your Gateway laptop's touchpad functionality.
Checking the Mouse Pad Status on a Gateway Laptop
When using a Gateway laptop, it’s important to be able to determine whether the mouse pad, or touchpad, is currently active or disabled. This knowledge enables you to customize your laptop’s settings to suit your preferences and troubleshoot any potential issues related to the touchpad’s functionality.
One of the simplest ways to check the status of the mouse pad on your Gateway laptop is by observing the indicator light, if available. Many Gateway laptops feature a small LED near the touchpad that illuminates when the touchpad is enabled. If the light is on, it indicates that the touchpad is active, while a lack of illumination typically suggests that the touchpad is disabled.
Alternatively, you can visually inspect the touchpad itself for any physical buttons or switches that may control its status. Some Gateway laptops are equipped with a dedicated button or switch to enable or disable the touchpad, allowing you to easily ascertain its current status. If you locate such a control, simply ensure that it is in the appropriate position to activate the touchpad.
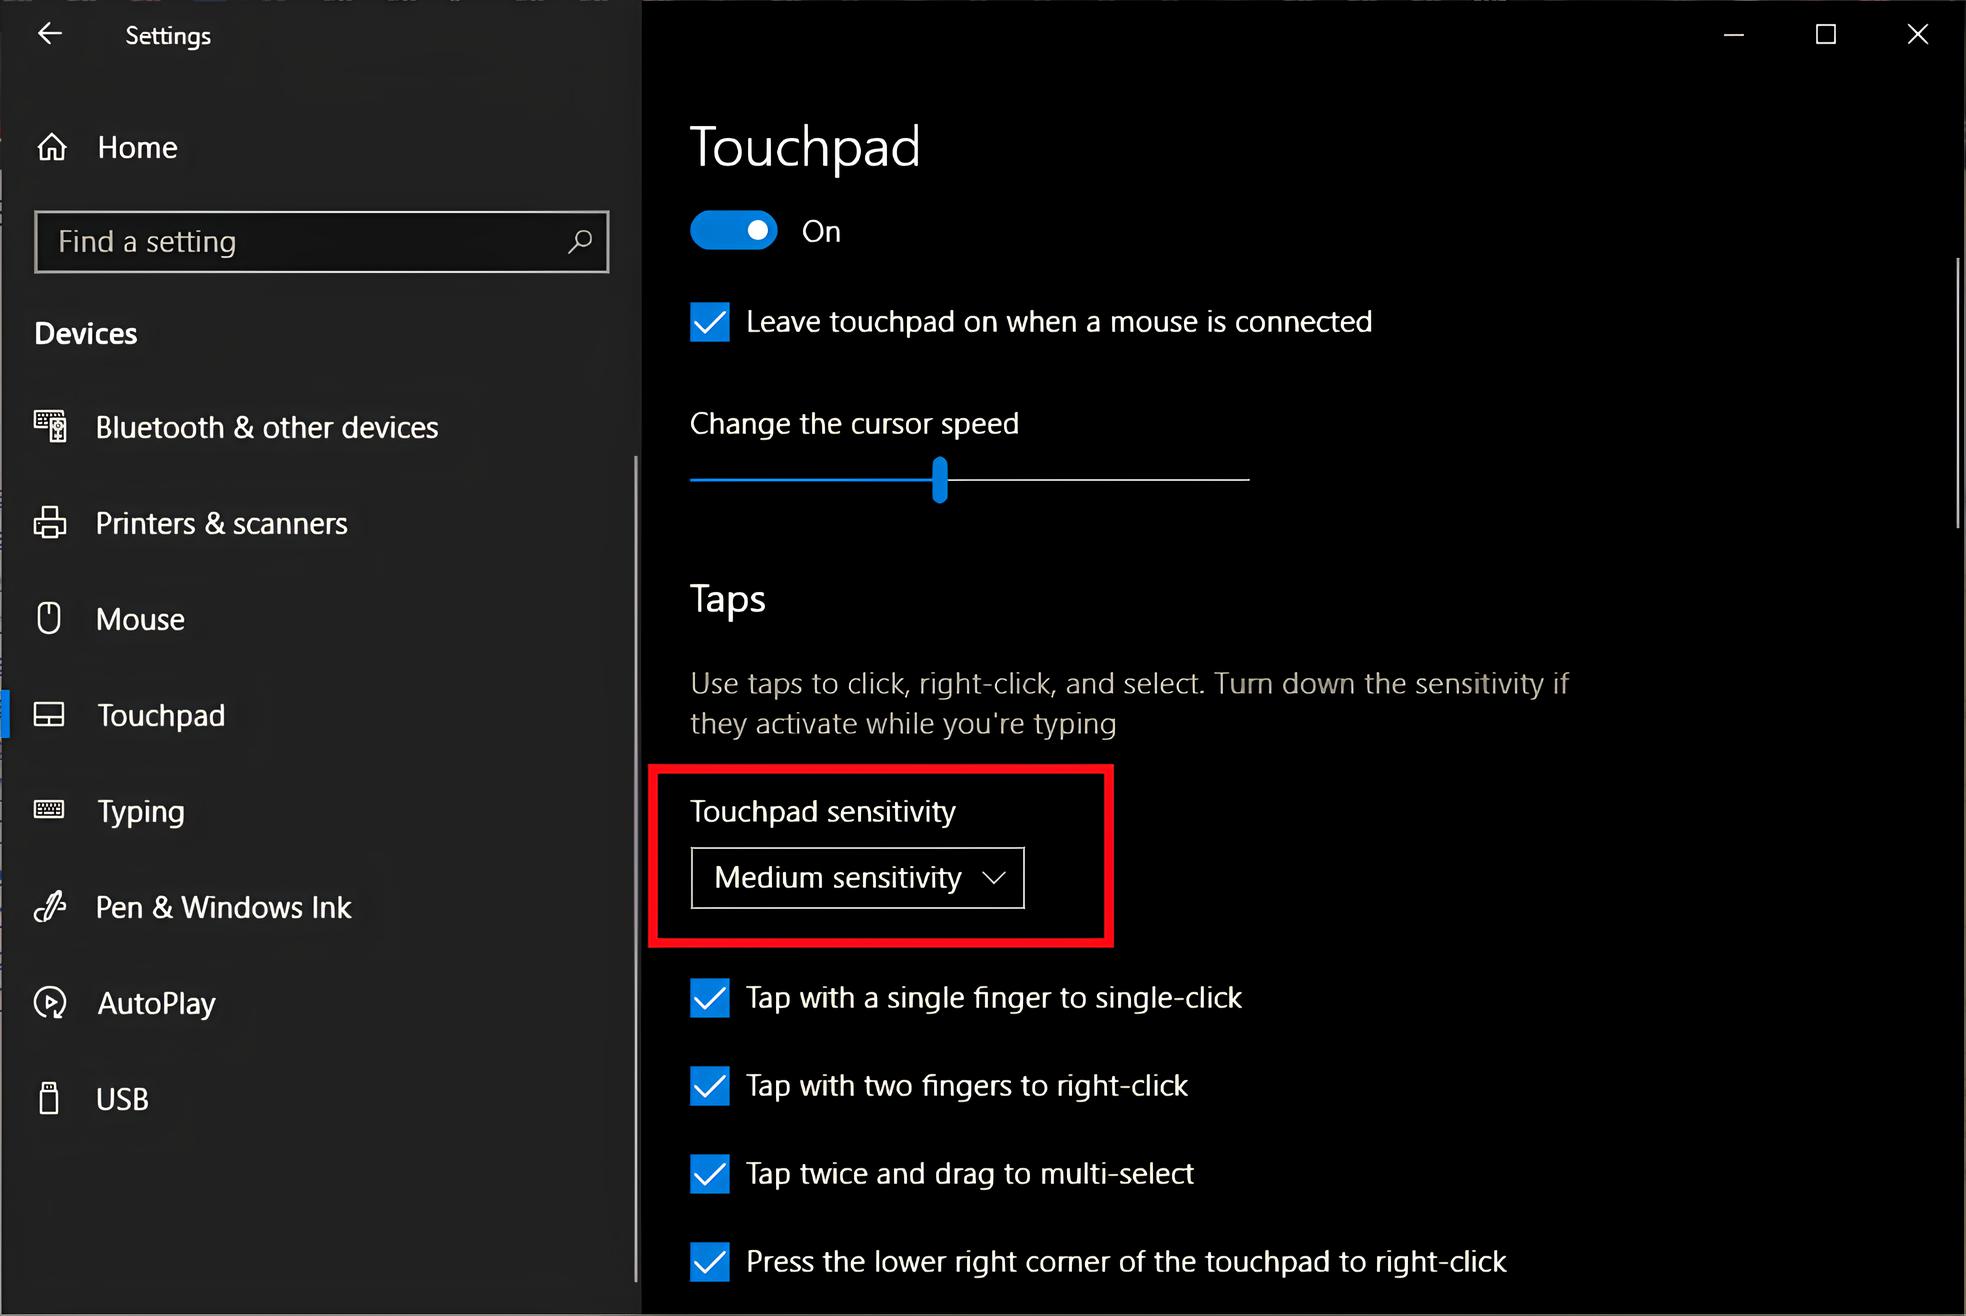
For laptops without a dedicated indicator light or physical control for the touchpad, you can also check the mouse pad status through the laptop’s settings. Navigate to the “Mouse” or “Touchpad” settings in the Control Panel or Settings app, depending on your laptop’s operating system. Here, you can verify the current status of the touchpad and make any necessary adjustments to enable or disable it as needed.
Understanding how to check the mouse pad status on your Gateway laptop provides you with the flexibility to manage its functionality according to your preferences. Whether you prefer using an external mouse and want to disable the touchpad or need to troubleshoot touchpad-related issues, being able to determine its status is a valuable skill that enhances your overall computing experience.
Using Keyboard Shortcuts to Toggle the Mouse Pad
Gateway laptops often offer convenient keyboard shortcuts to quickly toggle the status of the mouse pad. Familiarizing yourself with these shortcuts empowers you to efficiently enable or disable the touchpad without the need to navigate through settings or use external controls.
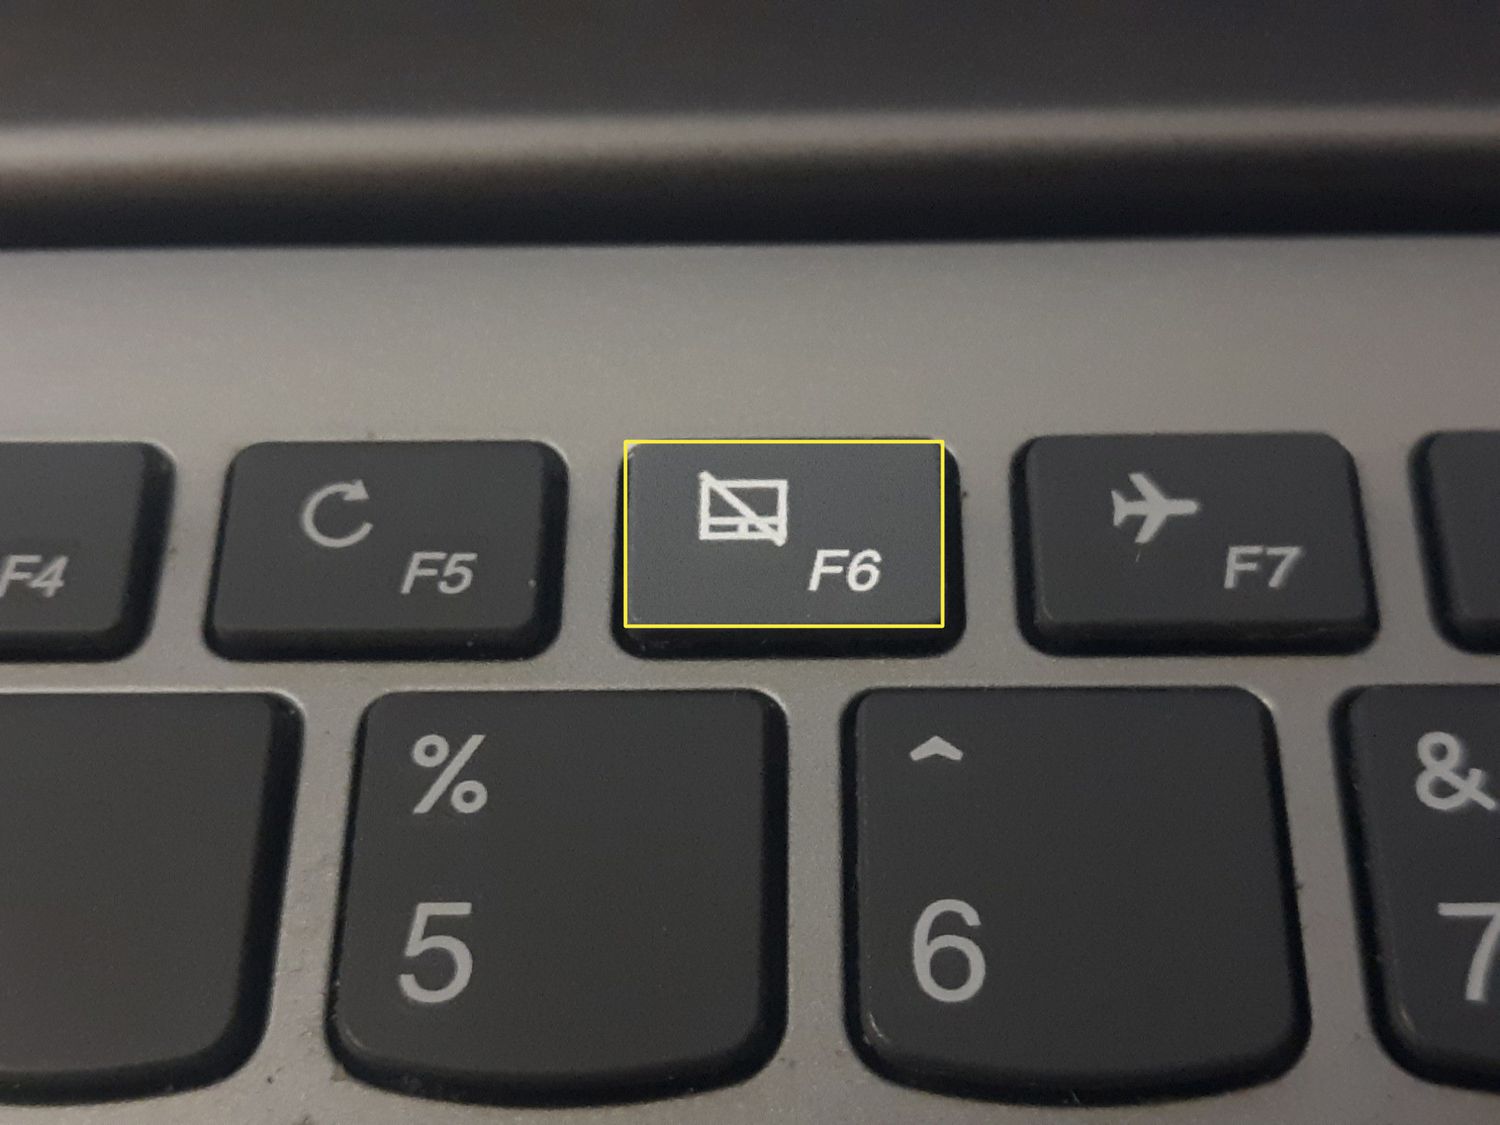
One common keyboard shortcut to toggle the mouse pad on Gateway laptops involves pressing a specific combination of keys. Typically, this involves holding down the “Fn” (Function) key, often located near the bottom left of the keyboard, and pressing a designated function key that corresponds to the touchpad. The function key used for this purpose varies among different laptop models, but it is often one of the “F” keys located at the top of the keyboard.
For instance, pressing “Fn” along with the “F6” key on a Gateway laptop may enable or disable the touchpad, providing a quick and seamless way to control its status. It’s important to consult your laptop’s user manual or support documentation to identify the specific keyboard shortcut applicable to your model, as the combination may differ based on the laptop’s design and features.
Mastering the keyboard shortcuts for toggling the mouse pad on your Gateway laptop enhances your productivity and user experience, allowing you to swiftly switch between touchpad and external mouse usage based on your current needs. Whether you’re on the go or working at your desk, having the ability to effortlessly enable or disable the touchpad through keyboard commands provides a valuable level of control over your laptop’s input options.
Checking Mouse Pad Status in Device Manager
Another method to determine the status of the mouse pad on your Gateway laptop involves accessing the Device Manager, a Windows utility that allows you to view and manage hardware devices installed on your computer. By navigating to the Device Manager, you can inspect the status of the touchpad and troubleshoot any related issues.
To access the Device Manager, you can use the search function in the Windows Start menu or press the “Windows key + X” combination and select “Device Manager” from the menu that appears. Once in the Device Manager, expand the “Mice and other pointing devices” category to reveal the touchpad entry. Here, you can right-click on the touchpad device and select “Properties” to view its status.
Within the touchpad properties window, navigate to the “General” or “Driver” tab to check the device status. If the touchpad is functioning correctly, the status should indicate that the device is working properly. However, if there are any issues with the touchpad, such as driver conflicts or hardware malfunctions, the status may reflect an error or a warning symbol, indicating that further troubleshooting is necessary.
Additionally, within the touchpad properties, you can explore the “Driver” tab to update the touchpad driver or roll back to a previous version if you suspect that a driver update has caused issues with the touchpad’s functionality. Ensuring that the touchpad driver is up to date is crucial for maintaining optimal performance and resolving any compatibility issues that may affect its status.
By checking the mouse pad status in the Device Manager, you gain valuable insights into the health and functionality of the touchpad on your Gateway laptop. This method not only allows you to verify the touchpad’s status but also provides you with the tools to address any underlying issues that may impact its performance, ensuring a smooth and reliable user experience.
Troubleshooting Mouse Pad Issues
Encountering issues with the mouse pad on your Gateway laptop can disrupt your workflow and hinder your overall user experience. However, with the right troubleshooting techniques, you can effectively address common touchpad-related problems and restore its functionality.
If you find that the touchpad is unresponsive or behaving erratically, the first step in troubleshooting is to ensure that the touchpad is enabled. Utilize the keyboard shortcuts or settings mentioned earlier to verify that the touchpad is activated. If the touchpad is enabled but still not functioning properly, consider restarting your laptop, as a simple reboot can resolve temporary software glitches that may affect the touchpad’s performance.
Another troubleshooting step involves updating the touchpad driver. Access the Device Manager, as outlined in the previous section, and navigate to the touchpad properties to check for driver updates. If an update is available, proceed to install it to ensure that your touchpad is equipped with the latest software enhancements and bug fixes.
In cases where the touchpad exhibits intermittent issues or becomes unresponsive after prolonged use, it may be beneficial to clean the touchpad surface. Use a soft, lint-free cloth lightly dampened with a mild cleaning solution to gently wipe the touchpad, removing any accumulated debris or residue that could impede its functionality.
For persistent touchpad issues that remain unresolved after attempting the aforementioned troubleshooting steps, consider performing a system restore to revert your laptop to a previous state where the touchpad was functioning correctly. System restore allows you to roll back your laptop’s settings and software configuration to a point in time when the touchpad operated without issues, potentially resolving any persistent problems.
If all else fails and the touchpad continues to malfunction, reaching out to Gateway’s support resources or seeking assistance from a professional technician may be necessary. Gateway’s official support channels, including online resources and customer service, can provide tailored guidance and solutions to address touchpad issues specific to your laptop model.
By employing these troubleshooting methods, you can effectively address a range of touchpad-related issues that may arise on your Gateway laptop, ensuring that the touchpad operates reliably and enhances your overall computing experience.
Conclusion
Understanding how to discern the status of the mouse pad on your Gateway laptop is essential for optimizing your user experience and addressing potential touchpad-related issues. By utilizing the methods outlined in this guide, you can confidently check the status of the touchpad and troubleshoot any issues that may arise, ensuring that your touchpad operates seamlessly and enhances your productivity.
Whether you prefer using keyboard shortcuts to toggle the touchpad, accessing the Device Manager to inspect the touchpad’s status, or troubleshooting common touchpad issues, the knowledge and techniques provided empower you to take control of your laptop’s touchpad functionality. These methods not only offer convenience and flexibility but also equip you with the ability to tailor your laptop’s input options to suit your preferences.
As you navigate the intricacies of managing the mouse pad on your Gateway laptop, remember to refer to your laptop’s user manual and official support resources for model-specific guidance. Additionally, staying informed about the latest touchpad driver updates and maintenance practices can contribute to the optimal performance and longevity of your laptop’s touchpad.
By incorporating the insights and techniques from this guide into your computing routine, you can confidently manage the status of the mouse pad on your Gateway laptop and address touchpad-related challenges effectively. Embracing these methods empowers you to harness the full potential of your laptop’s touchpad, ensuring a smooth and personalized computing experience tailored to your needs and preferences.