Introduction
Flying a virtual aircraft can be an exhilarating experience, especially when using a flight stick to navigate the skies with precision and finesse. However, for those new to flight simulation or gaming, understanding the technical aspects of a flight stick, such as the deadzone, can be perplexing. In this article, we will delve into the concept of deadzone in the context of flight sticks, shedding light on its significance and providing insights on how to optimize its settings for an enhanced flying experience.
Aspiring aviators and seasoned pilots alike often seek to replicate the realistic feel of controlling an aircraft. This pursuit of authenticity has led to the development of flight sticks with advanced features, including the ability to adjust the deadzone. Understanding the deadzone and its implications is crucial for harnessing the full potential of a flight stick, whether for recreational gaming or professional flight simulation.
Join us as we embark on a journey through the nuances of deadzone in the realm of flight sticks, unraveling its intricacies and empowering enthusiasts to optimize their flight experiences. Whether you're a novice seeking to grasp the fundamentals or a veteran pilot aiming to fine-tune your setup, this exploration of deadzone is sure to elevate your understanding of flight sticks and enhance your aerial escapades.
What Is Deadzone?
Deadzone refers to a critical aspect of the functionality of a flight stick, particularly in the realm of flight simulation and gaming. Essentially, the deadzone is a designated area within the range of motion of the flight stick where no input or response is registered by the system. In other words, when the flight stick is manipulated within the deadzone, the virtual aircraft remains unaffected, as if the controls were momentarily inactive.
Imagine the deadzone as a neutral zone within the movement range of the flight stick. When the stick is positioned within this zone, the software interprets the input as null, effectively disregarding any minor adjustments or fluctuations in the stick’s position. This phenomenon is pivotal in preventing unintended or erratic movements of the aircraft, especially when the flight stick is not being actively manipulated by the user.
It is important to note that deadzone settings can vary across different flight sticks and can often be customized to suit the user’s preferences. The size of the deadzone, denoting the extent of the neutral area, can be adjusted to accommodate individual piloting styles and mitigate any potential issues related to stick sensitivity.
Understanding the deadzone is instrumental in mastering the art of precise control in virtual aviation. By comprehending the role of the deadzone and its implications on flight stick performance, enthusiasts can fine-tune their setups to achieve optimal responsiveness and accuracy, thereby enhancing their overall flying experience.
Why Is Deadzone Important for Flight Sticks?
The deadzone holds significant importance in the realm of flight sticks due to its direct impact on the control and maneuverability of virtual aircraft. Its relevance becomes apparent when considering the intricacies of piloting and the need for precise, responsive input from the flight stick. Several key reasons underscore the importance of the deadzone in optimizing the performance of flight sticks:
- Enhanced Precision: By defining a deadzone, users can eliminate unintended or involuntary movements of the aircraft, thereby ensuring that only deliberate inputs from the flight stick are translated into on-screen actions. This precision is vital for executing maneuvers and maintaining control during flight simulations or gaming experiences.
- Reduced Drift and Instability: Without a deadzone, even minor variations in the resting position of the flight stick could result in unintended drift or instability in the virtual aircraft. The deadzone serves as a buffer, effectively neutralizing these minor fluctuations and providing a stable starting point for user-initiated movements.
- Customizable Responsiveness: Flight stick users can tailor the deadzone settings to align with their preferred sensitivity and control requirements. Whether desiring a more forgiving deadzone for smoother handling or a smaller deadzone for heightened responsiveness, the ability to customize this parameter empowers users to optimize their flight experiences based on their individual piloting styles.
- Realism and Immersion: For enthusiasts seeking an authentic and immersive flight simulation or gaming experience, the deadzone plays a crucial role in emulating the nuanced control nuances of real aircraft. By fine-tuning the deadzone, users can strive for a more realistic and engaging flying experience, enhancing their sense of immersion and mastery.
Ultimately, the deadzone’s importance lies in its capacity to refine the responsiveness and precision of flight sticks, enabling users to exert greater control over their virtual aircraft. By leveraging the deadzone to mitigate unintended movements and tailor the flight stick’s behavior to their preferences, enthusiasts can elevate their piloting proficiency and immerse themselves in captivating aerial escapades.
How to Adjust Deadzone on a Flight Stick
Adjusting the deadzone on a flight stick is a pivotal step in optimizing its performance to align with the user’s preferences and piloting style. The process of fine-tuning the deadzone involves customizing the range of motion within which no input is registered, thereby tailoring the flight stick’s responsiveness and precision. Here’s a comprehensive guide on adjusting the deadzone:
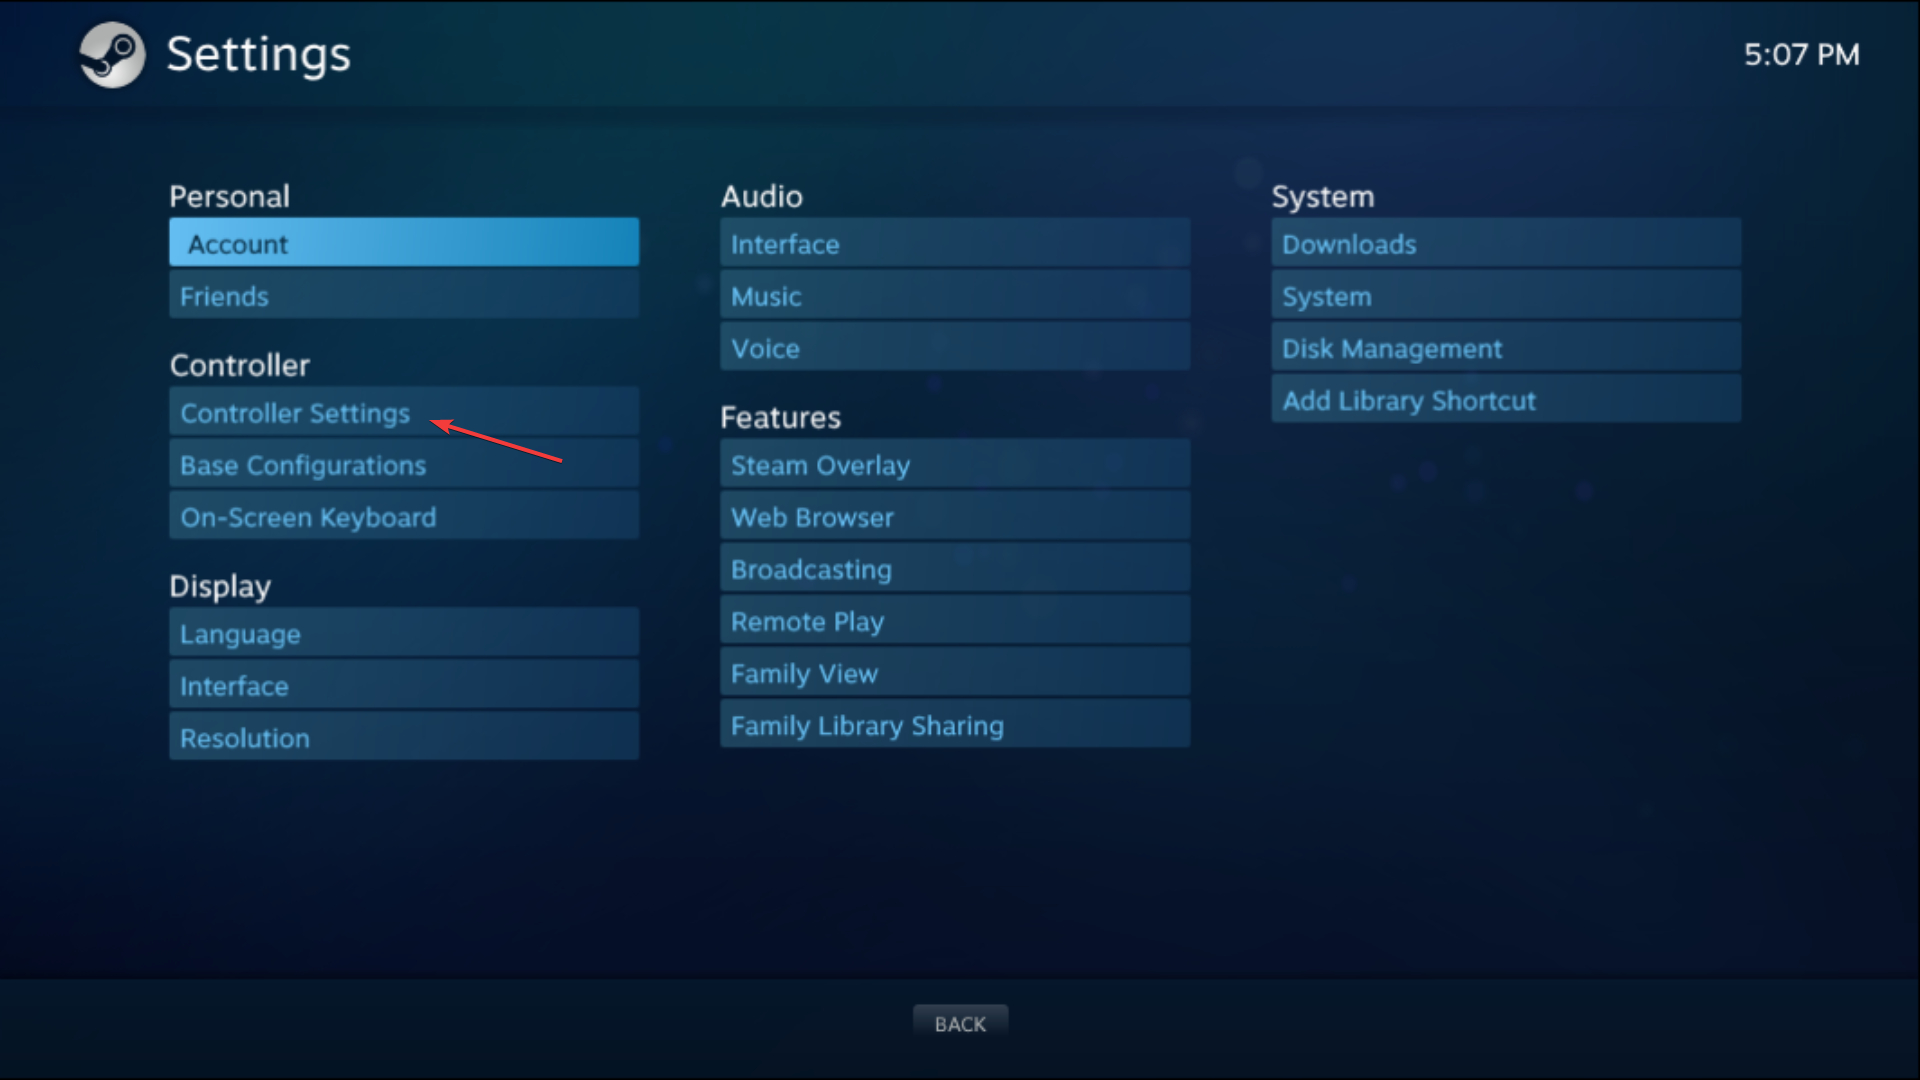
- Accessing Configuration Settings: Begin by accessing the configuration or settings menu of the flight stick, typically within the software or interface associated with the flight simulation or gaming platform. Look for options related to input devices or controller settings, where adjustments for deadzone and sensitivity are commonly found.
- Identifying Deadzone Parameters: Within the settings menu, locate the specific parameters related to deadzone adjustments. This may include options to modify the size of the deadzone, expressed as a percentage of the flight stick’s range of motion, or as a numerical value denoting the degree of neutral area around the stick’s center position.
- Testing and Calibration: Before making significant changes to the deadzone settings, it’s advisable to conduct test flights or maneuvers to gauge the current responsiveness and behavior of the flight stick. This initial assessment can provide valuable insights into any issues related to sensitivity or unwanted movements, serving as a baseline for subsequent adjustments.
- Modifying Deadzone Size: With an understanding of the deadzone parameters, users can experiment with altering the deadzone size to suit their preferences. Increasing the deadzone can mitigate over-sensitivity and erratic behavior, while reducing the deadzone can heighten responsiveness for more nuanced control. It’s recommended to make incremental adjustments and test the impact of each change before proceeding further.
- Iterative Refinement: Fine-tuning the deadzone is often an iterative process, necessitating a balance between responsiveness and stability. Users may need to iterate through multiple adjustments, testing the flight stick’s behavior in various scenarios to achieve an optimal deadzone configuration that aligns with their piloting requirements and enhances their overall flying experience.
By following these steps and exercising patience and discernment, users can effectively adjust the deadzone on their flight sticks to unlock enhanced precision, responsiveness, and control. This proactive approach empowers enthusiasts to tailor their flight experiences to their liking, fostering a deeper sense of immersion and mastery in the captivating world of virtual aviation.