Introduction
Welcome to Splitwise, the popular expense management app that simplifies the process of splitting bills and tracking expenses among friends, roommates, and groups. With Splitwise, you can effortlessly manage and divide expenses, ensuring that everyone pays their fair share. But what happens when you want to add expenses for only certain people in a Splitwise group? We’re here to help you navigate this situation!
Splitwise allows you to create groups, where multiple individuals can join and share common expenses. By default, when you add an expense, it is shared equally among all the group members. However, there may be scenarios where you need to add expenses for only specific individuals, or assign different shares for different participants. Fortunately, Splitwise offers flexible options to accommodate these situations.
In this guide, we will walk you through the process of adding expenses for only some people in a Splitwise group. Whether you’re planning a vacation, splitting rent, or organizing a group event, this feature will come in handy when not everyone in the group is responsible for the same expenses.
So, let’s dive in and discover how you can create expenses for a select few individuals in your Splitwise group, saving you time and ensuring accurate expense tracking!
Understanding Splitwise Groups
Before we delve into adding expenses for only some people in a Splitwise group, let’s first understand the concept of Splitwise groups. Splitwise allows you to create groups to manage shared expenses among a specific set of people.
A group in Splitwise is like a virtual wallet that keeps track of all the shared expenses and helps in evenly distributing the financial responsibilities. It is a convenient way to manage expenses and settle up without the hassles of sending individual payments back and forth.
In a Splitwise group, you can add multiple participants who share common expenses. This can include roommates, colleagues, friends, or family members who are all involved in shared financial obligations, such as rent, utility bills, groceries, or even a group trip.
When you create a group, everyone in the group has access to view and add expenses. By default, any expense added in the group is shared equally among all the participants. However, there may be instances where you need to add expenses for only specific individuals, or assign a different share for each participant. This is where the “Add Expense” functionality with selective participants comes in handy.
Now that you have a basic understanding of how Splitwise groups work, let’s explore how you can add expenses for only specific individuals in your group, giving you more control and flexibility over your shared financial responsibilities.
Adding Expenses in a Splitwise Group
When it comes to managing expenses in a Splitwise group, the default option is to add expenses that are divided equally among all the participants. However, there may be times when you need to add expenses for only some people in the group, or assign different shares to each participant. Splitwise provides a simple and intuitive process to handle these scenarios.
To add expenses in a Splitwise group, follow these steps:
- Step 1: Open the Splitwise app or website and log in to your account.
- Step 2: Navigate to the specific Splitwise group for which you want to add an expense.
- Step 3: Select the “Expenses” tab, where you can view and manage all the group’s expenses.
- Step 4: Choose the “Add Expense” button to start creating a new expense entry.
- Step 5: Enter the expense amount and add any relevant details like a description or category.
- Step 6: Select the participants for this expense. By default, all group members will be selected.
- Step 7: Choose the “Split UNEQUALLY” option to allocate different shares to specific participants.
- Step 8: Assign different shares for each participant involved in the expense.
- Step 9: Confirm the details and click the “Save” button to add the expense to the group.
By following these steps, you can add an expense for only some people in a Splitwise group or assign different shares to different participants, ensuring accurate and personalized expense tracking within the group.
Now that you know the basic process of adding expenses in a Splitwise group, let’s explore two common scenarios: adding expenses for only some people and adding expenses with different shares for specific individuals.
The Default Option: Adding Expenses for All Group Members
By default, Splitwise assumes that expenses added in a group are shared equally among all the participants. This means that when you create an expense entry, the cost will be divided equally among all the group members.
This default option is ideal for situations where everyone in the group shares the same financial responsibility for the expense. For example, if you are splitting the rent with your roommates or sharing the cost of groceries, the default option ensures that everyone contributes equally.
To add an expense for all group members using the default option, simply follow the steps mentioned earlier. Enter the expense amount, select all the participants in the group, and choose the “Split EQUALLY” option. Splitwise will automatically divide the expense equally among all the selected participants when you save the entry.
Using the default option of splitting expenses equally among all group members simplifies the process and helps ensure fairness. It eliminates the need to manually calculate each participant’s share and simplifies the process of tracking shared expenses in the Splitwise group.
However, there may be situations where you need to add expenses for only specific individuals or assign different shares to participants. Read on to explore how you can handle these scenarios in Splitwise.
Scenario 1: Adding Expenses for Only Some People
In some cases, you may need to add expenses in a Splitwise group that are only applicable to certain individuals, not the entire group. This could be for various reasons, such as when some members are not responsible for a particular expense or when a specific expense is only shared among a subset of participants.
Here’s how you can add expenses for only some people in a Splitwise group:
- Step 1: Open the Splitwise app or website and log in to your account.
- Step 2: Navigate to the specific Splitwise group where you want to add the expense.
- Step 3: Select the “Expenses” tab to access the list of expenses for the group.
- Step 4: Choose the “Add Expense” button to create a new expense entry.
- Step 5: Enter the expense amount and add any relevant details like a description or category.
- Step 6: Select the participants who are responsible for this expense. You can choose multiple participants by checking the boxes next to their names.
- Step 7: Instead of selecting the default “Split EQUALLY” option, choose the “Split UNEQUALLY” option.
- Step 8: Assign the specific shares for each participant involved in the expense. You can enter the exact amounts or choose percentage-wise splits.
- Step 9: Confirm the details and click the “Save” button to add the expense to the group.
By following these steps, you can add an expense to your Splitwise group that is applicable only to specific individuals within the group. This allows you to accurately track expenses and ensures that only those responsible for the expense are included in the calculations.
Now that you know how to add expenses for only some people, let’s move on to the next scenario: adding expenses with different shares for specific individuals.
Step 1: Open the Splitwise App or Website
The first step to adding expenses for only some people in a Splitwise group is to open the Splitwise app or website. Splitwise provides both a mobile app and a web version, giving you flexibility in accessing and managing your expenses.
To begin, follow these steps:
- Mobile App: If you’re using a smartphone or tablet, locate the Splitwise app on your device. Tap on the app icon to open it.
- Web Version: If you prefer using a computer or laptop, open your preferred web browser and navigate to the Splitwise website by entering “www.splitwise.com” in the address bar.
Once you’ve opened the Splitwise app or website, you will need to log in to your account to access your groups and add expenses.
If you already have a Splitwise account, enter your email address and password to log in. If you’re new to Splitwise, you can sign up for a free account by providing your email address, creating a password, and following the on-screen instructions.
Once you’re logged in, you’re ready to proceed to the next step and navigate to the specific Splitwise group where you want to add the expenses for only select individuals.
By opening the Splitwise app or website, you gain access to all the features and functionalities that allow you to efficiently manage your expenses and track transactions within your Splitwise groups.
Now that you’ve completed the first step, let’s move on to Step 2, where you’ll navigate to the desired Splitwise group.
Step 2: Navigate to the Group Page
After opening the Splitwise app or website and logging in to your account, the next step is to navigate to the group page where you want to add expenses for only some people. This page allows you to view and manage all the expenses associated with a specific Splitwise group.
To navigate to the group page, follow these steps:
- Mobile App: On the Splitwise app, you will find a menu icon on the top-left corner of the screen. Tap on this icon to access the main menu.
- Web Version: On the Splitwise website, you will see a navigation bar at the top of the page. Click on the “Groups” tab in the navigation bar.
Once you have accessed the main menu on the mobile app or clicked on the “Groups” tab on the web version, you will see a list of all the groups you are a part of.
Scroll through the list or use the search function to find the specific Splitwise group where you want to add expenses for only select individuals.
Click or tap on the name of the group to enter the group page.
On the group page, you will find various sections such as “Dashboard,” “Expenses,” “Settle Up,” and more, depending on the features available in your Splitwise group. This is where you can access and manage all the expenses related to the group.
Now that you have successfully navigated to the group page, you can proceed to Step 3, where you will learn how to select the “Expenses” tab to add new expenses.
Step 3: Select the Expense Tab
Once you have navigated to the group page in Splitwise, the next step is to select the “Expense” tab. This tab allows you to easily manage and view all the expenses associated with the specific Splitwise group.
To select the “Expense” tab, follow these steps:
- Mobile App: On the group page, you will see a series of tabs or buttons at the top or bottom of the screen. Look for the tab labeled “Expenses” or an icon resembling a dollar sign. Tap on this tab to access the group’s list of expenses.
- Web Version: On the group page, you will find a navigation bar or a sidebar with different sections. Look for the section labeled “Expenses” or a tab/tabular menu item with the same name. Click on this section to view the group’s list of expenses.
By selecting the “Expense” tab, you will be directed to a page where you can see all the expenses that have been added within the Splitwise group.
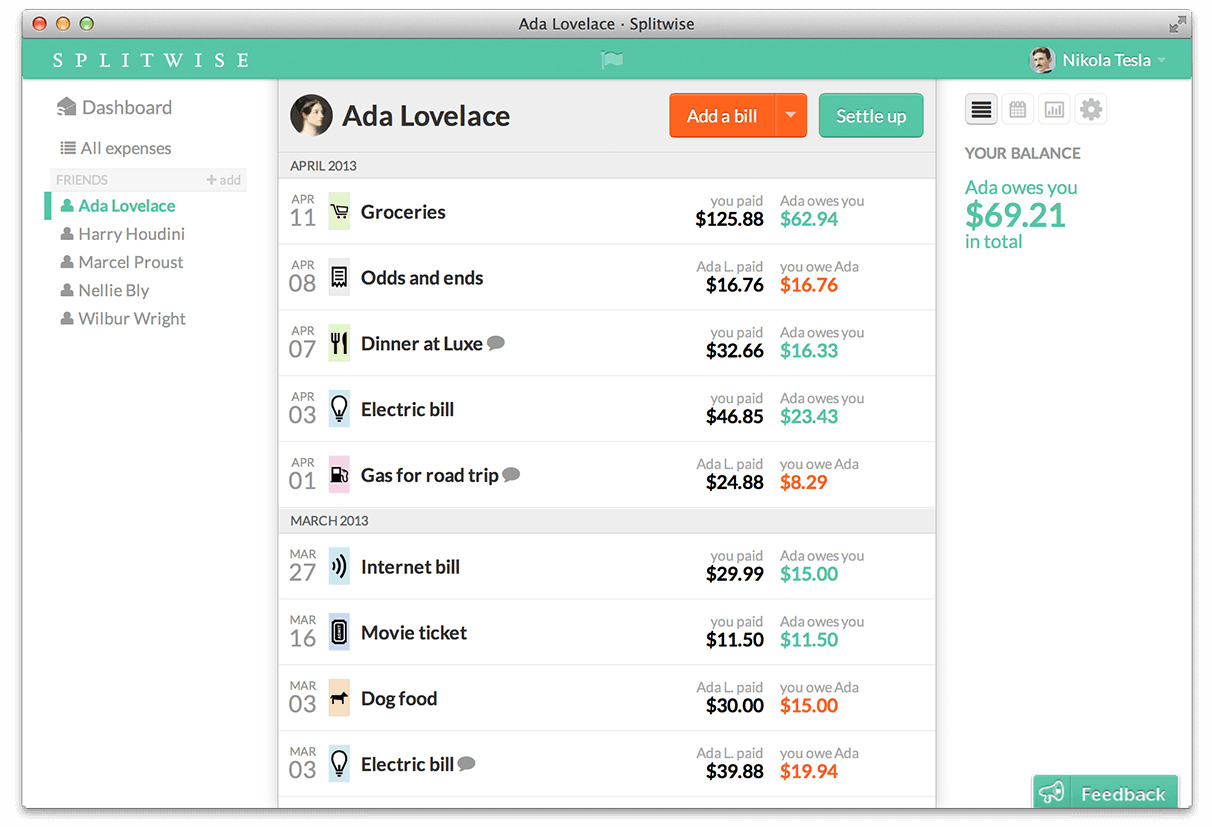
This page typically displays a chronological list of expenses, showcasing important details such as the amount, description, date, participants involved, and how the expense was split.
Now that you have successfully accessed the “Expense” tab, you are ready to move on to Step 4 and add a new expense to the group.
Keep in mind that the appearance and location of the “Expense” tab may vary based on the version of Splitwise you are using (mobile app or web), so explore the app or website if you’re having difficulty locating it.
Step 4: Choose “Add Expense”
After selecting the “Expense” tab in your Splitwise group, the next step is to choose the “Add Expense” option. This allows you to create a new expense entry and specify the details of the expense.
To choose “Add Expense,” follow these steps:
- Mobile App: On the expense page, you will typically find a prominent button or icon with the label “Add Expense.” Tap on this button to begin creating a new expense.
- Web Version: On the expense page, you will typically find a button or link with the label “Add Expense.” Click on this button to start adding a new expense entry.
Once you select “Add Expense,” you will be presented with a form or screen where you can enter the necessary details of the expense, such as the amount, description, and participants involved.
This step ensures that you are ready to input and track the specific expenses that you want to add for only select individuals in your Splitwise group.
Keep in mind that the placement and appearance of the “Add Expense” option may vary slightly based on the version of Splitwise you are using (mobile app or web). However, it is typically easily accessible within the “Expense” section.
After choosing “Add Expense,” you are now prepared to move on to Step 5, where you will enter the amount and other relevant details of the expense.
Step 5: Enter the Expense Amount and Details
Once you have chosen the “Add Expense” option in your Splitwise group, the next step is to enter the amount and details of the expense. This allows you to provide specific information about the expense you’re adding.
To enter the expense amount and details, follow these steps:
- Mobile App: On the “Add Expense” screen, you will typically see fields where you can enter the amount and description of the expense. Tap on the respective fields and use the keyboard to input the relevant information.
- Web Version: On the “Add Expense” form, you will usually find fields where you can enter the amount and description of the expense. Click on the respective fields and type in the necessary details using your keyboard.
When entering the expense amount, make sure to input the correct numerical value that represents the total cost of the expense. This could be a specific amount, such as $50 or €100, depending on the currency.
In addition to the amount, you can provide a detailed description of the expense. This helps in identifying the nature of the expense, such as “Dinner at XYZ Restaurant” or “Grocery shopping at ABC Supermarket.” Including relevant details in the description can aid in better expense tracking and clarity for all group members.
Once you have entered the expense amount and provided a description, you’re ready to proceed to the next steps, where you will select the participants involved in the expense and specify the sharing details.
Remember, accurately entering the expense amount and details ensures that everyone in the Splitwise group is aware of the specific transaction and the purpose of the expense.
Step 6: Select the Participants
After entering the expense amount and details in Splitwise, the next step is to select the participants who are involved in the expense. This allows you to specify which individuals should be included in the calculation and sharing of this particular expense.
To select the participants, follow these steps:
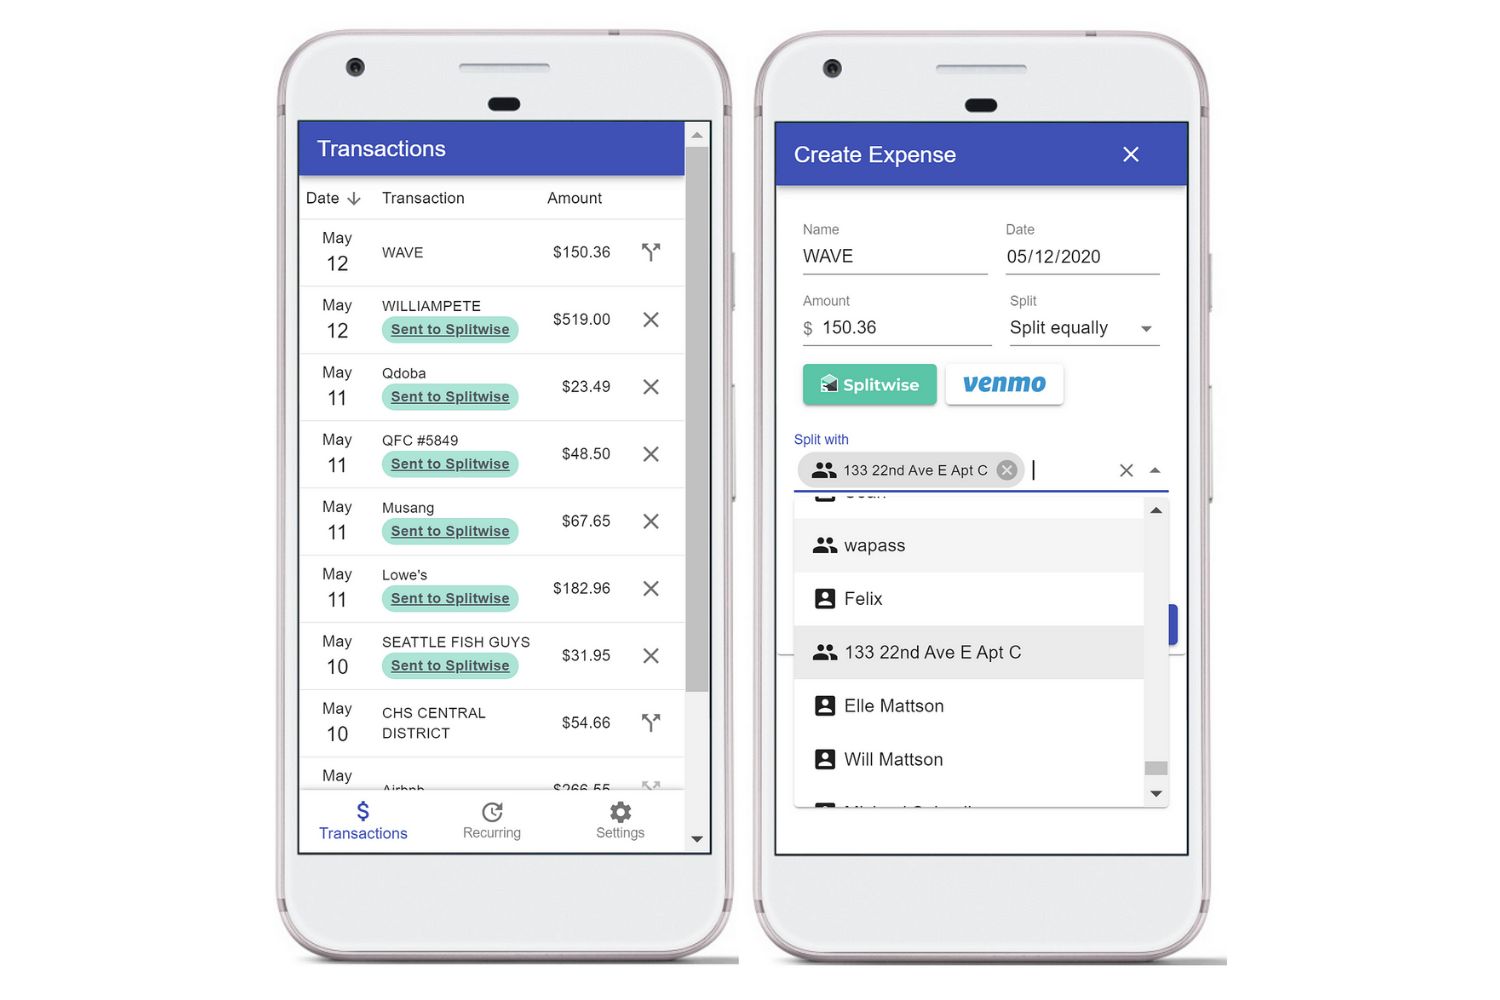
- Mobile App: On the “Add Expense” screen, you will usually find a section dedicated to selecting participants. Tap on this section to access a list of all the group members. You can then choose the individuals who are responsible for this specific expense by checking the boxes next to their names.
- Web Version: On the “Add Expense” form, you will typically find a section where you can select participants. Click on this section to view a list of all the group members. Simply check the boxes next to the names of the individuals who should be included in this expense.
Make sure to carefully review the list of group members and select only those who are involved in this specific expense. This step allows you to add expenses for only select individuals, ensuring accurate and personalized expense tracking.
If you accidentally select or deselect the wrong individuals, you can easily change your selection by unchecking or checking the corresponding boxes next to their names.
Once you have chosen the appropriate participants, you can proceed to the next step, where you will specify the splitting method for this expense.
Remember, selecting the participants involved in the expense ensures that the cost is appropriately allocated among the responsible individuals, reflecting the accurate financial contributions within your Splitwise group.
Step 7: Choose “Split UNEQUALLY”
Once you have selected the participants involved in the expense, the next step is to choose the “Split UNEQUALLY” option in Splitwise. This allows you to assign different shares or amounts to each participant based on their individual responsibility for the expense.
To choose “Split UNEQUALLY,” follow these steps:
- Mobile App: On the “Add Expense” screen, look for the splitting options section. Tap on this section to reveal different splitting methods. Select the “Split UNEQUALLY” option.
- Web Version: On the “Add Expense” form, you will find a dropdown or radio button selection for splitting options. Choose the “Split UNEQUALLY” option from the available choices.
By selecting “Split UNEQUALLY,” you indicate that the expense should not be divided equally among all the participants. Instead, each participant’s share will be determined separately based on your custom allocation.
This splitting option is perfect for situations where certain individuals in the group bear different financial responsibilities or when the expense is not evenly distributed among all participants.
Once you have chosen “Split UNEQUALLY,” you can proceed to the next step, where you will assign different shares or amounts to each participating member.
Remember, selecting the “Split UNEQUALLY” option enables you to accurately reflect the individual responsibilities and financial contributions of each participant within the expense entry in Splitwise.
Step 8: Assigning Different Shares
After choosing the “Split UNEQUALLY” option in Splitwise, the next step is to assign different shares or amounts to each participant involved in the expense. This allows you to specify the individual contribution of each group member based on their responsibility or involvement in the specific expense.
To assign different shares, follow these steps:
- Mobile App: On the “Add Expense” screen, you will typically find a section where you can customize the shares for each participant. Tap on this section, and you can input the specific amounts or percentages for each person involved in the expense.
- Web Version: On the “Add Expense” form, you will commonly find a section where you can define the shares for each participant. Click on this section, and you can enter the desired amounts or percentages for each individual’s contribution to the expense.
When assigning shares, you can specify the exact amount each participant owes or allocate the shares using percentages. For example, if there are three participants in a group, you can assign $30 to one, $20 to another, and $50 to the third participant. Alternatively, you can divide the expense as 30% for one person, 20% for another, and 50% for the last participant.
Ensure that you carefully enter the correct shares for each person, as this will determine their financial responsibility within the specific expense entry in Splitwise.
If needed, you can make adjustments to the shares by editing the amounts or percentages for each participant. Splitwise will automatically calculate and update the remaining share to ensure that the total adds up correctly.
Once you have assigned the different shares, you can proceed to the final step, where you will confirm the details and save the expense in Splitwise.
Remember, assigning different shares allows you to accurately reflect the individual financial contributions within an expense entry for select participants in your Splitwise group.
Step 9: Confirm and Save
After assigning different shares to each participant, the final step is to confirm the details and save the expense in Splitwise. This step ensures that the entered information is accurate and correctly reflects the expense and the allocation of shares among the selected participants.
To confirm and save the expense, follow these steps:
- Mobile App: On the “Add Expense” screen, review all the entered details, including the expense amount, description, selected participants, and their respective shares. Once you have verified that everything is correct, tap the “Save” or “Confirm” button to save the expense.
- Web Version: On the “Add Expense” form, carefully review all the provided information, such as the expense amount, description, selected participants, and their assigned shares. After ensuring the accuracy of the details, click the “Save” or “Confirm” button to save the expense.
Confirming and saving the expense creates an entry in your Splitwise group, reflecting the specific expense amount and the assigned shares for the participants involved. This allows for accurate tracking and calculations within the group.
Once the expense is saved, it will be visible to all the selected participants in the group, and Splitwise will automatically adjust the individual balances accordingly based on the assigned shares. This simplifies the process of settling debts and keeping track of who owes whom within the Splitwise group.
Remember, take a moment to verify all the entered details before saving the expense. Double-checking ensures that there are no mistakes or discrepancies, and all the relevant information is correctly recorded in Splitwise.
Congratulations! You have successfully followed all the steps to add an expense for only some people with different shares in your Splitwise group. Now you can track and manage your shared expenses more accurately within the group.
Scenario 2: Adding Expenses with Different Shares for Some People
In addition to adding expenses for only select individuals in a Splitwise group, there might be instances where you need to add expenses with different shares for specific people. This scenario arises when certain participants have varying degrees of responsibility or involvement in a particular expense.
Let’s explore how you can add expenses with different shares for some people in a Splitwise group:
- Step 1: Follow Steps 1-4 from Scenario 1 to open the Splitwise app or website and navigate to the group page where you want to add the expense.
- Step 2: Select the participants involved in the expense. Choose the individuals who will share this expense, as well as those who will have different shares.
- Step 3: Choose the “Split UNEQUALLY” option to indicate that the expense will be divided unevenly among the participants.
- Step 4: Instead of assigning equal shares, assign different shares for each participant involved in the expense. Specify the exact amounts or percentages according to their respective responsibilities.
- Step 5: Confirm the details and save the expense.
By following these steps, you can add expenses to your Splitwise group with different shares for specific individuals, ensuring that each participant’s financial contribution accurately reflects their level of involvement or responsibility in the expense.
This scenario is particularly useful for situations where certain participants are responsible for a larger portion of the expense or when there are varying levels of participation within the group.
Now that you know how to add expenses with different shares for some people, you have the flexibility to account for various financial dynamics and accurately track shared expenses within your Splitwise group.
Step 1: Follow Steps 1-4 from Scenario 1
To add expenses with different shares for some people in a Splitwise group, the first step is to follow Steps 1-4 from Scenario 1. These steps will get you set up and ready to add the expense, ensuring that you are in the correct group and accessing the expense management section.
Let’s recap the steps you need to follow:
- Step 1: Open the Splitwise app or website and log in to your account.
- Step 2: Navigate to the specific Splitwise group where you want to add the expense.
- Step 3: Select the “Expenses” tab to access the list of expenses for the group.
- Step 4: Choose the “Add Expense” button to create a new expense entry.
By following these steps, you will ensure that you are in the right place within your Splitwise account to add the expense with different shares for some people.
Once you have completed these steps, you can proceed to Step 2, where you will select the participants for the expense and indicate who will have different shares.
Remember, by following the initial steps, you are positioning yourself within the correct Splitwise group and accessing the appropriate section to add the expense with different shares for select individuals.
Step 2: Select the Participants
After following Steps 1-4 from Scenario 1 to navigate to the expense management section of your Splitwise group, the next step is to select the participants who will be involved in the expense. Here, you will indicate which individuals will have different shares for this particular expense.
To select the participants, follow these steps:
- Mobile App: On the “Add Expense” screen, you will typically find a section with a list of all the group members. Tap on this section to access the participants list.
- Web Version: On the “Add Expense” form, there is usually a dropdown menu or a section where you can expand the list of participants.
Review the list of participants and select the individuals who will be involved in this expense. Choose those who will share the expense equally, as well as others who will have different shares assigned to them.
By selecting the participants, you are indicating their involvement and responsibility within the expense. This step allows you to customize the sharing dynamics for each individual, ensuring accurate tracking and accountability.
Keep in mind that you can select multiple participants for this expense, including those who will have equal shares and those who will have different shares assigned to them.
Once you have chosen the appropriate participants, you can proceed to Step 3, where you will choose the “Split Unequally” option to indicate that the expense will be divided unequally among the participants.
Remember, selecting the participants involved in the expense allows you to specify who will have different shares, reflecting their individual financial responsibilities within the expense entry in Splitwise.
Step 3: Choose “Split UNEQUALLY”
After selecting the participants for the expense, the next step is to choose the “Split UNEQUALLY” option in Splitwise. This option allows you to specify that the expense will be divided unevenly among the participants, with different shares assigned to each individual.
To choose “Split UNEQUALLY,” follow these steps:
- Mobile App: On the “Add Expense” screen, there is usually a section or toggle labeled “Split Method” or “Split Evenly.” Tap on this section to reveal different splitting methods and select the “Split UNEQUALLY” option.
- Web Version: On the “Add Expense” form, you will typically find a dropdown menu or radio buttons for splitting options. Choose the “Split UNEQUALLY” option from the available choices.
By selecting “Split UNEQUALLY,” you are indicating that the expense will be distributed unevenly among the participants based on their individual shares. This option allows you to assign different amounts or percentages to each participant involved in the expense.
Choosing “Split UNEQUALLY” provides flexibility when certain participants bear varying financial responsibilities or when there are different levels of participation in the expense. It ensures that the expense calculation accurately reflects the individual contributions within your Splitwise group.
Once you have selected “Split UNEQUALLY,” you can proceed to Step 4, where you will assign the different shares or amounts to each participant.
Remember, by choosing “Split UNEQUALLY,” you enable Splitwise to apply individualized shares and accurately track the financial contributions of each participant for the expense in your group.
Step 4: Assigning Different Shares for Each Participant
After choosing the “Split UNEQUALLY” option in Splitwise, the next step is to assign different shares or amounts to each participant involved in the expense. This allows you to specify the individual contribution for each participant based on their responsibility or involvement in the specific expense.
To assign different shares, follow these steps:
- Mobile App: On the “Add Expense” screen, there is usually a section labeled “Shares” or “Amounts.” Tap on this section to customize the shares for each participant involved in the expense.
- Web Version: On the “Add Expense” form, there is typically a section where you can input the shares for each participant. Click on this section to enter the desired amounts or percentages.
When assigning shares, you have the flexibility to define the exact monetary value or percentage for each participant’s contribution to the expense. For example, if there are three individuals involved, you can assign $30 to one, $20 to another, and $50 to the third participant. Alternatively, you can allocate 30% for one person, 20% for another, and 50% for the last participant.
Ensure that you carefully enter the correct shares for each individual, as this will determine their financial responsibility within the specific expense entry in Splitwise.
If needed, you can make adjustments to the shares by editing the amounts or percentages for each participant. Splitwise automatically calculates and updates the remaining share to ensure that the total accurately reflects the expense amount.
Once you have assigned the different shares, you can proceed to the last step, where you will confirm the details and save the expense in Splitwise.
Remember, assigning different shares allows you to accurately reflect the individual financial contributions within an expense entry for specific participants in your Splitwise group.
Step 5: Confirm and Save
After assigning different shares to each participant for the expense, the final step is to confirm the details and save the expense in Splitwise. This step ensures that the entered information is accurate and reflects the specific expense and allocation of shares among the participants.
To confirm and save the expense, follow these steps:
- Mobile App: On the “Add Expense” screen, review all the entered details, including the expense amount, description, selected participants, and their respective shares. Once you have verified everything is correct, tap the “Save” or “Confirm” button to save the expense.
- Web Version: On the “Add Expense” form, carefully review all the provided information, such as the expense amount, description, selected participants, and their assigned shares. After ensuring the accuracy of the details, click the “Save” or “Confirm” button to save the expense.
By confirming and saving the expense, you create an entry in your Splitwise group that reflects the specific expense amount and assigned shares for the participants involved. This ensures accurate tracking and calculations within the group.
Once the expense is saved, it will be visible to all selected participants in the group, and Splitwise will automatically adjust the individual balances accordingly based on the assigned shares. This simplifies the process of settling bills and keeps track of who owes whom within the Splitwise group.
Take a moment to carefully review all the details entered before saving the expense. Double-checking ensures there are no mistakes or discrepancies, and all relevant information is accurately recorded in Splitwise.
Congratulations! You have successfully followed all the steps to add an expense with different shares for select participants in your Splitwise group. Now you can easily track and manage shared expenses with accurate financial contributions within the group.
Conclusion
Managing expenses within a Splitwise group becomes seamless when you have the flexibility to add expenses for only select individuals or assign different shares to participants. By following the steps outlined in this guide, you can easily navigate through the Splitwise app or website to accurately track and manage shared expenses.
Whether it’s splitting bills with roommates, organizing a group trip, or managing financial obligations with friends or family, Splitwise provides a user-friendly platform to simplify expense tracking and ensure everyone pays their fair share.
In Scenario 1, we explored the process of adding expenses for only some people in a Splitwise group. By carefully selecting the participants and assigning different shares, you can create customized expense entries that accurately reflect individual responsibilities and financial contributions.
In Scenario 2, we discussed adding expenses with different shares for specific individuals. This scenario is useful when participants have varying degrees of responsibility or involvement in an expense, ensuring fairness and accurate tracking within the group.
Remember, each step plays a crucial role in successfully adding expenses with selective participants and different shares. From opening the Splitwise app or website to confirming and saving the expense, attention to detail ensures accurate expense tracking and equitable sharing.
Splitwise empowers you to manage shared expenses effortlessly, eliminating the need for endless calculations and awkward conversations about money. By utilizing its features, you can focus on enjoying shared experiences with friends, family, or housemates, knowing that Splitwise has your back when it comes to managing finances.
So, go ahead and give it a try! Settle up your debts, track expenses, and maintain financial harmony within your Splitwise groups. With the ability to add expenses for only some people and assign different shares, Splitwise keeps everyone on the same page and simplifies the process of sharing expenses.
Start using Splitwise today and bring balance and transparency to your communal finances!
FAQs
Here are some frequently asked questions (FAQs) about adding expenses for only select individuals or with different shares in Splitwise:
- Can I add expenses for only some people in a Splitwise group?
- Can I assign different shares or amounts to each participant in an expense?
- How do I edit or modify the shares after saving an expense?
- Can I split an expense equally among some participants and unequally among others?
- Do the participants need to have Splitwise accounts to be included in the expense?
Yes! Splitwise allows you to select the participants involved in an expense, enabling you to add expenses for only specific individuals within your group.
Absolutely! Splitwise provides the option to assign different shares or amounts to each participant involved in an expense, ensuring accurate financial tracking within your group.
If you need to make changes to the shares or amounts assigned to participants after saving an expense, you can simply edit the expense entry in Splitwise and update the share values accordingly.
Yes, Splitwise allows you to have a combination of equal and unequal splits within the same expense entry. You can specify the shares for each participant based on their involvement or financial responsibility.
Participants need to have Splitwise accounts if they want to actively participate in expense tracking and settlement. However, you can still include individuals who don’t have Splitwise accounts in the expense, and they will be notified via email about their share.
These are just a few of the commonly asked questions regarding adding expenses with selective participants and different shares in Splitwise. If you have any further questions or need assistance, be sure to explore the Splitwise help center or reach out to their support team for clarification.
Remember, Splitwise is designed to simplify the process of managing shared expenses. With its intuitive features, you can navigate through various scenarios and ensure everyone pays their fair share, contributing to a hassle-free and transparent financial arrangement within your Splitwise groups.
Additional Tips for Organizing Expenses in Splitwise Groups
Managing expenses in Splitwise groups can be even more efficient and streamlined with these additional tips:
- Communicate and Set Clear Expectations: Regularly communicate with your group members to discuss financial responsibilities, set expectations, and ensure everyone is on the same page when it comes to expense sharing.
- Use Categories and Labels: Take advantage of Splitwise’s categorization feature to label expenses with relevant tags or categories. This helps in tracking and filtering expenses based on specific criteria, making it easier to analyze and manage shared expenses.
- Regularly Review and Update Expenses: Make it a habit to review and update expenses in your Splitwise groups regularly. This ensures that all shared expenses are accurately recorded and any changes or adjustments are accounted for in a timely manner.
- Utilize Receipts and Attachments: If you have digital receipts or supporting documents for expenses, use Splitwise’s attachment feature to upload and maintain a record of these receipts. This adds an extra layer of transparency and allows for easier reconciliation if needed.
- Settle Up Regularly: To avoid confusion and maintain a balanced financial dynamic within your group, consider settling up debts regularly. Splitwise provides a convenient settle up feature that simplifies the process of reconciling debts and ensures that everyone’s payments are accounted for.
- Keep an Eye on Currency Exchange: If you are involved in a Splitwise group that includes individuals who use different currencies, monitor exchange rates to ensure that everyone is paying their fair share in their respective currencies. Online currency converters can help you stay up to date with the latest rates.
- Be Mindful of Shared Expenses Outside of Splitwise: While Splitwise is a fantastic tool for managing shared expenses within the platform, remember to consider expenses that are not recorded in Splitwise. For example, if someone pays for an expense outside of Splitwise, ensure that this is accounted for to maintain accurate financial records.
By implementing these additional tips, you can enhance your experience with Splitwise and optimize your expense management for smoother financial coordination within your groups.
Remember, Splitwise is designed to simplify the process of managing shared expenses and promote transparency among group members. Using these tips in conjunction with Splitwise’s features will help you navigate the world of shared finances with ease.


