Introduction
Capturing videos from a camcorder to HDMI is a convenient way to transfer high-quality footage to a display or recording device. Whether you're a videographer, content creator, or simply looking to preserve cherished memories, understanding how to connect and capture video from your camcorder to an HDMI device is essential. This process involves leveraging the capabilities of HDMI technology, ensuring proper connections, and configuring your camcorder for seamless video transfer.
In this comprehensive guide, we will delve into the intricacies of capturing video from a camcorder to HDMI, providing step-by-step instructions and troubleshooting tips to help you navigate this process with confidence. By the end of this article, you will have a clear understanding of the fundamental principles behind HDMI connectivity, the necessary steps to connect your camcorder to an HDMI device, and the best practices for capturing high-definition video footage.
Whether you're a novice enthusiast or a seasoned videography professional, mastering the art of capturing video from a camcorder to HDMI will empower you to unleash the full potential of your recording equipment. Let's embark on this enlightening journey to unlock the seamless transfer of captivating visuals from your camcorder to an HDMI-enabled display or recording device.
Understanding the Basics of HDMI
HDMI, or High-Definition Multimedia Interface, is a widely used technology for transmitting high-quality audio and video signals between devices. It serves as a digital replacement for analog video standards, offering a streamlined and efficient means of connectivity. Understanding the fundamentals of HDMI is crucial for successfully capturing video from a camcorder to an HDMI-enabled device.
Key features of HDMI include support for high-definition video resolutions, multi-channel audio transmission, and bi-directional data transfer. This versatile interface is capable of delivering crystal-clear visuals and immersive sound, making it an indispensable tool for modern multimedia applications.
One of the defining characteristics of HDMI is its ability to carry both uncompressed digital audio and video signals, eliminating the need for separate audio and video cables. This simplifies the setup process and reduces cable clutter, contributing to a more streamlined and user-friendly experience.
Furthermore, HDMI supports various video formats, including standard, enhanced, and high-definition video, catering to a wide range of display and recording devices. It also facilitates the transmission of 3D and 4K Ultra HD content, ensuring compatibility with the latest advancements in visual technology.
Another noteworthy aspect of HDMI is its support for Consumer Electronics Control (CEC), which enables interconnected devices to communicate and perform coordinated functions. This feature allows for seamless integration and control of multiple devices through a single remote or interface, enhancing the overall user experience.
As the preferred interface for connecting audiovisual equipment, HDMI has undergone several iterations to accommodate evolving technological standards. The latest HDMI specifications offer increased bandwidth, dynamic HDR support, and advanced audio formats, paving the way for an unparalleled viewing and listening experience.
By familiarizing yourself with the fundamental principles of HDMI, you can harness the full potential of this cutting-edge technology to capture and transmit stunning video content from your camcorder to HDMI-compatible devices.
Connecting Your Camcorder to HDMI
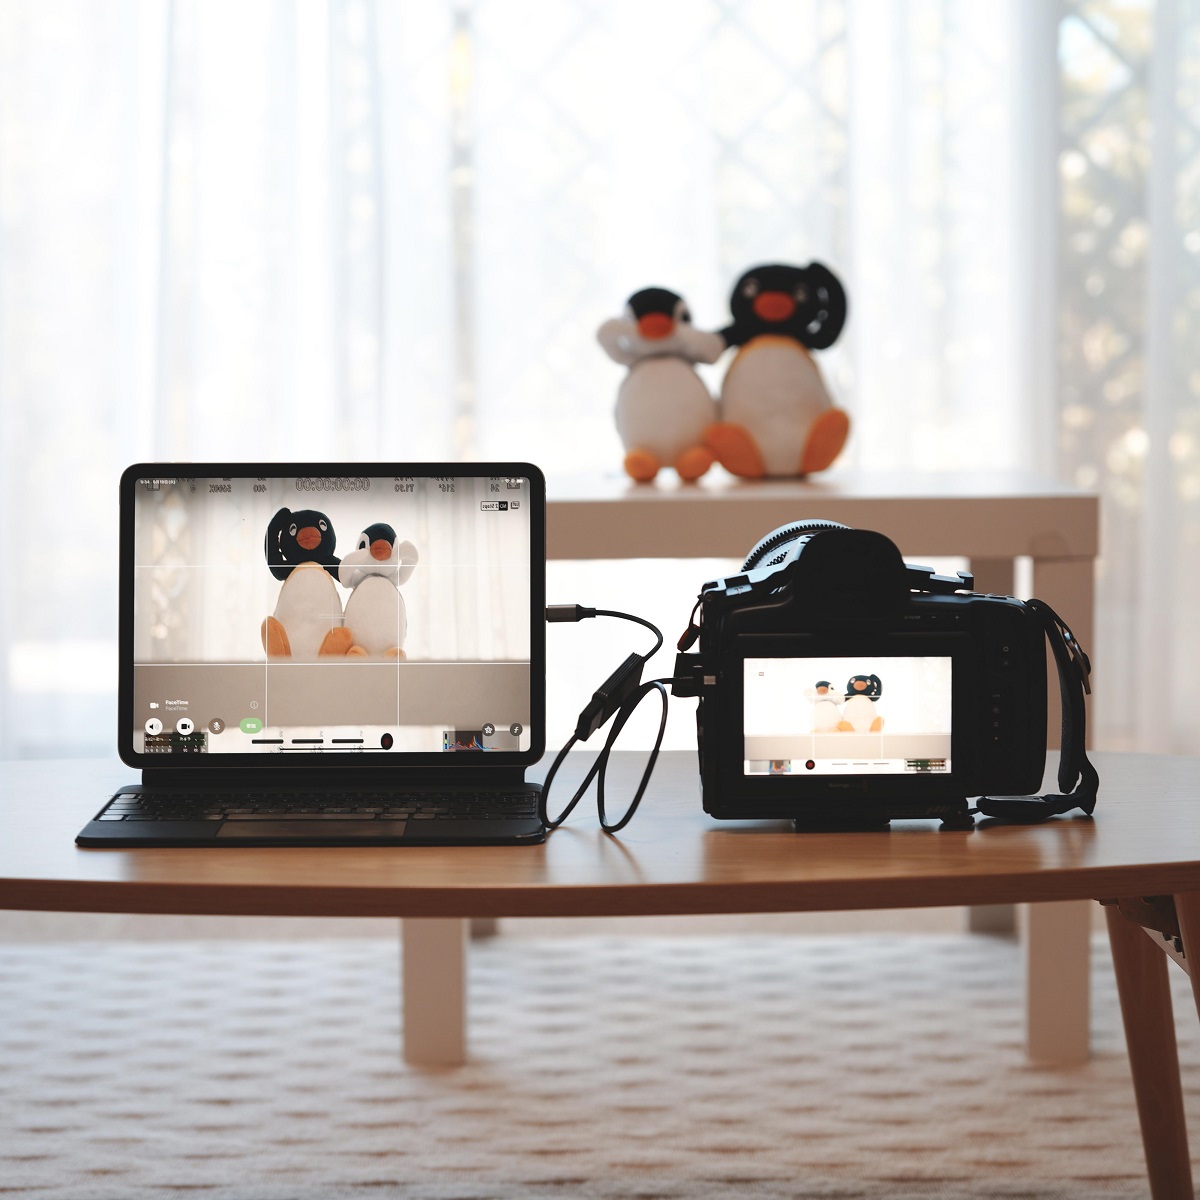
Before embarking on the process of capturing video from your camcorder to an HDMI-enabled device, it is essential to establish a secure and reliable physical connection between the two devices. This involves utilizing the appropriate cables and ports to facilitate seamless signal transmission.
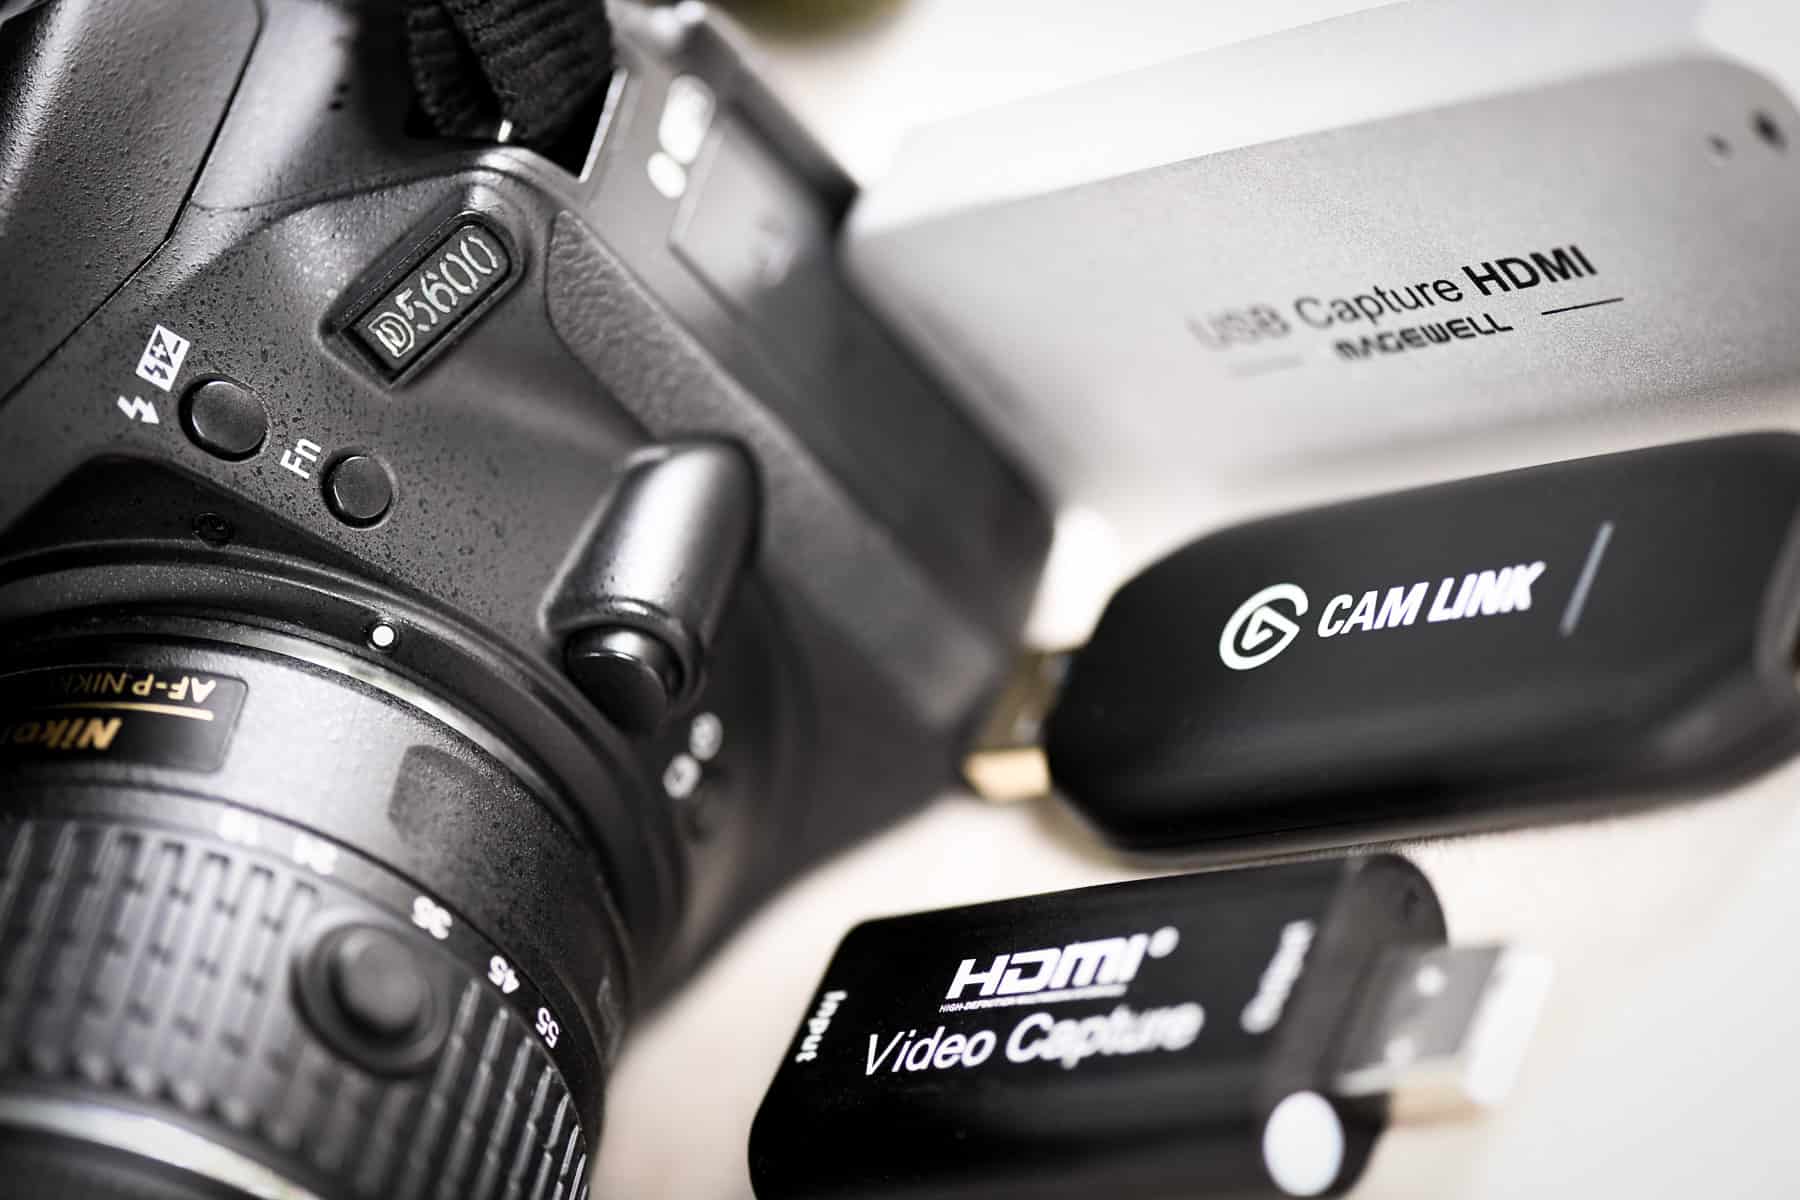
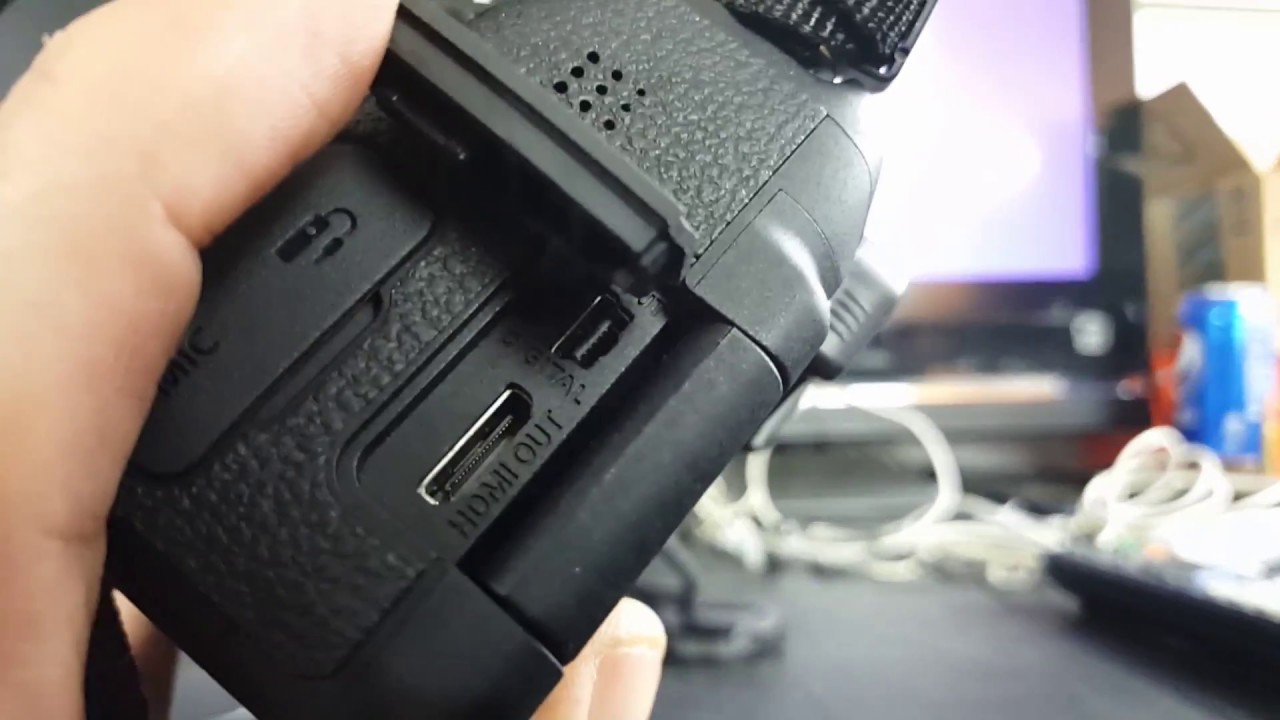
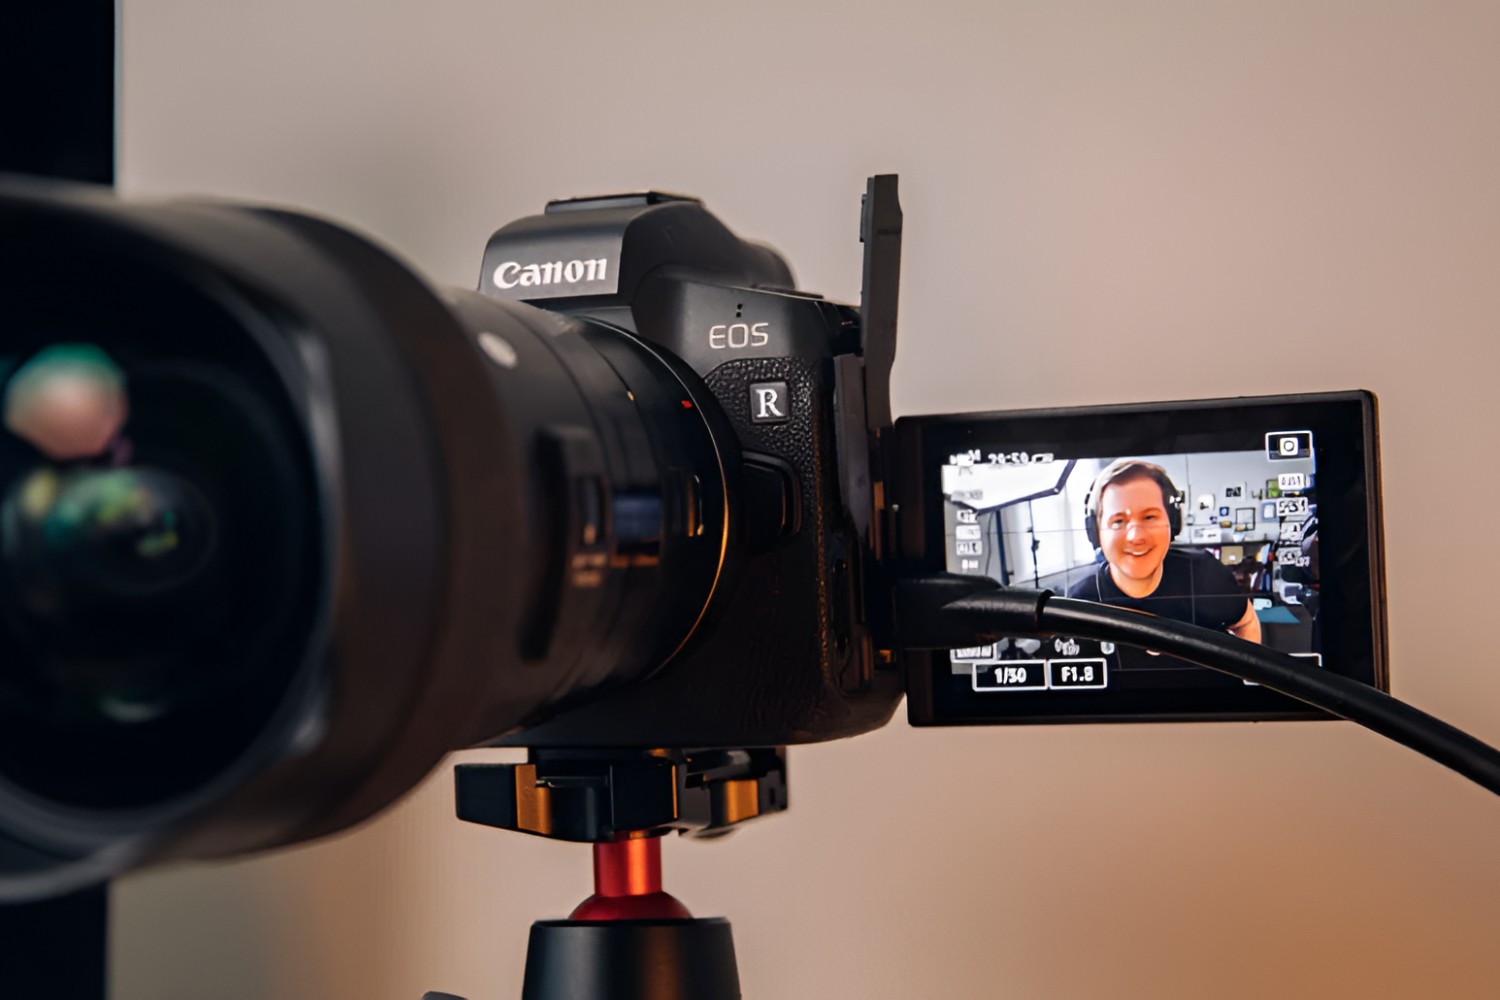
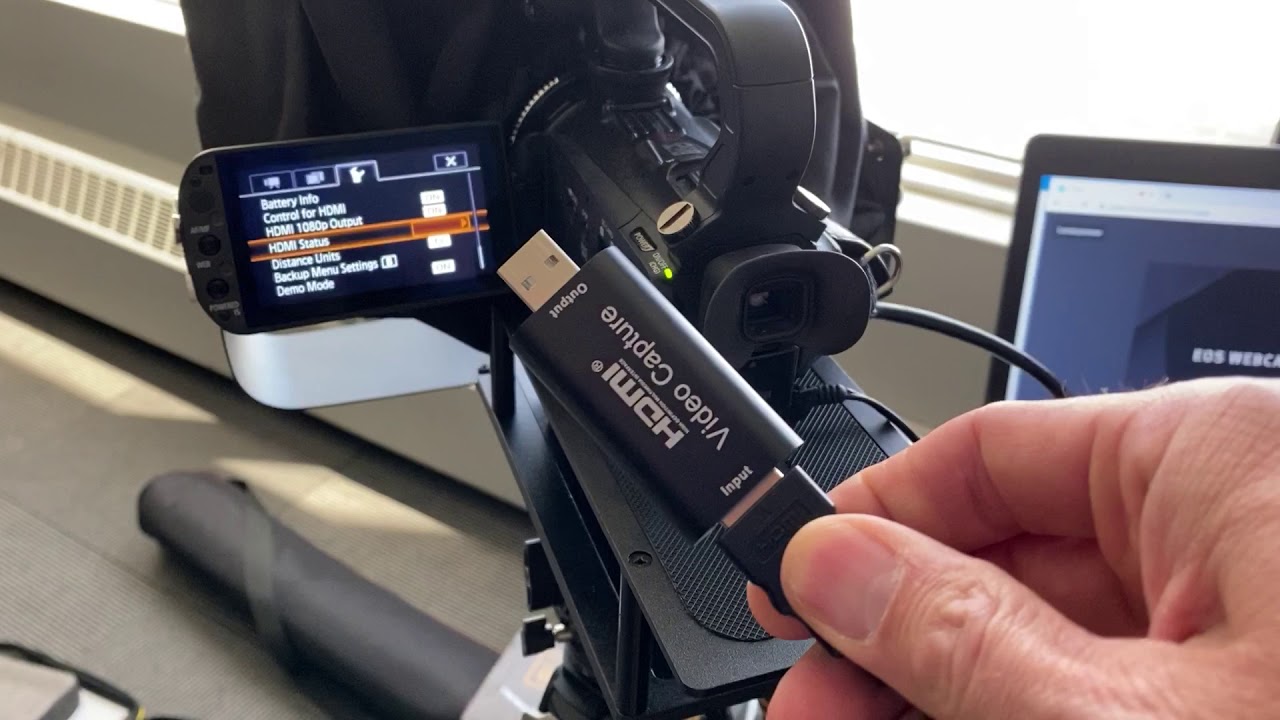
The first step is to identify the HDMI output port on your camcorder. Most modern camcorders are equipped with a mini or micro HDMI output, necessitating the use of a compatible HDMI cable for connectivity. It is imperative to select a high-quality HDMI cable with the appropriate connectors to ensure optimal signal integrity.
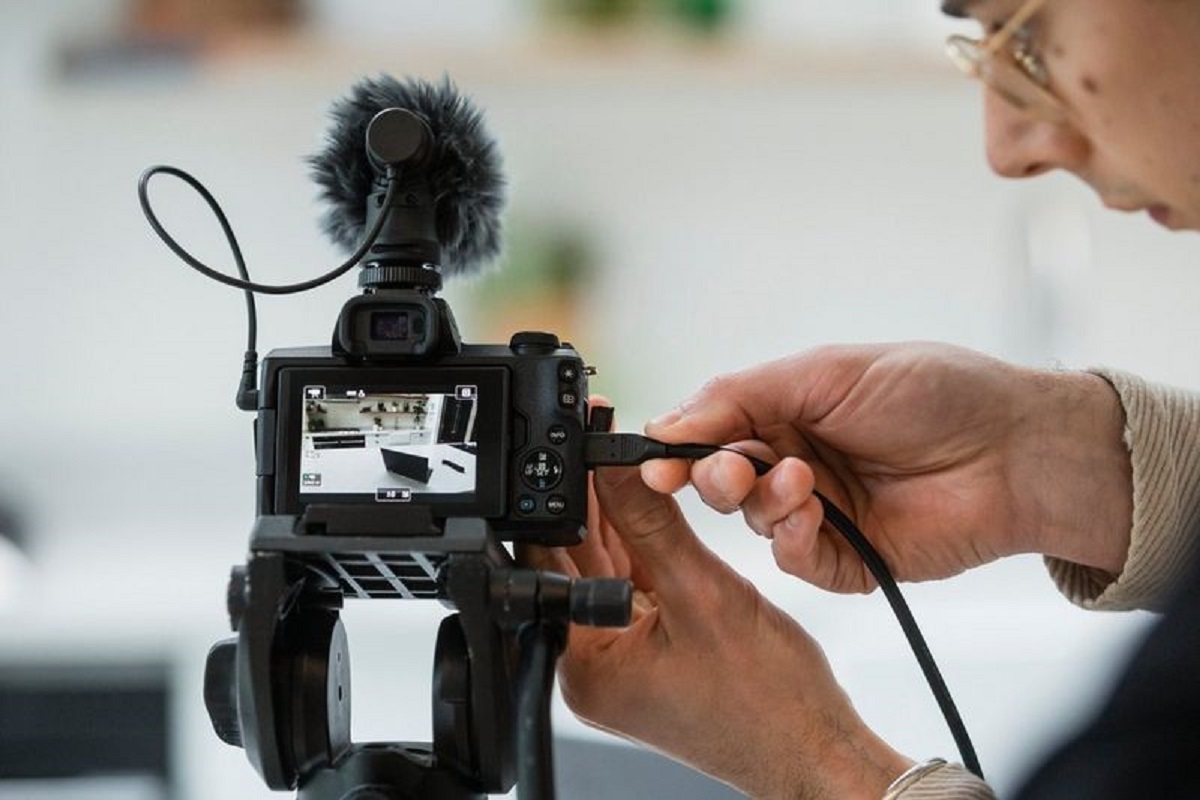
Once you have located the HDMI output port on your camcorder, carefully insert one end of the HDMI cable into this port, ensuring a snug and secure fit. Take care to handle the cable and connectors with delicacy to prevent any damage or strain on the ports.
Next, identify the HDMI input port on the display or recording device to which you intend to connect your camcorder. This may be a television, monitor, capture card, or other HDMI-compatible equipment. Using the other end of the HDMI cable, insert it into the HDMI input port of the target device, ensuring a firm connection.
It is important to verify that both the camcorder and the HDMI-enabled device are powered off before establishing the connection. Once the physical connection is in place, you can proceed to power on the devices and prepare for the subsequent steps in the video capture process.
When connecting your camcorder to an HDMI device, it is advisable to use cables of appropriate length to minimize signal degradation and ensure flexibility in positioning the devices. Additionally, employing cables with gold-plated connectors can enhance signal conductivity and reduce the risk of corrosion, contributing to a more robust and reliable connection.
By meticulously adhering to these guidelines and selecting high-quality cables, you can establish a seamless and dependable connection between your camcorder and an HDMI-enabled device, laying the groundwork for successful video capture and transmission.
Setting Up Your Camcorder for Video Capture
Before initiating the video capture process, it is imperative to configure your camcorder to optimize the output for HDMI transmission. This entails adjusting various settings and parameters to ensure that the captured video is compatible with HDMI standards and meets the desired quality specifications.
First and foremost, familiarize yourself with the menu system and settings of your camcorder. Navigate to the video output or display settings section, where you can customize the output resolution, aspect ratio, and other pertinent parameters. Select the appropriate HDMI output resolution that aligns with the capabilities of the target display or recording device, ensuring seamless compatibility and optimal visual performance.
Furthermore, consider adjusting the frame rate and video format settings to suit the intended use case and the specifications of the HDMI-enabled device. Some displays and recording equipment may have specific requirements regarding frame rates and video formats, necessitating careful alignment with the capabilities of your camcorder.
Another crucial aspect of setting up your camcorder for video capture is configuring the audio output settings. Ensure that the audio format and channel configuration are compatible with the capabilities of the HDMI device to which you intend to connect. This may involve selecting the appropriate audio output format, adjusting volume levels, and enabling features such as surround sound or stereo output, depending on the requirements of the target device.
Additionally, consider activating any relevant display overlays or on-screen indicators that may enhance the monitoring and recording experience. These may include visual aids such as gridlines, focus peaking, zebra patterns, or other display elements that facilitate precise composition and monitoring of the captured video content.
It is also advisable to review the power management settings of your camcorder to ensure uninterrupted operation during the video capture process. Verify that the battery is sufficiently charged or connected to a reliable power source to prevent any disruptions that may compromise the recording session.
By meticulously configuring your camcorder for video capture, you can optimize the output for seamless transmission via HDMI, aligning the visual and audio parameters with the capabilities of the target display or recording device. This meticulous preparation sets the stage for a successful video capture experience, ensuring that the transmitted content meets the desired quality standards and technical specifications.
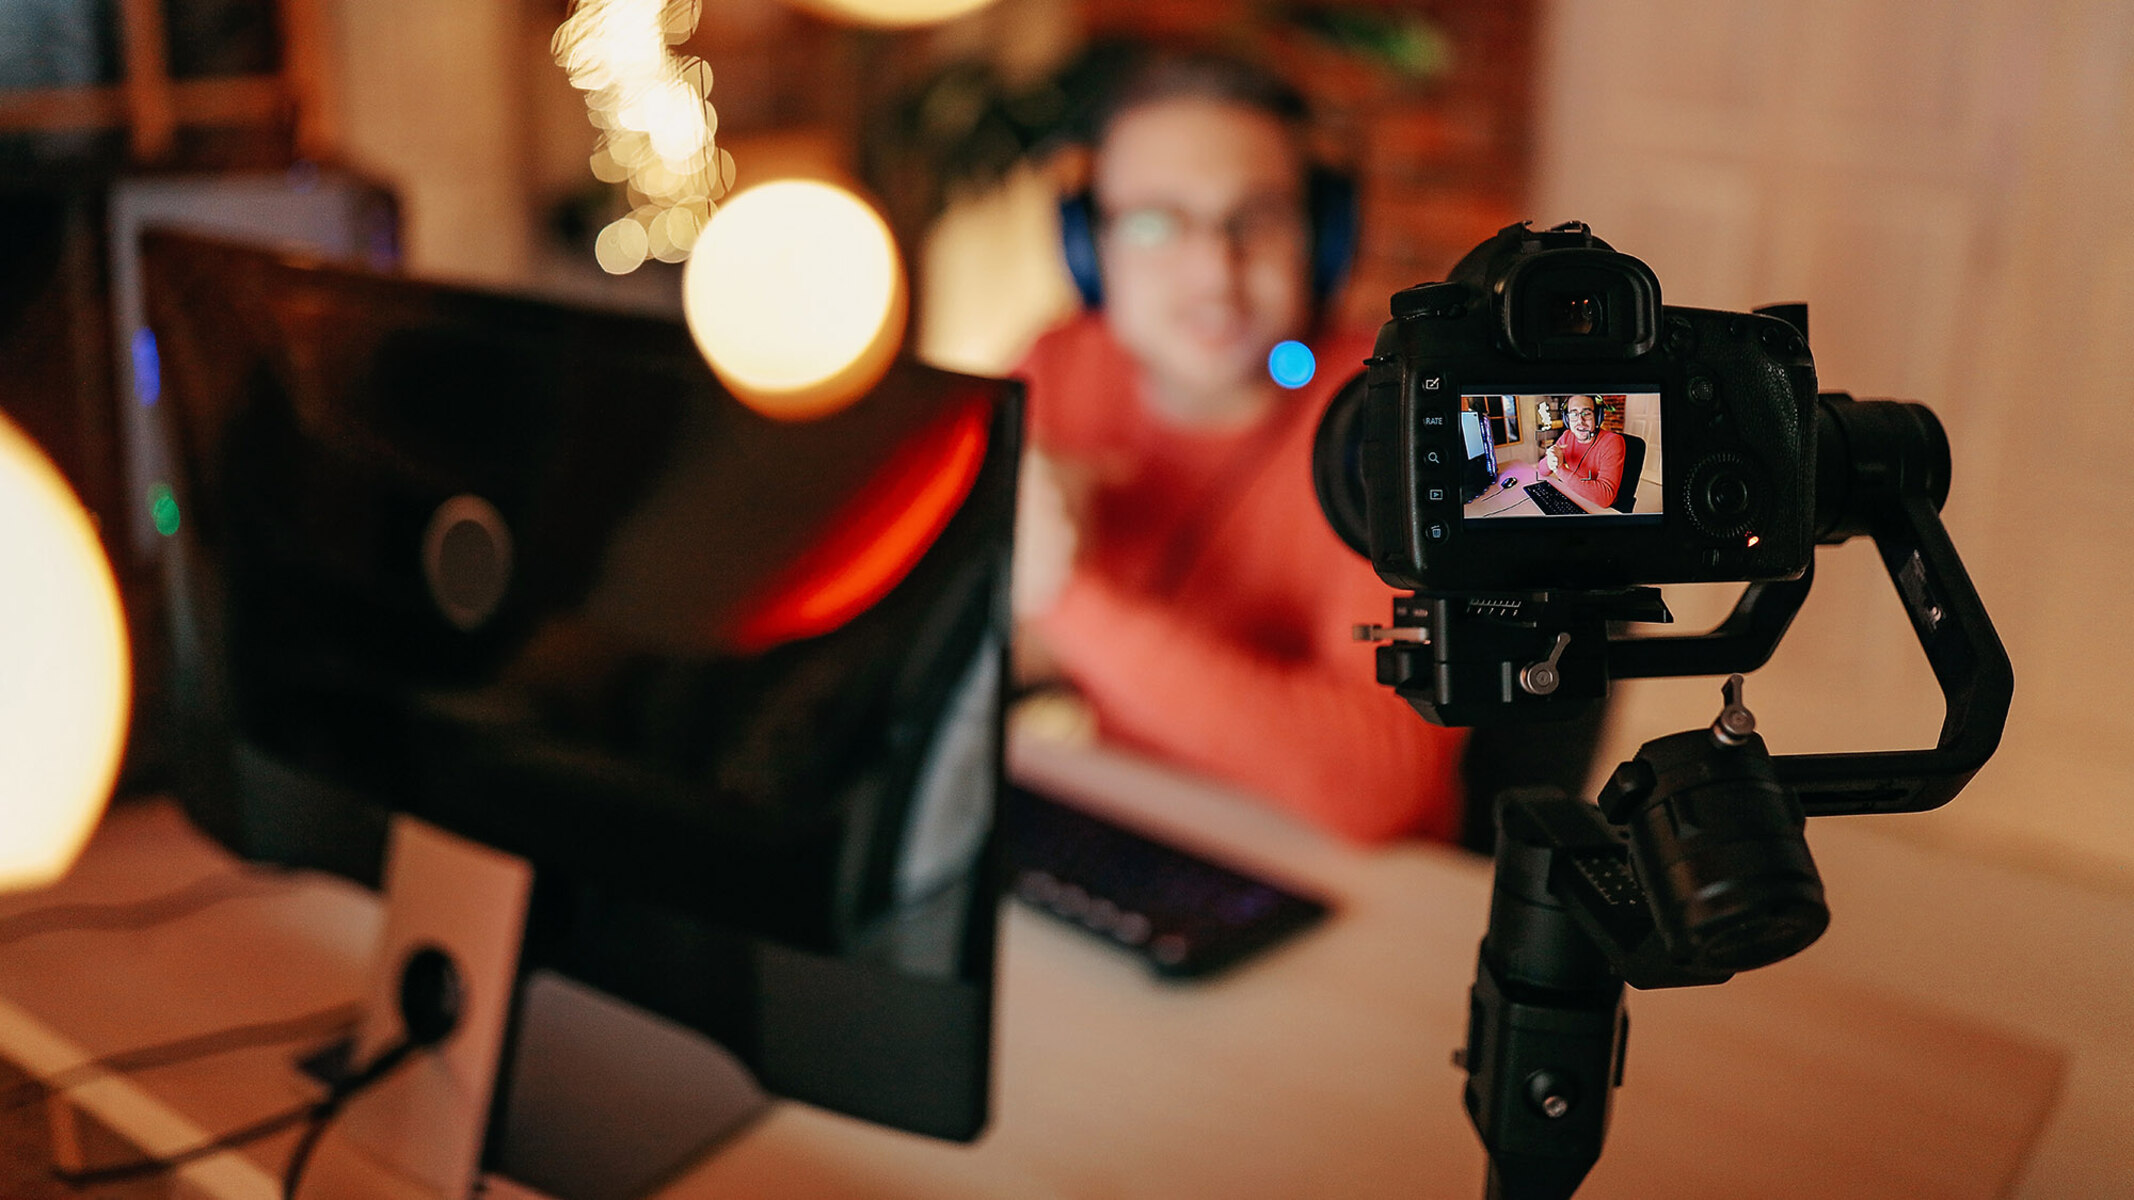
Capturing Video from Camcorder to HDMI
Once you have established the physical connection between your camcorder and an HDMI-enabled display or recording device and configured the camcorder settings for optimal video output, you are ready to embark on the process of capturing video content. This pivotal phase involves initiating the video capture, monitoring the output, and ensuring a seamless transfer of high-definition visuals and audio via the HDMI interface.
Begin by powering on your camcorder and the HDMI-enabled device to which it is connected. Upon activation, the HDMI output from your camcorder should be transmitted to the connected display or recording equipment, rendering the video content in real-time. Depending on the specific capabilities of your camcorder and the target device, you may encounter varying options for initiating and controlling the video output.
Many modern camcorders offer intuitive on-screen displays and menu options that enable users to monitor and adjust the video output parameters directly from the device. This may include features such as focus assistance, exposure control, and audio level monitoring, providing a comprehensive toolkit for refining the captured video content in real-time.
Simultaneously, the HDMI-enabled display or recording device should detect the incoming video signal from the camcorder and render the content on the screen or within the recording interface. Depending on the capabilities of the target device, you may have the flexibility to customize the display settings, configure audio preferences, and initiate the recording process to capture the incoming video stream.
Throughout the video capture process, it is crucial to monitor the output on both the camcorder and the HDMI-enabled device to ensure that the transmitted content meets the desired quality standards. This may involve verifying the visual fidelity, assessing audio clarity, and confirming that the transmitted video aligns with the intended composition and framing.
As you capture video from your camcorder to an HDMI-enabled device, take advantage of any available tools and features to refine the output in real-time, ensuring that the transmitted content reflects your creative vision and technical specifications. By leveraging the capabilities of HDMI technology and the inherent features of your camcorder, you can achieve a seamless and high-fidelity transfer of captivating video content, setting the stage for an immersive viewing or recording experience.
Troubleshooting Common Issues
While capturing video from a camcorder to an HDMI-enabled device, it is not uncommon to encounter various technical challenges that may impede the seamless transmission of video content. Understanding and addressing these common issues is essential for maintaining a smooth and uninterrupted video capture process.
One prevalent issue that may arise is the presence of signal interference or artifacts in the transmitted video. This can manifest as visual distortions, flickering, or color aberrations, detracting from the overall quality of the captured content. To mitigate this issue, ensure that the HDMI cable and connectors are free from damage or wear, and consider using high-quality shielded cables to minimize electromagnetic interference.
Another potential challenge is related to audio synchronization issues, where the audio output may be out of alignment with the corresponding video. This discrepancy can lead to disjointed playback and compromised viewing or recording experiences. To address this, verify that the audio settings on both the camcorder and the HDMI device are configured to match the desired output format and sample rate, ensuring harmonized audio-visual synchronization.
In some instances, users may encounter compatibility issues between the camcorder’s HDMI output and the input specifications of the target display or recording device. This can result in a lack of signal detection or limited functionality when attempting to capture video content. To resolve this, consult the user manuals of both devices to ascertain their respective HDMI compatibility standards and seek alternative connection options or device settings to achieve seamless interoperability.
Furthermore, intermittent signal loss or dropouts during the video capture process can pose a significant impediment to the continuity of the transmission. This may stem from cable instability, insufficient power supply, or environmental factors that disrupt the signal path. To counteract this issue, ensure that all connections are secure, the power supply to the camcorder is stable, and external sources of electromagnetic interference are minimized to sustain a robust and uninterrupted HDMI signal.
It is also prudent to verify that the firmware and software of both the camcorder and the HDMI-enabled device are up to date, as manufacturers often release updates to address compatibility issues and enhance overall performance. By staying abreast of the latest firmware releases and software updates, you can proactively mitigate potential technical hurdles and optimize the functionality of your video capture setup.
By proactively identifying and addressing these common issues, you can fortify the reliability and efficacy of capturing video from a camcorder to an HDMI-enabled device, ensuring a seamless and high-fidelity transfer of captivating visual content.
Conclusion
Mastering the process of capturing video from a camcorder to an HDMI-enabled device empowers videographers, content creators, and enthusiasts to unleash the full potential of their visual storytelling and recording capabilities. By understanding the intricacies of HDMI technology, establishing secure physical connections, configuring camcorder settings, and troubleshooting common issues, individuals can embark on a seamless and immersive video capture journey.
Throughout this comprehensive guide, we have explored the fundamental principles of HDMI, emphasizing its role as a versatile and high-fidelity interface for transmitting audiovisual content. Understanding the nuances of HDMI technology is paramount for facilitating the seamless transfer of high-definition video and multi-channel audio from a camcorder to a diverse array of HDMI-compatible displays and recording devices.
Furthermore, the meticulous process of connecting a camcorder to an HDMI-enabled device involves selecting high-quality cables, identifying the appropriate ports, and ensuring a stable and reliable physical connection. This foundational step sets the stage for successful video capture and transmission, laying the groundwork for an uninterrupted and high-fidelity signal path.
Configuring the camcorder for optimal video capture entails customizing output resolutions, frame rates, audio settings, and display overlays to align with the capabilities of the target HDMI device. This meticulous preparation ensures that the transmitted video content meets the desired quality standards and technical specifications, fostering a seamless and visually compelling viewing or recording experience.
While navigating the video capture process, individuals may encounter common technical issues such as signal interference, audio synchronization discrepancies, compatibility challenges, and signal dropouts. By proactively troubleshooting these issues and implementing best practices for maintaining a robust HDMI signal path, users can fortify the reliability and continuity of the video capture experience.
In essence, mastering the art of capturing video from a camcorder to HDMI transcends technical proficiency; it encapsulates the fusion of creativity, technical acumen, and a profound appreciation for the transformative power of visual storytelling. By leveraging the capabilities of HDMI technology, individuals can unleash their creative vision, preserve cherished memories, and deliver captivating visual narratives that resonate with audiences across diverse multimedia platforms.
As you embark on your journey to capture video from a camcorder to HDMI, may this guide serve as a steadfast companion, empowering you to navigate the intricacies of video transmission with confidence, creativity, and unwavering technical prowess.