Introduction
When it comes to playing the acoustic guitar, the bridge plays a crucial role in determining the instrument’s action and playability. Over time, due to a variety of factors such as humidity, string tension, or general wear and tear, the bridge may begin to sink or lower, causing buzzing strings and an unpleasant playing experience. In such cases, it becomes necessary to raise the bridge on an acoustic guitar for optimal performance.
Raising the bridge can significantly improve the guitar’s action, making it more comfortable to play and ensuring proper string height for accurate fretting. It can also help alleviate buzzing or fretting out issues that may arise from a low bridge. Whether you’re a seasoned guitarist or a beginner, knowing how to raise the bridge can save you from costly repairs and enhance your playing experience.
In this guide, we will take you through the step-by-step process of raising the bridge on an acoustic guitar. You will learn the tools and materials needed, the techniques involved, and the final adjustments required for optimum performance. By following these instructions, you’ll be able to easily raise the bridge and bring your guitar back to its optimal playing condition.
Why Raise the Bridge on an Acoustic Guitar
Raising the bridge on an acoustic guitar is a necessary step to ensure optimal playability and sound quality. Here are a few reasons why you might need to raise the bridge on your guitar:
- Eliminate string buzz: A low bridge can cause the strings to sit too close to the fretboard, resulting in buzzing sounds when plucked. Raising the bridge can create the necessary clearance for the strings, eliminating the buzzing and improving the overall tone.
- Improve action: The action of a guitar refers to the height of the strings above the fretboard. If the bridge is too low, the action becomes uncomfortably low, making it difficult to play and causing fretting out issues. By raising the bridge, you can achieve a more comfortable and playable action.
- Restore proper intonation: When the bridge sinks, it can affect the guitar’s intonation, making chords and notes sound out of tune. By raising the bridge, you can restore proper intonation, ensuring that your guitar plays in tune across the fretboard.
- Prevent further damage: A sinking bridge not only affects the playability and sound quality of the guitar, but it can also lead to other issues such as cracking or warping of the top. By addressing the problem promptly and raising the bridge, you can prevent further damage to your instrument.
- Enhance overall performance: With a properly raised bridge, your acoustic guitar will perform at its best. The improved action, eliminated buzzing, and restored intonation will not only make it easier to play, but it will also ensure that your guitar sounds its best in any musical setting.
Now that you understand the importance of raising the bridge on an acoustic guitar, let’s dive into the step-by-step process to help you achieve optimal playability and sound quality.
Tools and Materials Needed
Before you begin raising the bridge on your acoustic guitar, it’s important to gather all the necessary tools and materials. Here’s what you’ll need:
- Guitar neck rest or support: A guitar neck rest or support will help you stabilize the guitar while working on the bridge. This can be a dedicated guitar repair tool or something as simple as a rolled-up towel.
- Guitar string winder: A guitar string winder makes loosening and removing the strings much quicker and easier. It’s a useful tool to have when working on any guitar maintenance.
- Bridge pin puller: Some acoustic guitars have bridge pins that hold the strings in place. A bridge pin puller can help you remove these pins without damaging them or the guitar.
- Wood shims: Wood shims are small pieces of wood that can be used to raise the bridge. They are readily available at most hardware stores or can be made from scrap wood. Ensure they are thin enough to fit under the bridge without causing any imbalance.
- Tuner: A reliable guitar tuner is essential to ensure that your guitar is in tune throughout the process. This will help you accurately gauge the effect of raising the bridge on the instrument’s overall intonation.
- Small screwdriver or Allen wrench: Depending on your guitar’s bridge design, you may need a small screwdriver or Allen wrench to adjust and reposition the bridge for proper alignment.
- Soft cloth: A soft cloth or microfiber towel will come in handy for cleaning and wiping down the guitar throughout the process. It’s important to keep your instrument clean and free of debris.
- Patience: While not a physical tool, patience is an essential ingredient for any guitar maintenance task. Take your time, follow the instructions carefully, and work slowly to avoid any mishaps or damage to your guitar.
Once you have gathered all the necessary tools and materials, you’ll be well-prepared to embark on the journey of raising the bridge on your acoustic guitar.
Step-by-Step Guide
Now that you have all the tools and materials ready, let’s walk through the step-by-step process of raising the bridge on an acoustic guitar:
- Loosening the Strings: Start by loosening the strings of your guitar. Use a guitar string winder to unwind each string until they are slack. This will relieve the tension on the bridge and make it easier to work with.
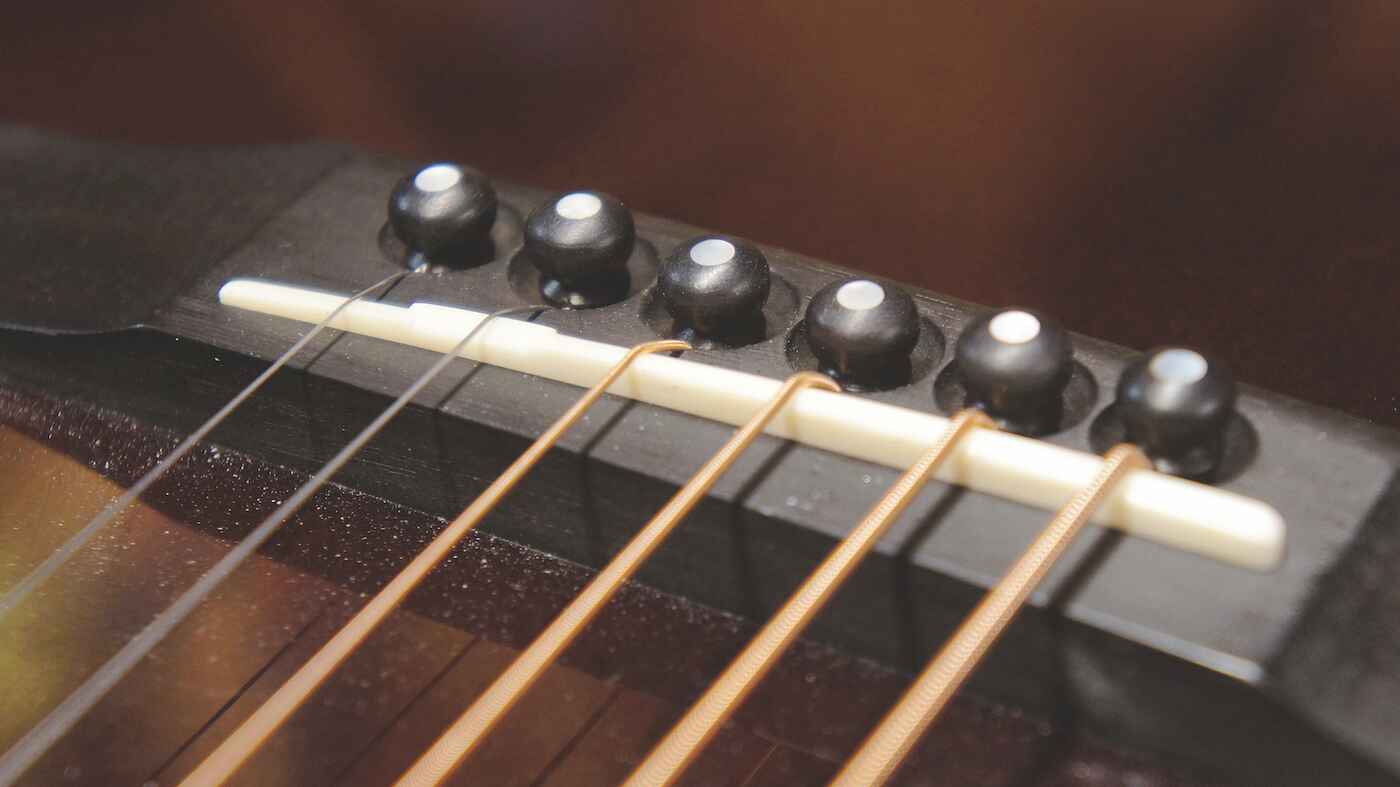
- Removing the Bridge Pins: If your guitar has bridge pins, gently insert the bridge pin puller under each pin and wiggle it back and forth to loosen the pins. Once loose, pull the pins out one by one to release the strings from the bridge. Set the pins aside in a safe place.
- Aligning the Bridge: Carefully inspect the bridge to ensure it is aligned properly. If the bridge has sunk or tilted, you may need to reposition it. Use a small screwdriver or Allen wrench (depending on your guitar’s bridge design) to make any necessary adjustments to align the bridge parallel to the fretboard.
- Apply Wood Shims: Take a thin wood shim and slide it under the bridge. Start with a small shim and gradually increase the thickness until you achieve the desired height. Remember to place the shim in the center of the bridge to maintain balance. Take caution not to use a shim that is too thick, as it may affect the guitar’s intonation.
- Reinsert the Bridge Pins: With the wood shim in place, reinsert the bridge pins into their respective holes, securing the strings to the bridge. Ensure that the strings are properly seated in the bridge slots and that the pins are snugly in place.
- Tune and Test the Guitar: Re-tune the guitar using a tuner to ensure that the strings are at the desired pitch. As you play, test the action and intonation of the guitar to determine if any further adjustments are needed.
- Final Adjustments: If necessary, make final adjustments to the bridge height by adding or removing shims. Check the action and intonation, fine-tuning as needed until you achieve the optimal playability and sound quality.
By following these step-by-step instructions, you will be able to successfully raise the bridge on your acoustic guitar and restore its playability and sound to their fullest potential.
Loosening the Strings
The first step in raising the bridge on an acoustic guitar is to loosen the strings. This is important because it relieves the tension on the bridge and makes it easier to work with.
To begin, you will need a guitar string winder. Attach the winder to the tuning pegs and turn it counterclockwise to unwind the strings. Do this for each string until they are slack and have no tension.
While loosening the strings, pay attention to the winding on the tuning pegs. Make sure the strings are coming off smoothly and aren’t getting tangled or caught on any parts of the guitar. Take your time and be gentle to avoid any unnecessary stress on the strings or the guitar’s neck.
Once all the strings are slack, you can use your fingers to gently pull and remove them from the bridge. Start from the bass (thickest) string and work your way down to the treble (thinnest) string. Keep them organized and set them aside in a safe place to prevent any damage or tangling.
Loosening the strings is crucial for this process as it allows you to easily access and manipulate the bridge. It also prevents any unnecessary strain on the guitar, making it safer to work with during the bridge-raising process.
With the strings loosened and removed, you are now ready to proceed to the next step of raising the bridge on your acoustic guitar.
Removing the Bridge Pins
The next step in raising the bridge on an acoustic guitar is to remove the bridge pins. These pins secure the strings to the bridge and need to be gently taken out before making any adjustments.
If your guitar has bridge pins, you will need a bridge pin puller. This tool is designed to help remove the pins without damaging them or the guitar. Insert the bridge pin puller under the head of the pin, ensuring a firm grip.
Gently wiggle the pin back and forth while applying upward pressure to loosen it from its position. Take care not to use excessive force or pull at an angle, as this can cause the pin to snap or damage the bridge. Repeat this process for each bridge pin until they are all removed.
As you remove the pins, set them aside in a safe place to avoid misplacing or damaging them. These pins are essential for properly securing the strings back onto the bridge later on.
It’s worth mentioning that not all acoustic guitars have bridge pins. Some guitars have a different bridge design where the strings are tied directly to the bridge, without the need for pins. If your guitar falls into this category, you can skip this step and proceed to the next one.
By removing the bridge pins, you free the strings from the bridge and create space for making adjustments. With the pins safely removed, you’re now ready to move on to the next steps in the process of raising the bridge on your acoustic guitar.
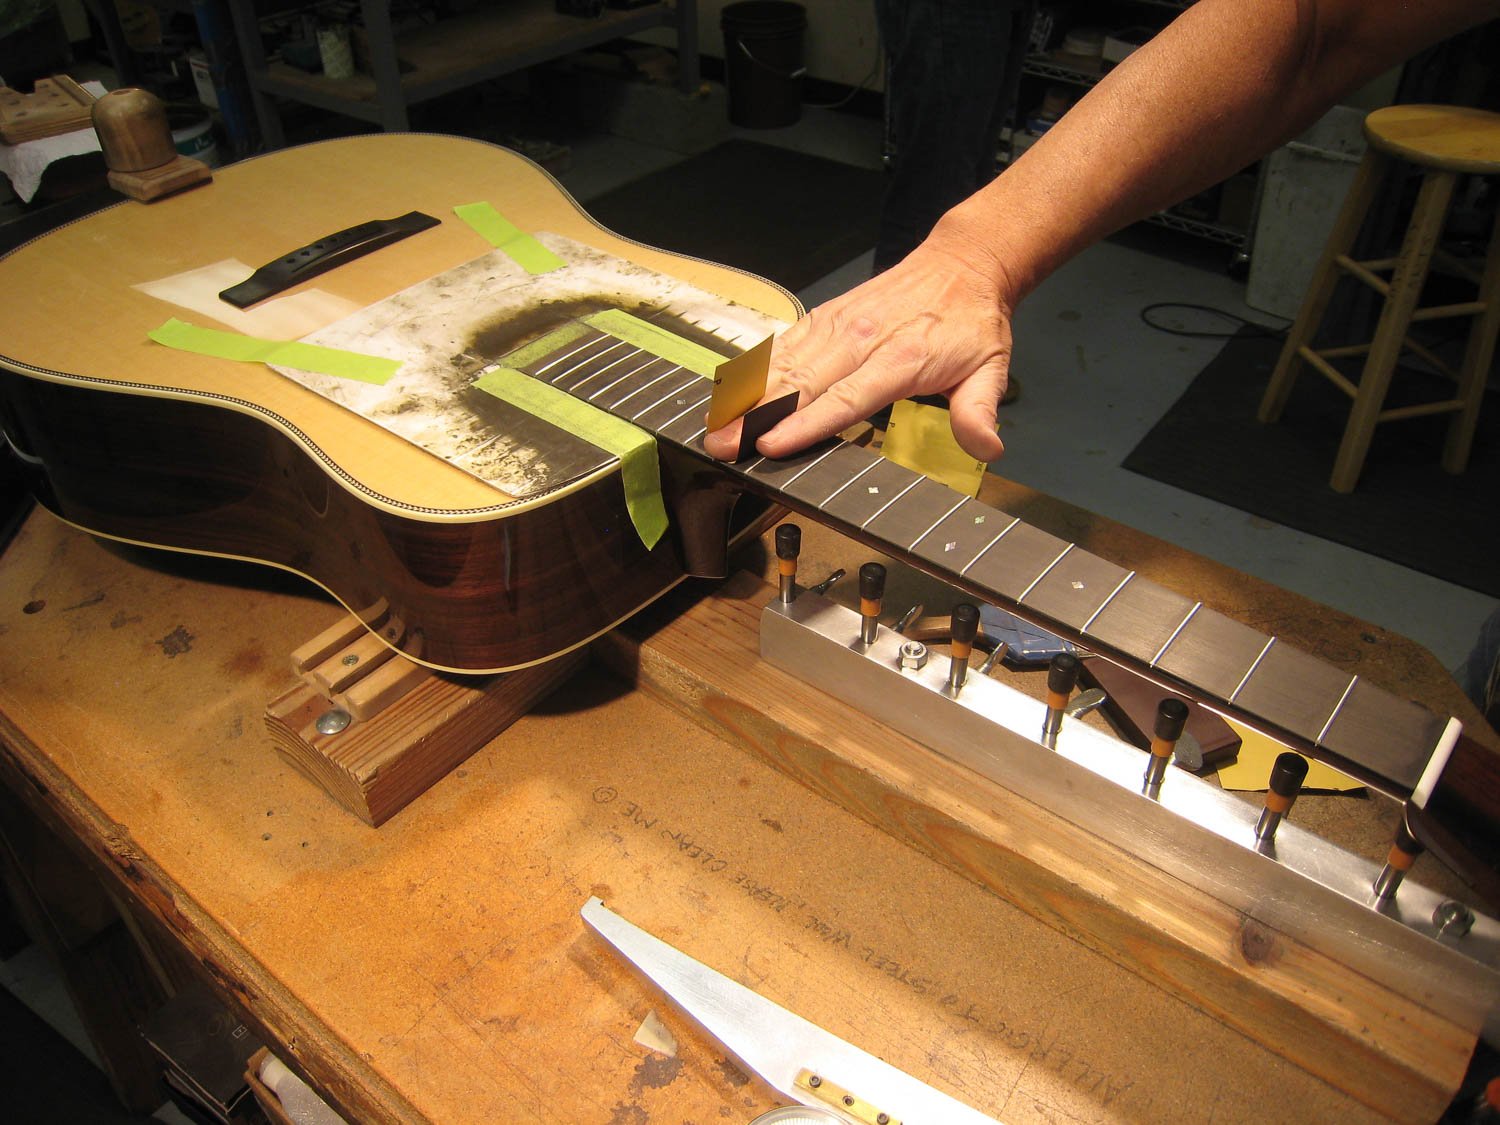
Aligning the Bridge
After removing the bridge pins, the next step in raising the bridge on an acoustic guitar is to ensure proper alignment of the bridge. Over time, the bridge may sink or tilt, causing issues with playability and intonation. Aligning the bridge correctly is essential for optimal performance.
To begin, visually inspect the bridge and observe its position in relation to the guitar’s body. If you notice that the bridge has sunk or is tilted, it will need to be repositioned. An improperly aligned bridge can lead to buzzing strings and poor intonation, so it’s important to address this issue.
Using a small screwdriver or Allen wrench, locate any adjustment screws or bolts on your guitar’s bridge (if applicable). These screws or bolts will allow you to make small adjustments to the bridge’s position.
Gently turn the screws or bolts in the appropriate direction to align the bridge parallel to the fretboard. Make these adjustments gradually, as small, incremental changes can have a significant effect on the bridge’s position. Take your time and be patient during this process to ensure accuracy.
If your guitar’s bridge does not have adjustable screws or bolts, aligning the bridge may require a different approach. In this case, it’s best to consult with a professional guitar technician who can provide guidance on how to address the alignment issue properly.
Properly aligning the bridge is crucial for maintaining good intonation and ensuring that the strings vibrate freely over the frets. It also plays a role in preventing unwanted buzzing or rattling sounds. Once you have aligned the bridge, you can now proceed to the next step of raising the bridge on your acoustic guitar.
Apply Wood Shims
With the bridge properly aligned, the next step in raising the bridge on an acoustic guitar is to apply wood shims. Wood shims are thin pieces of wood that will be inserted underneath the bridge to raise its height.
Start by selecting a thin wood shim that is suitable for the task. These shims can be purchased from hardware stores, or you can create your own by cutting thin strips of wood. It’s important to use a shim that is thin enough to fit under the bridge without causing any imbalance.
Take the wood shim and carefully slide it under the bridge, making sure it is positioned in the center. Begin with a small shim and gradually increase the thickness until you achieve the desired height. The goal is to raise the bridge enough to enhance the action without compromising the guitar’s playability.
As you insert the shim, pay attention to how it affects the angle of the strings. The strings should pass over the bridge smoothly and remain in contact with the saddle. Avoid using a shim that is too thick, as it may cause the strings to sit too high above the frets, resulting in uncomfortable playability and potential intonation problems.
Once the shim is in place, double-check the alignment of the bridge. It should still be parallel to the fretboard and sit securely on the shim. If needed, make minor adjustments to ensure everything is balanced and aligned correctly.
Remember that the goal of applying wood shims is to raise the bridge to an optimal height for improved action and playability. Be cautious not to overdo it and make small adjustments to achieve the desired results.
By applying wood shims under the bridge, you can effectively raise its height and address any issues with low action. With the shim in place, you are now ready to proceed to the next step in raising the bridge on your acoustic guitar.
Reinsert the Bridge Pins
After adjusting the height of the bridge with the wood shim, the next step in raising the bridge on an acoustic guitar is to reinsert the bridge pins. These pins secure the strings to the bridge and play a crucial role in maintaining tension and stability.
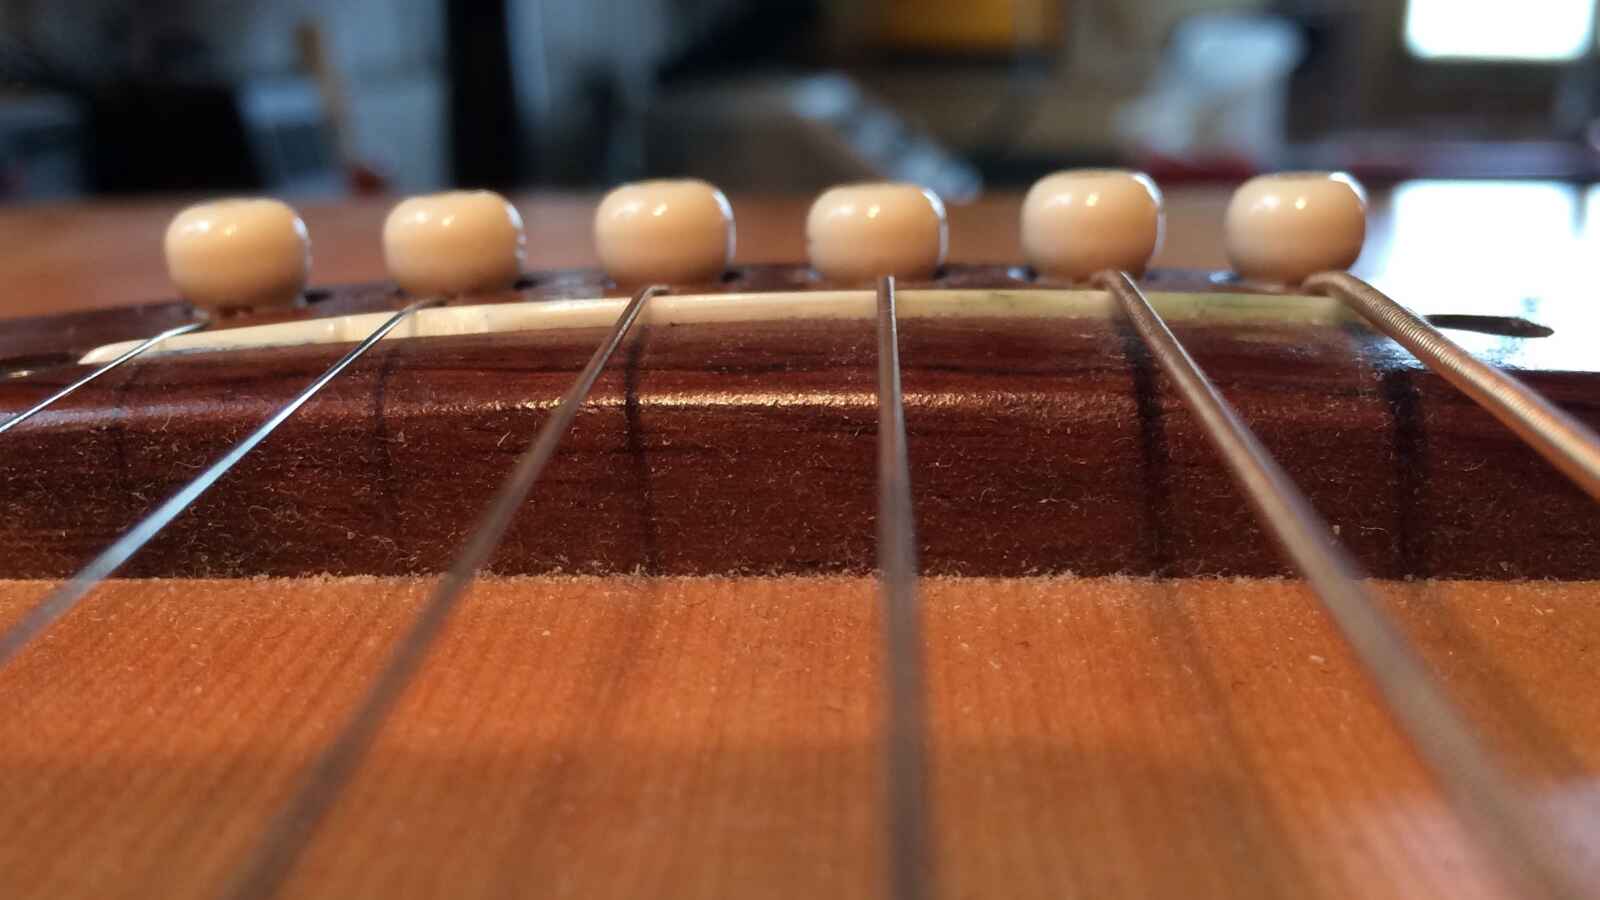
Begin by taking the bridge pins that you set aside earlier. Hold each pin between your thumb and index finger, making sure to position it correctly for reinsertion. Look for the tapered end of the pin, which should be facing towards the soundhole of the guitar.
Starting with the bass (thickest) string, guide its ball end into the corresponding hole on the bridge. While pressing down on the string, gently insert the bridge pin into the hole, making sure it is seated securely. Repeat this process for each string, working your way from the bass to the treble (thinnest) strings.
It’s important to exercise caution and take your time during this step to avoid damaging the bridge or the bridge pin. Apply gentle pressure as you insert the pins, ensuring a snug fit without excessive force.
As you reinsert the bridge pins, check that the strings are properly seated in the bridge slots. Each string should be positioned securely and evenly across the saddle. Take a moment to visually inspect the alignment of the strings and make any necessary adjustments.
Once all the bridge pins are back in place, give each string a gentle tug to ensure they are securely held in the bridge. The strings should not come loose or move significantly when subjected to minor tension.
Reinserting the bridge pins correctly is essential for maintaining proper tension and stability. It ensures that the strings remain securely attached to the bridge, allowing for optimal playability and sound quality.
With the bridge pins securely in place, you are now ready to move on to the next step in raising the bridge on your acoustic guitar.
Tune and Test the Guitar
After reinserting the bridge pins and securing the strings, the next step in raising the bridge on an acoustic guitar is to tune and test the instrument. This will ensure that the guitar is properly set up and ready to be played.
Begin by using a reliable guitar tuner to tune the strings. Start with the thickest string (usually the E string) and work your way down to the thinnest string. Carefully pluck each string and adjust the tuning pegs as needed until each string is in tune.
As you tune the guitar, pay attention to the tension and pitch of each string. With the bridge raised, there may be some variations in string tension compared to before the adjustment. Take your time and make small adjustments to achieve proper tuning.
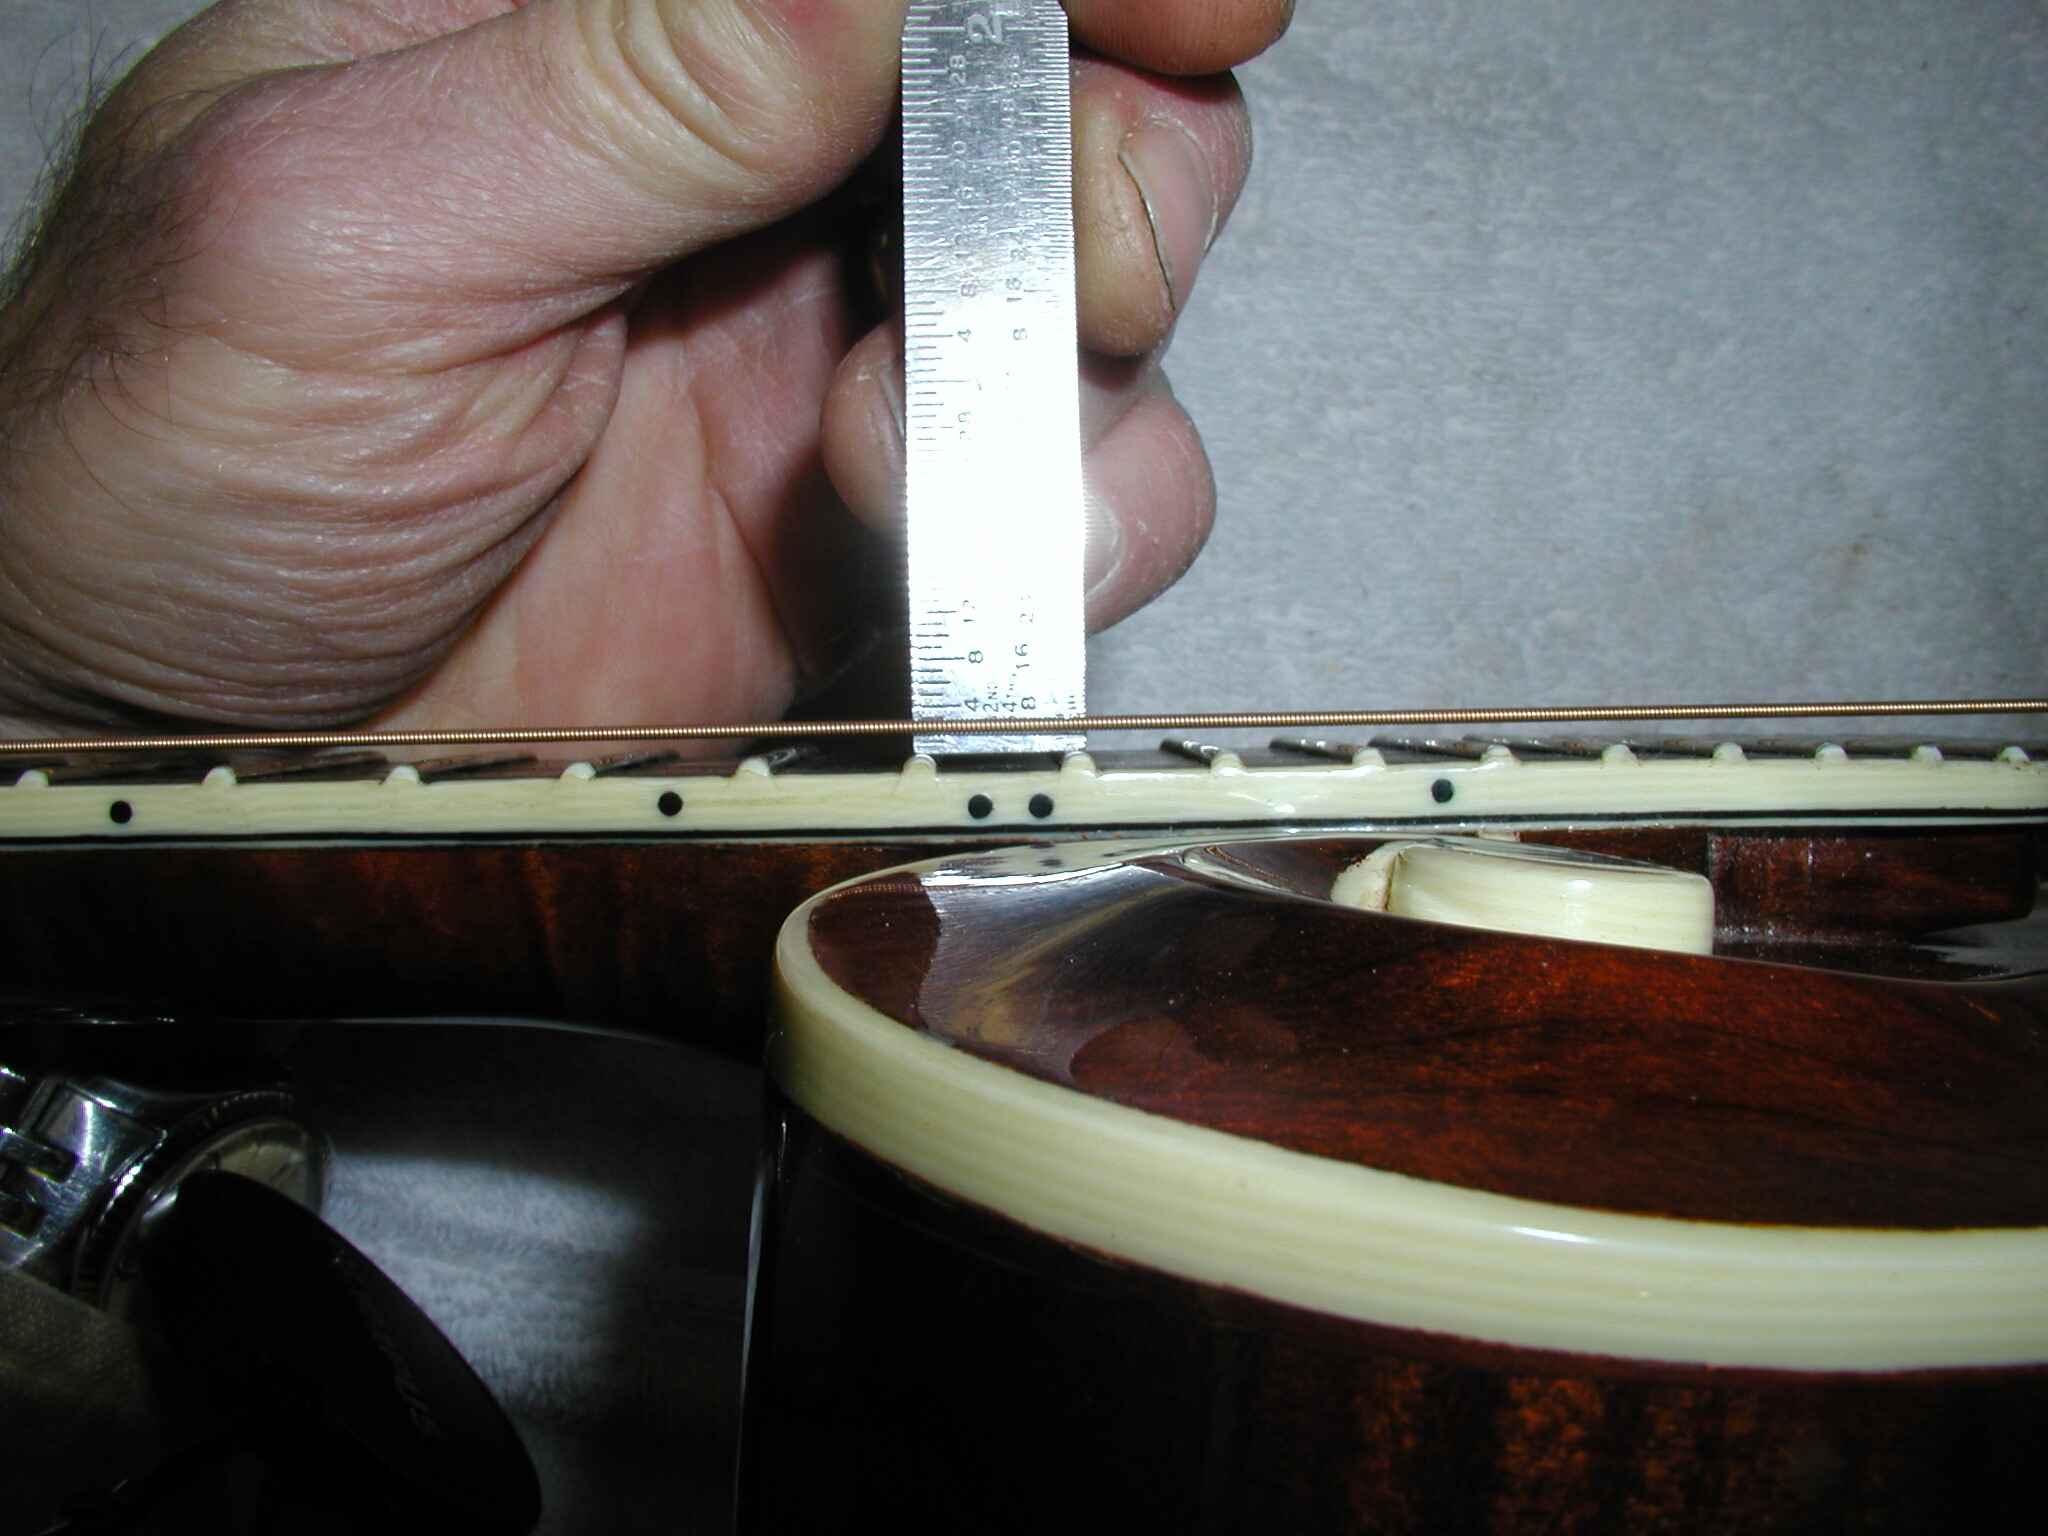
Once the guitar is properly tuned, it’s time to test the playability and sound quality. Fret each string at various points on the neck and play individual notes, chords, and scales to evaluate the action and intonation.
Check for any issues such as string buzzing, fretting out, or notes sounding out of tune. Minor adjustments may be required to fine-tune the guitar’s playability and intonation. This can include adjusting the truss rod or saddle height, depending on the specific needs of your guitar.
It’s important to note that raising the bridge may affect the guitar’s action and intonation to some extent. While the goal is to improve the playability and sound quality, it’s normal to encounter some adjustments and fine-tuning during this process.
Take your time to test the guitar thoroughly and make any necessary adjustments. Play various styles and techniques to get a comprehensive understanding of how the guitar responds to your playing. This will allow you to gauge the success of raising the bridge and make any additional tweaks as needed.
By tuning and testing the guitar after raising the bridge, you can ensure that it is set up optimally for playability and sound quality. Once you are satisfied with the results, you are ready to move on to the final step of raising the bridge on your acoustic guitar.
Final Adjustments
After tuning and testing the guitar, it’s time to make any final adjustments to ensure optimal playability and sound quality. This step involves fine-tuning the bridge height, action, and intonation to achieve the desired results on your acoustic guitar.
Start by evaluating the action of the guitar, which refers to the height of the strings above the fretboard. Play the guitar and take note if any strings feel too high or too low. If the action is too high, consider removing a small portion of the wood shim to lower the bridge slightly. Conversely, if the action is still too low, additional shimming may be necessary to raise the bridge further.
Make these adjustments gradually, testing the guitar’s playability and sound after each change. Remember that small adjustments can have a significant impact on the overall feel and tone of the instrument.
Next, pay attention to the intonation of the guitar – the accuracy of each note as you play up and down the fretboard. If any notes sound out of tune or lack clarity, you may need to adjust the saddle position or experiment with different shim thicknesses to achieve proper intonation. This step may require some trial and error, so take your time to find the optimal balance.
Throughout this process, it’s important to use your ears and trust your judgment. Every guitar is unique, and what works for one may not work for another. Experimentation and careful listening will help you find the sweet spot where the guitar plays and sounds its best.
As you make final adjustments, periodically check the stability of the bridge pins and ensure that the strings are firmly seated in the bridge slots. An occasional tug on each string can confirm that everything is securely in place.
Remember, patience is key. Take your time and be thorough with each adjustment. Don’t hesitate to seek guidance from a professional guitar technician if you encounter any difficulties.
By making final adjustments, you can fine-tune the playability, action, and intonation of your acoustic guitar. Once you are satisfied with the results, you can confidently enjoy playing your guitar with an optimally raised bridge.
Conclusion
Raising the bridge on an acoustic guitar is a task that can greatly enhance the instrument’s playability and sound quality. By following the step-by-step guide outlined in this article, you can successfully raise the bridge and bring your guitar back to its optimal performance.
We discussed the importance of raising the bridge to eliminate string buzz, improve action, restore proper intonation, prevent further damage, and enhance overall performance.
To successfully raise the bridge, you will need tools and materials such as a guitar neck rest or support, guitar string winder, bridge pin puller, wood shims, tuner, small screwdriver or Allen wrench, soft cloth, and patience. These tools will aid you in safely performing the necessary adjustments.
The step-by-step guide provided detailed instructions on loosening the strings, removing the bridge pins, aligning the bridge, applying wood shims, reinserting the bridge pins, tuning and testing the guitar, and making final adjustments.
It’s essential to tune and test the guitar after raising the bridge to ensure optimal playability and sound quality. This includes evaluating the action, intonation, and making any necessary final adjustments to achieve the desired results.
By properly raising the bridge, you can eliminate buzzing, improve playability, restore intonation, and enhance the overall performance of your acoustic guitar.
Remember, this process requires patience, attention to detail, and a willingness to make small adjustments to find the perfect balance for your instrument. If you feel unsure or uncomfortable performing these adjustments, don’t hesitate to seek the assistance of a professional guitar technician.
With the bridge properly raised, you can now enjoy playing your acoustic guitar with improved action, better intonation, and a more comfortable playing experience.
Take the knowledge and skills you’ve gained from this guide and apply them to raise the bridge on your own guitar when needed. With practice, you’ll become more comfortable and confident in performing guitar maintenance tasks.
Now, go forth and enjoy making music with your beautifully raised bridge acoustic guitar!