Introduction
When it comes to playing the acoustic guitar, a well-balanced and properly set up instrument can make a world of difference. The perfect setup is essential for achieving optimal playability, tone, and overall performance. Whether you’re a beginner or a seasoned guitarist, understanding and implementing the right setup for your acoustic guitar is crucial.
A stellar setup not only enhances the playability of your instrument but also ensures that it stays in tune, minimizes buzzing and fretting out, and maximizes the resonance and sustain. It’s like fine-tuning an engine – every component needs to work together seamlessly for the best results.
Additionally, a good setup can help you avoid unnecessary strain on your hands and make the guitar more comfortable to play. As a guitarist, you want your instrument to feel like an extension of yourself, allowing you to effortlessly navigate the fretboard and express your musicality.
In this article, we will explore the various aspects of achieving the perfect acoustic guitar setup. From selecting the right strings to fine-tuning the truss rod and adjusting the saddle, we’ll cover all the necessary steps to optimize your guitar’s performance.
Keep in mind that every guitar is unique, and what works for one instrument may not work for another. So, it’s important to approach the setup process with patience, and if you’re unsure, consider consulting a professional guitar technician.
Now, let’s dive into the world of setting up your acoustic guitar for a truly exceptional playing experience.
The Importance of a Good Setup
A good setup is the foundation for achieving the best possible performance from your acoustic guitar. It ensures that all the components of your instrument work together harmoniously, allowing you to play with ease and get the most out of your playing experience.
One key benefit of a proper setup is optimizing playability. By adjusting the action – the height of the strings above the fretboard – you can find the sweet spot where it’s easy to fret notes without excessive effort. This allows for smoother chord changes, faster soloing, and better overall technique.
A well-set-up guitar also helps with intonation. Intonation refers to the accurate tuning of each individual string along the entire length of the fretboard. Poor intonation can cause certain notes or chords to sound out of tune even when your guitar is properly tuned. By adjusting the saddle position and neck relief, you can ensure that your guitar stays in tune across all frets.
Another benefit of a good setup is the reduction of buzzing and fretting out. Buzzing occurs when the strings vibrate against the frets, usually caused by an uneven fretboard or improper string height. Fretting out happens when the strings get caught on high frets, resulting in a choked or muted sound. By properly adjusting the truss rod and saddle height, you can eliminate these issues and achieve clear, ringing notes.
A proper setup also contributes to the overall tone and resonance of your guitar. By finding the ideal neck relief, you can optimize the relationship between the strings and the neck, allowing for optimal vibrations and sustain. Adjusting the nut height and saddle position also helps to fine-tune the instrument’s tone by enhancing the string’s vibration and transfer of energy.
Furthermore, a well-set-up guitar reduces the risk of unnecessary strain on your hands and fingers. When the action is too high, it requires more pressure to press down the strings, resulting in fatigue and potential hand injuries. A proper setup ensures that the strings are at an appropriate height, reducing the strain and allowing you to play for longer periods without discomfort.
In summary, a good setup is essential for achieving optimal playability, intonation, tone, and overall performance of your acoustic guitar. It improves your ability to play with ease and precision, enhances the instrument’s tone and resonance, and minimizes issues like buzzing and fretting out. By investing time in setting up your guitar correctly, you’ll enjoy a more rewarding and satisfying playing experience.
Finding the Right Strings
String selection plays a crucial role in achieving the perfect setup for your acoustic guitar. Different strings have different characteristics that can significantly impact the tone, playability, and overall performance of your instrument. Here are some factors to consider when choosing the right strings:
Gauge: String gauge refers to the thickness of the strings. Lighter gauge strings (e.g., .010-.048) are easier to bend and require less finger pressure, making them ideal for beginners or players who prefer a more expressive playing style. On the other hand, heavier gauge strings (e.g., .012-.053) offer a fuller tone and increased volume, but require more finger strength to play. Experiment with different gauges to find the one that best suits your playing style and preferences.
Material: Acoustic guitar strings are typically made of steel or bronze. Steel strings produce a bright, crisp tone with excellent projection and durability. They are versatile and suitable for various playing styles. Bronze strings, on the other hand, offer a warmer, mellower tone that pairs well with fingerpicking and folk genres. Consider the sound you’re aiming for and experiment with different materials to find your desired tonal characteristics.
Coating: Coated strings are treated with a thin layer of polymer coating that helps prolong their lifespan and reduce finger noise. While coated strings tend to last longer, they may have a slightly different feel and tone compared to non-coated strings. Again, it’s a matter of personal preference, so try out different coated and non-coated options to see which works best for you.
Brand: There are numerous string manufacturers to choose from, each offering their own unique blend of tone, playability, and longevity. Some reputable brands include D’Addario, Martin, Elixir, and Ernie Ball. It’s worth trying strings from different brands to discover which ones resonate with your preferences and bring out the best in your guitar.
When changing strings, be sure to follow the manufacturer’s recommendations for proper installation and stretching to ensure stability and minimize tuning issues. Regularly changing your strings is also important as they can lose their brightness and playability over time.
Remember, finding the right strings for your acoustic guitar is a personal journey. It may take some trial and error, but the effort is well worth it when you discover the perfect match that enhances your guitar’s playability and brings out the tone you’ve been seeking.
Correcting the Action
The action of your acoustic guitar refers to the height of the strings above the fretboard. It directly affects the playability and comfort of the instrument. Too high of an action can make it challenging to press down the strings, resulting in fatigue and difficulty playing complex chords or fast passages. Conversely, an action that is too low may cause buzzing and fretting out. Here’s how you can correct the action to achieve the perfect balance:
Lowering the Action: If the action on your acoustic guitar is too high, you can lower it by adjusting the saddle height. Most acoustic guitars have an adjustable saddle that can be sanded down to reduce its height. However, it’s essential to make small adjustments and check the playability as you go to avoid taking too much material off the saddle. Alternatively, you can consult a professional guitar technician who can expertly adjust the saddle for you.
Raising the Action: In some cases, the action on your acoustic guitar may be too low, causing unwanted buzzing and fretting out. If this is the case, you can raise the action by adding more material to the saddle. This can be done using shims made of materials like bone or wood. Again, if you’re unsure or uncomfortable making these adjustments yourself, seeking the expertise of a guitar technician is recommended.
When adjusting the action, it’s important to find a balance that suits your playing style and preferences. A lower action allows for easier fretting and faster playing, particularly for individuals who employ techniques like fingerpicking or intricate chord voicings. However, keep in mind that overly low action can cause buzzing and affect sustain. On the other hand, a slightly higher action can provide more clarity and volume but may require more finger strength to play.
Additionally, it’s worth noting that humidification and climate changes can affect the action of your guitar. Dry conditions can cause the top of the guitar to sink, resulting in a lower action, whereas high humidity can cause the neck to expand, leading to a higher action. Regularly monitoring and adjusting the action, if necessary, is crucial for maintaining optimal playability.
Correcting the action of your acoustic guitar is a delicate process that requires patience and attention to detail. It’s best to make small adjustments and test the playability along the way. Remember, if you’re uncertain or uncomfortable making these adjustments yourself, seeking professional help from a guitar technician is always a wise decision.
Adjusting the Truss Rod
The truss rod is a vital component of an acoustic guitar’s neck structure. It helps counteract the tension created by the strings and allows for adjustments to the neck’s curvature, also known as neck relief. Proper adjustment of the truss rod ensures that the neck remains straight and provides optimal playability. Here’s how you can adjust the truss rod:
Check the Neck Relief: To determine whether the truss rod needs adjustment, first, check the neck relief. Fret the first and last fret simultaneously, then look closely at the gap between the string and the frets around the 7th to 9th frets. Ideally, there should be a slight gap, often referred to as a “bow.” If the gap is excessive or non-existent, you may need to adjust the truss rod.
Loosen or Tighten the Truss Rod: Most acoustic guitars have a truss rod adjustment nut located either at the base of the neck or inside the soundhole. To adjust the truss rod, you’ll need the appropriate sized hex wrench or truss rod wrench. If the neck relief is too flat or non-existent, insert the wrench and tighten the truss rod nut in small increments, typically in a clockwise direction. Conversely, if there is too much bow or excessive relief, loosen the truss rod nut by turning it counterclockwise.
Make Small Adjustments: It’s important to make small and gradual adjustments when tweaking the truss rod. Tightening or loosening the truss rod too quickly or excessively can lead to irreversible damage to the neck. After each adjustment, allow the guitar to settle for a few hours or overnight, as the neck may need time to adjust to the new tension before making further adjustments.
Seek Professional Help If Needed: Adjusting the truss rod requires careful attention and knowledge. If you’re unsure or uncomfortable making truss rod adjustments on your own, it’s always best to consult a professional guitar technician. They have the expertise and experience to make precise adjustments without risking damage to your instrument.
Remember, the goal of adjusting the truss rod is to find the perfect balance for the neck relief. The correct amount of relief can vary depending on playing style, string gauge, and personal preference. It’s recommended to seek guidance from a qualified technician, especially if you’re a novice guitarist or unsure about making adjustments yourself.
Properly adjusting the truss rod can significantly improve playability, intonation, and overall performance of your acoustic guitar. Take the time to learn and understand this aspect of guitar setup, and you’ll be rewarded with an instrument that feels and plays optimally.
Setting the Intonation
Intonation refers to the accuracy of pitch along the entire length of the fretboard. A guitar with proper intonation will play in tune regardless of where on the neck you fret a note or play a chord. In order to achieve optimal intonation on your acoustic guitar, you’ll need to adjust the length of the strings. Here’s how you can set the intonation:
Tune the Guitar: Before setting the intonation, it’s crucial to have your guitar properly tuned. Use a reliable tuner to ensure that each string is tuned to the correct pitch.
Check the Harmonics: Start by fretting the 12th fret on each string and plucking it. This creates a harmonic tone that is an octave above the open string. Compare the pitch of each harmonic to the corresponding fretted note on the same string.
Adjust the Saddle Position: If the fretted note is sharp (higher in pitch) compared to the harmonic, it means the string length needs to be lengthened. This can be achieved by moving the saddle slightly away from the neck. Conversely, if the fretted note is flat (lower in pitch) compared to the harmonic, the string length needs to be shortened. In this case, move the saddle slightly towards the neck. Make small adjustments and recheck the intonation after each adjustment until the fretted note matches the harmonic exactly.
Recheck and Fine-Tune: After adjusting the saddle position, recheck the intonation by playing different notes and chords across the entire fretboard. It’s important to check multiple positions on each string to ensure uniform intonation. Fine-tune the saddle position as needed to achieve accurate pitch across the entire neck.
Consider String Action: It’s worth noting that adjusting the intonation can also affect the guitar’s string action – the height of the strings above the fretboard. If you notice a significant change in the action after adjusting the saddle for proper intonation, you may need to revisit the action adjustment to find the right balance.
Setting the intonation on an acoustic guitar can be a meticulous process that requires careful attention to detail. It’s beneficial to have a good ear and experience with playing in tune. If you’re unsure or uncomfortable making these adjustments yourself, consider seeking the assistance of a professional guitar technician who can expertly set the intonation for you.
By setting the intonation accurately, you’ll ensure that your acoustic guitar consistently produces in-tune notes and chords across the entire fretboard. This not only enhances the overall sound of your playing but also makes it easier to play with others and in different musical contexts.
Ensuring Proper Neck Relief
Neck relief refers to the slight curvature or bow of the guitar neck. The right amount of neck relief is crucial for achieving optimal playability, avoiding buzzing, and maintaining proper intonation. Here’s how you can ensure your acoustic guitar has the correct amount of neck relief:
Check the Neck Relief: To assess the neck relief, press down the low E string at the first fret and simultaneously press down at the fret where the neck meets the body. Look closely at the gap between the bottom of the string and the top of the 7th or 8th fret. Ideally, there should be a slight gap, often referred to as a “relief.” If the gap is excessive or non-existent, adjustments to the neck relief may be needed.
Adjust the Truss Rod: The truss rod is a metal rod inserted into the neck of the guitar, designed to counteract the tension of the strings. It can be adjusted to shape the neck’s relief. For adjusting the neck relief, consult your guitar’s manufacturer instructions or a professional guitar technician. Typically, a clockwise turn tightens the truss rod, decreasing the neck relief, while a counterclockwise turn loosens it, increasing the neck relief. Make small adjustments, as the truss rod is a sensitive component, and allow time for the neck to adjust before making additional changes.
Seek Professional Assistance: If you’re unsure about adjusting the truss rod yourself or if you encounter any issues, it’s best to seek professional help. A trained guitar technician can assess and adjust the neck relief with precision, ensuring your guitar performs optimally.
Note that factors such as string gauge, playing style, and climate can influence the amount of desired neck relief. Lighter string gauges typically require less relief, while heavier gauges may require a bit more. Environmental changes, such as fluctuations in humidity and temperature, can also affect the neck relief. Regularly monitor the neck relief and make necessary adjustments due to these external factors.
A properly adjusted neck relief promotes optimal playability by allowing the strings to vibrate freely without encountering buzzing or excessive fretting out. In turn, this helps maintain accurate intonation across the fretboard. By ensuring the correct amount of neck relief, you’ll enjoy a guitar that plays effortlessly and rewards you with a comfortable and responsive playing experience.
Adjusting the Nut Height
The nut of an acoustic guitar is a small piece located at the top end of the neck, right before the fretboard. It plays a crucial role in determining the action and playability of the guitar at the lower end of the neck. Making necessary adjustments to the nut height can help ensure proper string height, optimal tone, and ease of play. Here’s how you can adjust the nut height on your acoustic guitar:
Evaluate the Nut Height: Examine the strings and their height at the nut. The ideal nut height allows for easy playing without excessive string buzz. If the strings sit too high in the nut slots, it can be more challenging to fret notes, especially in the lower positions. Conversely, if the nut slots are too low, it can result in string buzz and potential loss of sustain and tone.
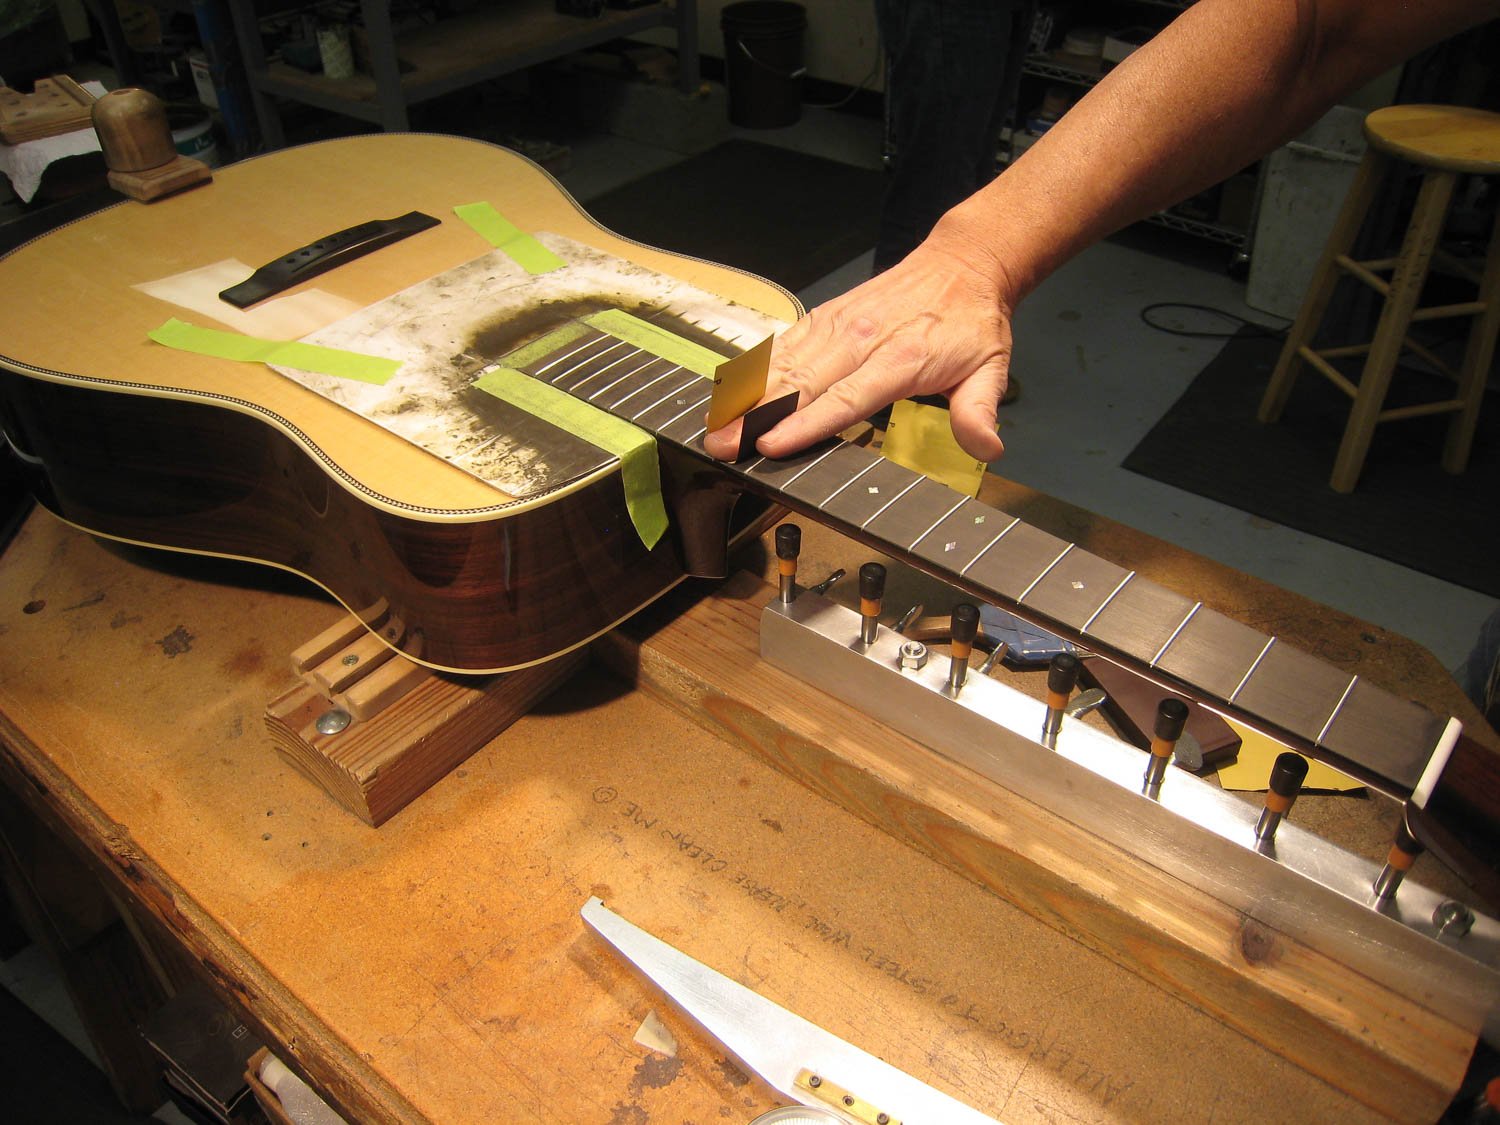
Make Small Adjustments: To raise the nut height, carefully file the bottom of the nut slots with a nut file or sandpaper. File parallel to the neck and make small adjustments, gradually increasing the height until the desired action is achieved. Take caution not to remove too much material at once, as it can be difficult to reverse the process if the slots become too deep. If you need to lower the nut height, consult a professional guitar technician, as it requires specialized tools and expertise.
Check String Slots: As you adjust the nut height, ensure that each string fits securely in its respective slot without binding or pinching. The slots should be smooth and properly shaped to allow for smooth string movement without snagging or excessive friction.
Consider Professional Help: Adjusting the nut height requires precision, as any errors can affect the guitar’s playability and tone. If you’re unsure or uncomfortable making these adjustments yourself, it’s always advisable to consult a professional guitar technician. They have the experience and tools needed to adjust the nut height with precision.
It’s important to note that the nut height also affects the guitar’s intonation. If the nut slots are too high, it can cause the open strings to play sharp, even when the guitar is properly tuned. Conversely, if the nut slots are too low, it can result in the open strings playing flat. Therefore, it’s crucial to find the right balance in nut height to achieve accurate intonation.
Properly adjusting the nut height can greatly enhance the playability and tone of your acoustic guitar. Finding the optimal string height at the nut allows for easy fretting and smooth string action, while maintaining accurate intonation. Take your time, make small adjustments, and consider professional assistance if needed to ensure a well-set nut that enhances your overall playing experience.
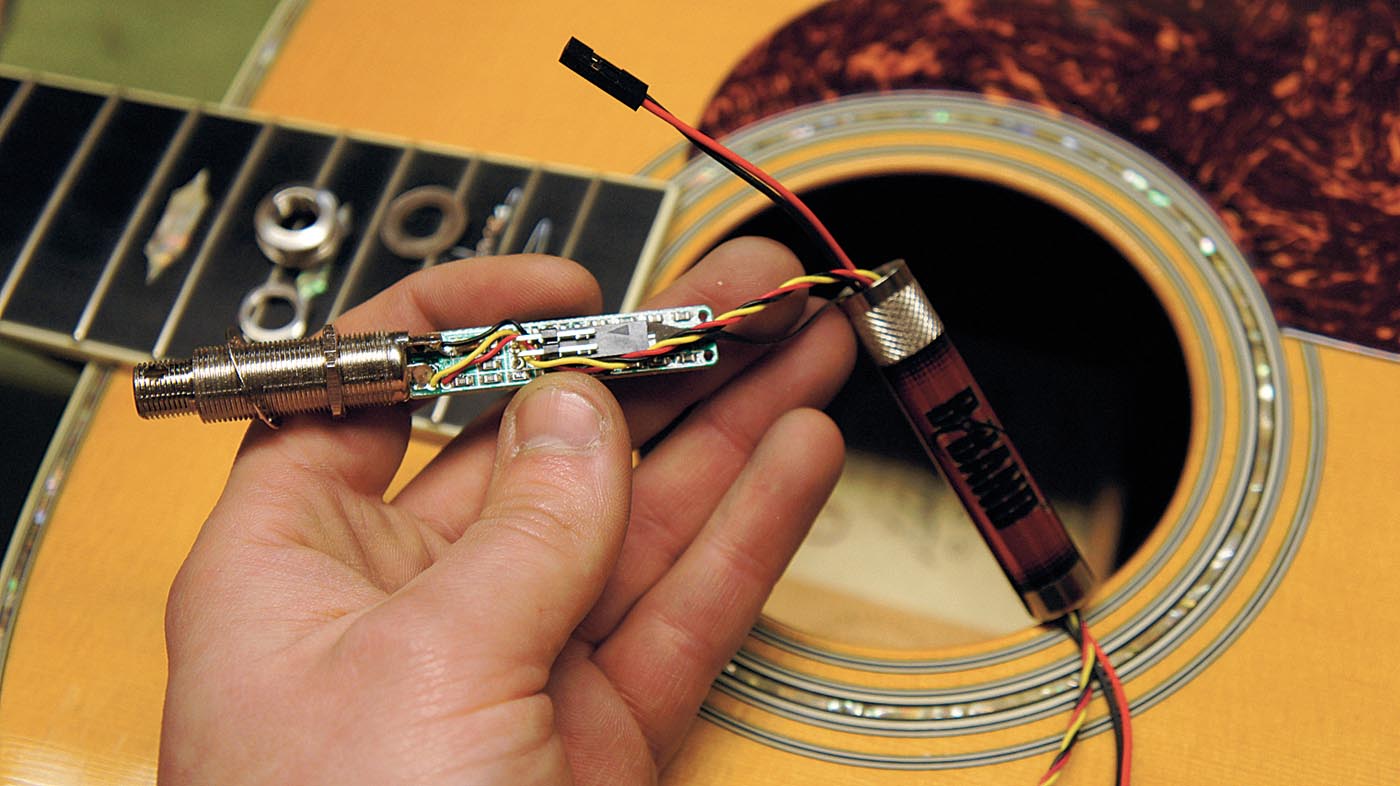
Addressing Bridge and Saddle Height
The bridge and saddle of an acoustic guitar play a critical role in maintaining proper string height, intonation, and overall performance. Making adjustments to the bridge and saddle height can greatly impact the playability and tone of your instrument. Here’s how you can address the bridge and saddle height on your acoustic guitar:
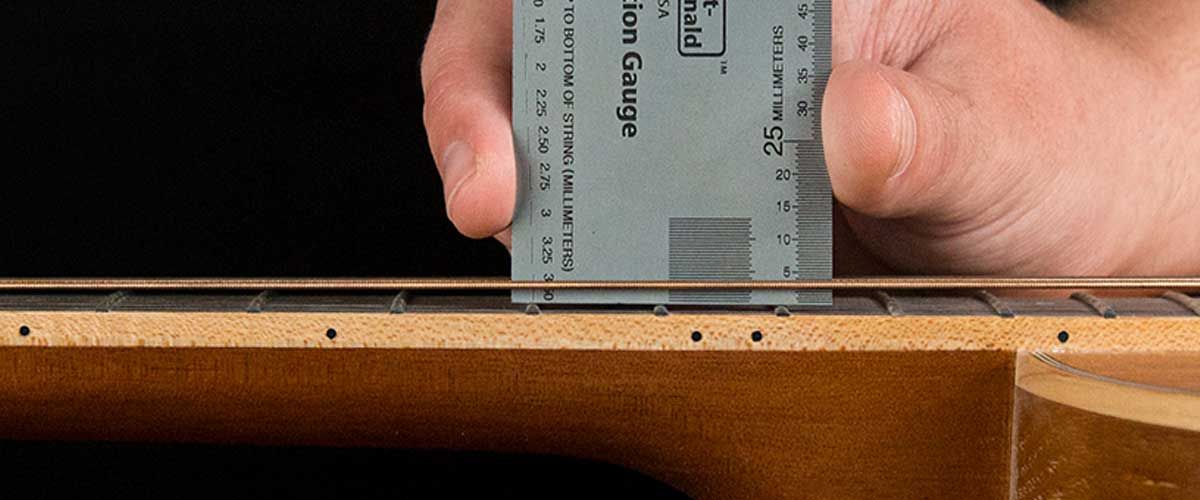
Assess the String Height: Start by evaluating the current string height at the bridge. The ideal string height depends on personal preference and playing style. However, as a general guideline, the action at the 12th fret for the bass (thickest) side should be around 3/32″ to 5/32″ (2.4mm to 4mm) and slightly lower on the octaves (thinner) side. If the action is too high, it can be difficult to play, while an action that is too low may result in excessive string buzz.
Adjust the Saddle Height: To modify the string height, you can adjust the saddle height. On most acoustic guitars, the saddle is either removable or adjustable. If the saddle is removable, you can carefully sand down the bottom or replace it with a shorter one to lower the action. Conversely, if the saddle is adjustable, you can raise or lower it with screws or set screws. It’s crucial to make small adjustments at a time and recheck the action after each modification to avoid taking off too much material.
Consider Compensating for Intonation: In addition to adjusting the saddle height for string action, you may need to compensate the saddle for proper intonation. Compensating the saddle involves slightly modifying its shape to ensure accurate pitch along the entire length of the fretboard. A guitar technician or luthier can expertly adjust the saddle’s compensation through careful shaping and sanding.
Seek Professional Assistance: Making adjustments to the bridge and saddle requires precision and expertise. If you’re uncertain or uncomfortable making these adjustments yourself, it’s advisable to consult a professional guitar technician or luthier. They have the experience and tools necessary to accurately adjust the bridge and saddle height, ensuring optimal playability and intonation.
It’s worth noting that changes in temperature and humidity can affect the bridge and saddle height. Dry conditions can cause the top of the guitar to sink, resulting in lower action, while high humidity can cause the neck to expand, resulting in higher action. Regularly inspect and make necessary adjustments to address any changes caused by environmental factors.
By addressing the bridge and saddle height, you can achieve the optimal string action for your acoustic guitar. Finding the right balance ensures comfortable playability, minimizes string buzz, and improves overall tone and projection. Take your time, make precise adjustments, and consider seeking professional help if needed to achieve the best results.
Checking the Tuning Machines
The tuning machines, also known as tuners or machine heads, play a crucial role in keeping your acoustic guitar in tune. Over time, the gears and mechanisms of the tuning machines can wear out or become loose, affecting the guitar’s tuning stability. Regularly checking and maintaining the tuning machines can help ensure accurate and reliable tuning. Here’s how you can check the tuning machines on your acoustic guitar:
Inspect for Wear and Damage: Start by visually inspecting the tuning machines for any signs of wear or damage. Check for loose or bent tuning keys, cracked buttons, or any other visible issues that could affect their functionality.
Test the Tuning Stability: Play each string open and tune it to the desired pitch. Once tuned, apply a slight downward pressure on the string behind the nut, simulating the tension created when fretting a note. Observe if the string goes out of tune or slips in pitch. If the tuning is compromised under pressure, it could indicate a problem with the tuning machines.
Tighten Loose Tuning Machines: If you notice that the tuning keys are loose, use a screwdriver or wrench to tighten any loose screws or nuts. However, be cautious not to over-tighten, as it can cause the gears to become stiff or strip the threads.
Lubricate the Tuning Machines: Over time, dust, dirt, and debris can accumulate inside the tuning machines, causing them to operate less smoothly. Apply a small amount of lubricant specifically designed for guitar tuners to the gears and moving parts. This will help the tuning machines turn more smoothly and maintain better stability.
Consider Upgrading the Tuning Machines: If you consistently experience tuning issues even after maintenance and adjustments, you may want to consider upgrading to higher-quality tuning machines. There are various types and brands available, offering enhanced tuning stability and precision. Consult with a guitar technician or do thorough research to find a set of tuning machines that best fits your needs and budget.
Seek Professional Help if Needed: If you’re unsure or uncomfortable performing maintenance on the tuning machines yourself, it’s always recommended to seek professional help. A qualified guitar technician can inspect, repair, or replace the tuning machines if necessary, ensuring optimal tuning stability.
Regularly checking and maintaining the tuning machines of your acoustic guitar is essential for accurate and reliable tuning. By addressing any issues promptly and performing routine maintenance, you’ll enjoy the benefits of a guitar that stays in tune, allowing you to focus on playing and creating music without constant tuning disruptions.
Final Thoughts
Achieving the perfect setup for your acoustic guitar is a continuous process that requires attention to detail, patience, and an understanding of your instrument’s unique characteristics. Each adjustment you make, from choosing the right strings to fine-tuning the truss rod and adjusting the saddle height, contributes to the overall playability, tone, and performance of your guitar.
Remember, there is no one-size-fits-all approach to guitar setup. It’s important to experiment, make small adjustments, and listen to how each change affects your instrument. Trust your ears and find the balance that suits your playing style, preferences, and the sound you want to achieve.
While it’s satisfying to learn and perform the setup tasks on your own, don’t hesitate to seek professional help if you’re unsure or uncomfortable making adjustments. A skilled guitar technician or luthier can provide expert guidance and ensure that your guitar is set up to its fullest potential.
Lastly, regular maintenance and monitoring of your acoustic guitar’s setup are crucial. Changes in climate, string tension, and usage can affect the instrument’s playability and tuning stability. Stay in tune with your guitar’s needs and make necessary adjustments as required.
By investing time and effort into achieving the perfect setup for your acoustic guitar, you’ll unlock its full potential and enjoy a more satisfying and inspiring playing experience. Whether you’re strumming chords, fingerpicking melodies, or exploring new techniques, a well-set-up guitar will be your faithful companion on your musical journey.